Knitting in patchwork style

All handicraft options that have always been popular among people do not lose their relevance today. This also applies to such an interesting technique as knitting in the patchwork style.
Style features
Knitting using the patchwork technique is an interesting process that is suitable even for those who are still very far from needlework. A patchwork design can be done without skill in any area. In this case, you can use both ready-made fragments and parts created from scratch. In a knitted product, the rules are the same.
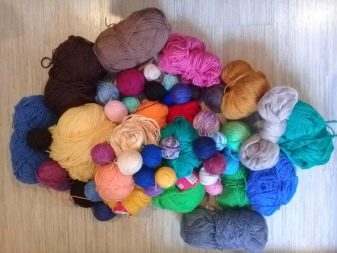
Usually, craftswomen resort to the patchwork technique when they have a lot of yarn leftovers or ready-made knitted fragments.
From leftover yarn
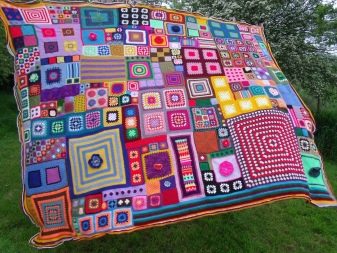
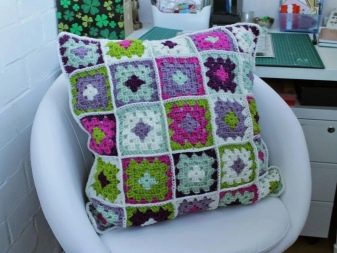
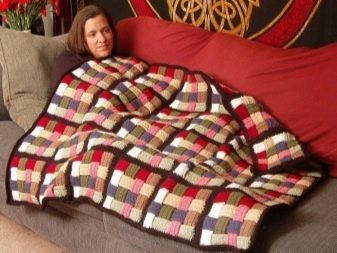
In almost every home there are several balls of thread that remain after knitting. They can be used to create small garter or knit shreds. When the required number of blocks is created, they will need to be combined into finished products, for example: large blankets, bedspreads, pillowcases or even vests.
"Drawing with needles"
In this case, rather complex patterns are most often used, for example: large and small hearts, abstractions and other equally complex patterns. Finished blocks must be connected together using a needle or hook. All this requires special skill and skills from the needlewomen, otherwise the canvas will not turn out beautiful.
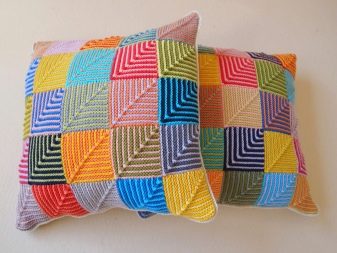
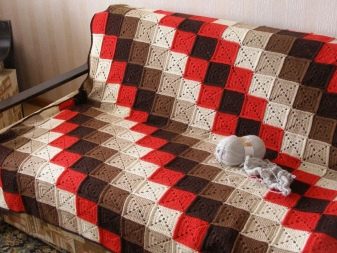
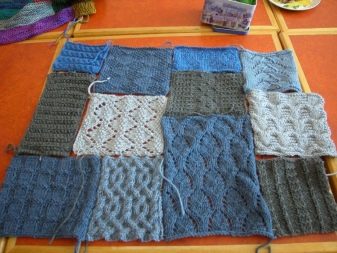
From squares
This is one of the lightest options used in patchwork. There are no transitions or complicated schemes here. The finished product is assembled from different squares, which differ from each other not only in patterns, but also in shades. All of them are knitted either with one fabric or from ready-made squares.In some cases, craftswomen use embroidery for individual parts to make the finished product more memorable.
What can be linked?
First of all, it is worth noting that knitted things in themselves attract a lot of attention, especially those that are based on multi-colored patches, because many of them are made with their own hands, and the craftswomen put not only their work into them, but also their soul.
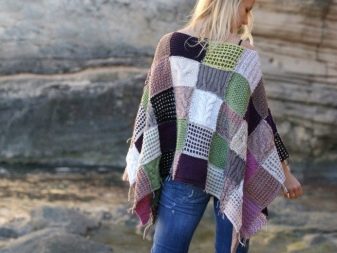
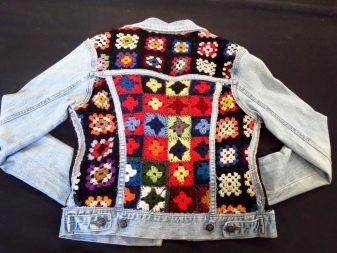
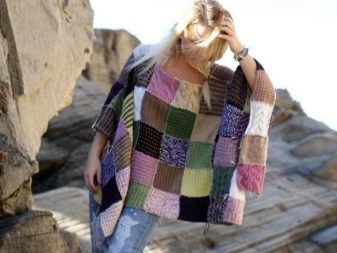
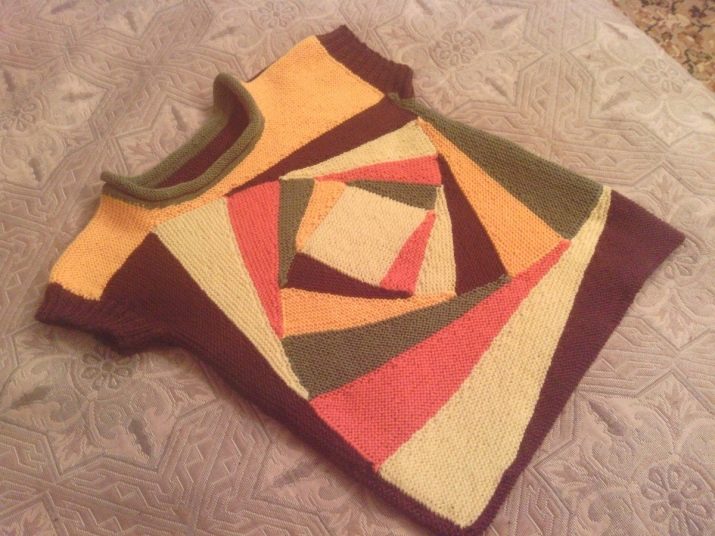
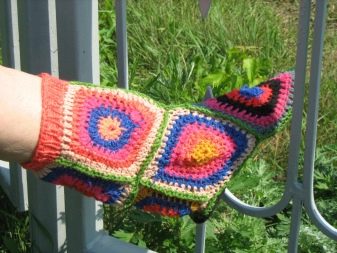
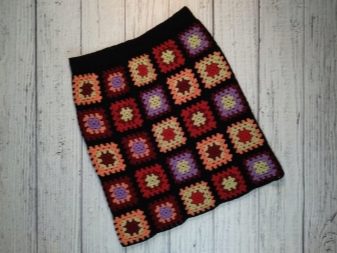
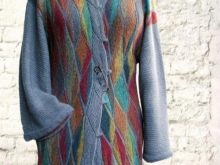
Inexperienced people think that the only thing that can be done this way is bedspreads, pillows or blankets of different sizes. However, this judgment is completely wrong. Those who have completely mastered the patchwork technique can create real masterpieces. Knitted clothes in such an interesting style are especially popular - for both men and women. In addition, it is worth noting that both men's and women's clothing are knitted in almost the same way. These can be the smallest details, for example: socks, mittens, hats, a scarf or even soft slippers, or large things: a jacket or dress, vests or cardigans, jackets or tunics, skirts and even a knitted coat or sweater.
It is also worth noting that using the patchwork technique, you can create beautiful and stylish decorative things. A tea set "dressed" in knitted clothes will look very nice.
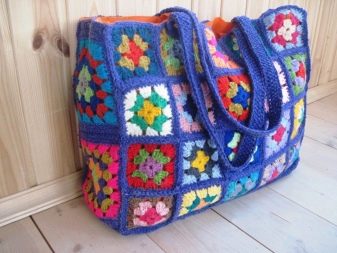
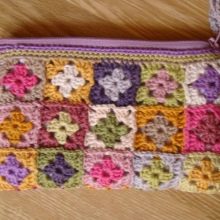
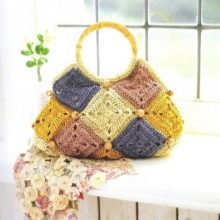
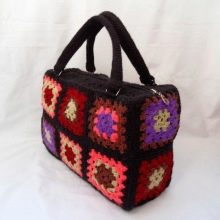
Stylish cosmetic bag or handbag in patchwork style will suit any girl or woman, regardless of her clothing style.
What materials to use?
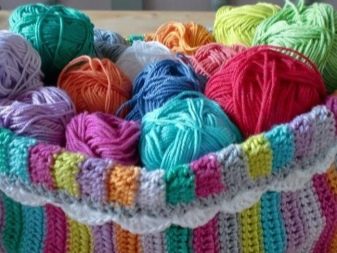
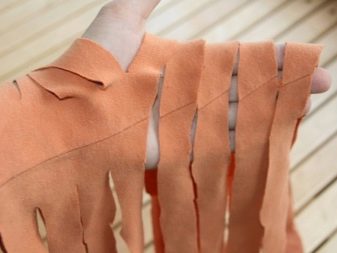
If, usually, when creating products in the patchwork style, colored patches or one-piece fabric are used, then yarn or pieces of old clothes are used in the knitting technique. These can be old sweaters or sweaters, vests or dresses that have already become small. In this case, they can be divided into separate pieces, which must be grabbed so that they do not bloom in the process of work.
If we talk about yarn, then your choice should be stopped on "breathing" threads, that is, those that contain only natural substances.
- Products made of woolen yarn will perfectly warm you on cold winter days.
- Soft cotton blankets, on the other hand, can be used on summer evenings when it's damp outside. In addition, cotton yarn is perfect for small children, because it does not cause allergies.
- For beginners, a fluffy mohair thread is perfect, with which you can hide all errors and irregularities.
- Those who wish to add some zest to the room should opt for "weed". The product will turn out not only original, but also soft to the touch.
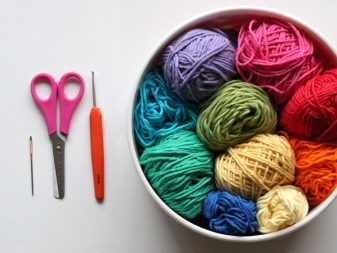
In addition to yarn, it is worth thinking about other materials and tools that will be required in the process.
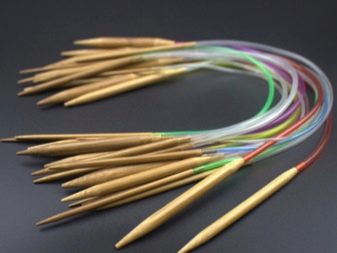
- Knitting needles from two to five units - it all depends on the chosen technique.
- Hook. It will be required even when the product is knitted, because it can be used to connect ready-made knitted blocks together.
- Sharp scissors to help cut off excess threads.
- A needle with a large eye will be required if you are not using a hook.
Step by step diagrams for beginners
To understand a little about the intricacies of patchwork knitting, it is worth considering several master classes from experienced craftsmen.
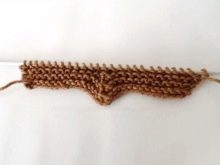
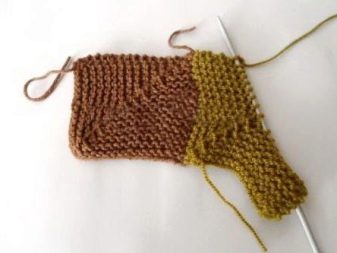
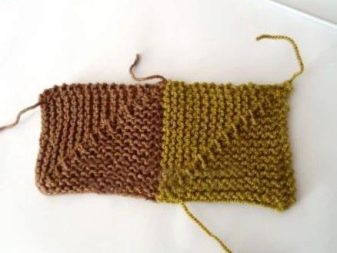
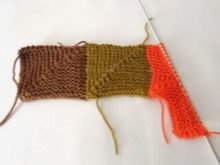
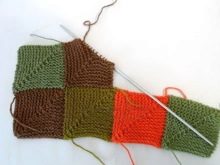
Plaid knitted from squares
In order to knit such a product, you can use a garter stitch, which consists of knit stitches and decreases. First you need to dial the loops for the base; their number must necessarily be odd and correspond to the size of the square. The whole square is knitted with front loops. However, in each even row, you will need to subtract 3 loops in the very middle of the row. The outer edge of each motif is formed by knots. To do this, remove the first loop in all rows, without exception, and do not knit it.
After only one loop remains in the last row, it is necessary to cut and secure the edge of the thread well.
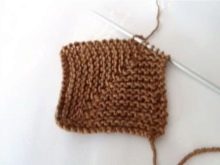

Now you can start knitting the next square. Its base should be one of the sides of an already connected square, that is, a row of loops. Thus, the next motive is knitted, and then the whole continuous canvas.It is very important that the direction of the loops does not change during the work itself.
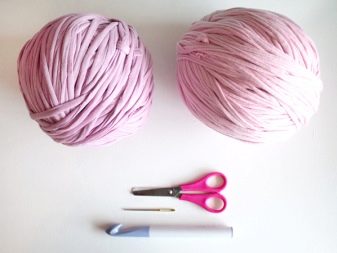
Rug from knitted strips or cord
Most often, knitted products using the patchwork technique are used to give a room a special warmth and coziness. Therefore, in many houses of needlewomen you can find rugs of various sizes. Newbies in this business can also create them - just purchase the following materials:
- balls of knitted thin strips made from old and unnecessary clothing;
- the thickest yarn;
- thin rope or cord.
To begin with, you should familiarize yourself with the method of creating a rug from knitted stripes for a nursery. Most often, such a product serves for a long time and does not change its original appearance.
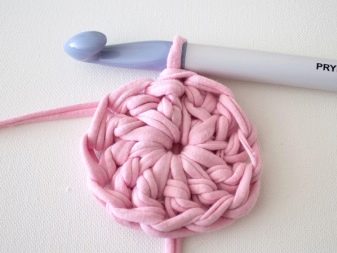
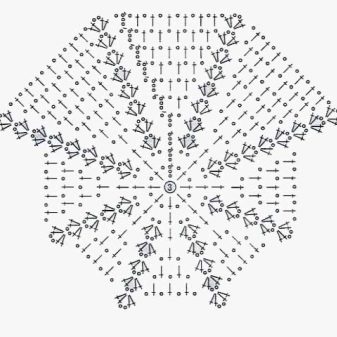
The first step is to purchase the largest crochet hook, as well as 2 balls of knitted patches of different shades. First of all, you need to knit a chain, in which there should be only three air loops, and then knit everything according to the following pattern:
- 1 row - 2 air loops, 11 double crochet;
- 2nd row - 2 air loops, then from each loop of the previous row it is necessary to knit 2 double crochets;
- 3 row - 2 air loops, 1 double crochet, then you need to knit 2 double crochets from each loop of the 2nd row;
- 4th row - 2 air loops, 1 double crochet, and then everything, as in the previous row.
Thus, it is necessary to knit before the end of the work, each time adding 1 double crochet. The last row must be fixed by hemming it with threads.
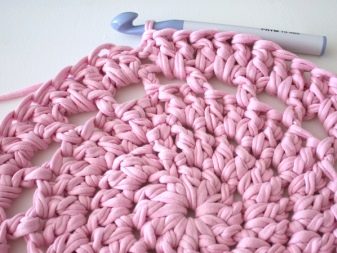
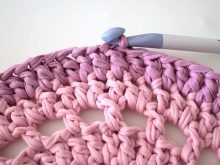
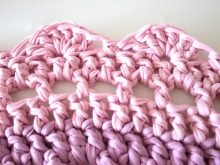

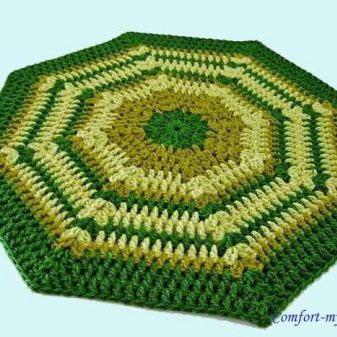
In the second option, it is worth considering how to make an octagonal product from the thickest yarn or multi-colored cord. It can be knitted in a very short time. To begin with, you should dial a chain, which consists of 6 air loops, and then connect them into a ring. All subsequent rows are knitted as follows: first you need to make 2 air loops, and then from each air loop of the previous row you need to knit 2 double crochets.
So you need to knit at least 10 rows.
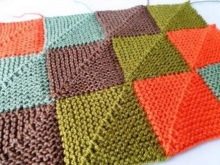
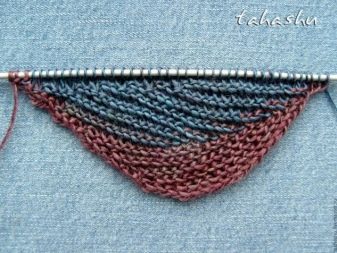
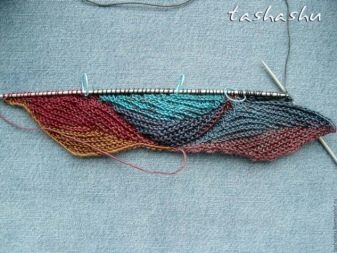
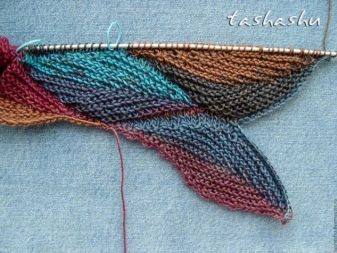
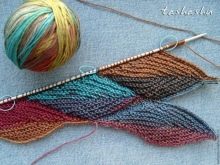
Master class "autumn leaves"
In order to knit products in the form of leaves, you can use a hosiery. First of all, you need to dial 40 loops on the knitting needles, and then follow the following pattern:
- 1 row - 1 edge loop, 34 front loops, then the work must be turned (after that, on the knitting needle on the right side, there should be 4 untied loops, as well as the loop formed after the turn, and on the knitting needle on the left side - 35 loops);
- 2 row - you need to knit 15 front loops, and then turn;
- 3 row - 13 loops and again a turn;
- 4 row - 15 front loops and again a turn;
- 5 row - 13 knit and again a turn;
- 6 row - 15 front loops and again a turn;
- 7 row - 13 knit and again a turn;
- 8 row - one more loop is added, now their number is 16, then turn;
- Row 9 - the same 13 knit stitches plus a turn;
- 10 row - 16 knit stitches plus a turn;
- 11 row - 13 front loops plus a turn;
- 12 row - 16 knit stitches plus a turn;
- Row 13 - Knit 13 plus a turn;
- 14th row - 16 loops plus a turn;
- 15 row - one more front loop is added, their number is now equal to the number 17, then a turn;
- 16 row - 13 front loops plus a turn;
- 17 row - 16 knit stitches plus a turn;
- 18 row - 13 knit plus a turn;
- 19 row - 16 knit stitches plus turn;
- 20 row - 13 knit plus a turn;
- 21 rows - 16 knit plus a turn;
- 22 row - 13 knit plus a turn;
- 23 row - 15 knit stitches plus a turn;
- 24 row - 13 knit plus a turn;
- 25 row - 32 knit plus a turn;
- 26 row - 38 purl loops, 1 untied and 1 loop formed after the turn.

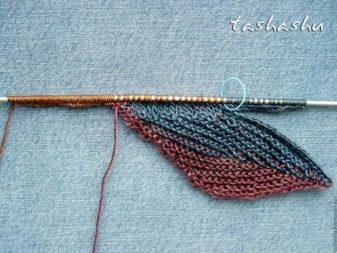
Thus, you should get a sheet to which you need to attach the next one. To do this, you need to close 20 loops from the previous row and knit 20 air loops. Now you need to knit all 40 loops with front loops, and then cast on 40 more front loops, which will serve as the basis for the next leaf. The first 40 should be knitted as described above from row 1 to row 26.After that, there should be 40 loops on both the right and left knitting needles. So, now you can start knitting 3 sheets. However, it is not worth turning the work, but you need to knit 15 loops with purl loops. After that, 25 loops should remain on the right knitting needle, which should not be touched. The leaf is knitted on the 25 remaining loops according to the pattern described above. Work must start from the 2nd row.

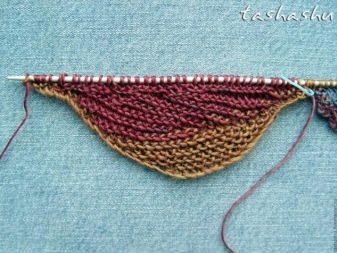

Next, you need to dial 20 air loops and start knitting the bottom leaf in the same way as all the previous ones. All subsequent leaves are knitted in the same way.

Examples of beautiful products
Today, experienced craftswomen can knit quite original patchwork products that everyone, without exception, will like.
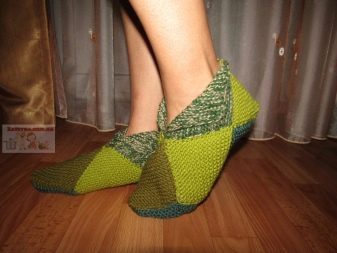
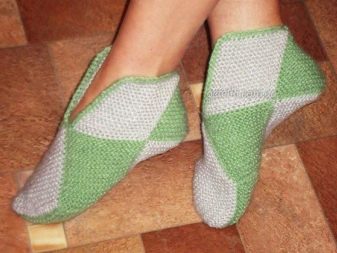
Warm slippers-socks
They will be a wonderful gift for those closest to you. The socks look original and fit very quickly.
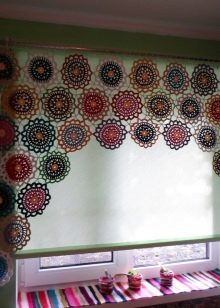
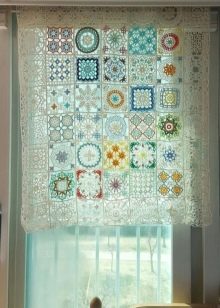
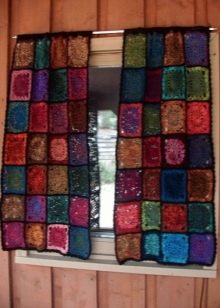
Original curtains
For a creative room, curtains knitted from multi-colored threads are perfect. Such beauty will appeal not only to adults, but also to children.
Summing up, we can say that, having mastered completely knitting in the patchwork technique, each person will be able to create real masterpieces. In addition, such an activity will help to while away your free time with the benefit not only for yourself, but also for others.
For information on how to knit a pullover using the patchwork technique, see the next video.


