What can a 3D pen do?
Volumetric drawings made with a 3D pen look very nice and graceful. Using this “smart toy”, you can create not only simple pictures, but also large figures.


Preparing to paint
You can even learn to work with a 3D pen at home. First you need to understand how to properly use this unusual tool. In the process, the following rules must be taken into account.
-
You can start drawing only after the pen has warmed up well. In the process of work, a sheet of paper should be placed on a flat surface.
-
When creating voluminous figures, the first step is to strengthen the base of the craft... Only then can you start working on the frame.
-
When painting over the base of the figure, you need to move in one direction. Chaotic movements will only ruin everything.
-
In the process of creating crafts, you can not be afraid to turn the base of the figurine. Thus, it will be possible to work it out to the smallest detail.
-
When connecting different parts, you need to ensure that the mount is strong.
-
When the work is ready, it is very important to properly separate the shape from the paper. This should be done slowly. Press with one finger on the model from the outside of the sheet. With the other hand, you need to separate the figure from the paper. If you do everything right, the craft will not break in the process.


For drawing, a novice artist will only need pencils, a piece of paper, and a pen. The use of stencils prepared in advance will help to simplify the work.


Simple crafts
The first work done with a 3D pen should be as simple as possible. There are many interesting schemes for beginners that will help to captivate both adults and children with this type of creativity.
-
Geometric figures... It is worth starting to comprehend the basics of drawing with the construction of basic geometric shapes. You need to learn how to draw even cubes, triangles and circles. It is very easy to cope with such a task. In addition, the acquired skills can be used in the process of creating more complex figures. And the colored parts are perfect for creating game cubes or beautiful decorative balls.


- Decorations for postcards. The 3D pen can also be used to create simple decorations for gift cards. If it is difficult for a person to draw them with his own hands, he should use ready-made stencils in his work. They can be bought or printed on a printer.


-
Fruits... The process of drawing fruit also looks quite simple. So, in order to depict bananas on paper, it is enough to select several fruits and circle them along the contour. After that, the base of the drawing must be filled with smaller strokes.


You can learn how to create such simple crafts very quickly.


Complex shapes
Having mastered the basic rules, you can start creating more complex products.
Animals
Modern 3D pens can be used to create animal figurines.
-
Butterfly... One of the simplest crafts is a three-dimensional colored butterfly. To make it, the first thing to do on a piece of paper is to draw the outline of the future figure. Then you can pick up the 3D pen. To begin with, you need to carefully circle the wings of the butterfly. Then they need to be carefully divided into separate segments. All parts of the wings should be filled with paint. After that, the base of the wings must be separated from the paper. Next, you need to draw a dense body with a head and a mustache for the butterfly. The resulting figurine needs to be attached to the wings. If desired, the finished product can be decorated with some colored details. A butterfly made with a 3D pen should be planted on a flower or curtain. It will be an excellent interior decoration.


- Cat... The figurine of a cat will also look interesting. To create it, the drawing must be applied to paper, and then divided into separate segments. All contours must be highlighted in black. Further, each of these elements needs to be filled with colored strokes. Additionally, it is worth creating a dense stand that is attached to the paws of the animal. This will make the product more stable.


In this way, you can make figurines of any animals or fantastic creatures, for example, dragons or unicorns.

Plants
With the help of a 3D pen, you can also make a great gift for March 8th. The step-by-step process for creating a beautiful rose consists of the following steps.
-
Fill a small plastic ball halfway with green plastic. Further, this part must be separated from the base.
-
In the center of the hemisphere, you need to outline a small point. A flower stem will come from it.
-
The resulting craft needs to be tweaked to make it look more natural.
-
Next, you need to do the drawing of the foliage. She is first depicted on paper with a pen or pencil. Next, a piece of scotch tape is glued onto the sheet. The leaves are outlined along the contour with a pen. After that, they are filled with colored plastic. Some of the sheets should be made more voluminous, the rest should be left thin.
-
Several leaves should be carefully connected together and attached to the resulting twig to the stem of the flower.
-
Further, the base for the bud and petals are made in the same way. The individual parts are neatly connected together. The bud should be beautiful and voluminous.

Other flowers can be created in the same way. Only the size of the details changes, as well as the shape of the bud.


New Year theme
Many people love to create New Year's decor with their own hands. Having a 3D pen close at hand is especially enjoyable. Those who are in search of interesting ideas should pay attention to a simple master class on creating New Year's toys. Children of all ages will love it.
-
First you need to draw two hemispheres on paper.... To make it easier to do this, you need to outline the outline of the drawing on paper.This is done with a felt-tip pen or marker. After that, the contour must be outlined with a 3D pen.
-
Next, the base of these parts is filled with colored patterns.... There may be images of butterflies, snowflakes or ordinary abstract shapes.
-
The resulting elements are separated from the paper, giving them the desired shape.
-
After that, the volumetric hemispheres are interconnected... The attachment point is additionally decorated.
-
So that the finished toy can be hung on the Christmas tree, pass a neat ribbon through the holes at the top of the ball.
-
The resulting craft can be decorated with voluminous patterns, rhinestones or beads.


Using a 3D pen, you can create a whole collection of unique Christmas balls. They will look great on a Christmas tree of any size.


You can also make a Christmas tree with this modern gadget. To do this, you need to follow the instructions provided.
-
First you need to make a barrel blank. Its basis is drawn on paper. After that, the tree is separated from the paper, and then volume is added to it.
-
Next, you need to make the base for the Christmas tree.... A high trunk is attached to it.
-
After that, you can start drawing green branches.... For this, it is best to use ready-made templates. Each layer of spruce consists of several branches. Therefore, it is worthwhile to prepare the required number of parts in advance. To make it easier to separate the drawings from the paper, you should stick a piece of tape on it.
-
Having prepared all the necessary parts, you can start attaching them to the base of the tree.... The trunk usually has several rows of branches at once. The smaller the distance between them, the more beautiful the plant looks.


The finished craft should be decorated with a garland or handmade colorful balls.

Space
Using a 3D pen, you can also make a gift for Cosmonautics Day with your own hands. The best option is a bright rocket. The step-by-step process of its creation is as follows.
-
First, you need to draw a rocket layout on paper.... Next, you need to circle the edges of the craft with a pen. The base needs to be filled with strokes.
-
In the same way, you need to make three more blanks.... They can be either plain or colored.
-
Next, each part must be separated from the paper and gently bent in half.... After that, they must be connected together.
-
The resulting rocket can be additionally decorate.


The finished craft can be used to decorate a volumetric postcard. To make it look more interesting, you can place the figure of an astronaut or three-dimensional images of planets next to it.

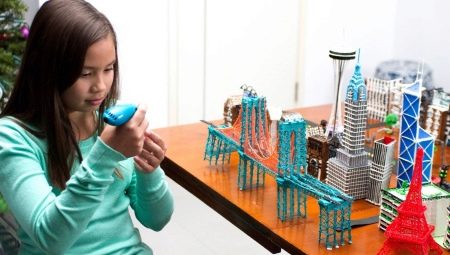
sights
Travel lovers will love the idea of decorating their space with some kind of memorable model. An excellent option for such a craft is the Eiffel Tower.
To create a model of the Eiffel Tower, you need to prepare individual parts. Some devices come with ready-made templates that you can use in your work.
To keep them in good condition, it is recommended to stick a small amount of tape on the paper.
Each detail needs to be carefully circled. Filling up the free space is not worth it. You just need to draw a line around all the lines drawn on the paper.


Having separated the parts from the paper, they need to be connected together. To begin with, fasten the "legs" of the tower. After that, the middle floor is attached to the base. The top of the tower is located on its surface. The finished product will look great on a shelf or desktop.

Technique
Using 3D pens, you can make beautiful Minecraft-style figurines or realistic products that resemble real technology in their appearance. One interesting example is a large plane. It is done very simply.
-
First, on paper you need to draw the base of the plane, two wings, a tail and a volumetric circle.
-
An even circle must be painted over tightly. The element should be tight enough.
-
Next, the plane needs to be circled along the contour, making a cobweb inside.
-
The contour of the plane must be glued to the circle prepared in advance.
-
Next, use the 3D handle to add volume to the shape. For this, "bridges" are first built up on the sides. After that, the plane is neatly entwined with cobwebs.
-
The finished base is tightly painted over, adjusting the shape of the future product.
-
Next, at the top of the plane, you need to carefully cut out a seat for the pilot.
-
After that, you need to circle the wings and tail of the plane along the contour. These details need to be painted over very tightly. They should turn out to be voluminous and durable.
-
After that, the prepared parts must be attached to the base of the aircraft. The fastening must be secure.
-
Next, you need to draw the chassis separately. Each detail must be filled with color, first on one side, and then on the other. Only then is the chassis attached to the wings.
-
The screw is made in the same way. It is attached to the front of the aircraft. If you use a small stud for fastening, the screw will be able to rotate quite well.


The finished model is decorated with suitable lettering. The front of the cockpit is highlighted in a different color. Thus, you can make a whole collection of different airplanes.

More ideas
Using a 3D pen, you can make an unusual accessory with your own hands. The process of creating bright glasses is as follows.
-
First you need to make the outline of the drawing. It is important that it is smooth and neat. The plastic feed rate at this stage should not be too high.
-
Further, each of the details must be carefully shaded with thinner lines.
-
After that, the base of the accessory, together with the temples, must be separated from the sheet of paper. Next, the side parts must be carefully bent at an angle and secure this part of the accessory.
Ready-made glasses can be used to create some interesting photos, as well as complement your image at the masquerade with them.


Useful crafts
Crafts created with a 3D pen can be not only beautiful, but also functional.
-
Phone stand. To create this easy craft, you need to draw a long rectangle on paper. It must be divided into three equal parts. Each of them must be carefully shaded. Next, the craft must be bent. The folds need to be strengthened. Next, you need to draw or print two identical figures with the image of an elephant with a long and raised trunk. Each of them needs to be filled with color, leaving only the ear and eye free. The resulting parts must be attached to the white base. The finished craft can be used both as a phone stand and as a container for storing office supplies and various little things.


-
Trinket... Beautiful key rings made with this modern gadget are loved by both children and adults. To create a cute accessory, you need to print a suitable template. It should be light enough. The base of the figure must be filled with colored gel. At the base of the craft, you need to make a small hole. The resulting figurine can be attached to the key ring with a paper clip. The attachment point should be decorated with a handle.


- Case for phone... The phone case made of plastic also looks impressive and unusual. It is done very simply. The first step is to trace the phone around the contour. Based on the picture, it is important to outline the place where the camera will be located. Next, the base of the cover must be tightly painted over with a pen.
Do not touch the opening for the camera.
The finished product needs to be separated from the paper. Next, the outline drawn on paper needs to be outlined again. The prepared base, along with this thin outline, must be attached to the phone using decorative tape. With gentle movements, you need to fill the base of the cover. It will turn out to be neat and voluminous. At the end of the work, the back of the cover can be additionally decorated with any suitable designs.


- Vase... With the help of the 3D pen, you can easily make a beautiful vase, candy bowl or small candle holder. It is done very simply. First you need to prepare a paper base made using the papier-mâché technique. You can use a regular balloon instead.The finished frame is decorated with voluminous flowers or filled with any patterns.
If a balloon was used as a base, it must be carefully deflated and removed from the colored frame.


Such original hand-made crafts will be an excellent home decoration or a gift for a loved one.


You can find even more interesting craft ideas to create with the 3D pen in the following video.


