How to tie an amigurumi hippopotamus?
Some believe that a handmade gift is the last century. Others, on the contrary, are sure that what they have created with their own strength and soul is an excellent present. The second is also supported by the fact that you know exactly what this or that figure is made of. It is impossible to use toxic materials at home, and exclusivity is another plus of such things. Nowadays this kind of creativity is very widespread, as amigurumi. In order to master it, too outstanding abilities and large material investments are not needed, and the result will delight both adults and children.
Peculiarities
Amigurumi came to us from Japan. The word literally translates as "bound-wrapped." And this very accurately characterizes the essence of the technique. This is crochet or soft toy knitting. Most often these are figurines of various animals, dolls, less often there are various accessories - hats, handbags, wallets. But first of all, it's still a way to create a toy.
In order to make it yourself, it is enough to own the simplest knitting skills.
By the way, lately, craftswomen have chosen hook... The main difference between this knitting method and ours is that the fabric is knitted in a spiral, and not in rows. Another small nuance - for work, a hook is taken that is smaller than the thickness of the yarn. This is necessary in order to obtain a dense web that will hold the padding well.
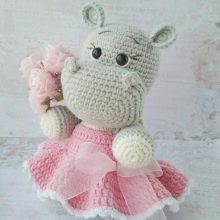
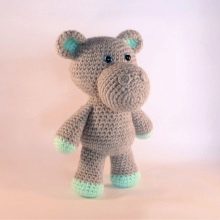
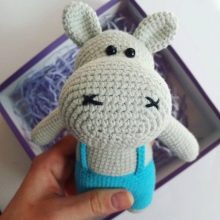
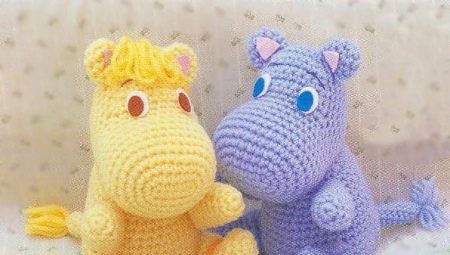
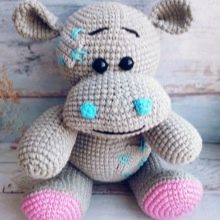
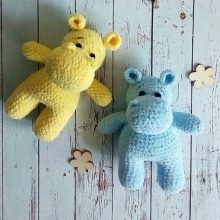
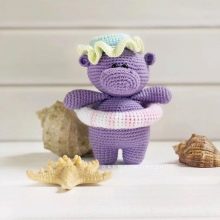
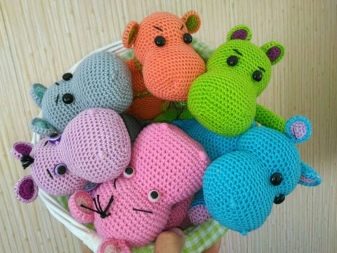
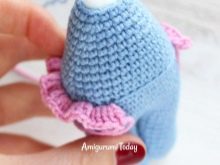
By the way, some amigurumi are somewhat reminiscent of our tumblers. They have no arms, legs or legs, they only have a torso and a head, while others are soft toys we are used to. For stuffing, you can also use a variety of materials - from felt to plastic balls.The only thing that unites all toys made using this technique is that they look very cute and pleasant to the touch. Most often they have a rather large head, an elongated torso and small limbs. One such example is the amigurumi hippopotamus, which we will try to create today.

Tools and materials
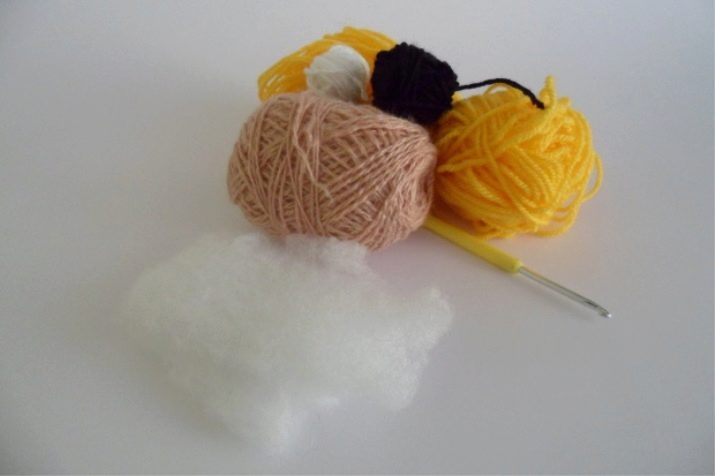
In order to make such a toy, we need the following set of tools and materials.
- Yarn... One skein will be enough to create a small toy. The name of the manufacturer does not matter - the main thing is to choose the one that will resemble a plush. Which ratio of cotton, acrylic or semi-acrylic you choose doesn't really matter either. The main thing is that the yarn is pleasant to the touch and has an attractive color suitable for a toy. You can even use lurex thread or colored yarn if you wish. It all depends on your desire, taste and financial capabilities.
- Hook... Its number, as we noted above, must be smaller than usual in order for the canvas to turn out to be dense. Try taking an instrument with the number 2 or 2.5.
- Toy filler... Any material will do - foam rubber, felt. You can buy a special filler, such as are found in stores for creativity and needlework. Or you can use old nylon stockings or tights.
- Two small beads. They will become the eyes of our hippo, so their size and color also depend on your desire.
- In addition, prepare scissors, a thick tailor's needle for sewing elements, if you wish, you can use special markers, to count the rows when knitting (this can be a regular pin). As you can see, not so much is needed. Moreover, if you have been knitting for a long time, then you probably have all this in stock. By the way, to create a small thing, the leftovers of yarn, which every craftswoman has, are quite suitable.
Knitting technique
To understand the crochet technique, if this is your first time picking it up, take a look video tutorial, it is much more efficient and faster than mastering this type of needlework yourself, even if you find the most detailed description. It will be even better if you attend a master class
Mastering this skill is not that difficult. One or a couple of lessons will be enough for you to understand the basic rules of working with thread and crochet.
Making amigurumi, which is small, which is large, does not require a high level of training. So, if you are familiar with the basic concepts: "air loop", "column" and "yarn", we can start making our baby from plush yarn.
Let's start the heads. Our hippo will have a solid muzzle, this will also make our task easier.
The scheme is as follows.
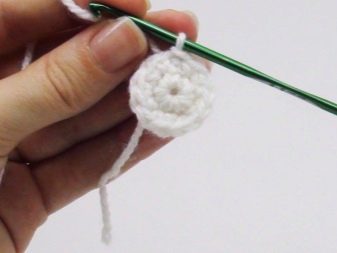
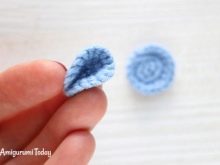
- Row number 1. We knit a chain and collect 6 single crochet into a ring.
- Row number 2. Add 6 columns, knitting 2 in each loop of the previous row.
- Row number 3-6. Add 6 single crochets in each row.
- Row number 7-11. By the seventh row, we should have 36 columns in a row, we knit the next 5 columns in a column.
- Row number 12. Add 6 more columns.
- Row number 13-14. We knit without additions.
- Row number 15-19. We decrease each row by 6 columns, without knitting some of the loops of the previous row.
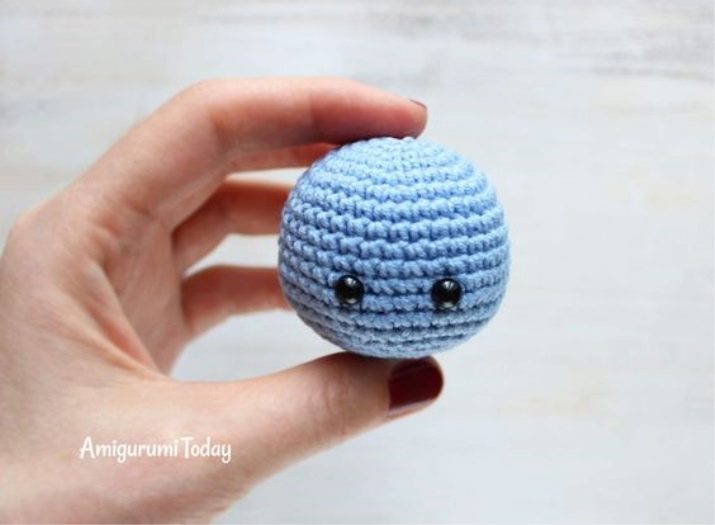
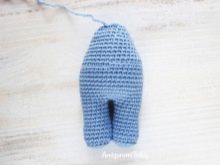
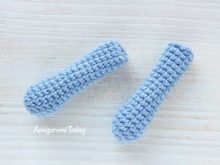
The head of our hippo is ready. To fulfill the body, we cast on 36 loops of the next 2 rows, bring their number to 40. The next 5 rows do not change the number. Then in 2 rows we reduce to 36. After that we divide the resulting circle by 2. We knit the legs of the hippo. Their length and thickness may vary. Most often it is another 9-10 rows. Now knit small cylinders for the legs and ears from literally 3-5 columns. Connect the parts and attach button eyes on the face.


You can watch another master class on how to tie an amigurumi hippo in the next video.


