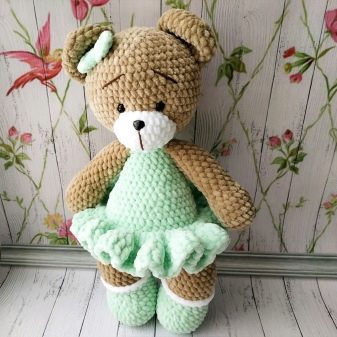
How to tie an amigurumi bear?
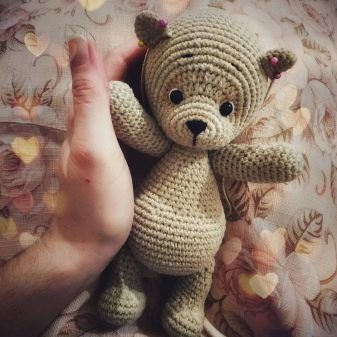
Amigurumi bear - a fairly simple version of a knitted toy that can bring a lot of joy to children and adults. Such products are tiny and quite large, look very cute, and can be worn as key rings on clothes or bags. After studying a simple master class for beginners, a description and a pattern for crocheting a bear from plush yarn, you can easily master a new art by creating an original toy in the Japanese amigurumi style.
What it is?
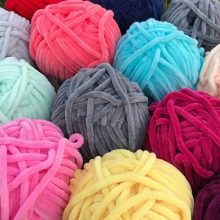
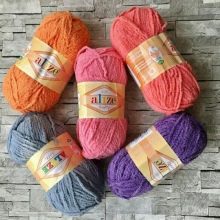
An amigurumi bear toy can be created from dense and smooth yarn such as iris, plush yarn, acrylic and regular wool. The Japanese knitting style provides for a high density of connection of rows, the use of simple single crochets. To obtain the desired effect, a hook that is thinner than yarn is usually taken. The details of the head and body of amigurumi bear cubs have an irregular distribution of proportions - the body is noticeably smaller, almost always oval.
Diminutiveness is another hallmark in this crochet style. The creation of detailed products less than 5 cm in size is considered special chic.... However, most of the bears are still about 15 cm tall.
A mandatory detail of the image are rounded ears, for the muzzle, you can knit contrasting details, tightening will help to give it expressiveness - horizontal stitches that allow you to make the head embossed.
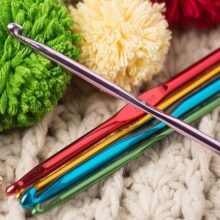
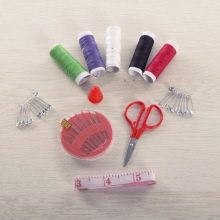
Tools and materials
To knit amigurumi bears, you need to stock up as a standard set of accessories: scissors, needles, pins, threads and floss, and special. These include a set of hooks - from No. 0.7 to No. 2.5, for the largest items, No. 3 is also suitable, they can also be used to knit ears. The thicker the yarn, the larger the tool number for the job: it is important to remember that an insufficiently dense structure of the rows will skip packing.
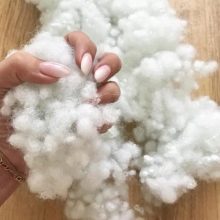
Small toys also require a number of accessories. For example, in order to fill an amigurumi bear, at the final stage of knitting, you will have to use toothpicks, sushi sticks, knitting needles. It is better to take a downy filler, such as holofiber or synthetic fluff. The choice of yarn also matters - it is difficult for beginners to work with plush, especially if the products are small.
It is better to start with smooth, dense and thin enough threads, then everything will work out.
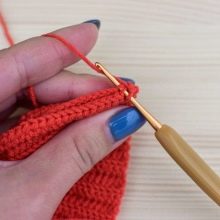
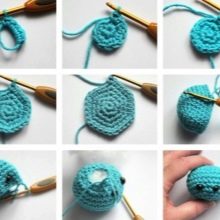
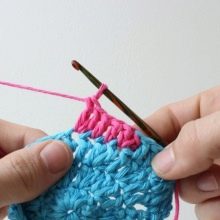
Knitting technology
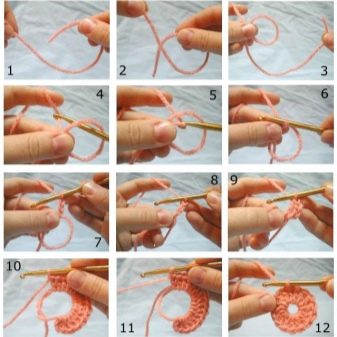
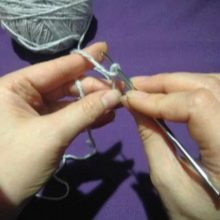
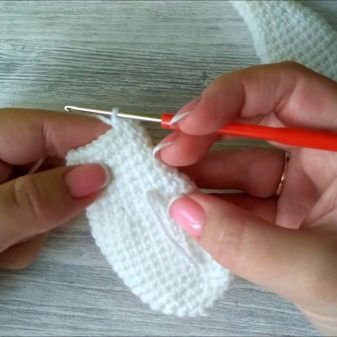
The main difficulty in knitting any amigurumi toys is movement in a circle. The beginning of the row cannot be traced visually, especially if the toy is rather large. In this case, the best solution would be to use a marker - a special thread of a contrasting color. She also marks the back of knitting in those toys where it is needed.
For novice needlewomen who are planning to tie an amigurumi bear according to a description or scheme for the first time, it is better not to choose complex master classes. Giant bears 35-40 centimeters in height require a long and painstaking work, tightening the muzzle in a complex product is also not the easiest thing, for a start it is better to take a toy with a head without such elements. Dressing up a mini bear in a dress or other suit is also better separately: knitting in a circle with a change of colors adds complexity.
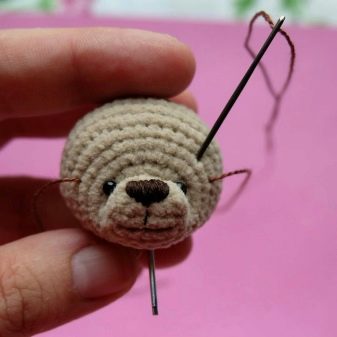
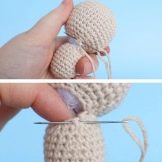
If you still want to do tightening, giving the muzzle expressiveness, you need to outline 4 points with pins: mouth, nose, eyes. They are measured like this.
- The point of tightening the mouth will be 4 rows below the beginning of knitting, strictly in the center.
- The nose is near the marker, 1 row above the amigurumi ring.
- The eyes are placed on the 8-9 row of the muzzle (in small toys 5-6), symmetrically, through 4 columns.
The tightening is performed from the point of the mouth, it is carried out with a large darning needle. It is carried out inside the packing and comes out at the place of the right eye. The column retreats, a stitch is made, the needle is withdrawn at the point of the mouth. The action is repeated several times, in the same way the tightening is performed for the left eye socket. At the end, the nose is pulled - over the canvas, 3-4 stitches from the point of the mouth, the threads are fixed.
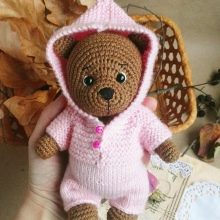
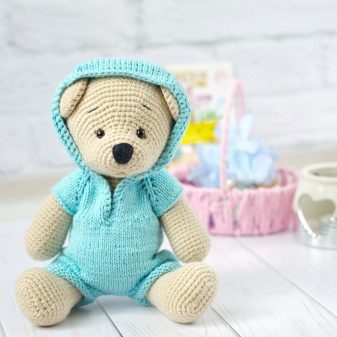
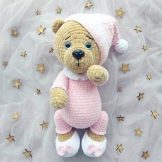
Sleeping or lying bear in pajamas
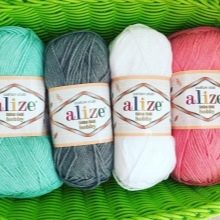
Quite a large, but simple version of the bear, knits immediately in clothes - you will need contrasting threads. You can take the yarn Alize Cotton Gold Hobby or other cotton, hook number 2. The finished toy has a length of about 22 cm, the main part is knitted with 1 piece. If you knit without pajamas, the work is done in 2 tones - for the face and body (darker).
The order of knitting is as follows.
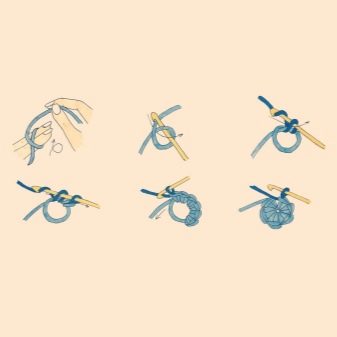
- Ring amigurumi is closed with light yarn. 6 double crochets are made, then 3 rows in a row for another 6 increments, until the total number of loops reaches 24.
- 5 and 7 row fits without changes. In 6 and 8, an increase of 6 loops is made. Their total number should reach 36. After that, rows from 9 to 11 are knitted without changes. The yarn is changed to the main background (for the body).
- In the 12th row knits 12 columns with an increase for each (1 immediately with the addition of a loop). Repeats 3 times. Then three times by alternating 1 column and 1 increase.
- In the 13th row first there is an increase, then 2 single crochets. The order is maintained for 36 loops. Then 2 single crochets are knitted and an increase with a threefold repetition. There will be 48 loops in total.
- On the 14th row 6 loops are added - for each 8. 15 and 16, 54 loops are knitted without changes. At 17, 6 loops are added again. From 18 to 26, 60 columns are tied. On the 27th and 28th row, an increase in 6 loops (up to 72), then the 29th circle is knitted without changes.
- 30 row you can start knitting pajamas in a contrasting color (plain or striped, with a change of thread after 2 rows).
- 30-31 no increase 72 single crochet. In row 32, there is an increase of 6 loops, in 33, 34 and 35 it is not, in 36 again an increase in the number to 84. 37, 38 and 39 rows are knitted without changes. On row 40, an increase of up to 90 loops, from 41 to 51 rows, the number of columns does not change. If colored threads were used, they are again changed to background ones.
- From 52 to 56 row fits 90 stitches. From 57 through 1, a decrease is made by 6. To row 62, there should be 72 of them.From 63 rounds to 73, 6 loops are reduced until a ring of 6 columns remains. It is pulled together and fixed, it is better to carry out the packing on the 70-71 row.
- Tie ears and tail according to the general scheme - 3 details. Add the amigurumi ring to the 3rd row to 18 columns. From 4 to 5 rounds according to the general pattern, without changing the number of loops. The closing 6th row is knitted from 17 single crochets and 1 connecting. Ears are not stuffed.
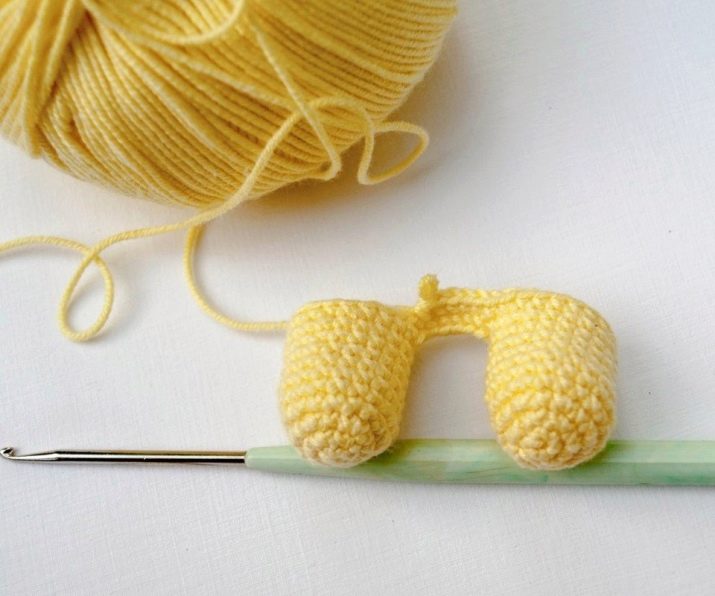
- Front legs. Knitted from plain brown yarn up to 9 rows, 1 ring amigurumi, 2 and 3 increase in 6 loops, in a circle of 18 columns. At 5, their number increases to 24. From 6 to 9, the number does not change, then the yarn is replaced by a colored, one-color or two-color, like on pajamas. Row with a decrease by 3 loops, row straight, repeat 2 times, knit the final circle of 18 columns, fill loosely, fold and tie, closing the part.
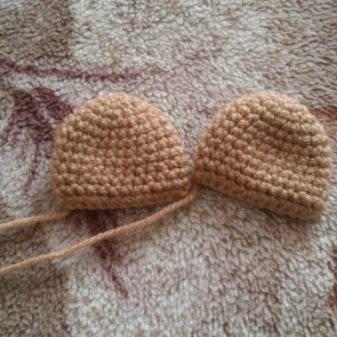
- Hind legs. 2 parts are knitted with a background yarn, from an amigurumi ring of 6 loops, then 3 rows of an increase of 6 single crochet. From the 5th to the 9th circle, the number does not change. On the 10th row from 24 loops, 3 is reduced, 11 is knitted without reduction. On the 12th circle, 3 columns are again subtracted, 13 and 14 do not reduce. Details are stuffed, folded in half, connected.
The assembly does not take much time. It remains to sew on the ears and tail of the bear, fasten the paws on the sides. Glue the eyes and nose or embroider them.
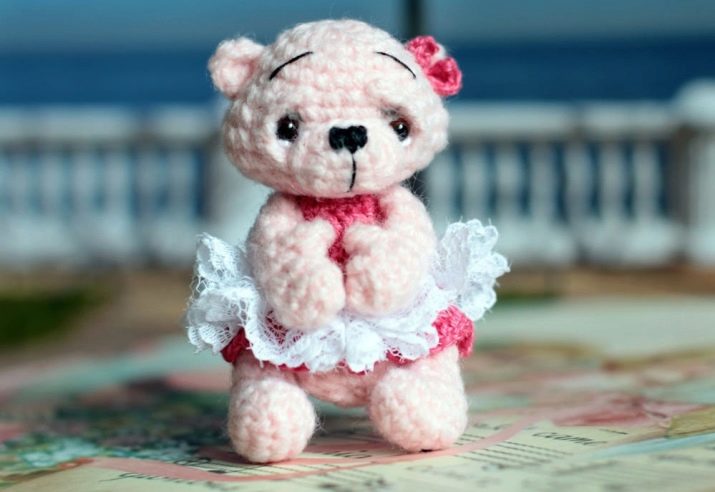
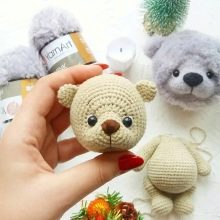
Little bear for beginners
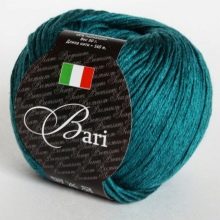
To create a product you will need Bari yarn or equivalent - a skein of 145 m / 50 g, hook 2 mm, filler - synthetic fluff, wire with a diameter of 2.5 mm in a plastic sheath, floss, half-beads for the eyes and glue to fix them.
The order of knitting will be as follows.
- Make a chain of 13 stitches, at 11 in a row, tie a single crochet, followed by another 10. Mark the edge of the row with a marker.
- Tie 3 single crochets in 1 loop, then 10 in a circle and 3 more in the last.
- Work according to the scheme 11 + 2 increments + 11. Add 2 more loops at the end of the row. The next scheme is 13 + 2 + 13 + 2.
- From 5 to 14 row evenly knit 34 single crochets. Additional loops appear due to the need to edit the beginning of the row. When knitting in a circle, it shifts, you need to get the missing columns to the marker line.
- From 15 row 4 loops are evenly reduced. The next one fits unchanged, in 30 columns.
- In 17, 18 and 19 rows evenly reduced by 6 loops. That is, the decrease occurs for every 4, 3 and 2 loops of the circle.
- The product is stuffing, it should be quite dense.
- 20 row is tied with a decrease of 6. The thread is cut - you need to leave the tip 15 cm. The remaining hole is pulled together and fixed. The tail of the yarn is retracted inside the warp.
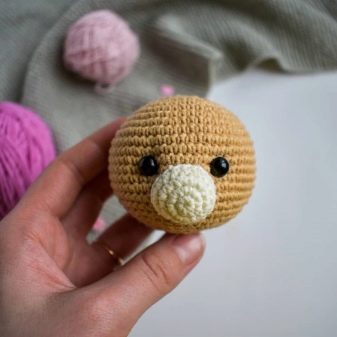
Further, it is knitted with a separate piece muzzle... To create it, you need an amigurumi ring. Then 3 and 2 single crochets are knitted, between them, in 4 loop - an increase of 3. The next row also increases the number of loops. Scheme 2 + 4 increments + 2 columns, the last round is done in 10 loops. The part is fixed, sewn into place (example in the center of the front of the body). It is better to use the seamy part of the knitting as the knit - it looks smoother. The rounded edge goes to the bottom of the body, sewing on the most part, stuffing the muzzle (wooden sticks or knitting needles will help to tighten the filler).
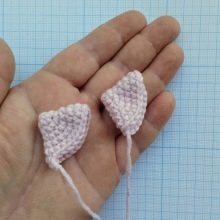
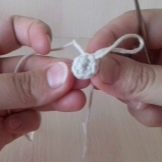
Ears are knitted from the amigurumi ring. 6 stitches in 1 loop, then 6 more in the opposite direction. The details are paired, this must be remembered. The finished elements are sewn to the upper body of the amigurumi bear, slightly bending them.
Then you can immediately glue the eyes, embroider the nose and mouth, or postpone this work until the assembly is complete.
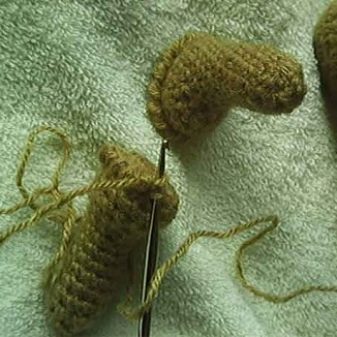
Paws very important. Lower knit from an amigurumi ring with 6 single crochet.
- On 2 row the number of loops is doubled, then tripled.
- WITH 4 to 5 circle 18 columns are made. At 6, there is a decrease. 6 stitches are knitted, decrease in 3 loops and 6 more.
- The next row has 2 reductions. They are made after 6 columns, then 5 more are knitted.
- On the next round, the decrease is only 1. After 5 columns, make a decrease, knit 6 more.
- 9 row unchanged, on 10 3 loops from 3 to 5 are removed. The foot is stuffed.
- The remaining 9 loops are reduced by another 3 from 2 columns, at the end of the row, the ring is tightened, the steps are repeated for 2 parts.
The top pair is also knitted from an amigurumi ring, with an increase on the 2nd row of 6 loops, 3 and 4 circles without changes. 6 and 7 columns are reduced by 5. Further 5 and 6, the remaining loops are pulled together, no padding is needed. A flexible wire is inserted into the body so that its ends become a frame for the bear's legs and arms. They are bent with pliers and inserted into the details of the product. The feet are sewn on, completely masking the wire frame. The bear is ready.
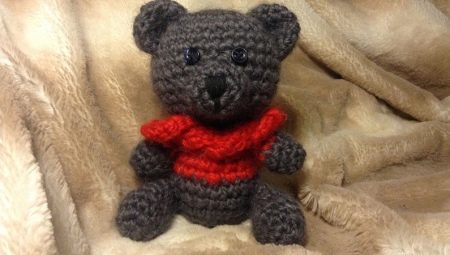
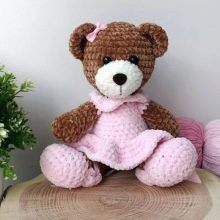
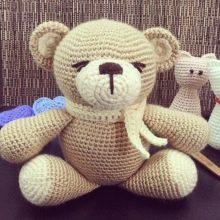
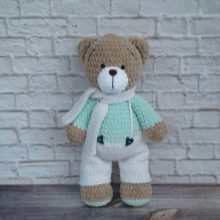
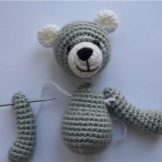
Soft teddy bear made of plush yarn
Toys according to this scheme turn out to be quite large. - 17 cm tall. You can decorate the amigurumi bear applique with a felt heart, satin ribbons or an outfit of your choice. Ready-made bead eyes are sewn on or glued, you can embroider the nose, mouth, eyebrows, or use ready-made details for the face. As a yarn, ALIZE Softy is well suited, the hook for it is No. 2.5.
For body bears are going to a ring of amigurumi from 6 loops, tightened. In rows 2, 3 and 4, 6 increments are made at an equal distance (in each loop, after 1 and 2, respectively). From the 5th to the 7th circle, the number of single crochets remains unchanged - 24. On the 8th row, a decrease is made every 2 loops - a total of 6 times. 9 and 10 are knitted without changes. At 11, 3 more loops are reduced, after 4 columns, at 12 there are 15 of them.
At the end of the row, the body is stuffed, the product is tightened or the edge is closed with a continuous row, on the part folded in half.
For handles and legs, 2 pieces are knitted. The top pair of legs is created like this.
- Amigurumi ring of 6 loops.
- Increase 3 loops on the 2nd row.
- 3 and 4 circles unchanged.
- 3 loops are reduced by 5.
- From 6 to 9 fit unchanged. The lower part of the foot is stuffed (up to the middle).
- The product is folded in half, an air loop is made. 3 single crochet stitches are sewn to close the detail over the edges.
Legs are created on the basis of an amigurumi ring, then 6 loops are added on the 2nd row, 3 and 4 are knitted in 12 single crochets. There is a decrease by 5. 4 loops are removed, 3 subsequent rows are knitted without changes, with a gradual laying of the padding, then the part is folded in half and closed with columns along the edge, over the edge. You can sew the legs to the body.
Next, the smallest detail is knitted - ears... 1 row - an amigurumi ring, turn the product over for 2, make 6 increments in the opposite direction, fix the thread. The second ear is knitted in the same way. The muzzle is contrasting, it is done separately from the whole head in 1 thread. First, the amigurumi ring is knitted. The next 3 rows have 6 increments - in each loop, after 1 and 2. 5 round is the final, it consists of 24 single crochet. The thread is secured.
The head fits like this.
- Amigurumi ring of 6 loops.
- Increases from 2 to 5 rows of 6. In total, you should get 30 single crochet.
- From rows 6 to 9, all loops are knitted without changes.
- On 10 and 11, 6 loops are reduced, on 12 round only 3.
- The remaining hole is used for head stuffing. The ring is tightened as tightly as possible.
- The connection is made to the torso.
The finished parts of the head are collected using a needle and thread. The nose and mouth are embroidered on the face.
You can make a tightening under the eyes - so the toy will look more expressive.
You can find out how to crochet a simple amigurumi bear below.


