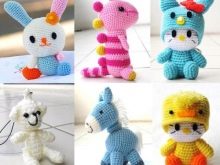
Amigurumi
Every year, handicrafts are gaining more and more popularity. Among them are toys made in the Japanese knitting technique called amigurumi. You can decorate the interior of a living room or bedroom with such cute products, present as a gift to friends or buy for children as a toy.

What it is?
Amigurumi is a technique for creating crocheted or knitting toys. Such products are absolutely safe and hypoallergenic, therefore they are suitable even for small children. The most common types of toys in this technique are sea or forest inhabitants, characters from movies, cartoons, fairy tales, comics, computer games, plants, natural phenomena, all kinds of objects and products.
The term translated from Japanese means "knitted-wrapped", which is completely true. The objects in this technique are based on the creation of knitted elements, stitching them together and filling them with dense materials.
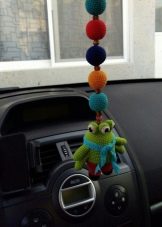
The amigurumi toy will become a child's best friend, decorate a shelf in an apartment, or serve as an excellent accessory in the form of a key ring or car decoration.


What is required?
Most beginners who want to master this type of needlework have difficulty with the choice of materials and tools for creating toys.
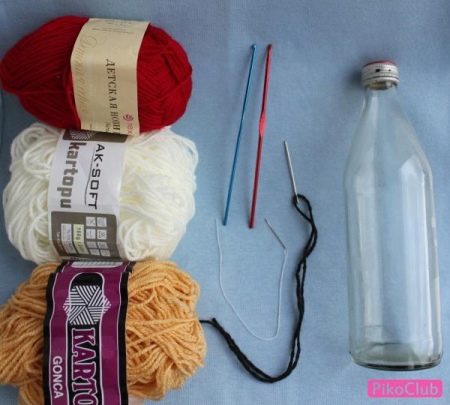
Yarn is a hobby base with a Japanese twist. Choosing quality knitting threads is almost half the success in mastering this technique. It is important to choose an economical but high quality yarn option. It will be difficult for beginners to start working with very thin or textured types right away. For this reason, it is important to choose yarn of medium thickness.
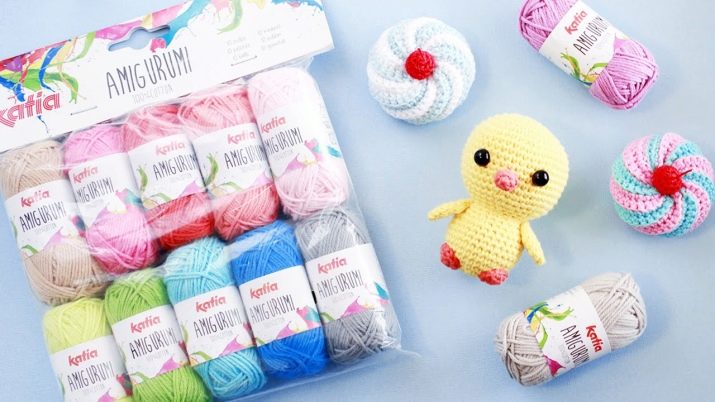
At first, it is better to master knitting techniques using light shades of threads. If you use dark colors, it will be difficult to distinguish between the columns. For beginners, cotton or acrylic threads, as well as any combinations of them, will be the best option.
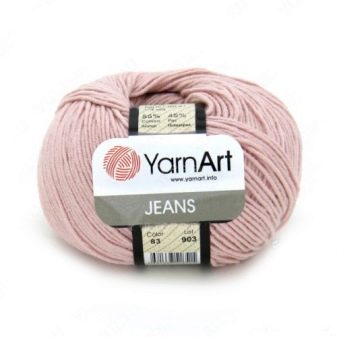
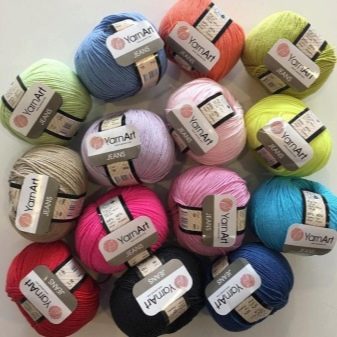
Firm yarn YarnArt entitled "Jeans" is very popular among lovers of the Japanese type of needlework. The threads contain more than 50 percent cotton fiber, the rest is acrylic. Recently, a thicker version of threads from the same company has appeared.
It is imperative that the chosen yarn is pleasant to the touch, since the creation of the toy will take quite a long time. If you sew custom-made amigurumi, the softness of the threads should be one of the most important criteria for their selection.
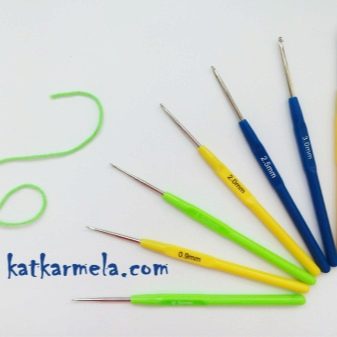
The selection of the hook is the second significant preparation moment. The hook should be chosen a couple of sizes smaller than the one recommended in the instructions for the threads. A cheap metal crochet hook is suitable for knitting. More expensive samples can be bought in the future (as needed), although almost any toy in this technique can be made with an ordinary cheap crochet or knitting needles.
It is important to choose a completely metal version, without plastic elements, since the latter can break.
There are not very high quality models with a plastic handle, which does not have a metal base. The service life of such tools is significantly reduced.
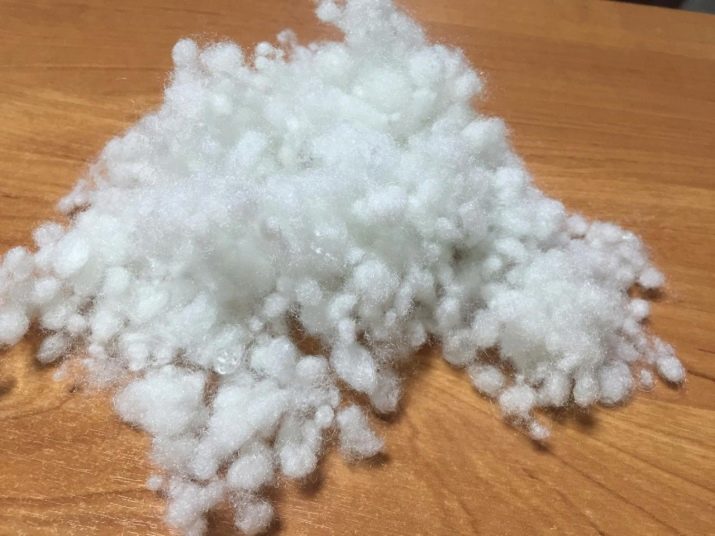
Filler is the third basic element in Japanese knitting art. Holofiber or synthetic fluff - the best options for creating voluminous toys. Wadding and similar types of fillers should be avoided as clumping can cause the product to lose its desired shape. The remains of materials, threads and fabrics are also not a very good option as filling, since the toy will deform over time.
Despite the restraint of Japanese craftsmen when creating such toys, if necessary, decorate the product, you can make decorative elements from beads, beads, feathers, rhinestones or sequins.
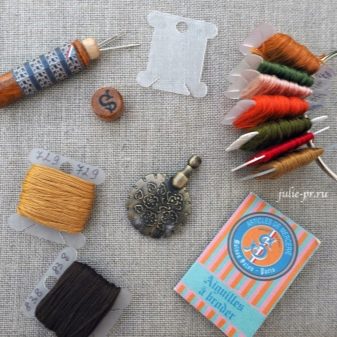
Tools with which you can master the amigurumi technique:
- sharp quality scissors, which will be required to separate the yarn;
- a needle with a spacious eye will help to connect the elements of the product to each other and handle sloppy details;
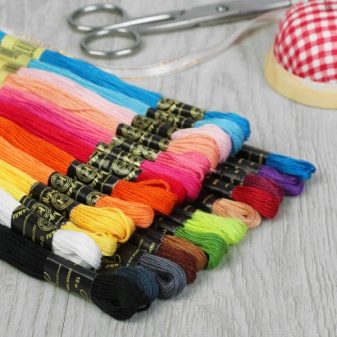
- a floss or a bobbin of thread for creating small elements in the form of a nose, mouth and eyes, as well as an embroidery needle;
- a skein of contrasting thread to indicate each successive row, this thread is removed at the end of the work on the toy.
At the initial stage, the simpler the knitting pattern and the toy itself, the more likely it is to successfully complete the work the first time. It is better to leave technically complex elements for the next stages, when the basic skills of creating loops, crocheting and reading knitting patterns are mastered.
How to read the diagram?
There is nothing easier than knitting in the amigurumi technique according to patterns... The catch is that this ease of work comes only with experience. Beginners who decide to master the Japanese hobby will have to make a lot of effort in order to understand the algorithms for reading diagrams.
There are several options for amigurumi schemes: translated into Russian with a full description, tabular and numerical schemes, as well as schematic images.
Full descriptions in Russian - ideal for beginners type of circuits... It contains the most accurate and complete instructions. Thanks to access to the Internet space, you can find any kind of simple toy with a full description, images and even video materials.
Let's list the options for starting a product detail.
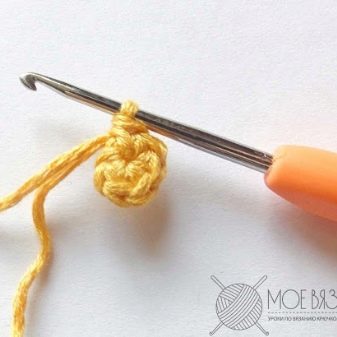
- Annular, which starts with 2 VP, after which 6 sb are knitted through the second loop from the hook. Then the starter thread is tightened and helps to close the hole.
- Air loopwhen the circular rows help convert the element to an oval. For example, 2 VP and 6 SBN denote a circular shape, and 6 VP and 4 SBN denote an oval shape. This method can be used to create a torso, head and legs, in rare cases - handles.
After the ring is ready, you should continue the actions according to the scheme. It is important to take into account the symbols in parentheses in the form of numbers. They indicate the number of loops as a result of the work.
Example:
- 1 row: dial 2 VP and knit 6 sc in the second loop from the hook [6];
- 2nd row: * increase *, repeat * 6 times [12];
- 3rd row: * 1 sc, increase *, repeat * 6 times [18].
Thus, the diagram shows the ring in the first row, after which there are 6 increments. The second row, according to the information in brackets, will contain 12 loops. The third is adding one more element to every second loop, that is, add 6. To 12, the number of loops will be 18. Sometimes the creators of the description do not take into account the first row.
Rows without deletions and additions cause the most difficulty for beginners... The abbreviation "bi" or "no change" denotes no padding, not the previous number of loops. It is best to use master classes in which this moment is clearly spelled out.... For example, "sc in each loop in a circle" is an understandable form of designation.
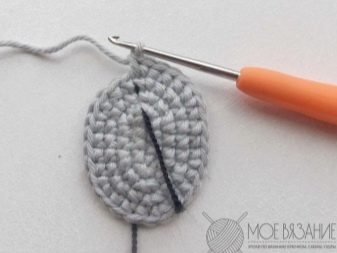
To mark the start and end stitches, it is important to use a contrasting thread or pin marker. This way of working greatly simplifies the development of new techniques and counting loops.
Numeric charts and tables are a fairly common form of charts.... You will have to work hard to read them, especially in the absence of knitting practice. The table includes columns for the total number of stitches and row numbers.
First, you should make 6 sc, after which in each subsequent row add 6 loops to the number of the previous row: 12, 18, 24 and so on. In some cases, the scheme at the initial stage includes not 6, but 7 loops, then this number should be added in each row.
When knitting complex elements, for example, handles, faces, legs, the rule of increases and decreases ceases to apply. Here it will be necessary to make uneven increases on one side, and decreases on the other, as in the case of a toe.
For inexperienced needlewomen, it is better to train with experts in the field of knitting amigurumi for the correct execution of complex elements.
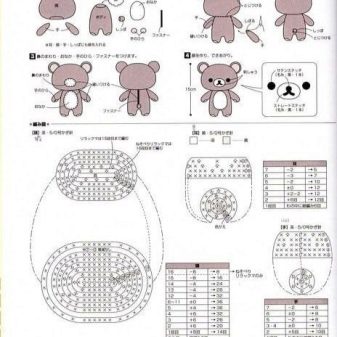
Japanese schematic images are the most confusing option for domestic craftswomen... After several weeks of training, you can master these types of schemes. They are somewhat similar to tabular variants. The image contains a diagram in symbols and a table next to it.
The first column of the table indicates the row number, which is important to read from bottom to top. The second column is the number of loops that should be the result. Despite the fact that in most cases increases and decreases are represented evenly in Japanese diagrams, it is important to use not only a table when working, but also a diagram in symbols.
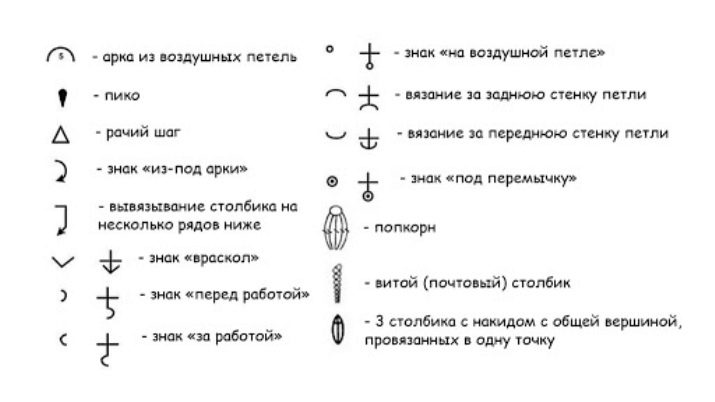
Conventions in Japanese schemes:
- cross - classic sbn;
- a cross in a tick - increase in loops;
- cross in the house - decrease in loops.
If there are multiple colors available to create a part, this will be indicated in the schematic drawing.
It is difficult for beginners to understand where on the diagram which part of the toy's body is located. To do this, you should use the image and logical reasoning. Most likely, the Japanese will start working on the toy from her head. In addition, it is the head that has the largest size. The tail and limbs are thinner.
If initially it is not clear where which element is, you can complete each of them, and then proceed to the assembly of the product.
If you cannot understand the schematic images created by Japanese masters, you should wait a bit, since over time, many schemes will be adapted for the Russian-speaking audience by experienced amigurumi lovers.
Master classes
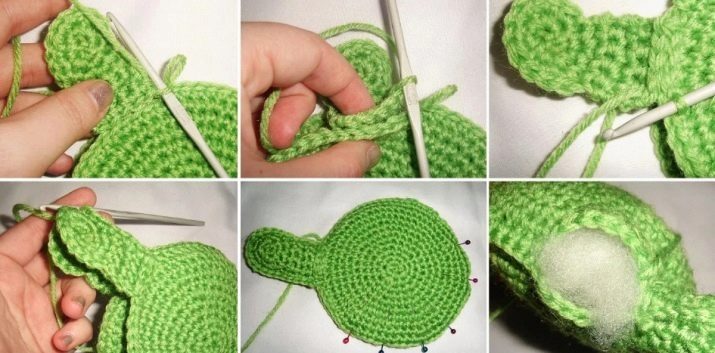
The amigurumi technique allows you to realize any fantasies of needlewomen. You can knit almost any item, from small volumetric key chains to large toys in the form of animals or dolls. A costume for dolls can also be made from yarn with your own hands. For beginners who want to master the amigurumi technology, a job description or a diagram, a needle bar or a pillow will be required.To knit a beautiful toy or accessory, you should not only complete the outer layer, but also fill the oval or ball of the body with a special filler. After that, you can sew on the details and pick up clothes. Learning this Japanese knitting technique from scratch is not as difficult as it might seem.

Below are master classes on making simple toys using the amigurumi technique.
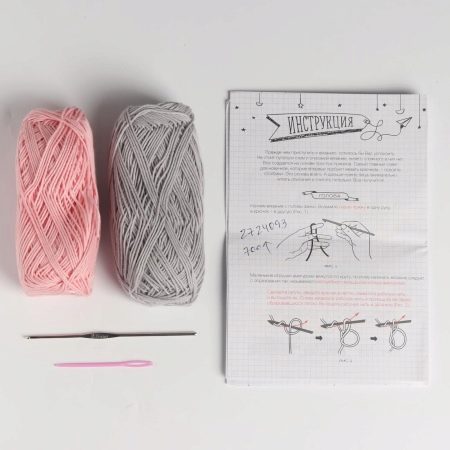
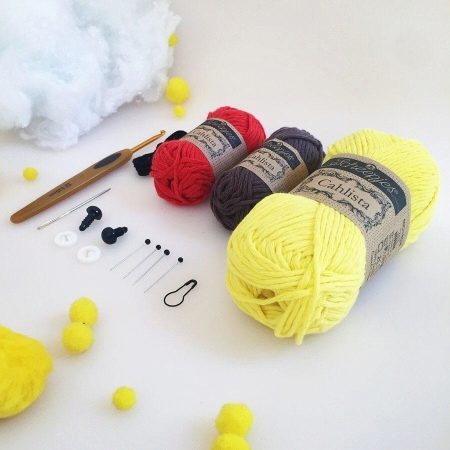
To work on them, you will need materials:
- hook of the size specified in the master class;
- yarn for knitting the desired colors;
- scissors;
- pins or thread markers;
- lighter;
- needles;
- dense thread for joining parts and tightening the eyes;
- filler;
- details for the eyes.
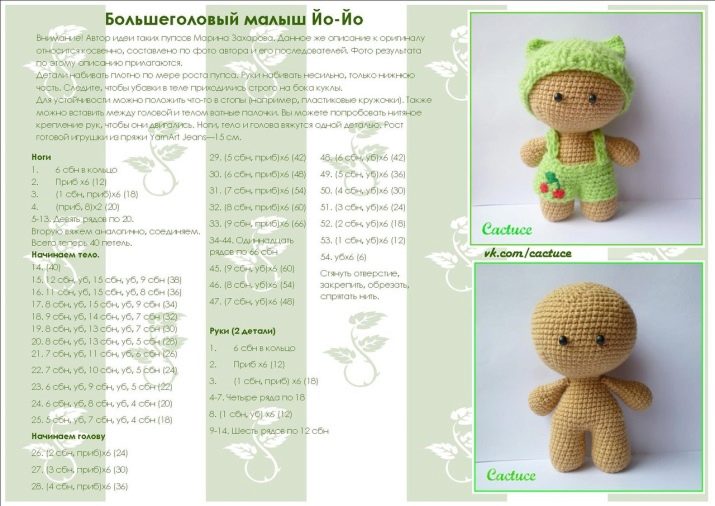
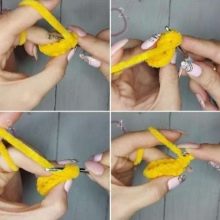
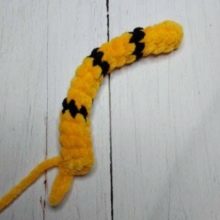
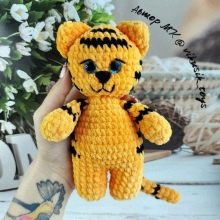
Tiger
To create a cute tiger cub measuring 17–20 cm, you will need only a few hours of free time and a careful study of the master class:
To begin with, you should create all the details in a spiral, and then use a dense filler. The final stage is sewing on ears, handles, tail, head.

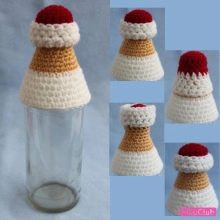
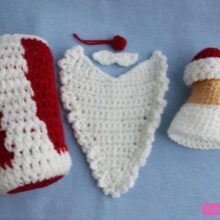
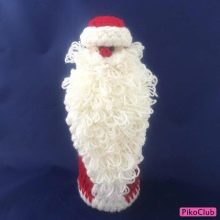
Father Frost
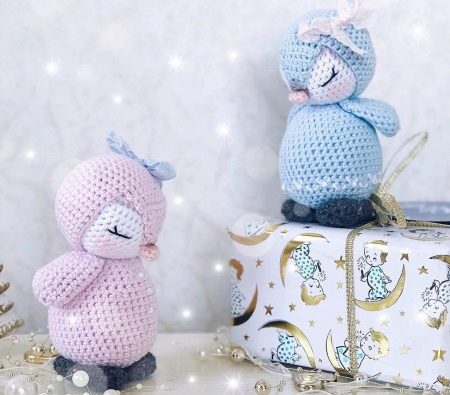
Christmas crafts on the eve of the winter holidays are always popular with knitting enthusiasts. On the eve of the celebrations, you can create a cute Christmas tree or Christmas tree decorations.
Santa Claus is the perfect New Year's gift that you can make yourself. You will need the following materials:
- threads of red, flesh, white and pink colors;
- hooks 1.5 and 3.0;
- filler;
- eyes.
Let's describe the progress of the work.
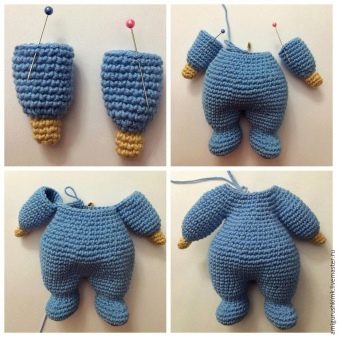
Creating the head and torso (start with pink thread):
- row 1: 6 sc in loop 2 from the hook = 6;
- row 2: 6 PR = 12;
- row 3: (1 PRS, OL) * 6 = 18;
- row 4: (2 PRS, OL) * 6 = 24;
- from 5 to 9 rows: 24 PRS unchanged.
Change the thread to red:
- row 10: (3 PRS, OL) * 6 = 30;
- row 11: 30 PRS;
- row 12: (4 PRS, OL) * 6 = 36;
- rows 13-14: 36 PRS;
- row 15: (5 PRS, OL) * 6 = 42;
- rows 16-17: 42 PRS;
- row 18: 42 PRS behind the back wall.
Fill with filler:
- row 19: (5 PRS, UB) * 6 = 36;
- row 20: (4 PRS, UB) * 6 = 30;
- row 21: (3 PRS, UB) * 6 = 24;
- row 22: (2 PRS, UB) * 6 = 18;
- row 23: (1 PRS, UB) * 6 = 12;
- row 24: 6 dec.
The bottom of the product can be connected separately by making increments in each row up to 42 RLS in the last row, then tied to the calf. Tie a fur coat along the bottom of the front wall of the loop with a RLS white thread.
Fur coat upholstery:
- dial 13 VP;
- 12 RLS from the second loop from the hook;
- attach to a fur coat.
Hair and beard:
- dial 18 RLS in accordance with the diameter of the head;
- VP, turn, 8 sc;
- VP, turn, 8 sc.
Add the rest of the chain to the end of the knitting. You will get a beard, and 8 RLS parts each - hair. Add a wig at the junction of the threads around the head.
Cap execution:
- row 1: 6 sc in 2 loop from the hook = 6;
- row 2: (2 PRS, OL) * 2 = 8;
- row 3: (3 PRS, OL) * 2 = 10;
- row 4: (4 PRS, OL) * 2 = 12;
- row 5: (5 PRS, OL) * 2 = 14;
- row 6: (6 PRS, OL) * 2 = 16;
- row 7: (7 PRS, OL) * 2 = 18;
- row 8: (8 PRS, OL) * 2 = 20;
- row 9: (9 PRS, OL) * 2 = 22;
- row 10: (10 PRS, OL) * 2 = 24;
- row 11: (11 PRS, OL) * 2 = 26;
- row 12: (12 PRS, OL) * 2 = 28;
- row 13: (13 PRS, OL) * 2 = 30;
- row 14: (4 PRS, OL) * 6 = 36;
- row 15: 36 PRS;
- row 16: 36 PRS.
The cap can be made shorter with white thread:
- row 1: 6 sc in 2 loop from the hook = 6;
- row 2: 6 sc.
Attach the spout to the cap with pink thread:
- 1 row: 6 PRS in 2 loop from the hook = 6;
- 2nd row: 6 PRS;
- fix.
Fix the eyes.
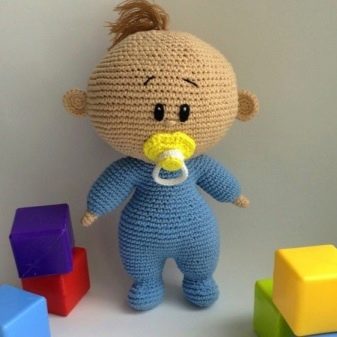
Penguin
The indigenous inhabitant of Antarctica will become the best friend for little children.
Bobblehead
The tiny little one is the perfect gift for girls who dream of motherhood.
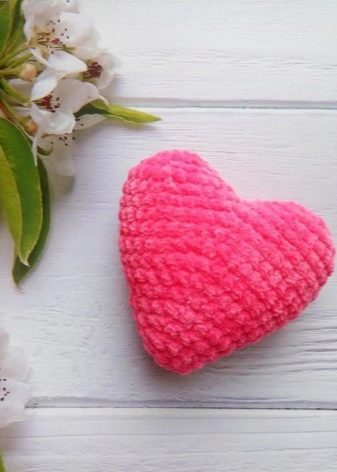
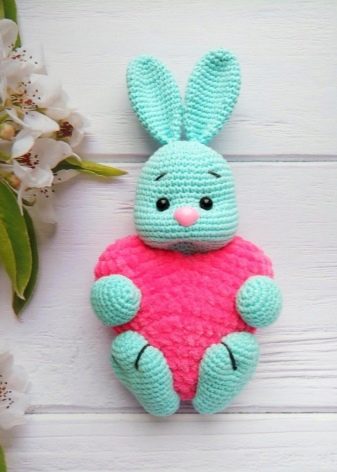
Valentines
On Valentine's Day, February 14, you can make a cute bunny figurine with a heart for your other half. Even the gloomiest guy will be moved by the sight of such a toy on Valentine's Day.
Beanbag
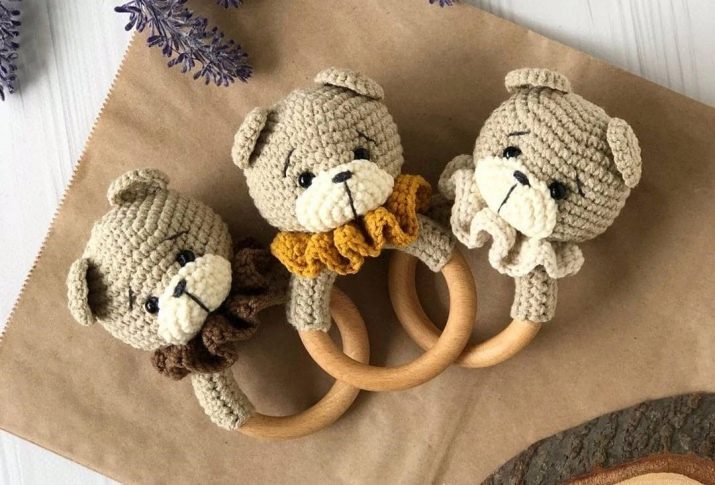
The master class will tell you how to make a soft rattle.
Materials:
- cotton acrylic yarn;
- hook 2.0;
- items for the eyes;
- filler;
- rattle;
- ring made of wood 6 cm.
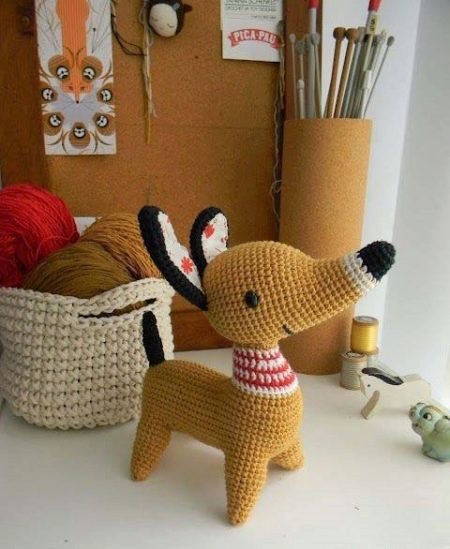
Dog
A soft dachshund, shepherd dog or terrier will be a great friend for an active child.
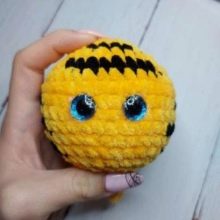
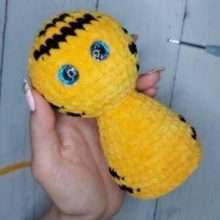
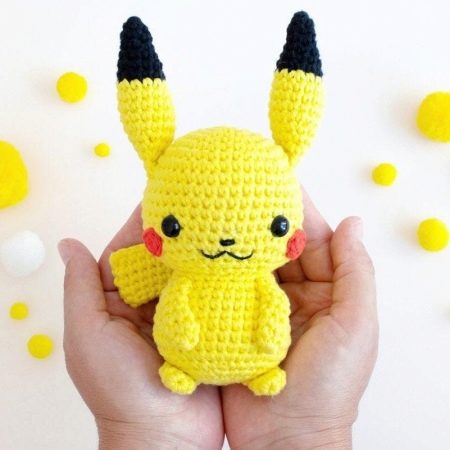
Pikachu
Despite the fact that cartoons about Pokemon have been around for many years, the image of Pikachu still remains relevant.
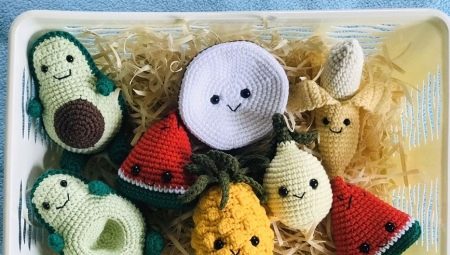
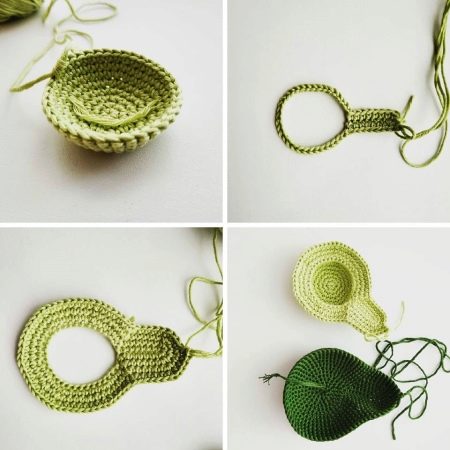
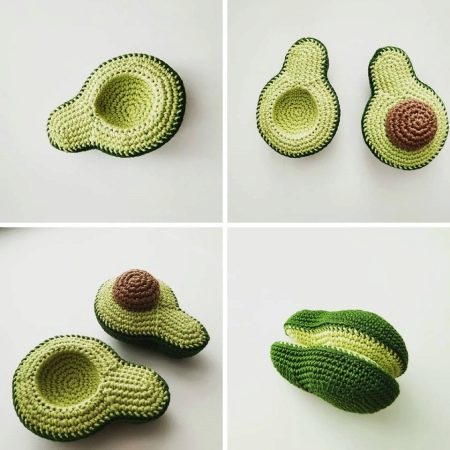
Avocado
Who would have thought that a knitted avocado could be so delicious.
Bone front (start brown):
- row 1: 5 sc in the spacecraft;
- row 2: 5 PR (10);
- row 3: (1 PR, 1 PRS) x 5 (15);
- row 4: (1 PR, 2 PRS) x 5 (20);
- row 5: (1 PR, 3 PRS) x 5 (25);
- Rows 6-7: 25 PRS.
Change color to light green:
- row 8: PSP (1 PR, 4 PRS) x 5 (30);
- row 9 (1 PR, 5 PRS) x 5 (35);
- row 10 (1 PR, 6 PRS) x 5 (40);
- row 11 (1 PR, 7 PRS) x 5 (45);
- row 12 (1 PR, 8 PRS) x 5 (50).
Fasten and cut the thread.
Turn the pentagon with the knitting end down. Attach a light green thread to the upper left corner.
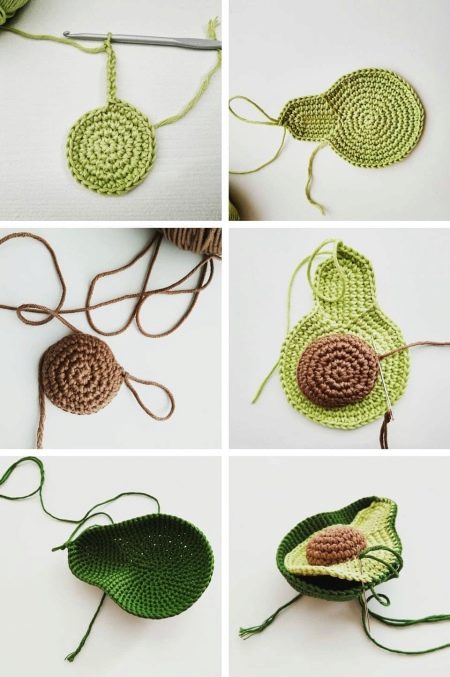
From the seamy side, knit in rotary rows:
- row 1: 10 PRS, 1 VP, turn (10);
- rows 2–4: 10 PRS, 1 VP, turn (10);
- row 5: 1 UB, 6 PRS, 1 UB, 1 VP, turn (8);
- rows 6–8: PRS, 1 VP, turn (8);
- row 7: 1 UB, 4 PRS, 1 UB, 1 VP, turn (6);
- row 8: 6 PRS.
Around 65 sc, tie SS in the first loop.
Insert eyes between 4 and 5 rows.
Back (dark green):
- row 1: 5 SBNv KA;
- row 2: 5 PR (10);
- row 3: (1 PR, 1 PRS) x 5 (15);
- row 4: (1 PR, 2 PRS) x 5 (20);
- row 5: (1 PR, 3 PRS) x 5 (25);
- row 6: (1 PR, 4 PRS) x 5 (30);
- row 7: (1 PR, 5 PRS) x 5 (35);
- row 8: (1 PR, 6 PRS) x 5 (40);
- row 9: (1 PR, 7 PRS) x 5 (45);
- row 10 (1 PR, 8 PRS) x 5 (50).
Fasten and cut the thread.
Turn the pentagon with the end of knitting down.
Attach a dark green thread to the upper left corner.
From the seamy side, knit in rotary rows:
- 10 PRS, 1 VP, turn (10);
- 10 PRS, 1 VP, turn (10);
- 1 UB, 6 PRS, 1 UB, 1 VP, turn (8);
- 8 PRS, 1 VP, turn (8);
- 1 UB, 4 PRS, 1 UB, 1 VP, turn (6);
- 6 sc.
Tie 65 PRS three times to get a deep "cup", SS - in the first loop.
Parts to tie 65 PRS in dark green.
We fill with filler during the binding process.
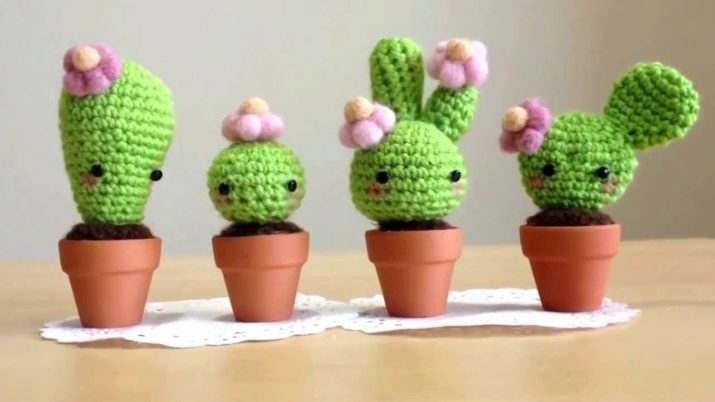
Flowers
The knitted cactus is a great replacement for the prickly desert dweller.
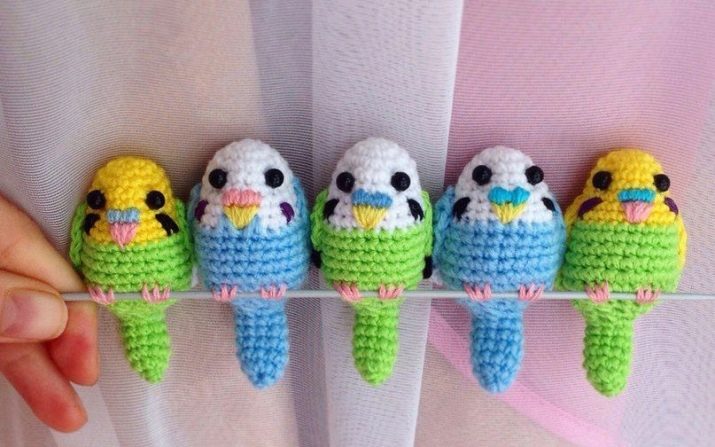
Parrot
A knitted feathered multi-colored friend will brighten up office or gray everyday life.
Luntik
The cartoon character, which has won the attention of millions of viewers, will delight any child.

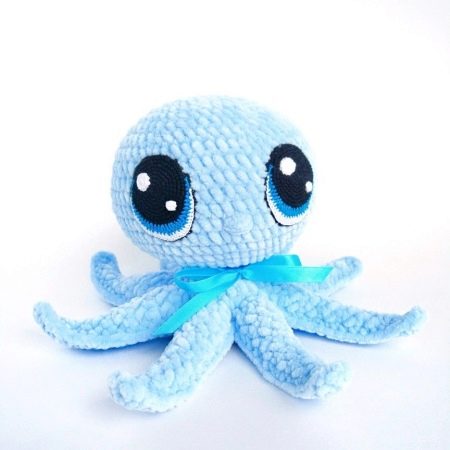
Octopus
A smart marine dweller will be able to decorate any interior in a nautical style.
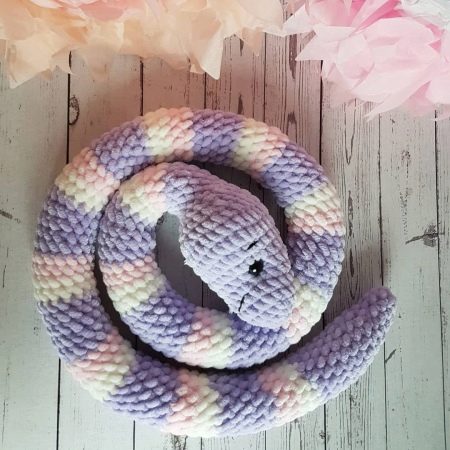
Snake
Who said that reptiles in the form of amigurumi toys cannot become best friends for children and adults.
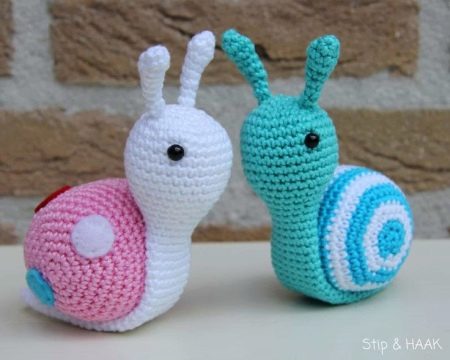
Snail
The famous garden clam will take pride of place among the toy creatures on the shelf.
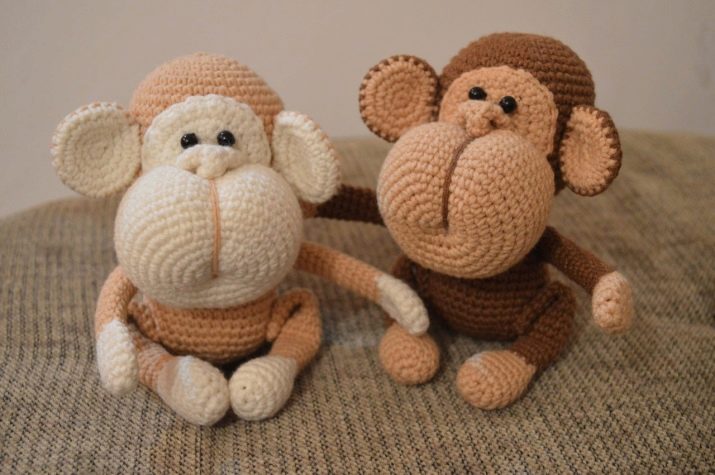
Monkey
An African resident will be able to settle in the nursery to delight the baby with his cute and funny look.
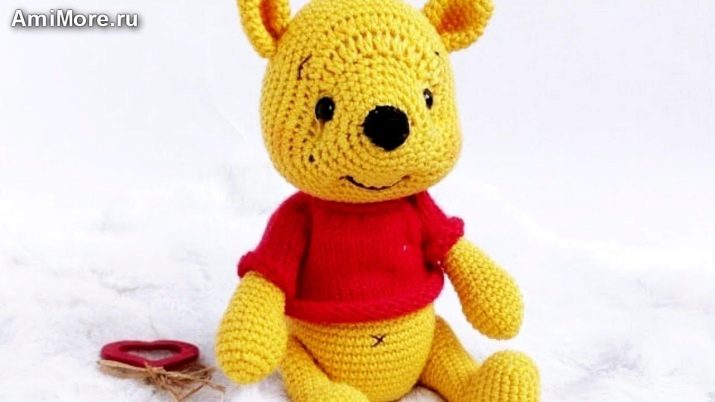
Winnie the Pooh
The clumsy fairytale hero is able to become the best friend who will keep all the secrets of the kids.
Knitting Tips
When creating masterpieces in the Japanese amigurumi knitting technique, it is important not only to take into account your own mistakes, but also to study the recommendations of other, more experienced craftsmen.
Rules for making beautiful and neat toys:
- using a hook that is smaller than stated in the manual to avoid the appearance of large holes on the product through which the filler can be seen;
- the thickness of the hook should be minimal;
- it is important not to confuse the front and back sides of the product elements;
- to make the product more miniature, you should knit them in one loop, and not in two, as indicated in Japanese patterns;
- the larger the toy's eyes, the more attractive it looks - the best impression is created by products with eyes made of plastic or glass;
- tightening should be as uniform as possible and be made from a single color or thread used in the knitting process;
- it is important to make sure that the legs of the toy look in one direction - for this, you should not tighten the thread too much and lead the needle slightly below the edge when connecting these elements;
- when putting toys for sale, it is extremely important to take care of a high-quality and interesting image of the product.
By applying the listed tips and using clear schemes, you can easily start creating simple masterpieces using the amigurumi technique. Thanks to a variety of tools and a large range of colors of materials, the created toys will attract the attention of relatives, friends, colleagues, and acquaintances. Once you've gained some basic skills, you can start a small business selling these toys.
An example of an amigurumi toy in the video.


