Making break applications

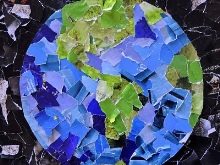
Creation - an important component of the formation of the personality of any child. A variety of handicraft classes develop fine motor skills of the hands, help to familiarize the baby with the world around him, and teach him to think artistically. One of the interesting types of children's creativity is the creation tear-off applique... This technique consists in creating various paintings using torn pieces of colored paper.
External similarities with mosaics activate children's brains to develop artistic imagination. This type of activity is suitable even for the smallest, since there is no direct contact with sharp objects, such as scissors or a clerical knife.


What it is?
The technical feature of the tear-off applique consists in the production of various parts of the composition from the tear-off pieces of paper. The material can be any paper product from which torn pieces can be made. - colored paper, old magazines or store catalogs, colored tape, cotton wool, etc.
The technique for creating such compositions is very simple, but the result is very effective and interesting.


Execution Algorithm
The creation of any cut-off applique has a certain sequence of actions.
- Thinks in advance about the plot or the hero we want to portray. Print out a character stencil, if necessary, and cut it out.
- Choosing a background. It should be thick paper or cardboard, since the large amount of glue used in the manufacture will simply soak a regular sheet of paper.
- There are two options for making a cut-off applique: according to a ready-made stencil, which is applied with a pencil to the background, or without preliminary drawing. It is best to choose the first option so that the drawing is clearer and more accurate.
- Tear-off appliqué can be partly made up of solid parts. For example, depicting an autumn forest, you can paint the grass and the sky with paint, cut out the trunks from colored paper, but depict the foliage in torn pieces.
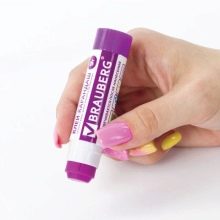
- It is recommended to use glue in the form of a pencil, as with liquid PVA glue the kid can overdo it and ruin the craft.
- When preparing the parts, decide on their size to make everything about the same. A picture made from pieces of different lengths looks sloppy.
- When filling in the applied templates, it is necessary to try to glue the pieces, strictly observing the outline of the drawing.
- For kids, it is better to choose large pictures without small details. For schoolchildren, you can choose more complex compositions with a large number of elements.


Simple jobs for toddlers
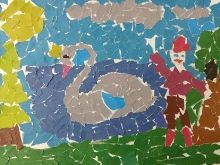
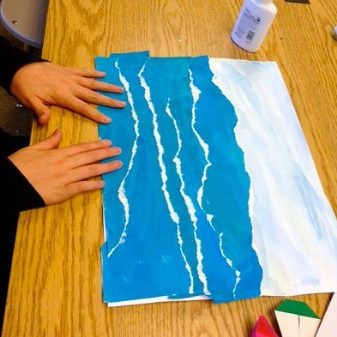
You can try to make a tear-off applique with children 2-3 years old. As an image, you should choose simple pictures with large details. For example, you can make a mosaic sea out of large pieces of colored paper. To do this, you will need the following materials:
- a set of colored paper;
- dense background;
- scissors;
- colour pencils;
- PVA glue in a pencil.


Progress.
- We take sheets of blue and blue colored paper and tear them into large pieces. You can make several whole pieces in a wave-like shape.
- Next, cut out a circle from an orange sheet and cut it in half.
- We begin to collect our application. To do this, glue the pieces of paper, forming waves. The sea should cover more than half of the sheet.
- The remaining space at the top of the sheet - paint the sky with colored pencils using yellow and orange colors. With a black pencil, draw two small seagulls in the form of checkmarks.
- At the end we glue our sun.
- The free space between the pasted pieces can be sketched with a blue or light blue pencil.
Our sea is ready!


A simple version of a torn applique for kids is the image of a mushroom. You will need the following components:
- thick sheet or cardboard;
- a set of colored paper;
- pencil;
- glue stick.


Progress.
- Draw a mushroom pattern on the sheet.
- For this applique, we need the following paper colors - green, yellow, beige and brown. If the kit is missing a beige color, you can use a medical patch in a flesh-colored skein.
- We tear the prepared sheets into medium pieces, trying to make all the blanks the same size.
- We begin to carefully glue the pieces of paper, trying not to go beyond the boundaries of the template. It is necessary to glue the parts as tightly as possible to each other.
- We make the upper part of the cap from brown pieces, for the inside we use yellow blanks. We will use beige pieces of paper or medical adhesive plaster to decorate the stem of the mushroom. And finally, we make the green grass from the corresponding color.
The mushroom is ready!


Applications for preschoolers
For children of kindergarten age (4-5 years old), you can already take more complex mosaic applique compositions, consisting of several parts. For example, you can use various animals as ideas - a cat, a squirrel, a panda, a dolphin, an owl, etc.
We suggest that you familiarize yourself with a detailed master class on making a cut-off applique "Bunny". To implement the composition, you will need the following components:
- printed hare template;
- a sheet of white paper;
- a sheet of blue paper (for the background);
- a sheet of blue paper;
- pencil;
- scissors;
- PVA glue and a brush.


Progress.
- We outline the hare pattern on a sheet of white paper and cut it out.
- On a sheet of blue color, which will serve as a background, we outline our bunny, so that later we can lay out a picture along its outline.
- Now we take the cut out template and tear it into small pieces. We try to keep them all the same.
- Now we glue the paper blanks on the drawn hare.
- Draw the eyes and nose of the bunny on a piece of blue paper and cut them out.
- We glue the cut out parts to the applique.
The snow-white mosaic bunny is ready!


Almost every modern child is familiar with Luntik - the character of the popular multiseries. The next master class will help you and your child to make a cut-off applique with the image of this multi-hero without any problems.
To work you will need the following materials:
- a set of colored paper;
- a thick sheet of white paper or cardboard;
- a ready-made Luntik stencil, which can be found on the Internet and printed;
- scissors;
- plasticine.


Progress.
- We apply a stencil and outline it on a sheet of white paper, which will serve as the background for the applique.
- Take a pink sheet and circle the Luntik stencil on it.
- Cut it out and tear it into small pieces of the same size.
- We take a sheet of bright pink color and draw on it the following elements for decorating Luntik's belly: one large circle with a diameter of 5-6 cm, one with a size of 3-4 cm, two circles of 2 cm and two circles of 1 cm. Cut out the drawn blanks.
- To design the muzzle, draw on a sheet of bright pink two nostrils, shaped like commas, a circle 2-3 cm in size and two small semicircles - eyebrows.
- To decorate the ears of a multi-hero, we apply a stencil to a sheet of bright pink color and begin to circle the ears. After that, select the part of the ears that will need to be cut out of colored paper, focusing on the finished applique picture. We cut out all the details.
- Now we begin to collect the composition. First, fill in the Luntik figure, tightly gluing all the pieces of paper.
- Then we glue the belly blanks. After that, we make out the face and ears of Luntik.
- Cut out the eyes from black and white paper and glue them.
- Now we take pink plasticine, form 2 small balls from it and 2 a little more. Those that are smaller, we put on the places of the palms and distribute the plasticine, trying not to go beyond the contours of the image.
- Then we do the same with the legs.
Your favorite character is ready!


Ideas for schoolchildren
At school age, children already feel confident working on an applique in a break-away style. It is no longer so interesting for a child to create paper applications for ordinary animals (bear, pig, fish, etc.). For children of primary school age, complex compositions consisting of many small details can already be used as ideas for creating a discontinuous applique. For example, images of various landscapes - an autumn forest, a river or the sea coast. You can still depict animals, only for stencils you should choose more complex detailed pictures.
For example, to create the Sea Sunset mosaic applique, you need the following components:
- a set of colored paper;
- dense white background;
- pencil;
- scissors;
- glue stick.


Progress.
- To begin with, we will apply the contours of the future application on a white sheet. We draw a horizon line, a setting sun, several circles around - rays, as well as a beach line.
- We take sheets of blue and light blue paper, tear them into small pieces of the same size.
- For the beach, take half a yellow sheet of paper and a thin strip of orange sheet. We make small blanks out of them.
- For the rays of the sun, take a strip of red paper and half an orange sheet. We tear them up.
- Draw a semicircle on a sheet of yellow paper - the setting sun, cut it out.
- On a brown sheet, draw and cut out 7 trapezoidal blanks - the trunk of a palm tree.
- Cut out palm leaves from a leaf of green and light green flowers.
- We glue the semicircle of the sun. Then we lay out its rays - an orange and a red semicircle.
- Fill the rest of the sky with pieces of blue.
- Then we lay out the horizon line from pieces of light blue. For the rest of the sea, we mix blue and light blue blanks.
- Now we lay out the beach line. Fill the free space with yellow pieces with orange splashes.
- We spread the trunk of the palm tree, then fix the palm leaves.
The beautiful seascape is ready!

In the next video, you will find a master class on cut-off applique.


