Variety of applications on the theme "Wood"

The application on the theme "Wood" is one of the most common crafts for young children. It is noteworthy that it can be adapted for any time of the year - for example, a picture of a blossoming fruit tree looks beautiful in spring, in summer it is designed to emphasize the beauty of the forest, in autumn it demonstrates the richness of colors, and in winter an elegant Christmas tree will be appropriate. Today we will introduce you to the most interesting ideas for paper and other materials appliqués.


How to make from paper?
The easiest way is to make an applique on the theme of "Wood" out of paper - even kids can handle this work. Just draw a brown trunk with branches on an album sheet, and then use stencils to cut out the leaves from colored paper of yellow, red and orange colors. The blanks are glued to the base with an adhesive pencil.

Another method of making wood is no less interesting. In this case, the trunk is also drawn with pencils or paints. But to create a crown, you need to punch a lot of multi-colored circles with a hole punch, and then just place them on the branches.

Older children can be offered to make flowering bushes.
To do this, they will have to remember all their drawing skills.
First, a light green circle is painted on a white sheet with watercolors. When it is completely dry, you need to draw a trunk and branches with a brown felt-tip pen.

Cut the colored paper into strips. Fold each piece with an accordion. Draw the outline of a flower in the center, cut with scissors. You should have a lot of colorful flowers.


After that, all that remains is to glue the flowers onto the prepared tree crown, the easiest way is to plant them on a glue stick.
If you attach flowers only for the middle, then you will get a voluminous craft.

To decorate the flowers, their central part is decorated with varnish with sequins or rhinestones. If desired, the contour of the blanks can be tinted with watercolors in dark green shades.


The resulting flowering tree is cut out and glued to a thick cardboard sheet. It can be fixed to the base entirely, or you can let the edge peek out - in this case, the effect will turn out to be more voluminous.


Cliff
Very beautiful trees are made from torn paper. To create such an unusual applique you will need:
- thick cardboard as a base;
- disposable cardboard plate;
- colored paper.
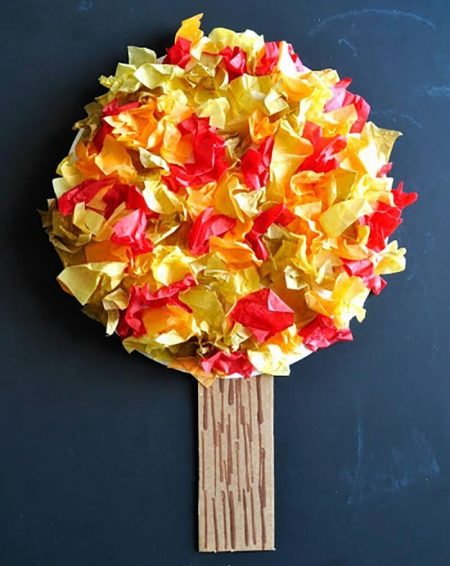
To begin with, colored paper of green, yellow, red or orange is torn into small pieces. Then a disposable plate is greased with PVA glue, and fragments of colored blanks are randomly placed on it. Thus, a voluminous crown of the tree is formed.

A barrel is formed from a rectangular brown paper blank.
To make it look believable, you can draw darker stripes on it - the easiest way to do this is with a marker or paints.
The craft is ready. All that remains is to glue the main elements to the cardboard base.

Volumetric
You will get a voluminous tree if you take colored paper, a toilet paper sleeve and buttons.

The idea of creating a voluminous tree from a paper bag is considered no less interesting. For this, its upper part is cut into thin strips, after which the lower part of the bag and each strip are twisted separately.

You should have a shape that resembles a raised tree trunk with branches.

Liberally grease the workpiece on one side with glue and fix it on a solid cardboard base.
Decorate the resulting tree with leaves. They can be green, orange, red or yellow - it all depends on what time of year you are portraying.
Such a picture can be safely hung on the wall of a child's room.

A curly autumn tree made of paper rings would be a good idea for creating voluminous crafts. The work includes several simple steps.
- To begin with, thin strips are cut from colored paper.

- Divide them in half.

- Twisted into rings and secured with glue.

- Improvised leaves are glued to a pre-drawn crown of a tree.

You will get such a beautiful tree.

But, perhaps, the most beautiful is a voluminous tree made of napkins.
First you need to take napkins of autumn colors, unfold them, lay them on top of each other and form 16 squares of the same size.


After that, the most interesting part of the work begins. Napkins must be crumpled so that lumps are obtained - improvised leaves.
The resulting blanks are glued to the drawn trunk, forming a crown.

If you wish, you can make a winter applique. Winter is a magical and fabulous season when nature freezes and transforms, and white and silver shades dominate around.
You will need:
- dark blue cardboard;
- colored paper of light blue, bright blue and brown shades;
- hole puncher;
- scissors;
- pencil;
- glue stick.

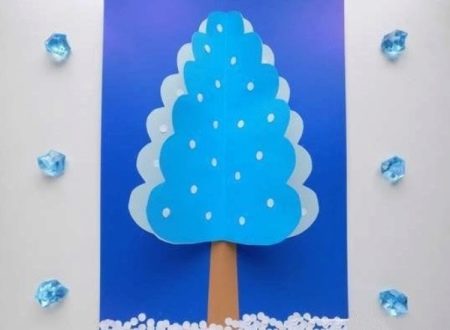
The winter tree will be made using three-dimensional technique.
First, take two sheets of light blue paper and one sheet of deep blue. They are folded together and folded in half.

Near the place of the fold, a silhouette of a half of a winter tree is drawn.

With sharp scissors, carefully cut out the painted crown.

You should get these blanks of various shades of blue for a winter tree.

Next, you need a glue stick. The trees are glued together, while the glue is applied only to the halves of the blanks.

Next, you need to prepare the trunk for the tree.It is cut out of brown paper and glued to the bottom of the applique in the middle.

After that, you can proceed to gluing the crown of the future winter tree.

The work is almost finished. It remains only to use white paper and a hole punch. With their help, you can create snow - round snowflakes are glued to the crown of the tree.
You can also use cotton wool or cotton pads to create a winter tree using the collage technique.

And to make such a craft look more spectacular, it is sprinkled with glitter.

Of hearts
Persevering guys can be offered to make a tree from hearts. To do this, you need corrugated colored and white cardboard and a standard set of tools (scissors, pencil, ruler, PVA glue and templates).

First you need to take colored paper of the same color, but different shades. Hearts of three sizes are cut out of it. In total, you will need 8 pieces of large, medium and small blanks of each color.

The hearts are folded in half. After that, a tree trunk is cut out of colored cardboard and glued to the cardboard base.
Next, they draw a circle - in this way they form the contours of the future crown.

The largest hearts are laid out in a circle so that they give shape, while not going beyond the contours.

Then you need to glue the hearts, the glue is applied only to half of the workpiece.
Medium hearts in three different shades are placed on the base and glued with glue.
Next, you need to place and glue the smallest hearts along the contour.
To make the picture more lively and expressive, birds are cut out of paper and glued to the branches.

At the end of the work, a few hearts are left near the tree trunk.

Options for making wood from natural materials
When creating an applique on the theme "Wood" for kindergarten, natural materials are often used. The easiest way is to take fallen and dried leaves. Such crafts invariably turn out to be interesting and very beautiful.
The manufacturing technology is practically no different from the usual application. First, draw the outline of the stem and branches on a piece of paper. When it's dry, place the dried leaves on it in any order you like.
Best of all, these leaves are fixed with a glue stick.

An autumn tree can be made with pumpkin seeds. To create such an unusual craft, you will need a sheet of thick cardboard, on which the outlines of a tree trunk with branches are drawn in brown gouache.
If you want the work to look more neat, prepare a stencil of the tree in advance.
Then you can start creating future leaflets. To do this, pumpkin seeds are painted in shades of the autumn palette - orange, yellow or red. This can be done with markers, acrylic paints or gouache.

The main part of the seed-leaves is glued to the branches. And a few more are placed next to the tree - they will depict leaf fall.

An unusual application can be obtained if you use not a drawn template as a trunk, but take a real branch of a tree. It is glued to cardboard with hot glue and painted seeds are laid out to simulate the crown.
You can also use pieces of paper, cloth, or colored buttons.

Making a tree with fluffy wire and pom poms is a good idea. In this case, a trunk and branches are formed from chenille, glued to paper with hot melt glue, and multi-colored pom-poms are placed around like leaves.


If you have a lot of old disassembled puzzles at home, you can make a nice tree out of them. You will need brown felt, paint, and paper. The work will not be difficult.
Draw the baby's hand on the paper and transfer it to the felt.
Cut out the resulting blank, and glue it to the paper with a glue stick - this will be the barrel.
Draw the grass below with green gouache, and then paint the puzzles in the desired color (green if you are planning to make a summer tree, or orange, red if you are creating an autumn craft).


The most creative part of the job is crown formation. For this, improvised leaves are placed in any chaotic order.

More ideas
The application can be not only on paper. To decorate school offices before the autumn holiday, an application on the window glass is used. In this case, it is necessary to cut out the trunk and branches of a tree from double-sided colored paper, and glue it to the window using a concentrated soap solution.
Maple leaves are cut from red, yellow and orange colored paper.
But leaves painted with watercolors look more impressive - in this case, you can create transitions of shades from yellow to orange, and from orange to red.
They are also fixed on soap.

An unusual tree can be made from coffee and cornflakes. To create such a craft, you can attract kids from an early age, even a one-year-old baby can handle it. Draw a template on paper, then divide the responsibilities. Let an adult pour glue in the form of branches, trunk and leaves, and entrust the kid to pour coffee or cereals.
The main thing is to make sure that the loose particles do not end up in the child's mouth.

An unusual technique for creating autumn handicrafts is plasticineography. This is a useful technique - it not only develops the baby's imagination, but also prepares his hand for writing, improves fine motor skills. To create a picture from plasticine, you need to draw the outlines of a tree on paper, then take a piece of mass for modeling and smear it along the contours with strong movements.

With some imagination, you can use any other means at hand to create a tree - peas, millet, and even pasta.


Another way to create a Wood applique from dry leaves is presented in the following video.


