Plasticine applications

Plasticine is a versatile material from which you can make a huge variety of crafts. It's not just about cute animal figures, flowers or cartoon characters. With the use of plasticine mass, it is possible to make excellent applications. In this article, we will learn how you can do them.


How to make mountain ash?
A child can make a variety of applications from high-quality plastic material. On the basis of cardboard or thick paper, you can fix plasticine figures of various animals, plants, and so on. If the child is still little familiar with all the features of working with plasticine, it is not worth setting too complex tasks for him.
Better to start with simpler options. A branch of rowan made of plastic material may turn out to be simple to manufacture. An applique with such a detail will look attractive, which will surely please the child who made it.


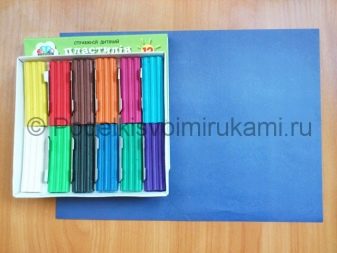
Let's get acquainted with the step-by-step instructions for modeling such a composition. To make an attractive rowan branch applique, the first step is to choose the right background. The best solution would be a gray or blue cardboard sheet. Of course, the child can give preference to other colors - there are no restrictions here. To mold a bunch of berries, you should stock up on red plasticine, brown plastic material will be needed for the branches, and green for the leaves.
Having prepared all the necessary components, you can proceed to making an attractive applique.First, you will need to roll several long flagella twigs from the brown plasticine mass. They should be glued to the top of the selected cardboard base. After that, in your hands you will need to thoroughly knead the red plasticine, having torn it into several small parts before that. From these components, it will be necessary to form small rowan berries. To make the homemade product attractive, the plasticine berries should be as natural and appetizing as possible.


Ready round berries should be glued at a level just below the brown twig on the base... Next, you need to stick a small brown ball / dot to each berry. The next step is to take the stack. The tool can be either wooden or plastic. You will need to make very small cuts in a stack, thanks to which the appearance of scarlet fruits will be more natural. Of course, this stage is optional, but it allows you to achieve more realism.
The rowan is singing at the very moment when the foliage on the trees turns yellow, so for sculpting the leaves it is worth using not only green, but also orange plasticine. Many small diamond-shaped pieces will need to be rolled out of these materials. When the leaves are ready, they will need to be glued to a twig, which is already fixed on a cardboard base. By means of a stack, it will be possible to neatly draw the corresponding pattern in the form of veins on the green and red leaves of the mountain ash. Thus, you need to supplement each of the leaves.
After that, a very beautiful autumn composition can be considered complete. Its production will not be difficult, but in the end it will allow you to end up with a gorgeous craft, which will certainly delight the young sculptor!


Making a model of the solar system
From the considered plastic material, it is possible to simulate a cool layout of the solar system in the form of an applique. For this you will need:
- dark blue or dark gray cardboard sheet;
- plasticine bars of various colors;
- stack and sculpting board.


Let's take a closer look at each of the stages of this creative work, which will definitely captivate the young master.
- First, you need to sculpt the central object of the layout - the sun. To do this, you need to choose a suitable shade of plasticine. You can mix orange, yellow and white shades together, but you should not achieve a uniform color.
- The resulting mass is fixed in the center of the cardboard base and smeared with your fingers.
- To make planetary orbits, you need to take snow-white or beige plasticine. Small and soft pieces are taken, which must be shaped into thin bundles.
- From the light threads, you will need to form 9 rings surrounding the Sun.
- A small planet - Mercury - should be sculpted from small pieces of gray, white and brown shades. A ball is rolled out of them, on which craters are formed with a carnation or a match.
- Venus should be made 3 times larger than Mercury. To do this, you can use brown, gray and black plasticine. It is possible to form a relief using a thin wire.
- Next, you need to make the Earth. She will be the brightest object of the applique. To sculpt it, you need materials in a green, yellow, blue or light blue shade.
- Mars will turn out to be made from a combination of orange and black plastic mass.
- Jupiter appears striped from afar. To make it, you need to take brown, beige and orange plasticine strips.
- Saturn will be similar in color to Jupiter. Do not forget about the ring that should encircle it.
- Uranium should be crafted from a blue material.
- To make Neptune, it is enough to roll a simple ball of blue plastic material.
- Pluto is a dwarf planet that can be molded from blocks of gray and white.
- All prepared planets will need to be fixed in order in their orbits. The result is a very beautiful and creative composition.


Constellation options
From plastic mass you can make different variants of known constellations, for example, such as the Big Dipper or Gemini. To make a model of these objects, the kid does not have to exert much effort and skill. Plasticine constellations are made very simply.
We will learn how you can sculpt different constellations from plasticine for beautiful applications. At the first stages, it is necessary to prepare a cardboard base, as well as a yellow plasticine block and a stack. It is worth choosing the constellation of interest, as well as determining the number of stars in it. In addition, you should find out how many trunks will be needed. You will need to take several servings of yellow plasticine and roll them into balls.


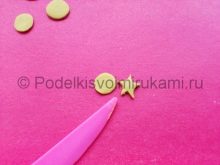
To form stars, the balls must first be flattened to form small cakes. The second portion of the plasticine pieces should be rolled into thin strings. Using the stack, you will need to carefully shape the cakes into the shape of a five-pointed star. For example, to model the constellation Cancer, you will need to make 5 such stars. Next, you need to start sticking the stars and connecting lines to the cardboard base. All the details will need to be pressed down with your fingers from above.
It is necessary to create a figure of the required planned shape. If the child is still very small or the plasticine is too soft for the stars to keep the correct shape, it is necessary to make notches on the blank cakes in a circle.
By the same principle, you can make the constellation Libra or any other options.


Crafts with flowers
A child can make a very bright and elegant applique depicting a variety of flowers from plastic material. It can be not only single buds and bouquets, but also a whole chamomile meadow.... Plasticine makes it possible to realize almost any ideas and ideas.
Let's figure out how you can make a spectacular application with plasticine flowers in a basket. You should take a set of multi-colored plasticine, a stack, a pencil and thick cardboard. On a sheet of thick cardboard they draw an image of flowers in a beautiful basket. Next, the existing background is carefully covered with small pieces of plasticine, and then smeared over it, filling the empty areas.


Then 4 plasticine sausages are rolled, corresponding to the height of the basket on the base. Longer and thinner flagella "braid" the basket to the very top. Plasticine twigs should fit as tightly as possible to each other. There should be no gaps. To decorate the basket, you can twist a couple of twigs and fix them in the upper part of the "container". After that, you can proceed to sculpting flowers.
You can make absolutely any flowers. For all parts, plasticine balls are first rolled up, and then they are flattened and given an oblong or rounded shape. There should be so many flowers that they completely fill the plasticine basket. At the end of the work, the buds can be made more attractive and realistic by treating their cores with a stack. In addition to flowers, their green teardrop-shaped leaves can also be located in the basket. On them, it is worth highlighting streaks of small depth in a stack. A very bright flower arrangement is ready!


More ideas
You can make a lot of other original applications from plasticine. In addition to the plastic composition, you can also use natural materials, vegetables and fruits. Consider a few simple master classes.
Animals
Children are very fond of making various animals from plasticine. These can be both very simple and more complex crafts. Let's look at how to model a cute applique with a cute sculpted hedgehog.
A thick cardboard is taken.The background can be formed from smeared light-colored plasticine. The composition may include an autumn forest. To do this, you need to make a couple of trees from brown flagella twigs, as well as orange autumn leaves of an oblong shape. The upper part of the applique can be supplemented with blue plasticine clouds.


Prepare a gray cake. This will be the body of the hedgehog. On the one hand, a slightly pointed beige or white detail should be attached to it - a muzzle. You need to make a stack on the back of the animal many short indentations that imitate needles. Eyes and nose are glued. It is worth considering the decor of the hedgehog's prickly back. You can sculpt small apples, grapes or cones from plasticine, and then fix them on the top of the hedgehog's body.


Mushrooms
For a child aged 2-3 years, a simple scheme for making applications with plasticine fly agaric is suitable... Let's consider the features of its implementation step by step. You need to take a set of colored plasticine blocks, as well as an unnecessary CD or DVD. The last detail will act as the basis for the applique. The clay will stick to both the front and back of this base.
Smear the green plasticine with a thin layer on the disc with your fingers. Next, a white plasticine mass is taken. It needs to be rolled in the palms, and then slightly flattened. These will be the legs of the fly agaric.


Prepare from red plastic material mushroom caps. Next, the white material is taken again. Small flattened circles are rolled out of it for the cap of fly agarics. From the green material, flat leaves are formed with veins highlighted by a stack. These details stick under the mushrooms. Between the mushrooms, you can stick a long green sausage-stalk with bell buds made of blue plasticine.
You can also complement the composition with a plasticine snail, a bee and a multi-colored butterfly. It will turn out very original and beautiful!


Fishes
For children 4-5 years old, a volumetric manufacturing scheme is suitable appliques with an elegant goldfish. On a cardboard base in blue or light blue, a future goldfish with clear outlines is first drawn.
Next, pinch off small pieces from the yellow plasticine and roll many balls out of them. They should be small. Fill in the contours of the fish from the body. The rolled balls are stuck there, and then they are slightly pressed down.


To fill the head of a goldfish, it is worth preparing orange plasticine circles. The eye should be made from a black ball. The tail of the fish is made from orange plasticine flagella.
The fins are shaped in the same way as the tail. Algae from green flagella with a slightly wavy shape can be placed next to the fish. It is worth putting flattened plasticine “stones” on the “bottom” of the applique.


Insects
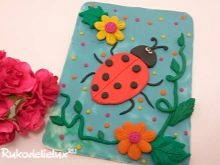
We will find out how to do plasticine ladybug applique... A sheet of cardboard is taken, soft and light plasticine is smeared on it for the background. In the center, a red oval cake-back is attached. A small black cake-head of a cow is attached to it. Black flat circles are attached to the back of the insect.


Thin flagella-legs and antennae are attached to the back. The red part is divided along a thin line using a stack. This will indicate the line separating the wings of the insect. Now you can decorate the craft with plasticine flowers, leaves and small colorful balls. Eyes made of white and black plasticine should be fixed on the face of a ladybug.
The child can use other decorations as well. This product makes it possible to fully show children's imagination.


To learn how to make the "Snail" application from plasticine with your own hands, see the next video.


