Applications on the theme "Summer"

The collaboration of children and parents plays an important role in the development of babies. Crafts are the best type of creativity to help strengthen relationships. With a variety of materials and access to application templates, you can regularly create new masterpieces with your child, without significant costs.


Ideas for the little ones
There is a stereotype that young children do not know how to focus on one activity, for example, on creativity. Fortunately, this is not the case. If you find interesting options for crafts for kids, you can captivate your child for a long time. And 2 years is a great age to start developing coordination of movements and fine motor skills.
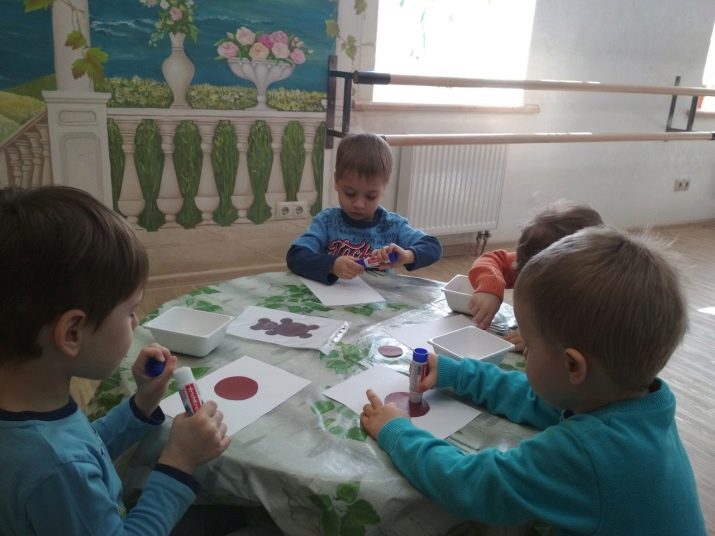
It is very important to gradually show your child how to work with paper, scissors and glue. To begin with, you should teach the baby the basic geometric shapes, from which applications will be assembled in the future: a circle, a rectangle, a square.
It is advisable to practice making figures of different sizes. In addition, you can enter different colors in parallel. After the child learns how to make these options, proceed to the full application.

You can make a simple version on the theme "Summer" or "Winter". A fir tree applique for children is quite simple.
- Prepare a landscape sheet of thick paper for the base, green and brown colored cardboard, glue and scissors.
- Cut out three isosceles triangles of different sizes from green cardboard and a brown rectangle.
- With the help of glue, collect the spruce on the album sheet.


Options for children 3-4 years old
At the age of 3-4 years, kids are sent to kindergarten.During this period, it is extremely important to interest the child in the creative process both in the kindergarten and at home.
The applique creation process contributes to the development of:
- imagination;
- coordination;
- observation;
- ability to combine colors;
- fine motor skills of the hands;
- accuracy.
For a three-year-old and four-year-old child, the principle of constructing applications from previously prepared geometric shapes is also suitable.

Applications can be made from various materials:
- colored cardboard;
- natural materials such as leaves, twigs, flowers, berries, acorns, cones, moss;
- improvised means, for example, from cotton pads, buttons, foam.
The most successful themes for applications will be:
- summer themes such as trees, flowers;
- vehicles - a steam locomotive, a rocket, a car;
- animals;
- birds;
- fishes;
- insects.


Paper bunny
Your child will need pink and white heavy paper, glue, and scissors.
- Gather and bend a sheet of light paper in the middle.
- Grease with glue and join the edges.
- The second part of the sheet is also connected with glue.
- Ears, muzzle and paws are cut out of thick cardboard.
- Make the inside of the ears, paws and nose from the pink leaf. The eyes can be drawn with a marker on pieces of white cardboard.
- Glue the parts to the base.


Colorful rocket
Materials: a thick sheet of black cardboard, colored paper or cardboard, thick colored threads, scissors, glue.
Stages of creation.
- Cut and fold the yellow rectangle in half.
- Cut three triangles and three circles out of red cardboard.
- Attach elements to the base.
- Measure and cut off several equal sized pieces of thread.
- Punch some holes in the cardboard in the area of the rocket tail and tie the threads.
White paper stars can be an additional decoration.


Crafts for the older group
At the age of 5-6 years, a child can master more complex techniques for creating applications, for example, volumetric and breakaway views. Cut-off applique is a type of crafts that resembles a mosaic. This technique is used by elementary school teachers to keep students interested.
The breakaway technique, on the one hand, is simple, since there is no need to cut shapes along the contour. On the other hand, this technique is very useful for preschoolers and elementary school students to develop abstract thinking.


The principle of creating a cut-off applique is quite simple.
- Pick up a base in the form of a landscape sheet of thick paper or cardboard.
- Draw the contours of the future applique with a pencil.
- Make small, medium and large pieces of paper of different colors with your own hands without using scissors.
- Fill the free space inside the drawing with elements of different colors.
- Secure each piece with glue.


From cereals
Groats can be found in the kitchen in every home. The variety of shapes, colors and textures allows you to use these materials at hand to create original appliqués. Preschool children and younger students will be very passionate about this process.
Varieties of crafts from different types of cereals:
- paintings that are made by drawing a contour and then filling it with cereals;
- paintings with a plastic or foam base;
- crafts from cereals, which are attached to plasticine bases;
- jars or bottles with bulk types of applications.
The main element of the craft can be the selected groats, and the decorative ones - all kinds of feathers, rhinestones, beads, sparkles and threads.


Helpful hints:
- The dense type of material should always be taken as a basis.
- The manufacturing process should take place from left to right and from top to bottom. Thus, the finished items will be safe.
- You should not save glue, since it is precisely its amount that will not allow individual grains to fall off.
- Cereals can be combined with other types of materials, such as paper parts.
- You can paint the details with food dyes, varnish or gouache.
- The most interesting is the combination of cereals of different sizes.
To create a children's applique in the form of a porcini mushroom, you will need the following materials: plasticine, cardboard, cereals (rice and buckwheat), paints or felt-tip pens.
Manufacturing process.
- Draw a picture of a mushroom on a cardboard base.
- Stick the pieces of plasticine of the desired colors on the parts of the product.
- Attach cereals of the appropriate colors to the cap and leg under slight pressure.
- Draw the background and additional components of the applique.
- If you wish, you can add rhinestones or beads.


Made of cardboard and paper
The classic version of children's crafts is made of thick cardboard and colored or any other paper. The saturated colors of the cardboard will make the appliqué bright and interesting, and the various shapes of the details will allow kids to master the basics of geometric shapes in a playful way.
The availability of the material allows for creativity. In addition, when working with paper thin sheets, newspapers or napkins, you can create various textures, as is the case with the volumetric options from paper balls.
Collective application is common in kindergartens and schools. This is a great way not only to develop color perception, creative thinking and a sense of beauty in young students, but also to teach children the principles of teamwork.

The collective application in the form of fish involves the use of materials and tools such as scissors, glue, a set of colored paper, napkins.
At each stage of making the craft, you should show the kids samples of ready-made fish, plants and other elements of the aquarium, accompanying each step with a little explanation. Additionally, you need to make basic blanks in the form of geometric shapes with the students, and elements such as fins and tails can be made in any shape.
Stages of work.
- Draw the aquarium and water with crayons or paints.
- Cut or paint plants and stones.
- Attach them to the bottom of the aquarium.
- Make blank fish from colored paper.
- Cut out additional details in the form of tail and fins.
- Attach items in a random order to the drawing of the aquarium.
- Finish the eyes, mouth, lateral fin, scales and gills for each of the fish.

From fabric
If someone you know is engaged in sewing clothes, you can ask them for leftover fabric. As a rule, these are small pieces of different materials that are usually thrown away because they are too small. These pieces are perfect for creating colorful appliqués with interesting textures.
Despite the fact that it is much harder to work with fabric elements than with paper ones, due to the high degree of elasticity of the material, children rejoice at the opportunity to try something new.
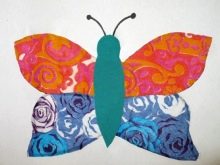
A butterfly-shaped fabric applique will require the following tools and materials: a pencil, scraps of fabric, paper, scissors.
- Divide the printed or hand-drawn butterfly into 3 parts.
- Make a paper template for each of the details, make a torso.
- Cut fabric elements according to patterns.
- Grease the drawing with glue.
- Glue the parts face up to the base.
- The torso is glued over the three pieces.


What can students do?
Schoolchildren aged 7 and over are able to apply previously acquired skills to create complex, beautiful and large-scale applications. It can be a panel made of natural material in combination with improvised means or a volumetric composition. The complexity of the products affects their appearance, making the work worthy of a corner of honor in the classroom.
Most of all, children like to make appliques for animals, fish, insects, mushrooms and plants.

Octopus made of colored paper
Required materials and tools: felt-tip pens, scissors, glue, colored threads, thick colored cardboard and a toilet paper roll.
Stages of work.
- Divide the sleeve into 2 volumetric parts.
- Cover each part with colored paper.
- Make some small holes at the bottom.
- Cut the colored threads into equal pieces and fold in half.
- Pass the workpieces through the holes and secure.
- Draw eyes with felt-tip pens.
- Paint a thick sheet of cardboard blue, creating waves using other colors or pieces of white paper, and then glue the octopuses.


The process of creating appliques is a very useful and exciting activity for every child, regardless of his age. This is an economical and affordable way to share leisure time with kids, which will help you learn the basics of teamwork, explore geometric shapes, and instill in your child a sense of beauty.
For information on how to make an applique on the theme of "Summer", see the next video.


