Variety of felt applications

Felt - bright, durable material, ideal for all kinds of crafts. Thanks to a simple scheme, you can easily and beautifully make any thing - from children's and Christmas tree toys to bags and hats. In this article, we will consider different types of felt applications.


Peculiarities
Felt is not woven, but produced by dry felting from animal hair with the addition of synthetic fibers.
It is similar to felt, but thinner and more aesthetic.
Felt works look dense and colorful. The edges do not need to be processed, the material does not crumble, does not stretch, does not deform.


Applications are performed not only on canvas, clothes, bags. All sorts of things and toys are made of felt, which are complemented by applications from the same material. For example, a voluminous mushroom is sewn from felt, onto which bright leaves, insects, grass are glued, cut from pieces of felt fabric of different shades.


How to make houses?
Desirable toys for children 2-3 years old will be soft houses, which are easy to make with your own hands.
Before starting work on the gingerbread house, all the details for it should be made of cardboard. Using the obtained templates and chalk, the contours of each element are transferred onto the felt, and then cut out.
When all the details are cut, take the brown felt walls of the house and join them with a blanket seam using white threads.

The white roof consists of four pieces, they must be sewn with a blind seam and then decorated with a blanket seam along the top. Decorate doors, stars, circles, and other decorative items in the same way.
Connect the roof to the walls. Since the house is gingerbread, all the small colored details will symbolize candies. Glue them to the walls and roof of the craft.


The white roof consists of four pieces, they must be sewn with a blind seam and then decorated with a blanket seam along the top. Decorate doors, stars, circles, and other decorative items in the same way.

Crafts on the theme "Autumn"
This is a broad theme that includes autumn flowers, fruits and vegetables harvest, trees with colorful foliage. We will make an autumn landscape.


Prepare all the details in advance. Cut from pieces of felt:
-
black wood;
-
orange and yellow leaves,
-
two blue clouds;
-
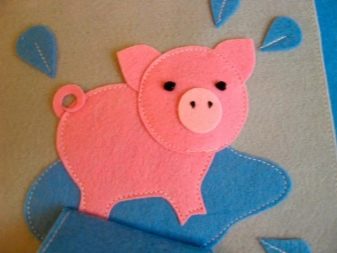
two blue puddles and water droplets;
-
green spruce.
Prepare a rectangular piece of gray felt. Lay out the cut out details on it so that you get a plot picture. Glue them on the highlighted places. Such a panel can be framed and presented to a friend.

Fruit making
Any fruits and berries can be made of felt, even in a cut, for example, a slice of watermelon or pomegranate with an open skin. We offer to make a red apple together.

Make templates out of cardboard according to the pattern shown in the figure (two halves of an apple, a leaf and a tail). Place them on a piece of felt, trace with a pencil, and cut out.


Sew both halves of the apple with a buttonhole and overlock stitch. In the process, do not forget to stop to sew in the ponytail, and leave some unfinished space on the side. Use it to insert synthetic fluff into the apple figurine for volume, then connect the parts completely.


Sew the leaf with a stitching and overcasting seam and attach to the ponytail. It turned out to be a pretty red apple.


More ideas
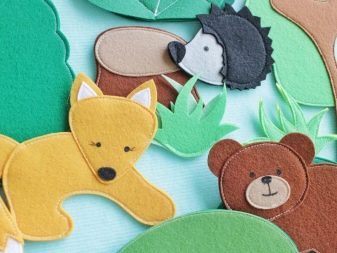
Any applique can be made of felt - food, landscape, transportation, people, animals, insects and birds. We offer master classes on various topics.
Animals
For figurine giraffe prepare templates, cut out felt details along them.
First, connect the nose with a padding polyester and sew it to the front blank of the giraffe.
In a chaotic manner, glue the brown felt spots on the animal's body.

Glue the ears and horns to the second blank (identical to the front one).
Sew both parts of the giraffe, leaving a hole for the filler. When you put the synthetic winterizer down, sew the figurine completely.


See how adorable different felt animals can look like.
-
Hedgehog with the gifts of autumn on pins and needles.

- A cat and a cat on a wonderful gift panel.

- Cute toy bull.

- Funny felt monkeys.

Birds
Of all the birds, we will choose the wisest - the owl, and we will try to fulfill it.
-
Prepare felt. Make templates out of cardboard.
-
Use these to draw and cut out all the felt items.
-
Sew the owl's eyes to the front blank. Now and afterwards use a simple forward stitch.
-
Fasten the beak in the center. At the bottom of the muzzle, glue the wavy details - feathers.
-
Sew all glued elements.
-
Make three seams on each wing to simulate plumage.
-
Glue the wings to the sides of the figurine.
-
Collect the front and back of the owl. Sew along the contour with threads without sewing the bottom.
-
Connect the double parts of the feet with a buttonhole seam.
-
Fill the figure with padding polyester, and sew the lower part.
-
Sew on the feet.
-
Turn the bird upside down and glue the undulating feathers.


The owl is ready. See what other birds you can make out of felt:
-
pigeon;

- peacock;

- parrot;

- bullfinch.

Insects
Let's make from felt butterfly.
Draw some butterflies with slotted wings on thick paper. One of them should be slightly smaller than the second, but otherwise try to make the figures identical. Attach the templates to the felt, trace with a pencil and cut out butterflies in different shades. Fold two butterflies into a single shape.


Take the chenille wire, bend it in half. Put on the bow tie so that the wire runs in the center on both sides of the figure from bottom to top. She will become the body for the insect.
Put a bead over the wire, it will become the head. Turn the ends of the wire in different directions - you get antennae. The carved openwork butterfly is ready.


See what other insects can be made from this material:
-
little mischievous bee;

- application of an ant on a development book;

- beetle from a fairy tale.

Mushrooms
Most bright mushroom in the forest - fly agaric, we will try to do it.
We need red and white felt. Prepare parts from it, as shown in the picture.
Roll a strip of white felt into a roll and secure with thread. The leg is ready.
Sew along the contour of the red round piece with a thread and pull it off, but not completely.
Put a synthetic winterizer in the hole left, giving the cap volume.

Cover the padding polyester with a piece of cardboard.
Pull the thread tighter to form the head, leaving only a small hole. Put some glue in it.
Using a toothpick, carefully insert the stem of the mushroom into the hole and press down, trying to stick it to the cap.
Using a brush, paint peas on the cap of the fly agaric with white paint.

From felt, you can make fabulous and realistic figurines of mushrooms:
-
beautiful Christmas tree toys;

- mushroom houses.

Sun
Prepare felt yellow and orange, synthetic winterizer, beads, threads, needle, glue, scissors, template paper.
On paper, draw a sun that looks like a flower with petals. Cut out the template.
Place the template on a piece of yellow felt, circle and cut out the sun figurine. Do the same with the orange cloth.
On the yellow version, embroider the eyes with black threads, and with red ones - lips in a smile.
Fold the two suns in such a way that the orange rays show through the yellow ones.


Sew a double sun in a circle with a connecting thread, marking his face. Do not forget to leave a place for the introduction of padding polyester.
Place the synthetic winterizer carefully into the figurine and sew the hole to the end.
Take a pink pencil, draw ruddy cheeks with it.
Glue three beads of different sizes on each yellow petal.
It turned out to be the sweetest fabulous sun.


Typewriter
You can make a soft, pleasant toy for your baby with your own hands.
-
Make a machine pattern on paper. The templates should be as shown in the figure.
-
Use the templates to cut out the parts of the car.
-
Sew side windows to two parts of the cab.
-
Sew the windshield onto the orange tape (top of the car).
-
Use threads to connect the top of the machine to its two halves.
-
Sew on the lower part of the body, but not completely, leave the opportunity to fill it with padding polyester.
-
Insert a synthetic winterizer inside and sew up the toy.
-
Install headlights on the front and rear of the machine.
-
We start working with wheels. We should have 8 red circles and 4 small black ones. Connect the red and black circles with thread.
-
On the back of each piece, add the remaining red circle, making the wheels double. Sew the details, leaving room for the padding polyester.
-
Insert a synthetic winterizer into each wheel and sew the holes completely.
-
Sew the wheels to the car.
If the kid likes the toy, it's easy to make a whole garage of colorful cars for him.


Interesting ideas for felt crafts can be seen in the following video.


