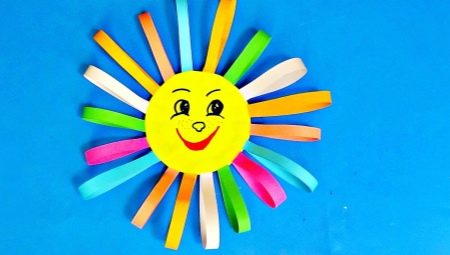
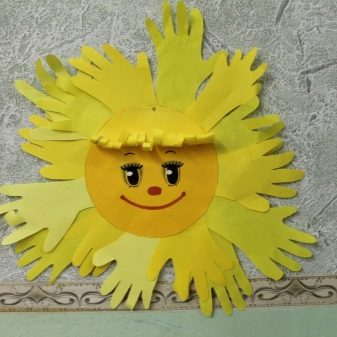
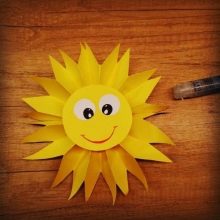
Application on the theme "Sun"

There are a huge number of ideas for applications. Among them there are both relatively complex and extremely simple. In kindergarten and junior school, they create cute applications on the theme of the "Sun". In this article, we will figure out how to properly craft such crafts.


How to make paper applique?
Works made of colored and white paper turn out to be pretty. Children of all ages can work with this material without unnecessary difficulties. There are many extremely simple schemes for modeling beautiful paper applications. Even the smallest craftsmen can choose the available option.


Consider one of the simple but interesting master classes on creating a beautiful paper applique on the theme of "The Sun". For its implementation, it is necessary to prepare the following components:
- yellow paper;
- blue cardboard;
- compass;
- pencil;
- red and black markers;
- ruler;
- 3 cotton pads;
- scissors and glue.


Having prepared all the listed components, the baby can start creating a bright and attractive applique.
- The first step will be to make the most radiant sun. To do this, draw a circle on yellow paper. It can be done with a compass, or you can circle some round object. After that, using a pencil and a ruler, draw rays. Their size may vary.
- To make the applique more vivid and expressive, the sun itself, together with the rays, should be circled with a black marker or felt-tip pen.
- Further, the main detail - the sun - must be carefully cut along the contour using scissors with sharp blades. It is advisable for adults to be present during this process.
- Next, an incision is made in the center of the yellow circle. This is necessary in order to then give the details an additional volumetric structure. To do this, overlap the edges of the sun, and then glue them together.
- The protruding rays should be trimmed with scissors. At the same time, a slight fold is made around the circumference so that all the rays lie in one plane.
- The finished sun is glued onto a blue cardboard sheet base. Several cotton pads can be fixed here as clouds.
- The charming eyes and mouth of the playful sun can be drawn with a felt-tip pen or marker. It is worth depicting ruddy cheeks with a red felt-tip pen.


At this stage, the positive radiant "Sun" of colored paper will be ready. The applique is done simply, but it turns out to be very bright and beautiful.
Workshop on making the sun from leaves
A very beautiful application "Sunshine" can be made from fallen autumn leaves. A similar composition can be made by a child 3-4 years old and older. This will require the following components:
- well-dried fallen leaves (shapes and sizes are not at all important);
- yellow paper;
- dark blue paper or cardboard;
- white, orange, pink paper;
- glue;
- gold and black handles.


The application is done like this.
- You need to prepare a dark blue background for modeling the craft. Next, you will need to make a smiling face of the sun from colored paper of a yellow shade. This part should be round. You can immediately make eyes for the main character of the composition. To do this, use white paper, and for the mouth and nose - pink and orange. It is worth choosing such sizes of blanks that will correspond to the radius of the sun's circle.
- Eyes, mouth and nose can be glued to the yellow circle. Pupils can be made from black paper, or drawn with a pen. With a pen with golden ink, you can draw dots-freckles on a smiling face. The workpiece can be put aside for now.
- Now the background is dark blue. It will be necessary to glue autumn leaves on it around the circumference. Thus, a lush edging of a radiant face will be formed.
- First, the first circle must be magnificently decorated with foliage. For the starter layer, it is recommended to take leaves of approximately the same length.
- The remaining "gaps" between the leaves must be covered with leaves from the second round layer. It is better to move these components slightly closer to the center. In the middle, the yellow sun itself is glued.


Technique of execution from other materials
The charming sun can be made not only from paper, autumn foliage and cardboard, but also from other available materials. For example, very attractive and elegant applications are obtained from plasticine of different colors.
It is a very malleable and flexible material that is easy to work with for children of all ages.


Let's find out what components will be needed to create an original plasticine applique:
- blue or cyan cardboard;
- white paper;
- plasticine mass of yellow, red and black colors (it is recommended to use a standard or light type of plasticine).


From the listed components, the applique will be made as follows.
- First you need to prepare a sheet of blue / cyan paper or cardboard. This component will act as the base of the applique.
- At this stage, the base can be immediately supplemented with snow-white clouds, chaotically scattered against the background of an impromptu sky. They can be cut from white paper into a distinctive shape. Clouds should be glued with PVA glue or glue stick.
- When the base is fully prepared, you can start modeling the "Sun" itself. To do this, you need to take a large piece of yellow plasticine mass. It will need to be rolled into a ball. Once this part is ready, it should be flattened and rolled out properly.
- The flattened yellow ball must be glued to the cardboard base. It is advisable to do it in the center. It is worth taking care of a more reliable fixation of the plasticine character on a cardboard sheet.
- Now you need to make beams for the smiling "Sun". To do this, you need to take several pieces of yellow plasticine. They are first rolled into balls and then shaped into sausages.
- The rolled yellow filaments are slightly flattened and fixed on a blue cardboard base. The beams should be placed around the entire perimeter of the main round element.
- The child can make the sizes of the rays both the same and different.
- After that, the matter is small - the design of the face of the charming plasticine "Sun".
- To shape the face of the main character, you need to roll a couple of small black balls of plasticine. They should be slightly flattened, and then attached to a yellow blank ball.
- You can or may not make a nose for the sun, since this is not necessary. But you shouldn't leave a radiant character without a sweet smile. To design this detail, you will need to take a little red or pink plasticine. It is rolled into a ball, and then shaped into a very thin and long flagellum.
- The finished flagellum should be given a semicircular smile. After that, the part can be stuck on a sunny face just below the black eyes. At this step, the process of making the original applique can be considered complete!


By a similar principle, you can make other beautiful compositions using plasticine mass. The child has the opportunity to realize a huge number of creative ideas.
How to make a volumetric application on the theme of "Sun", see below.


