Variety of applications "Apple"

Studying the topic "Fruit" with children is rarely complete without creating appropriate applications. The most common fruit is an apple. By looking at this product, little ones can make a variety of craft choices from different materials.


How to make from paper?
It is better to start creating paper apples with the simplest applications that do not require the use of special techniques. For example, the first could be a work called "Harvest", depicting fruit in a box. The creative process will require the use of brown, red, green and blue paper, a ruler, pencil, scissors and glue.
It all starts with creating a box: 4 strips 21 centimeters long and 2.5 centimeters wide are cut from a brown sheet. One of them is immediately cut in half to obtain the sidewalls of the structure. The assembly of the box is carried out on blue paper. For long strips, only the edges are covered with glue, after which they are attached in parallel. Short workpieces are fully clamped at the edges.


The fruits themselves are cut from 7 by 8 centimeters of red paper. Each blank is folded in half, and the outline of the half of the apple is marked on it with a pencil. Having made a cut along the outlined line, it remains only to add a stalk and a piece of green paper to the fruit. Having created a couple more apples, they will need to be put into a box, that is, fixed under the loose parts of the container. It is worth mentioning that, according to a similar scheme, you can create applications "Large and small apples on a plate", "Apples on a tree", "Apples in a jar" and others.


Mosaic
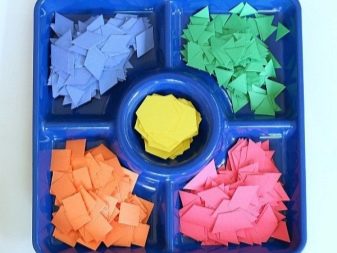
The tear-off applique on the theme "Apple" can be made both on a cardboard substrate in the shape of a fruit, and on a disposable cardboard plate.In both cases, the essence of the creative process lies in the use of torn paper. The surface of the apple, leaf and twig is filled with torn pieces of paper of a suitable color until the white base is hidden (the paper is attached with glue). You can also pre-roll these fragments into lumps, or even use cut squares in three colors: red, green and brown.
If the base is a cardboard apple, the kids will have to try not to go beyond its contours, but when using disposable tableware, a slight violation of the boundaries, on the contrary, will be a plus.


Volumetric
To create a simple applique "Apple", suitable for children of the middle group, you will need thick white paper, gouache of red, orange and yellow colors, colored paper of brown and green shades, a green felt-tip pen, scissors, glue and a ruler. To follow the instructions step by step, you will have to start by painting white paper with paints. It is better to make the background red, and use yellow and orange for blotches, but in general, the baby can paint the way he wants. While the workpiece dries up, you can start creating a leaf. To do this, a leaf blade is cut out of green paper, then veins are drawn on it. Using a pencil will give the piece of paper a slight wavy bend.


A sprig of fruit will turn out from a small brown rectangle, rolled into a tube. When the base of the fruit dries out, the entire leaf will need to be cut across into strips 3 centimeters wide. The first of them will need to be rolled up into a ring and fixed with glue. A ring is also twisted from the second strip, but it should already go on top of the previous one. All multi-colored blanks are attached in a similar way, but it is important to ensure that the places where they are glued are on the same side. The last strip will have to hide the gluing points. At the end of the work, a leaf and a twig are glued to the bulky apple. The whole composition is fixed on a cardboard backing.


This master class can be simplified in such a way that it becomes available for young children 3-4 years old. The sheet is painted over in the same way, but then only one strip is required from it. The workpiece is folded like an accordion, which, in turn, is closed with glue in a ring. A twig is twisted from a brown rectangle, and a couple of leaves are cut out of a green one.
At the end, these parts are glued to the fruit.


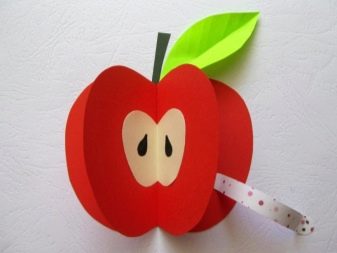
Another interesting master class will allow the child to become familiar with the elements of the origami technique. The list of materials and tools required includes colored paper, white cardboard, scissors, and a glue stick. First of all, three symmetrical apples and one leaf are cut out of colored paper by hand or according to a template. In addition, you will need to prepare a couple of yellow strips, the width of which will be 1 centimeter and the length is 29 centimeters.


Further, all three apples are folded in half. Half of one part is coated with glue and half of the other part is glued to it. The same should be done with the third part. If everything is done correctly, then the expanded workpiece forms a voluminous fruit. To obtain a worm, the strip is folded in half, forming an angle of 90 degrees.


Further, one part of it is bent up, and the other - to the side. These two actions should be alternated with each other until you get a miniature accordion. The worm is glued or a muzzle is drawn, after which it is glued to one of the apple's "pages". The second strip is folded in the same way and glued to another part of the fruit, as if an insect gnawed a hole and crawls through it. A beautiful frame for applique is formed of colored paper processed with curly scissors and a curly punch border.


On a sheet of A5 format, lines are drawn on all sides with an indent from the edge by 2 centimeters. The strips are trimmed with curly scissors and decorated with a composter. The resulting details are placed along the edge of the background, and an apple with a leaf is glued to its center.


Manufacturing from fabric
The fabric scraps left over after the creation of some kind of global product can also be adapted for apple applique. For example, in the work you can depict two fruits: one will be in red tones, and the other in green. At the preparation stage, you will need to select pieces of material that are suitable in color, as well as prepare a couple of paper templates with a detailed image and well-drawn borders of a pair of apples.
The selected fabric can also be glued with a spider web - a special non-woven tape made of polyamide fibers, which gives strength to the base material.


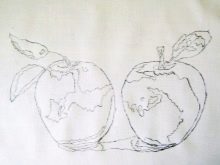
The creative process begins with the fact that on a paper template all the details are numbered, which should be painted in different colors, after which they are cut out. Another template is used to draw an image on a piece of heavy, light-colored fabric to be used as a base. Further, on paper blanks from different scraps, individual parts are cut out, then the fruit is assembled in stages. It is recommended to first attach the details to the pins in order to assess whether the colors are harmonious. Only then should they be glued or sewn on. It will be enough to walk along the contours with a stitch.


More ideas
The applique in the form of a basket with apples from cotton pads looks very original. For work, you will need gouache, water and sippy cups. In the cups, the paint necessary for coloring the fruit is diluted, for example, yellow, green and red. Each disc (future bull's-eye) is dipped in the selected paint and put on a cloth until it dries out. After the blanks are dry, they will have to be smeared with glue with a brush and fixed on paper in the amount that you want. As for the basket, it can be pre-painted with paints, cut out of colored paper, or assembled from several layers of cotton pads left almost white.


In another master class, the composition is first formed on paper, and then painted over. To create it, the child will need a sheet of corrugated cardboard as a base, cotton pads, scissors, PVA glue, gouache, brushes, a jar of water and felt-tip pens. To make a basket, 7 cotton pads will need to be cut in half. Semicircles in the amount of 14 pieces are fixed to the base in such a way that there are no gaps left, but a basket is obtained. For example, as a basis, you can make three rows: in the upper and middle there will be three blanks, and in the lower - two. Then, on top of the rows, you need to distribute the remaining semicircles in two layers.


The basket handle is made by cutting 9 semicircles in half. To create this part, you will only need to glue the rounded top to the paper. Apples are cut from solid cotton pads: fruits, leaves and twigs. If desired, they can be supplemented with other fruits. They are immediately fixed inside the basket. Finally, all parts are painted with paints using the blotting method.
If necessary, the work is enclosed in a cardboard frame of a different color.


For information on how to make a tear-off Apple applique, see the next video.


