Making the application "Bunny"

Many children love to make appliqués. In this article, we will tell you how you can make such a craft in the form of a bunny.


A simple option for kids from colored paper
The easiest way in kindergarten will be to make a flat applique in the shape of a hare. There are several options for creating such applications.
So, you can make a hare from geometric shapes - circles. For crafts, you will need the following materials and tools:
- a sheet of colored paper;
- felt-tip pens;
- scissors;
- colored cardboard;
- PVA glue or glue stick;
- compass.


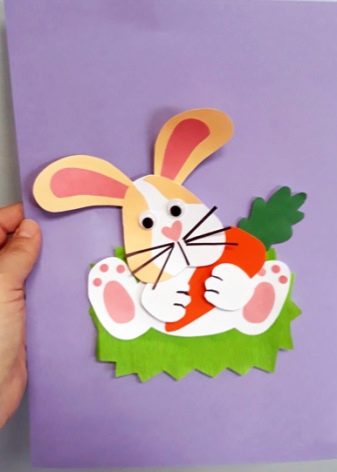
First of all, you need to cut 5 circles of approximately the same size. Two of them must be set aside, and the rest are folded in half and cut along the fold line. Thus, we get several elements from 3 circles at once: 2 hare ears and 4 paws.
After that, we form a hare on a sheet of cardboard and attach all the elements with glue. Draw the animal's face with a felt-tip pen. If you wish, you can cut a carrot out of colored paper for the bunny. The craft is ready!

You can make a breakaway applique in the shape of a hare. This is more difficult work, but also more interesting. To work on such a craft, you will need all the same materials, as well as a template in the form of a hare.
Having prepared everything you need, you can get to work. To begin with, draw a simple pencil around the hare pattern on the colored side of the cardboard sheet.

After that, we take a sheet of colored or white paper and tear it into small pieces, approximately the same size. Having finished with this, we fix the torn pieces on paper, gradually forming a bunny. Be careful when working with PVA glue. Do not overdo it with its quantity. Otherwise, you run the risk of simply pouring glue on the work, thereby ruining it.


Cut out the eyes and nose for the animal from colored paper, and then fix it with glue. The breakaway hare applique is ready!


How to make a volumetric applique?
Making a volumetric applique with your own hands is not so difficult as it might seem at first glance. The child will be able to cope with it on his own.
To work on such a craft, you will need the following materials and tools:
- cardboard;
- colored paper;
- plastic eyes;
- black felt-tip pen;
- scissors;
- glue;
- simple pencil;
- as well as thread or double-sided tape.

Having prepared all the materials, you can proceed to the step-by-step execution of the work. First, cut a sheet of A4 paper in half. You can just take two pieces of paper of the same color, but in this case the hare will turn out to be slightly larger. Now we begin to fold one of the leaves into an accordion, trying to make folds no more than a centimeter in size. We make folds to the very end of the sheet. We do the same with another sheet.


We put the resulting parts together and slightly squeeze the folds. After that, we determine the approximate middle of the accordion, fold it in half. The fold must be secured with something. This can be done using double-sided tape, but if you do not have it, then in this case you can tie the middle with ordinary threads or make a couple of stitches there with their help.


Next, we glue both sides of the accordion, thus getting something that looks like a fan. Slightly straighten the folds and glue the sides of your fan. After these steps, you should get a circle.
If you carefully secured the middle of the part in the previous step, the circle should not fall apart.


After that we draw and cut out the remaining parts for the bunny: 4 parts for the ear, teeth, muzzle, paws and nose. We glue it all to the circle along with the plastic eyes. If there are no plastic eyes, cut them out of white paper and draw the pupils separately. We draw individual details with a black marker: select the legs, teeth, draw dots and antennae on the face. The voluminous craft is ready!


More ideas
There are other options for creating hare crafts. For example, you can make this animal out of paper hearts. To create the applique, you will need the same materials as for the other aforementioned works.
First of all, you need to cut out three hearts of the same size, one of them should be white. The rest of the hearts should be smaller: one for the ears, cut it in half, and three very small ones for the eyes and nose. The hare antennae can also be cut out or drawn with a marker.
Now we lay out all the received elements, forming a hare, and glue it. Completed work! This application can be used instead of standard cards for Valentine's Day, it looks much more interesting and original.

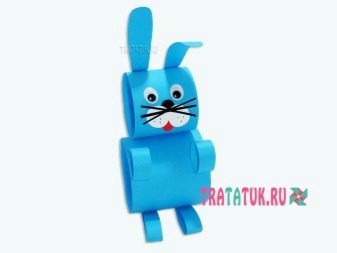
There is another option for creating a hare from colored paper. We use the same materials for crafts. To begin with, we cut out two strips of medium width from cardboard or thick paper, while one of the strips should be slightly wider and longer.
From the resulting strips, we fold the rolls, having previously greased their edges with glue. We glue these two parts together. A smaller roll is a bunny's head, a larger roll is a body.


Now we cut out the ears and 5 more shorter and thinner strips for the legs and tail. We also fold the strips into rings and glue them. We attach all the parts to the body with glue. The ears of the hare can be slightly wrapped with a pencil to make the craft look more interesting.


After that, we make details for the animal's face: cheeks, nose, tongue and mustache. The latter need not be cut out; they can be drawn with a marker. We attach all this to the craft. Almost all! It remains to attach the plastic eyes. If there are none, they can be cut out of paper by drawing the pupils with a marker. The voluminous hare is ready!


How to make the "Bunny" applique, see below.


