Applications on the theme "Umbrella"

The applique is a very simple craft that children of all age groups can make. The child can adhere to absolutely any theme, modeling an attractive homemade product. In today's article we will figure out how to properly make spectacular applications on the theme of "Umbrella".


Simple umbrellas for toddlers
If a kid at the age of 3-4 years will be engaged in modeling a beautiful application, then it makes sense to use the most simple and affordable technique.
You should not try to make very complex and multi-component applications with a large number of small details the first time. It is advisable to start with the more affordable and lighter options.

It will be easiest for the kid to work with ordinary colored paper. This material is affordable, does not require special knowledge and skills. Everyone can cope with the manufacture of paper applications. To make an elegant applique on the "Umbrella" theme, you will need to prepare the following components:
- sheets of colored paper;
- scissors;
- pencil;
- ruler;
- PVA adhesive composition.


Having prepared all the necessary components, you can start modeling an attractive applique. Let's figure out the correct course of creative work.
- At the first stage, you will need to make the umbrella itself - the center of the entire application. To do it, you will need to take a sheet of colored paper, cut it into 4 squares with sides of 10 cm.
- Next, each of these squares will need to be carefully folded in the form of a small bag. The workpieces made should be fixed with PVA glue.
- As a result, you should get 4 blanks in the form of bags.
- In the next step, you will need to take scissors. They will be needed in order to trim the top edges of the workpieces. Such work should be carried out under the strict supervision of adults in order to avoid possible injuries, because babies are often clumsy and can be injured with scissors.
- Now you need to glue the formed paper bags to each other, applying an adhesive composition to their side bases. The result should be a complete blank of the future umbrella.
- The blank umbrella should be glued to the chosen base of the applique. A sheet of blue paper or cardboard is suitable for this. The umbrella on the base should be fixed horizontally. As a complement from brown paper, you will need to carefully cut an elegant small handle. It should be glued to the blank of the main applique element.
- On this, the manufacture of the applique can be considered complete, but the decorations in the form of autumn leaves made of colored paper will be useful. With these components, the children's craft will be designed in the "Autumn" theme.
- First, the sheets need to be made of orange paper. To do this, you need to take a couple of small pieces, fold them in half and draw the outline of the half of the sheet with a simple pencil. Next, these details need to be cut. Thus, at the same time, 2 leaves will be obtained at once.
- Leaves can be made not only orange, but also yellow, green. Once they are ready, they will need to be glued onto the applique. First, you need to glue the leaves closer to the umbrella, and then you can randomly "scatter" them over the base.
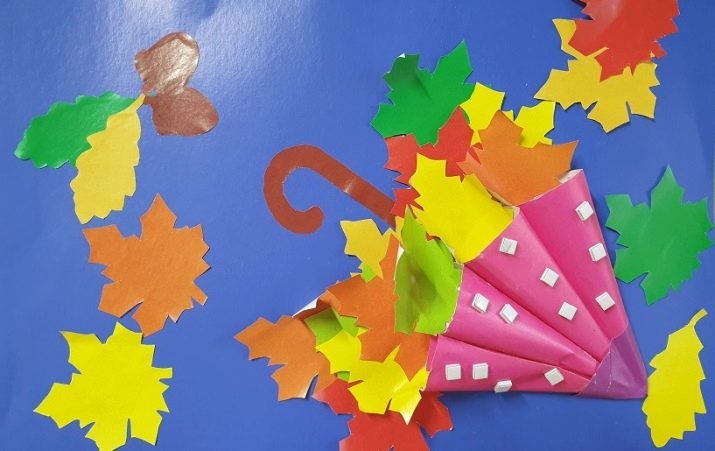


The result will be a very interesting, but easy-to-manufacture craft. The child will easily cope with her modeling.
The main thing is to act as carefully as possible and under the supervision of adults.
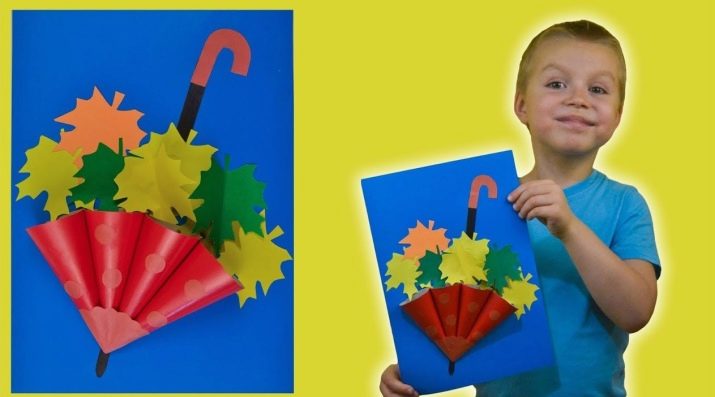
How to make a voluminous umbrella?
There is another option, how to make a beautiful voluminous umbrella, using not only colored paper, but also other unexpected components. Let's find out which ones we are talking about:
- colored paper (colored stickers will do, but without the glue edge);
- cotton pads;
- cardboard sheets of different colors;
- PVA glue and scissors.


Making this craft will be available to children of different ages. Young masters 5, 6-7 years old can easily cope with all the work. Let's look at the step-by-step instructions.
- First you need to take 4 multi-colored squares. After that, each of them will need to be folded very neatly diagonally. As a result of these manipulations, small triangles should form. In the future, an umbrella for applique will be formed from them.


- At the next stage, you should take the made triangles and bend the right corner to the diagonal line. Care should be taken to make the craft look neat. Now you will need to bend the left corner to the diagonal of the part. As a result of these actions, the necessary blanks for assembling the umbrella will be formed.


- If there are still paper squares left, you will need to carry out the same manipulations with them to form triangular parts. The outer modules should be folded diagonally and glued with adhesive.


- The handle for a fancy umbrella can be made from a small cardboard strip of any color. It should be slightly bent closer to the edge. All the blanks made will need to be glued to the prepared base. The base can be blue or light blue cardboard.


- Next, you will need to take cotton pads. Each of them must be divided into 2 separate circles. These details will need to be shaped into clouds using scissors. The finished elements should be glued to the base on which the paper umbrella is already placed.
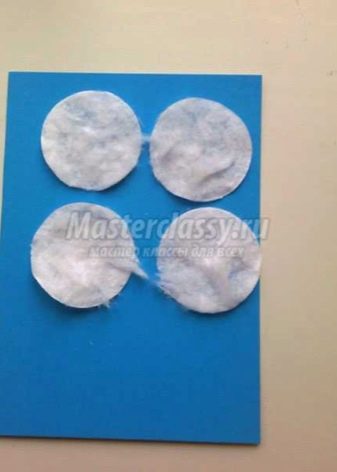

- With the help of droplets of PVA glue, you can form small droplets of rain on the applique. The result is a very attractive and original craft with voluminous details.


Autumn version with leaves
Gorgeous crafts are obtained if you use the gifts of nature to model them.
If the application is to be carried out in the autumn theme, then in this case the best natural materials will be red and yellowed tree leaves.
Let's take a look at the complete list of required details:
- colored paper;
- cardboard sheets;
- adhesive composition (PVA or glue stick is suitable);
- scissors;
- felt-tip pens and pencil;
- tree leaves (maple leaves are ideal).

Let's divide into the main stages the process of modeling with our own hands a beautiful autumn applique on the theme "Umbrella".
- From 2 sheets of colored paper, you will need to carefully cut 4 squares of the same size. One pair of squares can be made in one color, and the second in another.
- Next, you will need to take 1 paper square, and then carefully fold it into a small cone, as in the first considered master class. The edge of the workpiece must be greased with an adhesive solution for secure fixation. After that, the tapered part will not unfold.
- The edge of the cone piece must be cut very carefully with scissors.
- Similarly, you will need to form cones from the rest of the paper squares.
- Next, on the finished cone-shaped parts, you will need to draw multi-colored peas using a felt-tip pen of any color you like.
- On the remaining third sheet of colored paper, you will need to draw the outline of the umbrella handle. You should also draw a large circle. The applied parts must be cut strictly along the contour.
- The circle is folded in half, and then again in half and glued along the edges. This will make a small bag.
- Next, a cardboard sheet is taken. You will need to glue the made bag to its lower part. It will be necessary to glue the tapered parts that were prepared earlier. It is advisable to alternate the colors of the cones.
- Now you can glue the handle of the paper umbrella. Autumn leaves will serve as the decoration of the original applique. Natural components will need to be carefully glued into the bag parts.


Break applique
It is very easy to make a cut-off applique on the theme of "Umbrella". Children of all ages can easily cope with its modeling. Let's consider step by step how you can make such a beautiful and creative craft.
- First, the child will need to prepare a suitable base for such an application. For these purposes, sheets of paper or cardboard are suitable. Their color is not that important. You can even use a simple snow-white leaf.
- On the selected workpiece, you will need to draw the contours of an umbrella with a bent handle. You can sketch this detail with your own hands, or you can print it on a printer - both options will do.
- When the contours of the umbrella on the applique are ready, you should make more "breakaway" details with which they will be filled. To prepare the "filling" of the drawn figure, you should take several pieces of colored paper. You can cut small squares from each of them, and then grind them, forming many small multi-colored parts.
- With ready-made scraps of multi-colored paper, fill in the outlines of the drawn or printed umbrella on the base. The child can choose the location and alternation of different colors on his own.


The result should be an original and colorful umbrella, decorated with scraps of paper. Making such an applique will surely captivate and interest young craftsmen!


More ideas
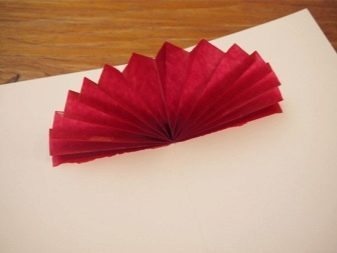
There are many other interesting ideas for modeling original applications on the theme of "Umbrella". For example, very beautiful and elegant crafts are obtained by making an umbrella out of accordion-folded paper. To make such an applique, you need to use paper of minimum density or A4 cardboard sheets. From these materials it is necessary to fold the accordions.
In order for these details to turn out as even and neat as possible, it is necessary to draw parallel stripes from their back side using a pencil and a ruler.
The paper can then be folded along the lines that have been marked, folding back and forth.


The resulting accordion piece should be folded in half along the longer side. The edges of the part will definitely need to be glued together so that a circle is eventually formed. A small hole will remain in the center. It is possible to pass a rope through it if the workpieces are planned to be hung. If an applique is being made, ready-made accordions will need to be carefully glued to the selected base, for example, from a cardboard sheet. You need to complement the umbrella with a handle cut out of colored paper.

You can also make another original application on the theme of "Umbrella" from paper and plasticine mass. As a result, an excellent craft will come out, the manufacture of which will not cause unnecessary difficulties for a child.

We will learn how you can make an elegant plasticine applique with your own hands.
- First you need to find a suitable base. As with all the workshops listed above, it can be paper or a sheet of cardboard. The color of the base is not particularly important, but it is better to prefer blue, cyan or white.
- On paper / cardboard, the child will need to depict a drawing of an umbrella with clearly defined contours. If you don't want to draw this object yourself, you can print it on a printer.
- When the base with the umbrella image is ready, you can proceed to filling it with plasticine mass.
- Making an umbrella for applications, it is worth using the child different colors of plasticine. The "dome" of the umbrella itself can be decorated by alternating several colors.
- To do this, you need to pinch off small pieces from the plasticine bars, roll them in your hands, and then place them within the zone that you plan to fill. There, the mass should be smeared with your fingers. It is very important to strictly adhere to the contours of the umbrella on the applique.
- When the "dome" is complete, you will need to fill in the contours of the curved handle with clay.
- The craft can be supplemented with various decorations, for example, plasticine leaves, drop-shaped details that imitate rain, and so on - there are a lot of options.


You will get acquainted with another interesting master class on making the "Umbrella" craft by watching the following video.


