How to make a tie from a satin ribbon with your own hands?
Nowadays, ties have become a piece of clothing for both men and women. Moreover, children who have reached school age have to wear them every day. The good news is that you can find models of different shapes, colors or sizes. Or you can make the desired option yourself: it's quite simple if you have ribbons at hand. A homemade tie will allow you not only to bring the desired sketch to life, but also to hone your needlework skills.


Necessary materials
In order to make a tie from ribbons, you need certain materials and tools. This set depends not only on the chosen tie option, but also on the skills of the person.
It is not at all necessary for a beginner to buy several types of ribbons and special devices that are used by masters working in the kanzashi technique. At the initial stage, you will need one or two types of tapes and accessories that everyone has at home.
As materials you can use:
- satin ribbons: plain, patterned or lurex;
- rep ribbons: with lurex, pattern or perforation;
- ribbons made of lace, brocade, ordinary organza or with a satin insert;
- velvet and jacquard ribbons.
Each variety has its own ruler of sizes, for example, the width of the satin is from 6 mm to 5 cm. The wider ones are used for making the main parts, and the narrow ones are for the decor.


List of required tools:
- medium-sized scissors (with straight blades, but in some cases curved blades can be used);
- short and long rulers, centimeter tape;
- crayon or pencil for marking;
- thin needles, safety pins and ordinary pins;
- threads in the color of the ribbon;
- glue gun or "Moment Crystal";
- a candle or lighter for singling the cuts (with constant work with ribbons, it is easier to use a soldering iron: you can not only solder the cuts with it, but also cut them).

Step-by-step process for creating a simple tie
Even little boys need a tie. It can be worn on a special occasion or to a school uniform. Especially convenient is a tie with an elastic band, which is worn under the collar of a shirt.
- From a gray tape 5 cm wide, measure out segments of 34 and 30 cm. From the same, but blue, - 32 cm. Seal the edges so that they do not bloom.
- We take any segment, fold it in half inside out. We work with a fold: mark on the sides by 1 cm and the middle. Cut along the lines from the midpoint to the side. You can immediately use a soldering iron or scissors, but in the second case, it is worth soldering the sections over the fire. We repeat the same with the other two segments.
- We put the blanks in a pile: at the bottom a long gray, then blue and again a short gray. Align with the upper straight cut.
- We work with the upper cut: we mark from the corner by 7 mm and down by 5 cm, according to the resulting landmarks, bend the upper corners to the opposite side and pin off with pins. Sweep along the top cut, stitching together all the details and wrapped corners.
- Cut off another piece of gray 15 cm long. Fold it in half lengthwise, measure 8 mm from the fold, cut off the excess to make a thin strip.
- We proceed to the design of the site. We put two 8 cm long pieces of blue and blue color on top of each other with an offset of no more than 1 cm and glue them so that they do not delaminate. We put it on the narrowed top of the workpiece, wrap the sides behind it and glue it. Do not stretch too much. Then we wrap the upper edge on the reverse side. If its sides stick out strongly at the sides, they can be cut off. We turn it over, put a previously prepared narrow strip under the bent edge, apply glue to it and carefully fix everything.
- We take two pieces of elastic, the length of which is equal to the circumference of the neck plus three centimeters. Lubricate the edge of the gum with glue, insert it inside a narrow gray tape, do the same on the other side. Sew a piece of Velcro or a hook on the free edges of the elastic. If desired, the tie can be decorated.
Naturally, when calculating the length of a tie, it is necessary to take into account the height of a boy or a man.
You can cut a long one that needs to be tied around the neck with a traditional knot, then there should be a seal between the layers of the tape. It is convenient to use ribbons when sewing ties for the groom's friends in accordance with the colors of the celebration.


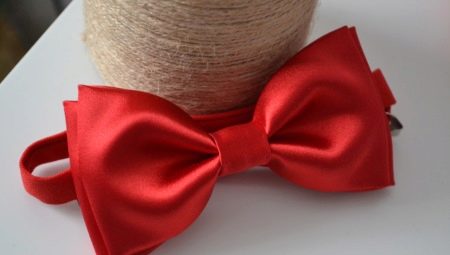
Making a bow tie
The second most popular after the classic is the bow tie. Moreover, it can be worn by both boys and girls. There are several steps to follow to create a vibrant color option.
- We cut a wide satin ribbon into lengths of 26, 7 and 12 cm (there are two of them).
- We bend the middle piece in half and to the side at a right angle so that the edges remain the same length.
- And then fold it in half, focusing on the middle of the fold.
- We align the slices and connect with a pin. We make one more detail.
- We sew the sections of both parts one by one. We tighten the thread to make folds and sew the parts together. The first bow is ready.
- At the longest tape, fold the cuts to the center, slightly overlap. Sew and pull together. Smooth out the folds, and then wrap the middle with thread.
- We put the first bow on top, sew.
- On the reverse side, we fix the elastic and wrap the middle with the remaining short ribbon, its edges can be sewn or glued.


Master class on creating a tie-brooch
As an alternative to rubber bands or hairpins, the tie can be pinned with a pin. To make such a fashionable accessory, you need to follow the instructions below.
- Prepare 4 pieces of rep ribbon 4 cm wide and 13 cm long, and the same lace.
- We put lace on the ribbon, fold it in half, sew the free edge with a thread and pull it tight.
- We collect the loops in the shape of a bow and glue them in the center, for this it is better to take a glue gun. This will be the base of the tie.
- Cut off three narrow strips 24 cm long. Fold each of them in half, then unfold and glue the ends to the intended center. We fold two blanks crosswise, and the third - in the middle along. Then we sew or glue in the middle.
- We take two pieces of a wide ribbon of 20 cm each, put the same lace on top, glue the edges to the center. We apply the resulting blanks crosswise and fix in the center.
- From a narrow tape 14 cm long, we make a ring and fold it in half, placing the seam in the back in the center. Cut off 10 cm of lace ribbon and cut in half lengthwise. We will use only one half: we sew along the finished edge and assemble with a thread. We glue the edges to make a round piece. We select a bead or other decorative element that is suitable in size and glue it onto the lace.
- We begin to collect the bow: on the base of a wide ribbon with lace we put a bow made of narrow ribbons, in the center we wrap it with a narrow ribbon or sew.
- Place a narrow ribbon ring on a smaller lace blank and sew. And on top we glue the lace with a bead.
- We attach the upper part to the lower one and fix it well with glue.
- Cut off two pieces of a wide tape 14 cm long and one of a narrower one - it should be 10 cm.
- We put lace on a wide ribbon, mark from the lower right corner 2 cm up and cut towards the opposite corner. Repeat with the second part, but cut off the lower left corner. For a narrow tape, mark 1.5 cm from the bottom on each side and cut towards the center.
- We place wide ribbons with lace on the sides, and fix the narrow one in the center with glue. We glue it to the back of the bow.
- We close the gluing points with a lace tape and glue a small pin.


Tie-frill
A more sophisticated kind of tie is the frill. Over time, it has changed many times, so now you can find a huge number of varieties. However, the main features of a frill are airiness and elegance, so ribbons are very suitable for creating it. Making a beautiful frill tie suitable for both school and office work is pretty easy.
- For the upper part, cut the tape 2.5 cm wide into segments equal to 18, 16 and 14 cm.
- For each segment, we outline the middle, to which we glue the ends. And then we glue them on top of each other, starting with the largest. To prevent the hinges from bulging, they can be glued to the lower ones.
- We wrap the middle of the resulting workpiece with a piece of ribbon (6 cm is enough), fix the sections with glue.
- For the lower part, you need pairs of segments of 16, 15, 14 and 12 cm, as well as one by 18 cm. We fold each of them in half and solder the ends. We do not iron out the folds: they must be bulky and rounded.
- We take the longest loop, apply glue to the corners and, with a slight offset, glue the next largest loops. We repeat until the blanks are finished.
- On the seamy side of the upper part, carefully glue the lower blank, as well as a tape or elastic band with a fastener. We take another ribbon 14 cm long and glue its ends to the middle: this part will become the wrong side and help hide all traces of glue.
If desired, the frill can be made wider and more layered by increasing the number of loops. Instead of satin or rep ribbons, lace looks especially appropriate here.


Next, watch a workshop on making a classic tie from a satin ribbon for boys.


