How to tie a satin ribbon bow beautifully?
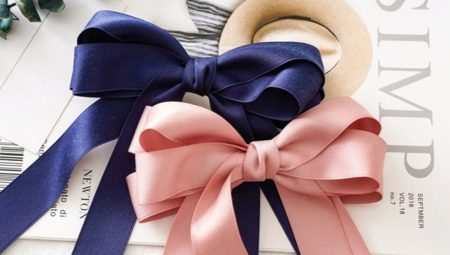
The bow is a versatile piece of jewelry used in a wide variety of areas of life. A simple decoration will make everyday life more colorful and vibrant, add flavor to a stylish look and help create a festive atmosphere. In this article, we'll look at different ways to tie satin ribbon bows to decorate gift boxes, clothes, bouquets, and more.

Tying bows on a box
Satin ribbon is a strong and durable material with a beautiful glossy sheen. With proper care, jewelry made from such material retains its shape for a long time, is not afraid of moisture and does not become electrified. Satin fabric should not be washed in hot water - this treatment will shrink the material, coarse and lose its shape. The cut edge of the ribbon crumbles, so it must be carefully scorched with a lighter - the scorched cut will coarsen and fix the structure of the material.
It is important to remember that the front side of the satin ribbon is shiny, and the back side is matte, this must be taken into account during work.
To make your craft look beautiful and uniform, all the details must be done with the right side out.
There are many ways to tie a satin ribbon decoration to a gift - from a classic bow to a complex multi-tiered bow. We suggest taking a closer look at the three most common ways of tying a box for a birthday, New Year or any other holiday.

Classical
To make a simple little gift wrap bow, you'll need a satin ribbon, fabric scissors, and a glue gun (you can use double-sided tape instead). Having prepared everything you need, follow the instructions step by step.
-
Fold the ribbon back to back to form a loop.

- On the left side of the first buttonhole, create a second similar piece without cutting the tape.

- Place the first one over the second eyelet.

- After the performed manipulations, a hole is formed at the bottom - pull the first loop (superimposed on top) into it.

- Pull on both tabs to secure the knot.

- Turn the garment so that the hinges are at the top and the loose ends are facing towards you. Pull on one free edge while holding the knot to adjust the size of one of the buttonholes.

- In the same way, adjust the second loop behind the other end, making the bow symmetrical.

- Pull the bow at the ears to make the knot tighter. Carefully smooth out the folds on the hinges, and flatten the loose ends of the ribbon coming out of the knot.

- Fold the free edges of the satin ribbon in half one at a time, and cut off the excess ends at a distance of 3-5 cm from the knot at an angle of 45 degrees. The scissors should be turned from the aligned sides of the tape towards the fold.

- Glue the finished bow to the gift with a glue gun or double-sided tape.

Tiffany
The peculiarity of the "Tiffany" bow is that this technique allows you to wrap a gift without using glue. It will be very easy to unpack the decorated box - just pull the ends of the bundle and remove the ribbon.
To create a Tiffany bow, you will need a lot of satin ribbon, because it is used not only to create a bow, but also to decorate the box as a whole. You can wrap a gift with a skein ribbon - in this case, the material will definitely be enough. And you can also calculate in advance how much fabric is needed for a particular box. To do this, you need to measure the length and width of the lid, as well as the height of the box ribs. Add the obtained values and multiply the sum by five - this number will be the length of the ribbon, sufficient for tying the Tiffany bow.

After preparing the tape and scissors, follow the instructions step by step.
-
Find the middle of the ribbon and attach it to the center of the gift box lid. Then, holding the satin, pull the edges over the ribs to the bottom of the box, intertwining them in the middle of the bottom.

- Next, bring the edges back to the top of the gift, passing them through the center of the other two edges of the box. Pass the free edges under the piece of satin fabric on the lid and twist the ends together without touching the top of the fabric. Tie a knot at the intersection of the ends and the middle of the ribbon.

-
From the remaining free ends, form a simple bow by simply tying it from two loops. Then cut off the excess ribbon by folding it in half as in the previous method.


This decoration method is suitable for gifts of any shape - square, rectangular, and even round boxes.
Lush
To make a fluffy large bow for decorating a gift, you will need the following items: wide and thin satin ribbons, scissors, and a glue gun or double-sided tape. Step-by-step instructions will help you to correctly make a product with your own hands.
-
Form a loop from the free end of the wide tape, then create another loop along the continuation of the strip to make the number 8. The second loop should go so that it overlaps the bottom of the cut of the tape.

- Turn the figure eight so that the tip of the tape is not in the middle, but rests against the fold of the loop.

- Wrap the double loop with tape 6-7 more times - the more skeins you make, the more voluminous the bow will turn out. Cut off the excess satin fabric where it aligns with the fold of the buttonhole.

- Bend the figure 8 in half, then cut notches on the sides of the folded ribbons at the fold, leaving about 1 cm uncut in the middle.

- Pass the prepared piece of thin tape into the notches on the figure eight, then tie it with a double knot.

- Holding the knot with your fingers, pull the loop to the side from the inside of the figure eight.

- Pull the next loop on the same side of the folded ribbons to the opposite side of the previous loop.

- Pull out all the loops in different directions one by one, and repeat the same on the other side of the knot.

- Flip the piece over and trim all the details, giving the bow a neat look.
The finished fluffy bow can be glued to the box with a glue gun or tied with a thin ribbon to the gift itself. Such a voluminous decoration will look beautiful not only on a gift, but also on a bottle or on a glass.

Beautiful options for a dress
A bow will beautifully decorate any outfit - such decoration looks good on the neck, waist and back. This product looks best on a wide belt sash - these two accessories together very successfully emphasize the graceful waist. Many women of fashion use the traditional method of tying a bow on a dress. Let's look at this method step by step.
-
Tie the satin ribbon tightly in a knot at the waist. If the belt is too loose, the bow will hang down.
-
Form a loop from the first free end of the tape by lifting it up and moving it slightly to the left.
-
Wrap the base of the loop with the other free end. Then pass the second edge through the hole, creating the second side of the bow.
-
Pull to the sides and straighten the tabs.

This method seems complicated at first glance, however, it is enough to understand the technology once, and it will become much easier to tie. In addition, if desired, the classic tying method can be complicated by turning a simple decoration into a voluminous bow. A more complex variation is called the "four-loop bow". Follow the directions to tie a satin ribbon at your waist using this method.
-
Tie a ribbon around the waistband and create a classic piece, but don't overtighten it.
-
Create two more loops on top of the first, but with slightly smaller ears, then tighten firmly.
-
With the free ends of the ribbon, wrap the bow in the middle and tie.
The free falling ends will be short, but thereby only emphasize the splendor and volume of the bow.

How to make a bouquet?
The bouquet itself is a beautiful gift, and if you decorate it with a bow, the surprise will become even more festive. The decoration can be made by hand, practically without using any tools. To tie a double bow on your fingers, all you need is a satin ribbon and scissors. The decoration will turn out neat and not too big - and will look great on flowers, not competing, but only emphasizing their beauty.
To correctly make a bow on your fingers, follow the instructions.
-
Spread the index and middle fingers in a "V" shape and wrap tape around them. The fold of the satin strip should wrap around the index finger, and the free edges should go down the front and back of the middle finger.

- With the end of the ribbon farthest from you, wrap your fingers over the top again.

- Insert the same strip of fabric between your fingers and loops, then pull it all the way through.

- Slip the edges of the stretched tape over the other side of the loops and up, and pass through the hole created after the previous step.

- Pull the strip all the way in and tighten the knot. At this stage, the outline of the bow is already visible.

-
Remove the product from your fingers, and turn it over to you with the other side, because the front side will be on the back of your hand. Straighten the bow ears. Trim the risers diagonally.

This bow can be attached to a package of flowers using a glue gun or double-sided tape.
More ideas
A beautiful two-tone bow can be created using three satin ribbons of different widths. To create a decoration, you must prepare the following materials and tools: ribbons 0.5, 2.5 and 5 cm wide, scissors, a needle and thread, a lighter and a glue gun. Next, follow the step-by-step instructions for making a fluffy bow from three ribbons.
-
From skeins of satin ribbons 2.5 and 5 cm wide, cut two strips of the same length. Carefully burn the sections of the parts with a lighter, slightly melting the edge - this is necessary so that the fragile fabric does not crumble. Fold the wide ribbon in half and press down on the fold, leaving a noticeable center mark. Unfold the piece and place a 1-inch strip of fabric on top. Place both ribbons face up.


- Carefully turn the future bow, trying not to move the narrow part, wrap the edges slightly overlapping to the middle. Using a needle and thread, place a basting stitch along the center.

- Pull the double bow along the basting stitching and lock it in that position. To do this, make a few more stitching stitches with a needle, and tie the thread in a knot.

- Hide the place of assembly with a piece of satin ribbon 0.5 cm wide.To do this, wrap the middle of the fluffy bow with a narrow strip of fabric, and secure it on the seamy side with a glue gun. You can also use thread instead of glue to gently secure the edges of the thin tape.

Such a bright bow of two ribbons of different widths can be glued to the box with a glue gun or double-sided tape. And also it can be attached to a hair clip, and used as a decoration, attaching it to the hair.
An unusual way to make a miniature bow using a regular fork. The finished decoration will be very small, and at the same time neat and aesthetic. To make such a craft, you will need a thin satin ribbon, scissors and a four-pronged fork. To create a bow with your own hands, follow the simple instructions.
-
For work, prepare a ribbon at least 15 cm long. Position the satin strip so that there is a short end on one side of the fork and a long end on the other.
-
Wrap the long edge of the ribbon around all the prongs of the fork, and then pull it between the center prongs to the wrong side.
-
Also thread the short end inside out between the center teeth, but on the other side of the loops.
-
Tie the ends into a tight knot and remove the bow from the fork.
-
Spread out the bow ears, and cut off the excess free edges with scissors.


If necessary, a simple bow can be made more lush - to do this, it is enough to make more turns of the satin ribbon around the fork at the beginning of the process, and then repeat the same steps as described above. The jewelry can be glued to a hairpin, worn as an accessory on the hair, or attached to a gift box.


