Making bouquets from cones
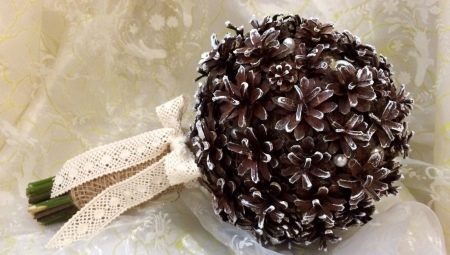
Cones are a natural material that is very often used in crafts. And not necessarily they will be strictly in the winter, New Year's theme. Any seasonal creative work can be decorated with cones of different sizes, in different variations. Recently, bouquets of cones have become popular: such a bouquet will stand for a long time, and it looks very original.


Material preparation
It is not enough just to find and collect buds. The process of their preparation involves several stages.
- Blank. There are resin residues in the cones, dirt and insects accumulate between their scales. Therefore, they should be collected in rubber gloves, and also in clothes that can be conditionally dirty. It makes sense to sort the samples brought home by size and shape.
- Cleaning. At this stage, each master uses his own methods, if you choose a certain average cleaning option, it is. Cones need to be cleaned from coarse fragments of dirt, moss and seeds, from pine needles. Tweezers and a paintbrush are usually great for this.
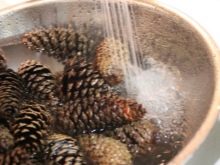
- Washing. The cones are immersed in water with vinegar (for 2 parts of water, 1 part of vinegar). All bumps should be covered with water. And they "take" this bath for half an hour. Wet scales will close. But when heated, they will open again.
- Drying. The washed cones are laid out freely on the newspaper.
- Calcining in the oven. The baking sheet should be covered with parchment (you can also use foil), spread the cones on it, observing the distance between them. Hot air circulates better, and this is important for the scales to open. The temperature in the oven must be maintained at around 100-120 degrees. Cones are calcined there for about 30 minutes.If you dry them in the fresh air, it will take several days, and the master may simply not have such a temporary resource.


And then the stage of forming the shape of the bumps may follow, but this depends on the type of craft that will be made of them. Formation consists in removing excess scales so that the bump begins to resemble, in this case, a flower.
Sometimes part of the cone is simply cut off with a jigsaw.


Making flowers
The most interesting thing is that a variety of flowers are made from pine (and not only pine) cones. Consider 3 master classes with the most popular options for such spruce or pine flowers.
Roses
Pink buds are especially delicate and look good in a vase. For crafts you will need: clean and open bumps, wooden skewers, a paint brush, a drill (drill according to the diameter of wooden skewers), a green floral ribbon, small sparkles.


The manufacturing process is as follows.
- First, the prepared cones need to be painted. It is not very convenient to do this later, and it is easier to make a bouquet from the already painted ones. In this case, the author took different shades of pink.
- A hole should be drilled in the bottom of each painted cone (and dried, of course). It should be about the size of a wooden skewer or stick.
- The bud-cone is put on a stick. The stick itself is wrapped in green tape. If ribbon is not available, corrugated paper can be used. One end of the skewer is inserted into the hole in the cone.
- Sprinkle a little sparkles on top of the buds - it will be very beautiful.
It remains only to send the flower arrangement to the vase. A craft for school or a gift for mom will turn out to be quite spectacular.



Zinnias
These summer flowers are beautiful on their own and seem to have no connection whatsoever with either pine or spruce. But the next master class proves the opposite.
For work you will need: opened cones (already colored, that is, painted), a drill, a locksmith's vice, goggles, a hand saw. However, you can paint during the manufacturing process.


Zinnias from cones with your own hands.
- The flower is formed from a cut cone, you will have to cut about 2/3. And this is the most difficult thing, because it needs to be fixed and processed with a drill. For this, a locksmith vice is required.
- The cut cones are laid out on the newspaper. They can be painted manually with a brush, or you can simply spray them.
- Each cone needs to make a circle-core with yellow paint.
- In this master class, bright zinnias do not have stems - they will be in a green tray or in a green cardboard clearing. It should give the impression that zinnias are growing in a flower bed.


The finished craft can be put on the windowsill - it looks festive, summer-like.
Chamomile
To make these crafts, you will need: glue, wire, the cones themselves, paints and a green tape.


Work plan.
- The tops of the cones need to be broken off, leaving the lower wide part.
- All elements laid out on a newspaper must be painted with white paint, the core - yellow.
- A hole is made in the bump with an awl, where the wire will be inserted.
- The wire is wrapped with green tape.
In a pot or in a vase, such daisies can be a decoration for a table or windowsill, and can also be a gift.


Assembling simple bouquets
To make the craft look bright at an exhibition in a kindergarten or school and not get lost against the general background, you can make a cool bouquet of cones and maple leaves.
With autumn leaves
The craft is beautiful, inexpensive, and looks very stylish. And for the exhibition of creative works on the theme "Autumn" is ideal.
For work you will need: leaves, paint and / or a cotton swab, brush, moss, wire, floral sponge, basket.

The manufacturing process is step by step.
- Put cones on paper and paint them with gouache or acrylic. It is more convenient to paint over the core of the flower with a cotton swab.
- The wire must be attached to the bump by grabbing one of its scales. And then this wire is inserted into a floristic sponge prepared in advance.If there is no wire, you can use wooden skewers (but then you need a glue gun).
- When all the formed flowers are stuck into the sponge, you need to fill the space left between them. Only at first you can pick up a basket for the bouquet. Either ready-made or homemade is not so important. When the composition is in the basket, the arrangement of the bouquet continues.
- In addition to autumn leaves (preferably pre-laminated in glycerin), you can use moss, twigs, dried flowers, acorns, mountain ash and other suitable natural materials.
Or, by the way, you can replace these natural materials with artificial analogs - such a composition will last longer.


Sprinkled with "snow"
And this bouquet will be a wonderful craft for the New Year. To make it, you will need: a high metal tin can, cones, spruce branches, ordinary branches, twine or twine, scissors, sand and water, coarse salt or artificial snow, PVA, a glue brush.


Instructions for making a winter bouquet.
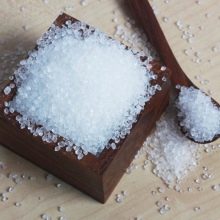
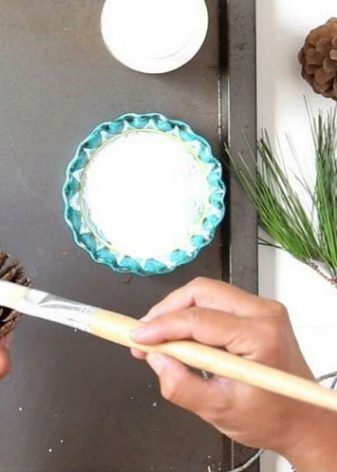
- You need to take salt, glue and cones with branches. Salt can be poured into a bowl for added convenience. A brush applies glue to the edges of the bump. After that, the cone is sprinkled with salt on all sides. With a spruce branch, you need to do the same. The material sprinkled with salt remains to dry.
- Pour sand into a tin can. Water is poured there to tamp the mixture - this will help prolong the life of the bouquet, in such a substance it will really stand longer. And for the stability of the form of the composition, it suits optimally.
- Cones on a branch cannot always be found, and therefore they simply take a separate branch and fix a cone to it with hot glue. And you can also fix the cones on the spruce branches, there will also be an interesting effect. A pine cone with a branch is sent to the bank.
- It's time to form a bouquet: twigs are sent to the jar one by one.
- Now you need to take a piece of burlap, which wraps around a tin can. Ideally, the burlap should be fixed with hot melt glue, just a couple of drops will be enough.
- And then - the author's final touches. You can simply tie the jar with a satin ribbon (as in the photo). You can use jute rope or twine. If this bouquet is formed as a gift, you can hide a small card under the rope.
The winter bouquet is nicely complemented by artificial twigs with berries, which are sold seasonally in stores of the same price. You can decorate the branches with Christmas tree decorations to make the bouquet more elegant.


How to make a panel?
There are many interesting options when the flowers are formed from cedar or spruce cones and become part of the composition. Such a panel can be framed or hung on the wall.
You will get a cool picture from natural material.


13 ideas for a cone flower panel.
- On a fairly long, but relatively narrow board, a flower arrangement is laid out from the painted tops of the cones. Instead of stems, they use unpainted twigs. Fixation - on hot melt glue. Such a composition will look beautiful in the hallway.

- There are no gaps or empty spaces on this panel. The whole space is taken by the multi-colored flowers from the cones, and the sizes of the flowers will also be different. The cones are simply glued in stages to a base made of cardboard (very dense) or plywood, and you get such a stylish composition.

- Quite often, in such crafts, the theme of a fence, behind which flowers grow, is played up. Children like this, and if the craft is intended for them (or they are involved in making it), you should take note of the idea. And again, twigs instead of stems, and for a greater atmosphere of a summer flower bed, a butterfly is placed above the flowers.

- In a vase, the bouquet looks more orderly, and therefore ideas such as this are very much in demand. The jar-vase itself is made according to a stencil: it can be made of paper, fabric, an old bag, burlap, etc. On old (or artificially aged boards) such a composition looks best.

- Assuming that the panel does not have to be rectangular and may not have any frame, then such a heart made of flower cones is a cool idea. The craft will be hung. The base to which the formed flowers are glued must be sufficiently dense and strong.

- And this is a small New Year's panel, in which, in addition to traditional cones, dried citrus fruits, as well as moss, acorns, and leaves are used. The craft at the finish line can be varnished, hung on a rope.

- The essence of this composition is that it is very reminiscent of succulents. You will not immediately understand what they are made of. You need to be very careful when choosing a color scheme - it should be as consonant as possible with the natural colors and shades of succulents.

- Cones do not become the main detail of the composition, but they play the role of flowers here. Natural material is used to the maximum: it even forms the basis of the panel. Spruce branches become the most visible part of it.
You can also use the composition as a seasonal decoration.

- Obviously, the theme of horizontally elongated panels, where flowers are simply arranged in a row, is very popular. This variation of such a composition shows that, among other things, moss can be used in it.

- And one more flowers, curiously peeping out from behind the fence. The flowers themselves should go beyond the plane of the frame with petals. For the leaves, you can use individual flakes painted with green paint.

- The composition is complemented by delicate artificial flowers that add tenderness to it. It is necessary to fasten the cones so as to exclude the formation of gaps. Well, if it doesn't work out, you can use moss to fill the voids.

- An unexpected solution, because it uses cones differently, and also uses moss and dried flowers.

- Instead of a base, by the way, you can take a laminate, and if it is also laid obliquely, there will be an interesting background. And the twigs can form a neat little vase.

Cones are durable, textured and not very difficult to process. The flowers that are obtained from them are pleasing to the eye and look original, fresh in almost any interior.
To learn how you can make a bouquet of cones with your own hands, see the next video.


