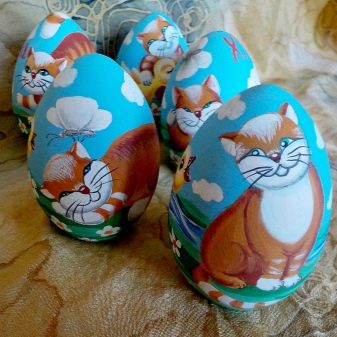
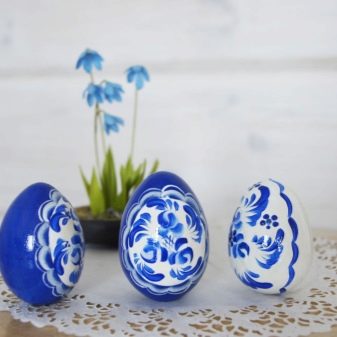
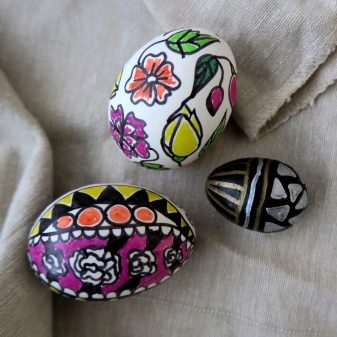
How to make a Styrofoam egg and decorate it?
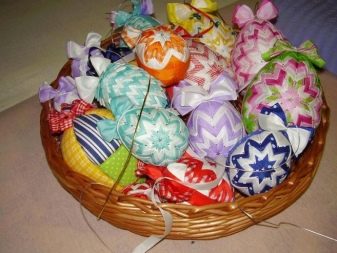
Easter is one of the brightest, purest and most joyful holidays. Therefore, I want the house to be cozy and elegant. The main attributes are painted eggs. They are not only eaten, but also prepared as a designer decoration. Let's talk about how to make a Styrofoam egg and decorate it.
Create a blank
Of course, polystyrene is a soft and pliable material, you can make any objects from it, but you can't cut an even oval with a knife just like that. However, you can try carefully. To do this, you need to take a dense piece and carefully cut it into small pieces with a sharp knife, maintaining symmetry on both sides.
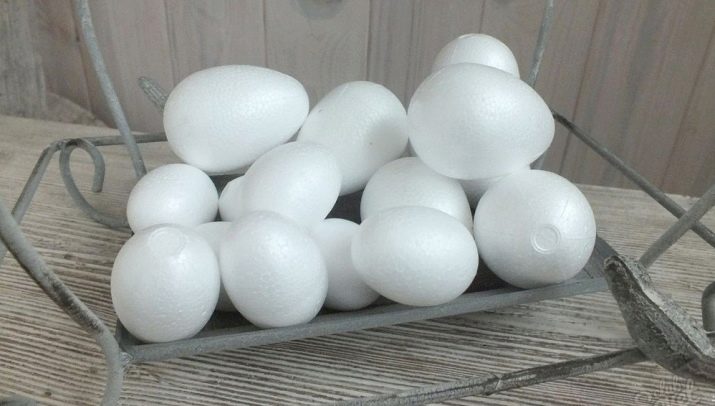
It is most convenient to purchase a large decorative blank. For the price, it will come out inexpensively, and you will not have to spend energy on manufacturing. You can buy it on the pre-holiday days anywhere: an online store, points of souvenir products, shops with accessories. After acquiring the form, you can start decorating with your own hands.
Decor with sequins
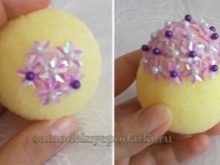
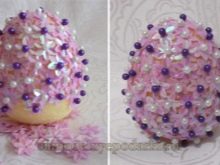
This is a fairly simple, but at the same time, unusual way of decorating for Easter. First, we apply the Moment glue to the surface of the foam blank, and then we glue the sequins. But there is one caveat: the pattern must be thought out in advance, because the glue dries quickly. It is not necessary to use only sequins: it will be interesting if you make splashes on the surface from small beads.
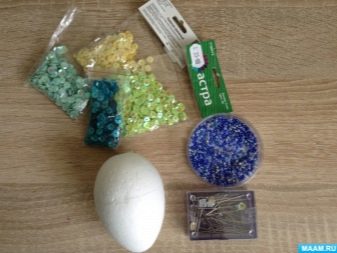
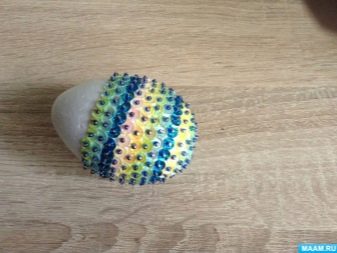
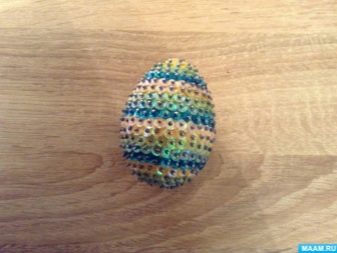
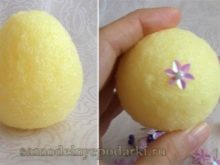
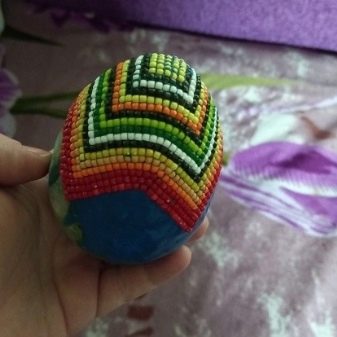
But you can do without glue. Such creativity will be within the power of even older preschoolers, it is only necessary to carefully handle sharp objects. First, prepare white beads, safety pins, flower sequins. The main actions are stringing beads and sequins on pins, followed by fastening and filling the entire surface of the workpiece.
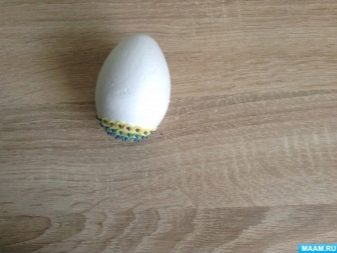
It is recommended to start from the top. If this is some kind of complex pattern, then we advise you to first apply the drawing with a simple pencil over the entire area of the workpiece. Accuracy, perseverance, patience are required here.
If desired, attach a thin tape to a separate pin, then the egg can be hung.
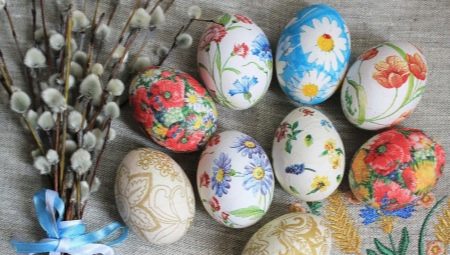
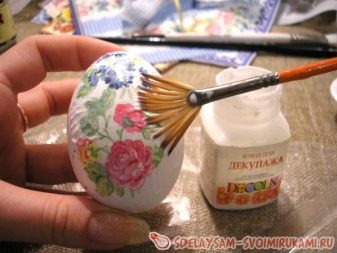
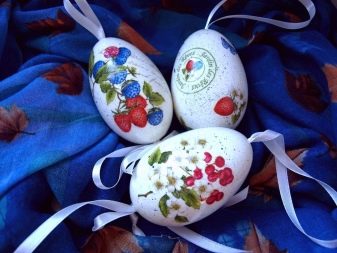
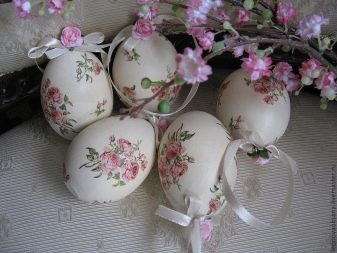
Decoration in decoupage technique
Decoupage is also considered a simple decorating technique. The technique involves the use of napkins with a pattern of 2-3 layers, a brush, a thin tape, egg white or PVA glue.
The simplest pattern is the patchwork technique.... For this, we use the remains of multi-colored napkins. We cut them into small pieces and fix them with glue over the entire area of the workpiece. Slightly straighten the pieces of napkins so that voids and bumps do not form.
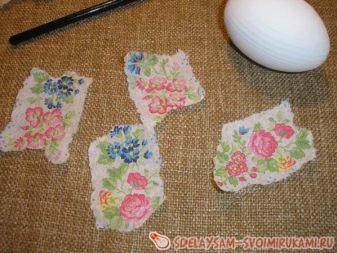
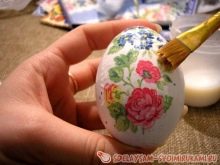
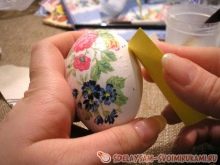
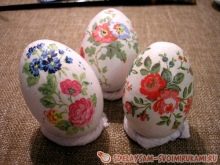
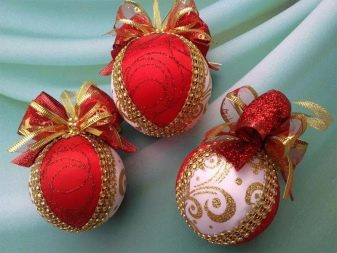
As a complicated option: we take napkins with a pattern and a white edging, carefully tear off, do not cut off the edges. This will give the impression of a drawn pattern. We distribute the eggs over the surface, carefully glue them. From above we make an imitation of a bow with a loop, put it on glue. In this way, you can even hang a beautiful Easter egg.
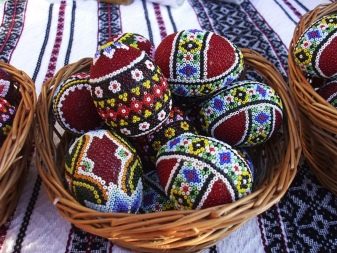
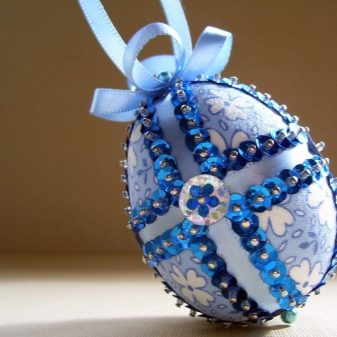
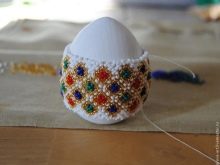
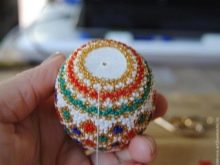
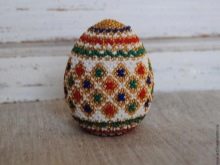
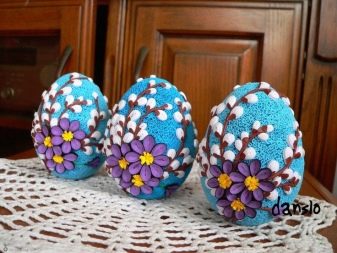
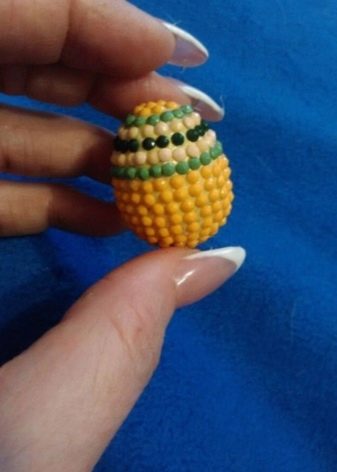
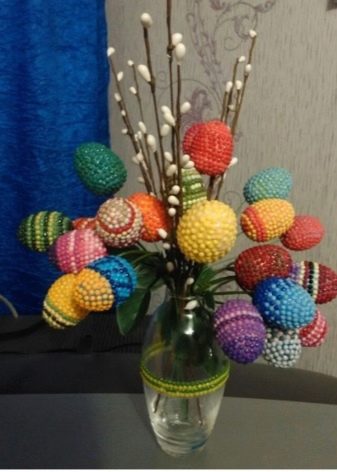
Beading decoration
There are quite a few ways to make a styrofoam Easter egg: from designer complex things to the simplest ones. Let's dwell on a basic decoration without schemes, which even a beginner can handle.
Step-by-step master class:
- we first apply the necessary drawing to the workpiece with a simple pencil;
- after that we apply the Moment glue pointwise and fasten the beads of the desired color with tweezers or fingers.
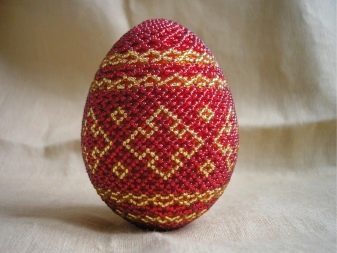
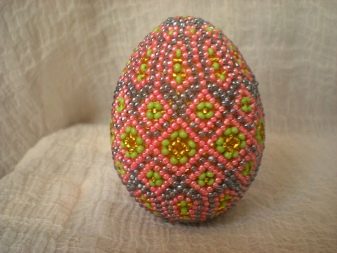
If you use more sophisticated techniques, it will look like this.
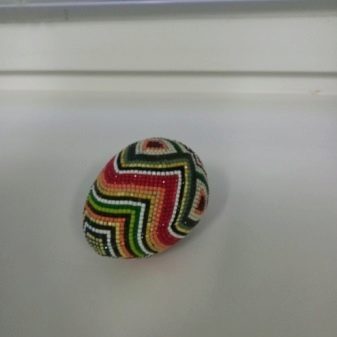
- Visually or with a pencil, we divide the workpiece into belts: upper, lower, middle.
- We start working from the central part: we weave a net of beads and a thin thread according to a simple scheme, counting on the fact that the net will fit according to the girth of the egg.
- We connect the edges together, we braid the poles. The work of joining the crown of the head will be difficult: here it is necessary to evenly reduce the number of beads. Care must be taken to ensure that the beaded mesh fits snugly against the foam blank.
For this technique, you can use beads of the same color or several colors, the work will look interesting if you use beads of different diameters.
Use of fabric
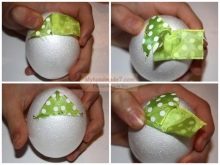
The cloth lined egg looks very cute. We choose any fabric. If you have certain skills, you can use thin fabrics or felt. We do not advise beginners to take them, because felt is inconvenient to stitch, and thin flowing fabrics begin to crumble instantly. We take two fabric discs equal to the diameter of the workpiece, connect them with the seamy side to each other.
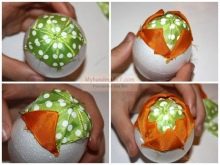
We sew them with small stitches by hand or on a typewriter, it turns out something like a skirt, we cut off the excess fabric. Then we turn it out on the front side, put it on the form. We make sure that the covered workpiece fits well on the foam mold. Sewing up the hole. For decoration in place of the seam, we put a satin ribbon or braid, planting it on the Moment glue, or stitch it neatly with threads.
At the final stage, we decorate with rhinestones with beads, sequins, beads, and other accessories.
More ideas
There are many ways to decorate a Styrofoam Easter egg. We suggest considering the following options.
Using felt
We will prepare all the necessary material: double-sided tape or Moment glue, safety pins, foam blanks, chalk, felt, a pen, scissors. First, we apply the drawing with a pen, marker or pencil. We divide the form into sections according to the number of available fabric colors. Using paper, we draw a pattern, and then using paper blanks we cut out from felt.Do not forget to leave a little on the seam, otherwise, after gluing the bag, empty voids may remain on the egg.
Next, glue the felt with tape or glue. We get the execution in the form of a rainbow testicle. After that, we recommend making a stand out of felt or thick cardboard. We cut out fabric or paper strips along the diameter of the workpiece, with a width of up to 2 centimeters. Sew or glue along the edges.

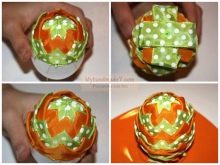
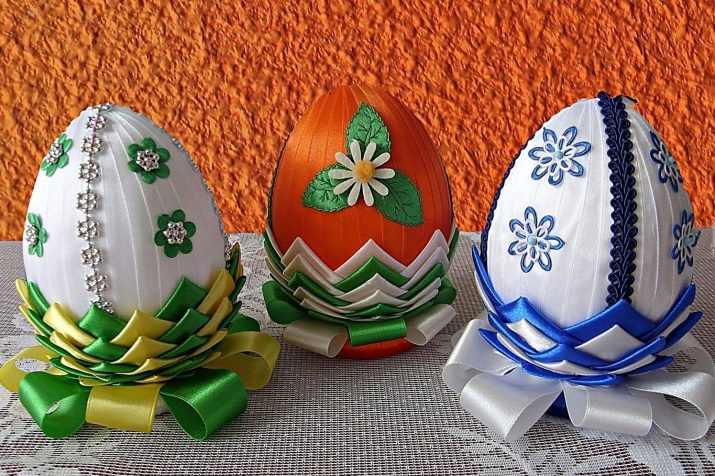
Decorating with ribbons
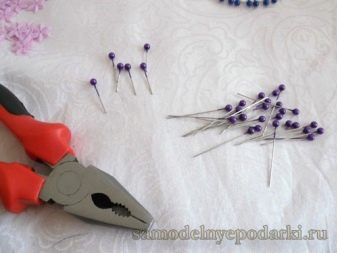
We offer to consider decorating with satin ribbons using the artichoke technique. Prepare multi-colored satin ribbons, blank, glue or safety pins. We cut the satin into small pieces, collect them into triangles.
Further, in a circle, we fix the triangles at the base in rows so that one workpiece slightly overlaps the other. The slightly raised corners of the triangles look beautiful, imitating artichoke leaves.
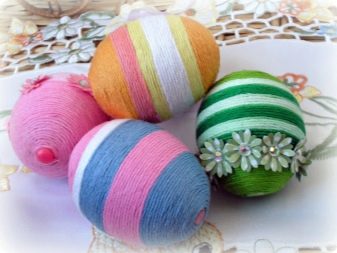
Yarn decoration
This technique is available even to children; as a rule, there are no difficulties. We take any thread, yarn or lurex blank, you can use several colors at once. We'll also prepare the glue.
At the base, we glue the tip of the yarn, after which it should be wrapped with threads, yarn, the entire disc completely, leaving no gaps. Threads can be applied both vertically and horizontally. After complete drying, the model can be easily decorated with embroidery, foamiran, or any other pattern made of fabric or ribbons. This will make the Easter egg look even brighter.
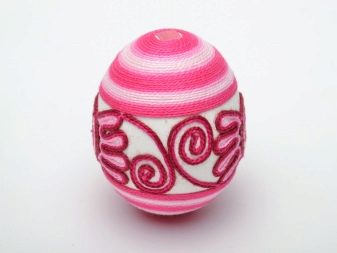
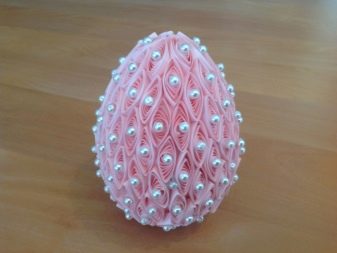
Quilling
The quilling technique involves the creation of jewelry from multi-colored stripes twisted together.... Moreover, they can be made independently or purchased ready-made in handicraft stores.
We make our own rolls of strips, winding them on a toothpick. It is easier with finished parts, it takes less time. It is necessary to dream up on the theme of the pattern, to lay out the details in advance on the table.
Then, using glue, apply to the foam.
Kanzashi
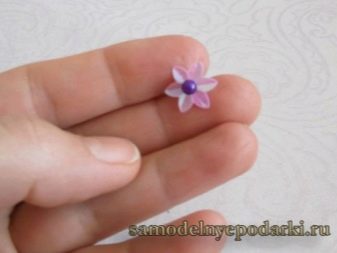
Kanzashi is a fairly popular handicraft technique these days. It involves the production and subsequent decoration of multi-layered flowers from satin ribbons. We pre-prepare flowers at our discretion, take glue, colored twine or hemp threads.
Next, using glue and threads, you need to carefully tie the egg. At the final stage, we glue the flowers onto the blank. Moreover, you can decorate the form with one or more flowers (an odd number): to whom it is convenient.
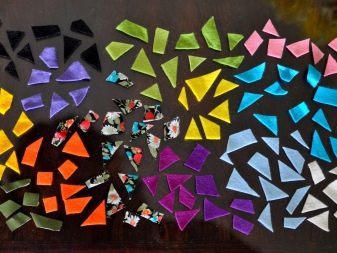
Using diamond mosaic
You can make beauty if you use a diamond mosaic. We take sets of different colors, do not forget about the glue. Draw patterns on the foam with a pencil. And then, in a certain order, we glue the mosaic.
There is another way. First, put plasticine on the disc with an even thin layer, and then inject the mosaic according to the planned scheme. The work is difficult, but the result is literally dazzling beauty.
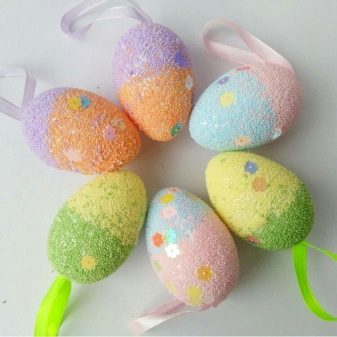
In the spraying technique
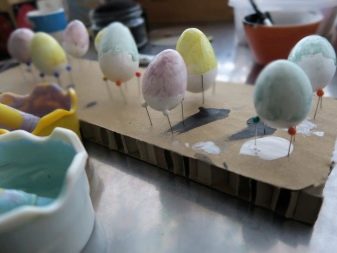
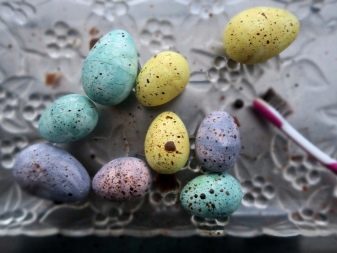
This technique is simple, it is used even in kindergarten, so kids can also be helpers.... Let's prepare toothbrushes and acrylic paints from pastel to dark brown tones.
First, paint the egg evenly using white or pastel colors. After complete drying, apply brown or black paint to the toothbrush and spray over the painted form. Everything will look as if an outlandish bird brought you an unusual gift for a holiday.
All this can be decorated and supplemented with various plots.... For example, it is convenient to make a nest from blades of grass or a basket of newspapers. Put decorated eggs inside, add a toy in the form of a chicken, chicken, hare, cockerel.
Similarly, you can paint with gouache according to a previously conceived plot.
Only brushes for painting are better to take thin, such as "Squirrel".
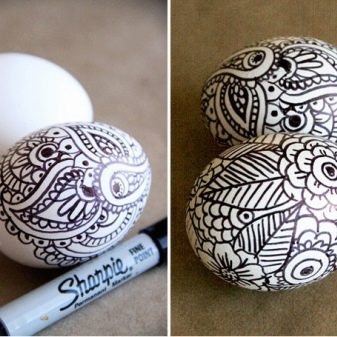
With permanent markers
An interesting technique of decorating with permanent markers with a metallic effect. First, cover the form with one color until an even state, no white spots should be visible.Then we turn on our imagination and apply beautiful patterns or small Easter subjects (it all depends on your skill, perseverance and patience).
The effect is stunning because the metallic sheen gives it its own flavor.
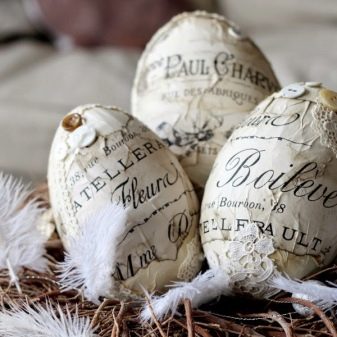
Applying a newspaper print
Prepare the leftover newspaper, varnish and any glue for work. We choose the necessary piece in a newspaper or magazine, cut it off in one piece or divide it into smallest pieces (as it is convenient for anyone).
Next, using glue, apply to the foam either flattened or slightly wrinkled (to give the effect of crumpled paper). After complete drying, cover with transparent varnish. It is he who will give a unique shine to the finished product.

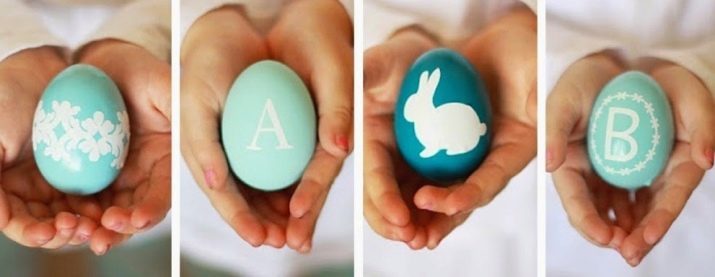
Stencil staining
For this technique, we take a blank, acrylic paints and a stencil with a brush. Previously, attach the finished stencil to the workpiece and carefully trace the drawing with a pencil.
Then remove it, and paint the rest in the desired color. Here, only accuracy and perseverance are needed. But the effect exceeds all expectations.
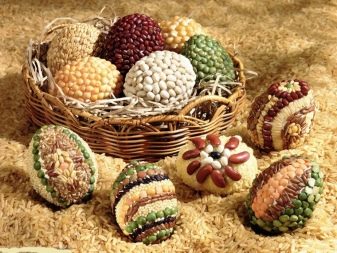
Decorating with cereals
It looks beautiful, but it is worth remembering that such a charm cannot be stored for a long time. We take a blank, cereals that are available at home, glue, brushes, acrylic paints.
At the initial stage, paint the blank with a brush and acrylic paints. After that, we apply glue to certain areas and roll the workpiece in cereals. So you can get a hedgehog, chicken, lamb, and other animals. Add a muzzle, tail, and other additional details if desired.
It is not necessary to apply the glue in parts: you can completely apply it to the entire surface, and then roll it in cereals, coffee beans or dry shine. Then there will be no limit to the surprise of others!

Adding clothes
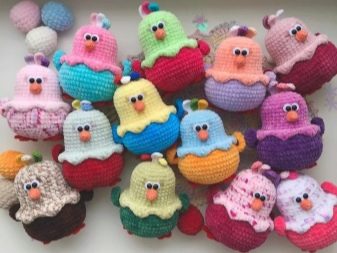
This lesson is for true craftswomen. Any product can be supplemented with various details, provided that the blank is already painted. After this moment, we begin to tinker: we make clothes with the help of embroidery, sewing, knitting. These are all kinds of skirts, hats, belts, bags made of fabric, yarn, ribbons or threads with lace. We complement everything with beads, ribbons, flowers and sparkles. To all this, you can paint on funny faces, create certain emotions or imitate various animals. There are many ideas: which one you bring to life, concerns only you.
Making a Styrofoam egg and decorating it for Easter is easy. Now there are a huge number of handicraft techniques. And foam, as you know, is the most convenient and pliable material for these purposes, and it is stored longer. Its advantage over a real egg is undeniable. Try, fantasize, bring your ideas to life!