Decoupage boxes: ideas and workshops
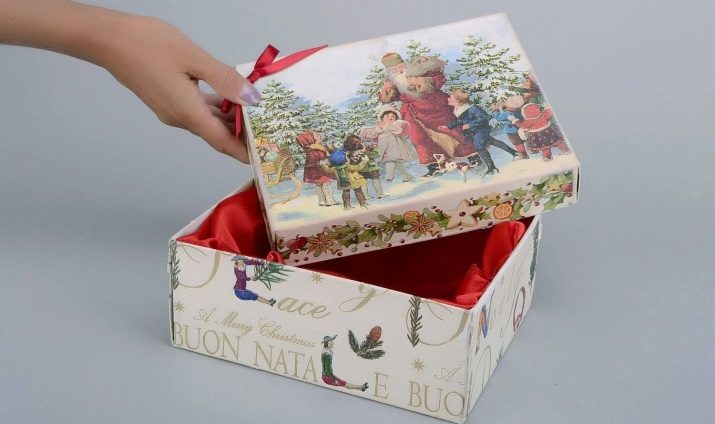
Any seemingly unnecessary thing can be used. This is why people who enjoy tinkering never throw anything away. A striking example is an ordinary box. Such an item can be found in every home. With the help of your ideas, paper, napkins, pieces of fabric and other interesting gizmos, the box can be turned into an original piece of furniture.
Application features
Decoupage can be mastered by absolutely anyone. And as an object to which efforts will be directed, you can use any box, even a used one. It could be a shoebox or even a drawer. If you need something special, you can make it out of cardboard with your own hands. Better to start with a small box. Having mastered the technique well, you can later arrange large boxes for storing bulky things.
The main requirement for the workpiece is the absence of dents, folds and other damage - it will not be easy to hide them.
Decoration can take place in several ways, using some devices, as well as a variety of adhesives and paints and varnishes. Some products are not suitable for cardboard (it can get wet and deformed), so you can take a box made of wood or plywood.
In this article, we will look at the simplest options that are most suitable for beginners. Even a small object is time consuming, so you need to be patient. But decoupage also has advantages. By activating all creativity, you can create a truly unique thing.
This lesson is suitable for people who love to draw, since the final effect will be very close, but special skills are not required.
Decoupage is ideal as a hobby - as it allows you to reveal your creative potential and has a beneficial effect on the psychological state. And the resulting boxes can be not only beautiful, but also practical.

How to decorate?
If the desire to master decoupage arose suddenly, and there is a suitable object at hand, anything can be used as a material for covering. Most often, these can be paper or fabric images that are suitable in style and color.
Paper
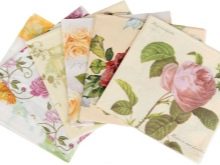
Most often, a paper covering is taken for decoupage. These can be specially designed decoupage cards, any multi-layered napkins, newspapers, pages of magazines, books or other printed publications. The main difficulties for a beginner are related to thickness and density. There is nothing worse when the paper stretches, wrinkles, tears. On poor quality paper, you can see fibers and other inclusions in the finished product. If not a wide canvas is used, but individual elements, it will be difficult for thick paper to mask the joints and borders.
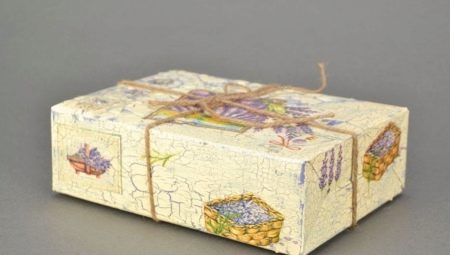
For decoupage you need the following components:
- shoe box;
- napkins with a pattern;
- PVA glue;
- primer and paints (acrylic);
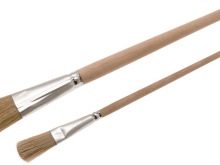
- brushes (narrow and wide) or sponge;
- varnish.

Consider the progress of the work.
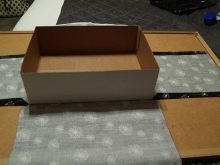
- First, at the cardboard box, you need to strengthen all the weak points. This primarily applies to corners and folds. This requires pieces of masking tape.
- Then all external sides must be primed, dried and all irregularities must be well sanded. The number of layers depends on them. As a result, the surface should be perfectly flat.
- After complete drying, you can start painting. The background color should be in harmony with the selected image. From the inside, the box and the lid must also be painted - to match the external background or in any other (contrasting is possible).
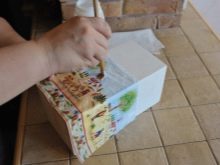
- Then you need to select a picture or cut out a separate fragment. Only the top layer of the napkin should be peeled off. The pattern can cover the entire box, only the lid, one or more sides to choose from.
- This is followed by the most crucial stage - gluing the selected image. We apply it to the box, grease it with glue and smooth it carefully to avoid swelling and wrinkles. If you wish, you can make small adjustments. For example, paint details, shade edges or remaining space. At the bottom, you can lay a commensurate sheet of cardboard, decorated in the same technique.
- Let the design dry and secure with several coats of varnish.

You will learn more about decoupage boxes with napkins by watching the following video.
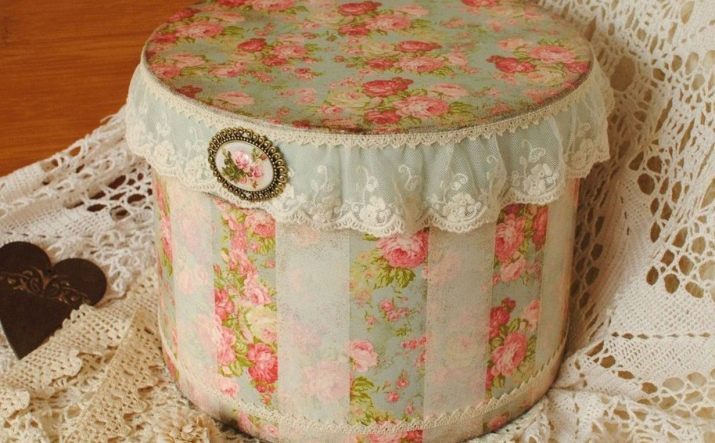
Cloth
In addition to paper, you can use fabric. Moreover, you can make quite unusual combinations with it.
For example, use napkins for the lid, and cover the sides and bottom with fabric.
Consider a master class on the fabric design option.
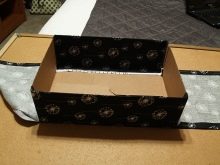
- Prime the box. If the fabric is opaque, the parts to be glued on top of the primer need not be painted.
- Take measurements off the box. Mark the pattern on the canvas. To make the edges look more neat, allowances are needed, which should be ironed inward.
- All fabric parts, even if they are small, should be well ironed.
- Then we lay out the workpiece. A layer of glue should be applied to it, as well as to the box.
- Then we proceed to gluing the fabric. It should be smoothed well, following from the middle to the edges.

In addition to fabric, lace can be used. Usually they are framed by fragments of a pattern or edges.
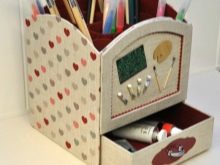
Other decorative elements
Decoupage boxes can be supplemented with ribbons, ropes, twines, as well as all kinds of beads, shells and similar materials.
When choosing decorative elements for a box, it is important to observe the measure. You should not use more than three materials to decorate one product.
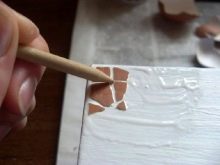
Decoupage works well with other techniques. The image can be applied not to a smooth surface, but to a relief surface.To do this, in addition to the items already listed above, you will need an ordinary eggshell. It should be rinsed and removed from the inner film. You will also need tweezers, a stick, and a glue brush.
Step-by-step instructions for implementation include several stages.
- The first stage consists of gluing the shell. It can be glued in small pieces. Or, to save time, take larger pieces. The selected part of the shell must be coated with glue from the inside, and then applied to the desired place and pressed. Cracked pieces must be slightly apart to the sides so that there is no overlap. It is also better to apply glue on top of the shells.
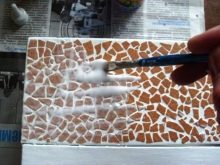
- After the whole box is covered with the shell, it is painted with acrylic paint - it can be white or any other in accordance with your idea. To avoid unpainted areas, there can be several layers.
- Then you can start decoupage. Cut out the desired fragment of the napkin, separate the top layer, apply and grease with glue. The final layer will be a varnish layer.

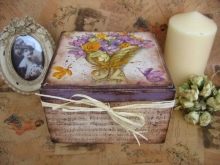
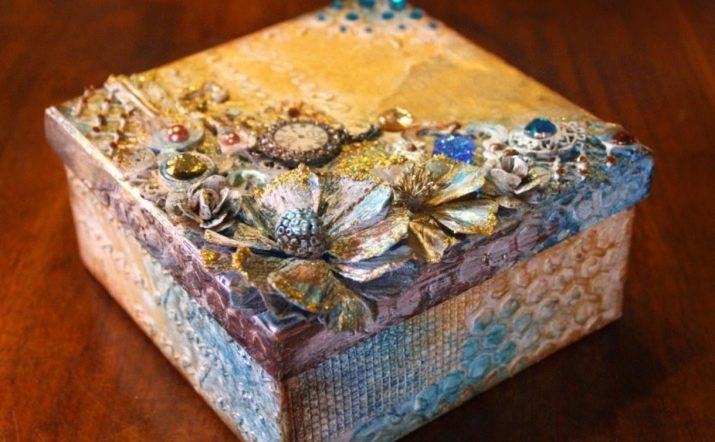
Interesting examples
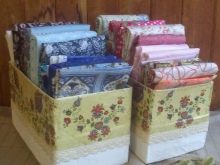
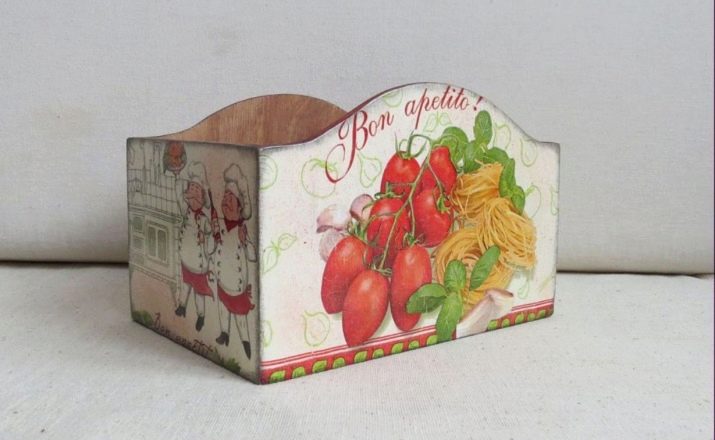
With the help of decoupage boxes, you can easily revive any interior or change things that have become familiar. All kinds of boxes for spices, pastries or sweets will help create a cozy atmosphere in the kitchen. Using hand-made things is definitely more enjoyable.
In any home, the issue of storage is acute. First of all, this applies to all kinds of little things (keys, chargers). It is worth putting them in beautiful boxes, and the furnishings will become more neat.
Round boxes look the most exquisite.
But when it comes to the internal organization of cabinets, you should give preference to square or rectangular - they are more ergonomic and roomy.
Even hidden by doors, an elegant box can quickly cheer you up.
Decoupage is able to radically transform any, even outwardly nondescript box. Decorated in this way, they can not only become an alternative to gift wrapping, but also act as an independent gift. For the beautiful half of humanity, a jewelry box is perfect. For an office worker or student - a box for stationery. And any craftswoman will be glad to have a convenient container for her needlework.