Blanks for decoupage: what you might need and how to work with it?
Decoupage opens up scope for creativity, even to those whom nature has not endowed with real artistic talent. If you have taste and patience, this technique will allow you to turn the most ordinary things into a work of art. First you need to decide which item to decorate with pictures, as well as what tools and materials will be required for this.
Surface features
For the implementation of artistic ideas using decoupage, any smooth surfaces:
- glass;
- metal;
- ceramic;
- plastic;
- wooden.

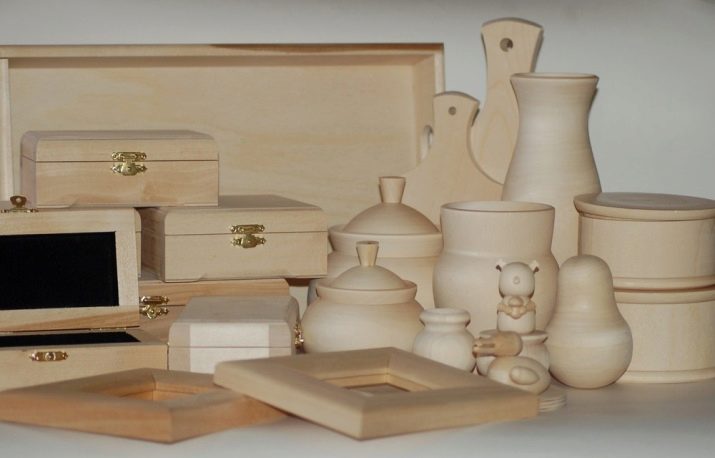
You can turn your gaze to furniture, dishes, kitchen utensils, rigid food packaging and so on. It is very convenient to use blanks made of wood, plywood, MDF. Paper is reliably glued to such porous surfaces, and they allow you to make high-quality decor.
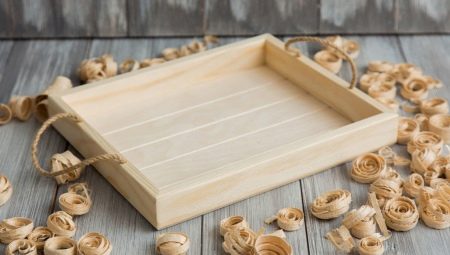
The same kitchen board with its simple shape becomes a "polygon" on which it is easiest to practice the techniques of handling napkins to create decoupage.
It is this kitchen item that can be taken into work by those who decided to master the art of decorating with fragments of images from thin paper.
You can make a useful thing, and at the same time a "blank" for decoupage with your own hands. But this is provided that there is the skill of working with wood, as well as the necessary equipment to create an item worthy of quality.
Another option is to ask for help from a friend or relative who has everything you need in his arsenal. Then from his hands you can get, for example, a simple-looking wooden box or a photo frame, which, with the help of decoupage, will turn into a thing amazing in appearance.Or it can be a plywood base for creating openwork Christmas tree decorations, a panel or an elegant kitchen board.
Another way is to shop at a specialty store that sells creative supplies. Surely there is something inspiring there. It's quite expensive though. You can also place an order from manufacturers who produce blanks, for example, from such inexpensive wood as pine. Sometimes it makes sense to order a small wholesale batch of goods. Moreover, the economic efficiency of such a purchase also requires careful assessment.
Whatever method of acquisition is discussed, it must be remembered that the basis for decoupage is of enormous importance in terms of obtaining a good (or bad) result of work. If the object itself, made of wood, plywood or other material, has flaws, then a beautiful thing will not be able to be made in the end.
Rather, there will be disappointment in their own creative abilities.

How to decorate?
For decoupage, you can use pictures printed on different "media".
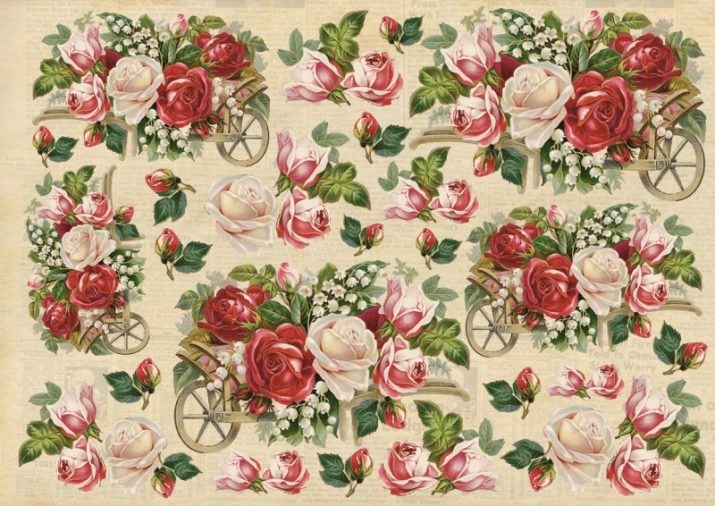
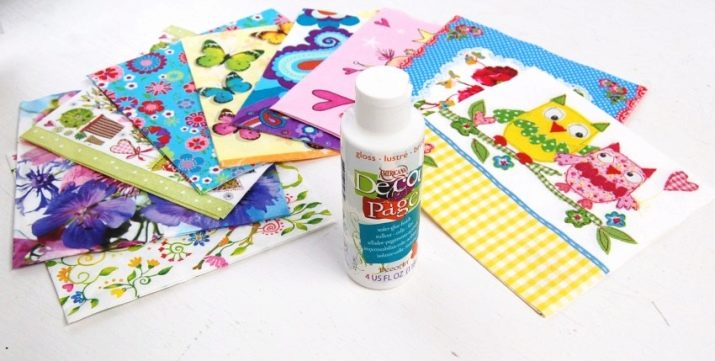
- Napkins... Their advantage is that they adhere easily and adhere tightly to the surface, creating an imperceptible transition between the pattern and the base. Plus, napkins are inexpensive. It's bad that they break easily, and with all the variety of drawings, it is not always possible to find something that fully corresponds to the artistic intention of the decoupage master.
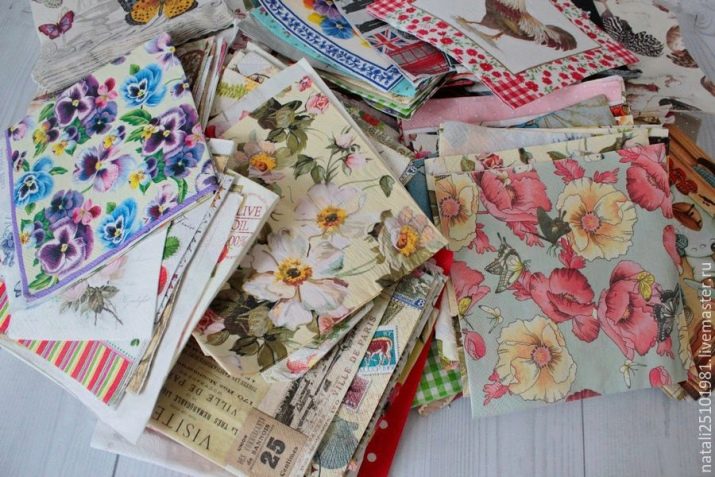
- Decoupage cards. They are printed on special paper designed for the appropriate direction in creativity. There are different densities and sizes. Such paper does not tear as easily as a napkin. Although the transition from the surface to the pattern is more noticeable in it, which requires additional efforts and time to eliminate this effect. Decoupage cards are more expensive than napkins.
- Rice paper for decoupage. In texture, it is a cross between a regular decoupage card and a napkin. It fits very easily on the surface, and in the case of a tree, it is almost imprinted on it. It is quite convenient to tear the image out of rice paper - the transition between the surface to be decorated and this material is almost invisible. However, you will have to pay for the convenience of work.
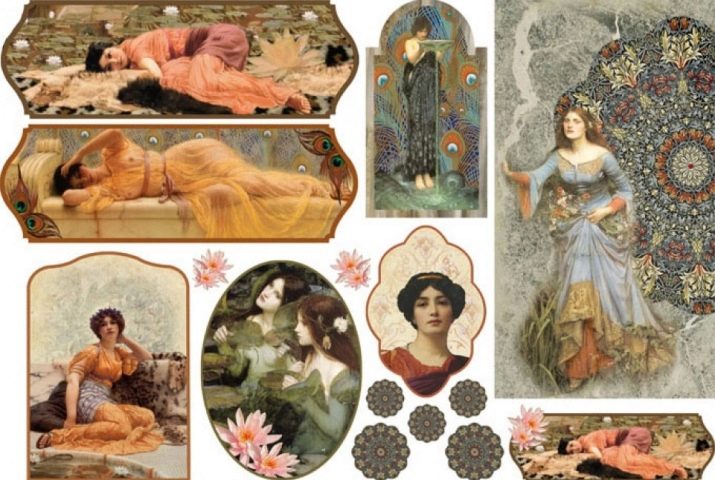
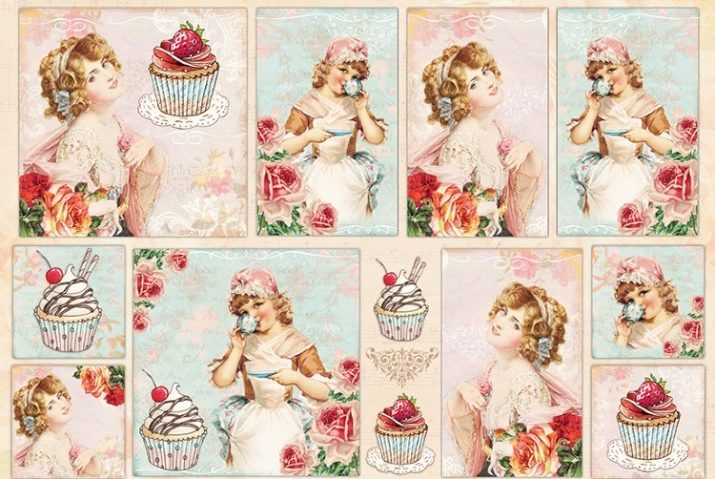
- Printouts... Any image can be printed on a printer and decorated with a selected surface. In this case, the size of the picture can be easily adjusted to the required area. On the other hand, prepress preparation takes time, and it is much more difficult to separate a drawing even from a thin varnish film than from a napkin or decoupage card, as well as mask the transition to the surface to be decorated.
Preparatory woodwork
If a piece of wood is chosen for decoration using decoupage technique, it should be prepared for the upcoming wonderful transformation into a unique thing. First you need to remove dust and the slightest dirt from the surface. To do this, use a soft, damp cloth.
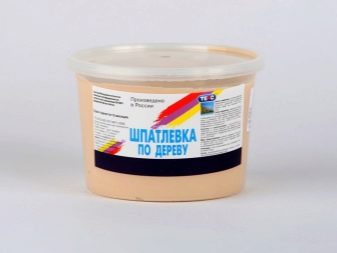
If there are cracks or chips on the workpiece, this cannot be ignored. Moreover, all the shortcomings are perfectly masked with a putty for construction work. (The material is sold in specialized hardware and hardware stores).
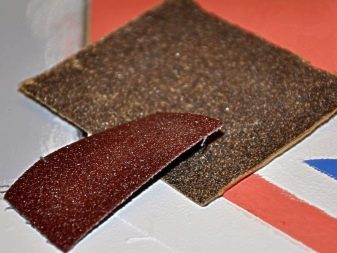
After applying the putty to the wood, its surface is treated with sandpaper.
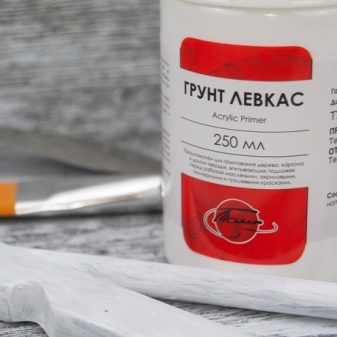
When all the shortcomings have been eliminated, the workpiece should be primed. The primer is sold in creative stores, although you can make it yourself by mixing in equal proportions acrylic paint and PVA glue, which are easy to get at the nearest household department. The primer is applied with a brush or sponge. The item is then allowed to dry. After that, sand the surface with sandpaper and wipe again to remove dust.
It is advisable to apply the primer 2 or even 3 times in order to achieve perfect evenness of the base for decoupage.
What do you need?
If we are talking about decorating a wooden blank, in addition to it, you need to have at your work table:
- napkins;
- scissors and brushes;
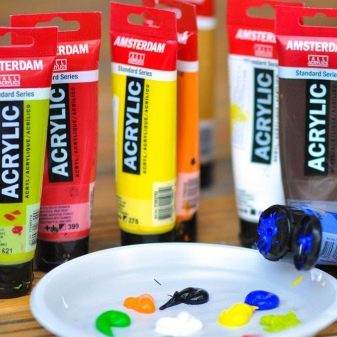
- acrylic paints;
- PVA glue;
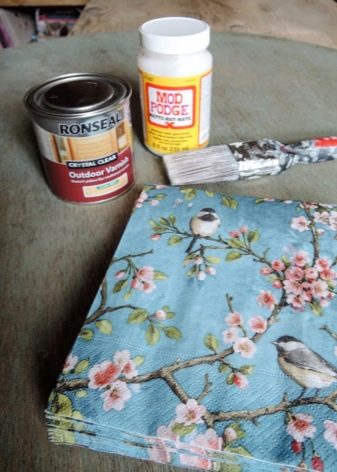
- decoupage varnish.
All this is sold in the departments for creativity or special hand-made stores.

Decoupage with napkins
The napkin consists of three layers. From it you need to separate the top - with a picture. Then cut or tear out the desired fragment and attach it to the place that will be decorated in order to try on the picture.
If everything is in order, you can start gluing. Use a soft brush to apply the glue. The fragment treated with an adhesive is carefully applied to the intended place, smoothed from the center to the edges and allowed to dry for 30 minutes. Then you can additionally dry it with a hairdryer. If necessary, finish the surface of the item with acrylic paints. At the last stage, the product is coated with acrylic varnish.
A couple of additional coats can be applied as needed.
Interesting ideas
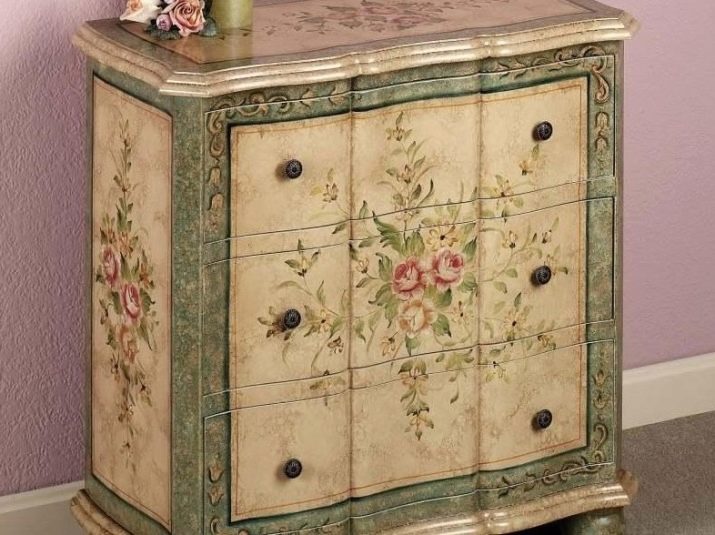
It is better not to throw the old chest of drawers in a landfill, but to update it with decoupage. The result will be a unique thing, no worse than from a museum.
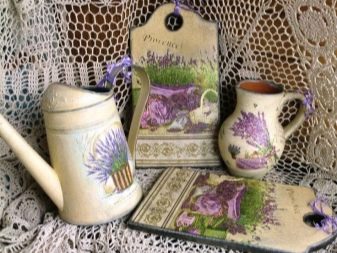
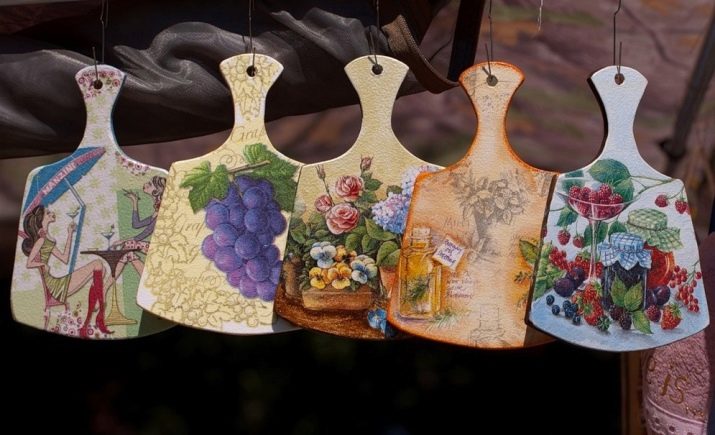
A cutting board using decoupage turns into a unique item, becomes an excellent gift, as well as a decoration of the kitchen interior.
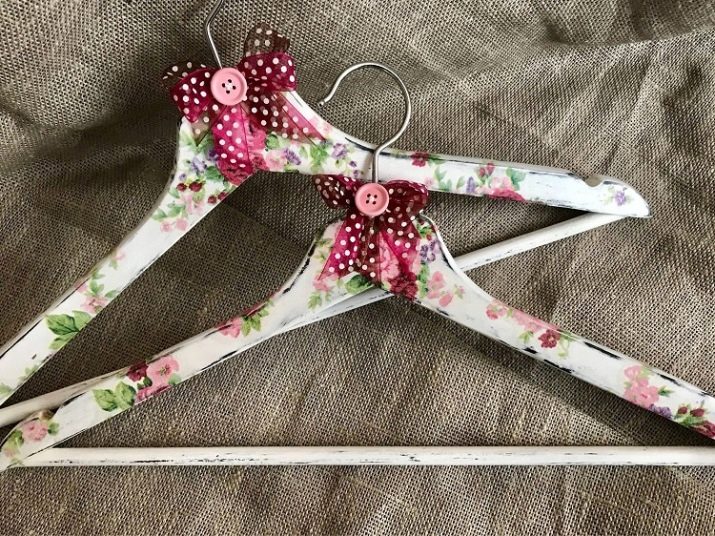
Even a wooden hanger will take on a new life in a "decoupage suit", delighting its owners with a beautiful "outfit".
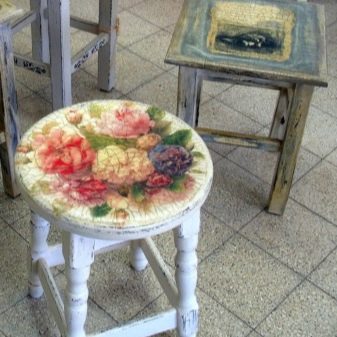
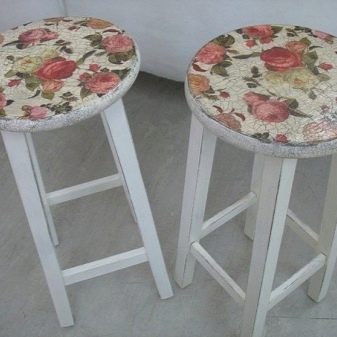
The old stool, without losing its functionality, is transformed with the help of napkins into an interesting art object that can add a "zest" to the decor of the room.
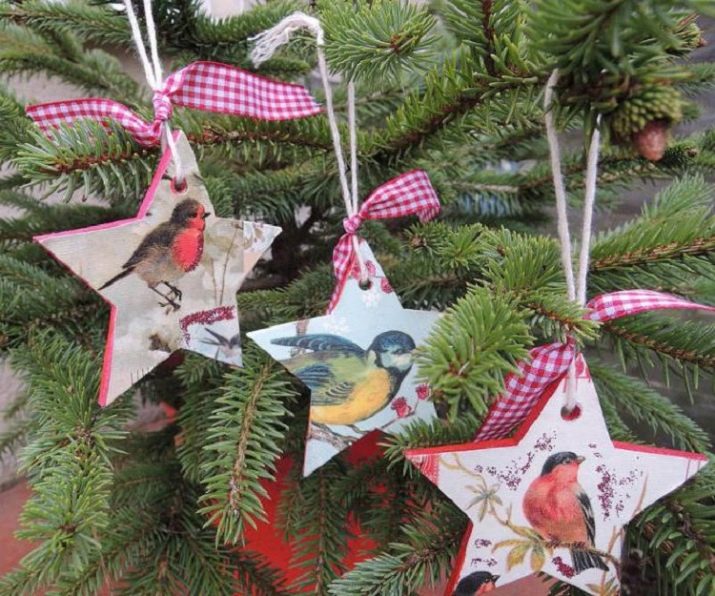
Wooden toys for the Christmas tree, made using napkins and decoupage cards, will become a real family property in a few years from the beginning of use.
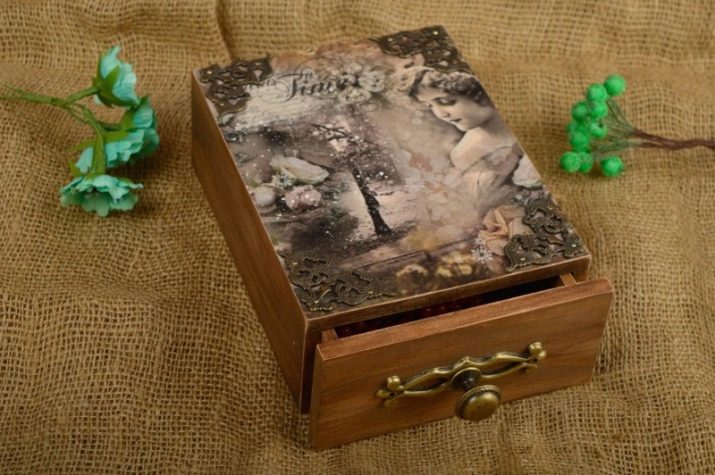
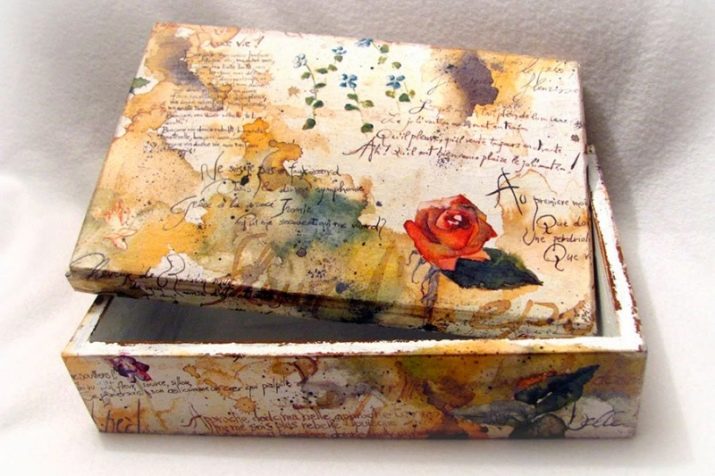
Wooden boxes, decorated using decoupage technique, look great and romantic, become the pride of their owners, who keep jewelry and all kinds of "secrets" in them.
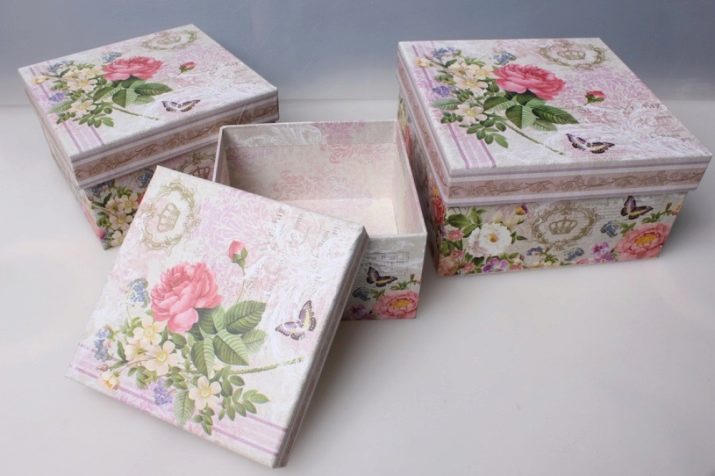
Using the same images, it is easy to create a whole set of beautiful boxes for storing important things in the household.
A master class for beginners on decoupage in the next video.


