How to make ripped jeans with your own hands?

Ripped jeans are one of the most controversial wardrobe items. Some holey pants delight, while others they cause only bewilderment and irritation. However, both supporters and opponents of ripped jeans will agree that today it is one of the main trends in clothing.

Ripped jeans have not gone out of fashion for several seasons in a row, so more and more girls and young people are thinking about purchasing such a thing. But the prices for such pants are not at all lower, and sometimes even higher than for whole clothes, and not everyone is ready to overpay for an impractical, albeit fashionable thing.
The solution to this problem is obvious - to make fashionable holey jeans with your own hands. For detailed instructions on how to do this at home, read below.


Can ripped jeans be made from regular jeans?
It is most correct to make fashionable ripped pants from old, but favorite jeans, which have already been worn out, but it is a pity to throw them away. These jeans usually have scuffs and holes in the right places - we just have to slightly enhance the effect.
You should not give a second life to pants that are already worn out and are in a state of "throwing away", because our task is to look stylish, but neat. Therefore, it is better to throw out jeans with indelible stains, holes between the legs and other defects that cannot be corrected.


If you don't have the right old jeans at your disposal, you can try modifying the new pants.It is not recommended to buy good, expensive jeans for these purposes, because the result may disappoint you.
For your first experience, we recommend purchasing inexpensive jeans at a sale in a discount center. The main thing is that they are of acceptable quality and fit well.
Where are the holes made?
To make a truly stylish piece and look flawless in it, it is important to know the right places in which to make holes.
Holes are usually made on the following parts of the jeans:
- pockets - back and front;
- belt - in this place it is better to make a neat terry and scuffs, and not through holes;
- the legs are the most comfortable and the most popular place; holes can be made everywhere except in the knee area: in this area, the fabric is very stretched and the gaps quickly increase in size, so the holes should be located a few centimeters above or below the knees.


What materials are needed?
You can get beautiful fringed holes only by using a special set of tools and materials.
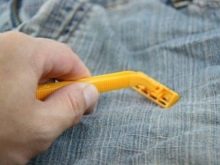
If you just cut your jeans with scissors or a razor, the effect will not be what you expect.


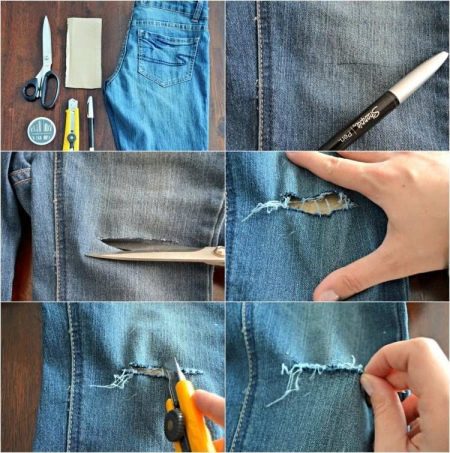
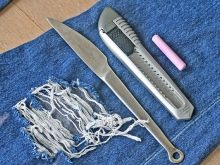
Therefore, to work, you need to stock up:
- a small piece of plywood or thick cardboard;
- a sharp knife, such as a clerical knife;
- with crayon or remnant;
- sewing ripper;
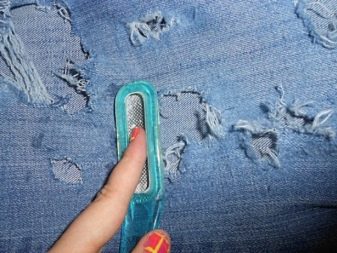
- with a fine grater, a file or a piece of sandpaper;
- you may also need a set of safety pins, tweezers, and a vacuum cleaner.
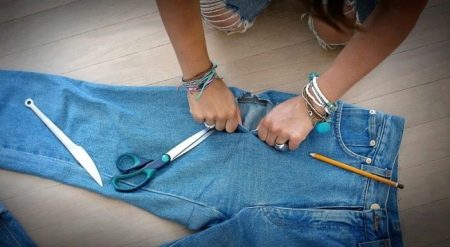
How to make holes correctly: step by step instructions
- First, decide on the future look of your jeans. For convenience, you can even draw a sketch, which will mark the location of all decor elements: holes, scuffs, patches, etc.
- After that, transfer the sketch directly to the jeans. Use a bar of soap or crayon to paint the lines directly onto the front of your pants. If you have a refillable marker, it will be more convenient to use.
- Now we need to examine denim. Take a good look at the weaving and determine the location of the white and colored threads. It is important for you to understand which ones go vertically and which ones go horizontally. If it is difficult to determine this by eye, make an incision in an inconspicuous place and disassemble the edge along the threads.
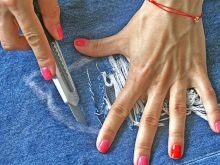
- Before starting work, place something hard under the place of the future cut, for example, a piece of plywood, so as not to damage the other side of the jeans. Plywood needs to be tucked into the leg, not just put your pants on it!
- Start cutting according to the markings you have drawn. Do not make the cuts too long, as they will gradually spread apart. To make the holes "like in a store", try to make the cut in one motion.
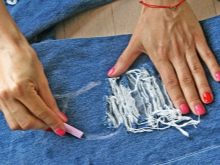
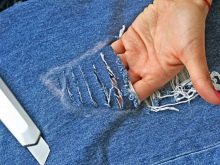
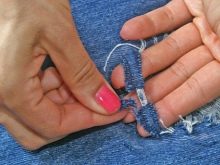
- Now you need to give the fresh tears a stylish shabby look. For this we need a sewing ripper. With its help, gently pull out the white threads, and remove the colored ones. If you do not like the holes covered with threads, you can simply walk along the edges with a grater or nail file.
- You can quickly remove thread scraps and dust left after working with a file with a special sticky clothes roller or a hand-held vacuum cleaner.

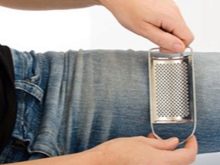
Add a scuff effect
You can make the model even more interesting by adding a worn effect to the jeans.

To do this, you can use any available tools with an abrasive effect:
- kitchen graters;
- nail files;
- sandpaper;
- bars for sharpening knives.
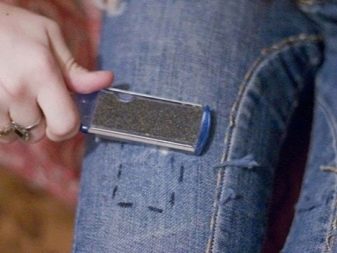
Just grab one of these tools and start gently cutting the jeans in the right place. Be careful not to damage the white threads, otherwise the scuffs will quickly turn into holes.
To make the scuffs brighter and look more expressive, walk over them with a sponge dipped in bleaching agent (remember that you need to work with rubber gloves, as bleach is dangerous for the skin).

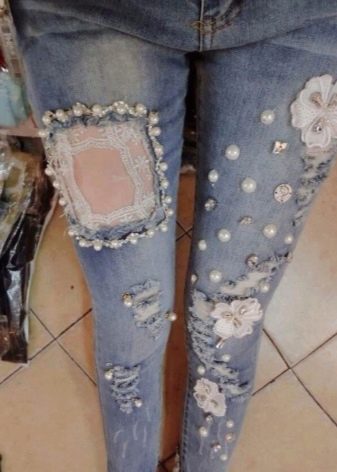
Decor and decoration with lace
For those who just don't seem to be spectacular enough, ripped jeans can be advised to additionally decorate them with lace inserts. The combination of rough denim and delicate lace looks very beautiful and unusual.
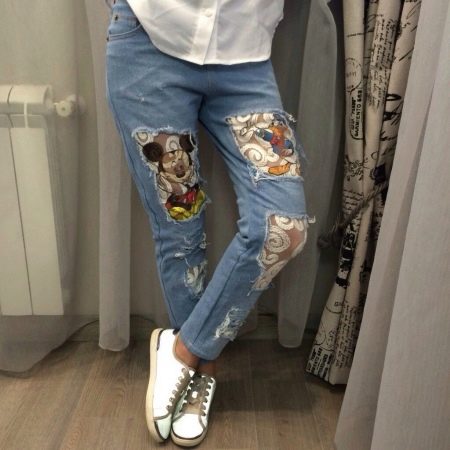
We need quite a bit of lace for the decor, so if you have any lace trims left, that's just fine. It is better to decorate light jeans with black lace inserts, and dark ones with white ones.

Lace should be sewn on the wrong side. The patch should be slightly larger than the hole itself. Do not be afraid to cut out too large a piece - after finishing the work, the excess can be easily cut off.
The lace must be sewn along the contour of the hole with small, frequent stitches (for convenience, the patch can be fixed with safety pins). Choose threads to match the lace - so they will be less noticeable.