Foil for gel polish: what is it, types and application in design
After the appearance of such material as gel polish in the manicure world, masters began to invent various designs based on it. Foil has become one of the most popular decors in recent years. It greatly facilitated the creativity of novice craftsmen and expanded the horizons of opportunities for experienced professionals.
What it is
What is this - nail foil?
In fact, this material is different from the normal food variety. It is sold in specialized retail outlets or through online stores.
In terms of affordability, it is not very expensive. However, the material is very convenient for creativity, since it has plasticity, a wide range of colors and several methods of application.


With the help of foil, you can diversify the manicure, especially the design that is applied to the gel polish. In addition, you can work with it at home.
Thus, foil makes the work of creating a unique manicure simple, interesting and allows you to create designs not only for special occasions, but also as an everyday business option.


Advantages and disadvantages
Using foil to create a manicure has its pros and cons.
Among the advantages are the following factors:
- ease of application;
- ease of design creation;
- affordability;
- wide range of colors;
- huge assortment;
- the variety of possibilities allows you to create unique, non-repeating images.


The disadvantages include such criteria.
- You cannot wear a manicure using foil for a long time.After 2 weeks of wearing, the nails need rest, and it is advisable to carry out a strengthening procedure.
- Adhesive designs are less durable.
- Reproduction of decor from ordinary, non-transfer foil takes time to improve: complication of patterns, accuracy of application.
- Self-development of a design requires an artistic flair, otherwise you will have to use images created by other masters or artists.


What are the types
Foil material for gel polish is produced in several types.
Three main types can be distinguished according to the method of application.
- Tear-off. The material is produced and sold in the form of rolls or in the form of ordinary smooth sheets of small format. Decorative elements are cut or torn off along special perforated lines, they are applied to the nail plate with tweezers and fixed with special means. If any flaws have formed during work, they can be easily removed with a nail file.
This kind of material requires accuracy, precision and craftsmanship.


- Translated. Foil is also available in rolls that are packed in plastic containers for increased storage security. Due to its characteristics, this material is suitable for beginners, as well as for creating a manicure with your own hands. Manufacturers offer a large assortment, there are many colors, textures are different. In addition, some types have decals or designs. Due to a certain method of application, the foil got its name: the material is applied to the nail treated with glue, smoothed, and then the substrate is torn off, leaving a decorative layer on the nail plate.


- Thermofoil - this is not quite an ordinary foil, this is a special type of film that must be heated before applying it to the nail. Heating will make her pliable and obedient. All excess is removed with a nail file.


By shape, foil can be classified into the following types.
- Sheet usually does not have a sticky layer, so a special glue is needed to use it. It is very suitable for cutting various decorative details, since it comes in different shades and textures.
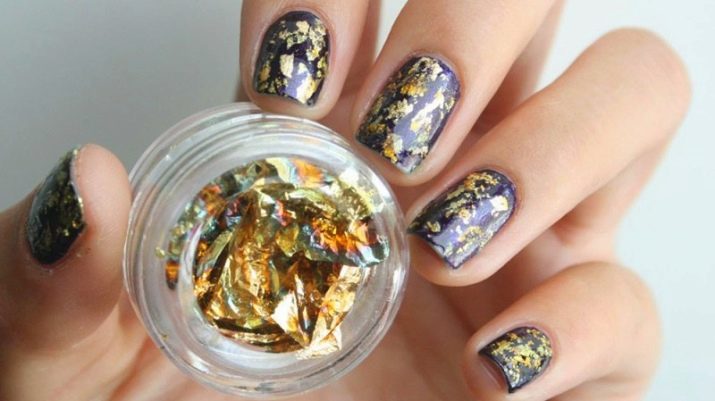
- Harvested similar to gold leaf, very thin. Manufacturers release it in small jars in a compressed form. It can be laid out on a slightly dried gel polish without glue, but only with tweezers. When applying, you should be careful, as it tears easily, but it allows you to create an unimaginable number of unique designs.
- Scotch - a special decorative version of the foil in the form of narrow strips with a sticky backing layer. It can be colored, manufacturers offer a wide variety of shades. Craftsmen use it not only as a decor, but also as stencils when depicting geometric patterns.
- Stickers - the simplest version of the transfer foil. In this case, the picture has already been completely created by the artists, all that remains is to remove the backing and carefully attach the picture with an adhesive layer to the nail surface.


The texture of the foil is also different.
- Smooth.
- Embossed. This look becomes more diverse, new patterns and colors appear. Since the foil has a raised embossed pattern, it is thicker than its counterparts. The material is sold either in rolls or sheets. Sometimes the embossed material is used as a stencil for applying sketches with gel polish.
- Liquid. The role of this material is gel polish with the addition of small glitters. It provides complete creative freedom, eliminating the complexity of cutting out the necessary parts, they can simply be drawn.


Application methods
In any form of art, before starting to create, you need to carefully prepare. So it is here: before proceeding with the design of a manicure on gel polish with foil, you should process the nails according to the basic technology.
- Remove old decorative coating.
- Remove cuticles. For these purposes, they use either the classical method or special means for its removal.
- Trim your nails to your desired length.
- Shape the nails into the desired shape with an abrasive file.
- Polish the nail plates with a buff, giving them smoothness and shine. This type of file is very suitable for nail art, since the gel lays on polished smooth nails smoother and lasts longer.
- Degreasing.
- Application of a base coat of varnish and drying it under a UV lamp.
- Toning with gel varnish of a background color.
- Drying.

Only after all these actions have been carried out, you can proceed to further decorating the manicure.
There are several techniques and technologies for distributing foil onto gel polish. Let's consider the most popular ones. They can be used as a guide for getting a manicure at home.


Uniform foil coverage of the entire nail plate
In this case, both tear-off and translation material can be used.
After the basic manicure is done, they begin to decorate with the use of foil.


Option with glue
After the gel polish of the main shade has been applied and dried on the nails, the dispersion layer is removed from them with special napkins.
In the case of using a tear-off foil, you need to worry in advance and prepare the details, cut them in the shape of the nail. For a transfer type, these steps are not required.

This is followed by glue processing. It is better to use a product with a manifesting effect, which will greatly facilitate the work and allow you to correctly estimate the drying time.
Once the adhesive becomes transparent, you can attach the foil to it.

An important condition is that the material should be laid and smoothed with a pusher or a cotton swab, pressing firmly against the plate.
After thorough ironing, the transfer foil backing is removed. Excess foil around the edge can be removed with a nail file.
After all these manipulations, the nails are covered with a transparent finish top. Next, it is dried under a UV lamp for at least three minutes.
If all actions are carried out correctly, you will get an even and beautiful manicure, on which you can additionally apply patterns. Do not forget that then you need to fix everything again with the finishing top.
After final drying, the nails are treated to remove the dispersion and a special oil is applied to the cuticle.


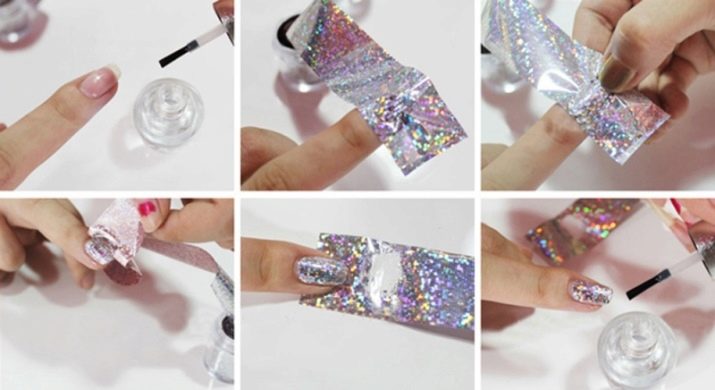
Option without glue
When working with foil, you do not need to use the adhesive, but transfer it directly to the gel polish.
After applying the first gel layer and drying it, it is not necessary to remove the sticky (dispersion) layer, it will serve as an adhesive base. Further, foil parts are applied, smoothed with the available tools.
After 10-15 seconds, the backing of the transfer "gold" is removed. A top-finishing fixer is applied on top and dried under a lamp. Defects are removed with a nail file. Sticky deposits are removed with lint-free wipes.


Liquid Foil Manicure
Gel polish "liquid foil" appeared relatively recently. It is a gel mixture with fine glitters. It is easy to apply, and the effect is the same as when using real foil.


The application technology consists of several standard stages.
- The basic treatment of nails is to give them the desired length and shape. The cuticle is also removed and the plates are polished with a buff.
- Cleaning nails from abrasive dust after polishing and degreasing them with a cleanser
- The primer of the manicure is carried out with a special tool called a primer. Firstly, it qualitatively degreases the surface, and secondly, it provides good adhesion of the gel polish to the nail. Thanks to the primer, the gel does not peel off, and the durability of the manicure increases. In addition, it protects the nail plate from the chemical elements that make up the gel polish, from the penetration of bacteria and fungi.

- Dry for a couple of minutes in normal air.
- Base coat application.
- Drying: using an ultraviolet lamp - 2 minutes, under an LED device - half a minute.

- Coating with liquid foil. Before starting work, the bottle should be gently rolled between the palms so that the settled sparkles are mixed. Important: the varnish must not be shaken, otherwise bubbles will form, and they do not allow you to get an even coating.
No pressure is required when applying the gel to the brush.

- Curing under the lamp: UV - from 2 to 3 minutes, LED - from 0.5 to 1 minute.
- For a more intense effect, you can apply a couple more additional layers, subjecting the manicure to polymerization after each application.
- Finish coating. The manicure is sealed with a colorless top on all sides, the cut of the nail and the ends should be especially carefully processed.
- Another fixed time interval polymerization procedure.
- Removal of the dispersion layer with a cleanser.
- Additional decoration. At this stage, you need to connect your imagination. The use of painting, various stickers and other decorative elements is encouraged.

- Final top coat, drying and cleaning with a cleanser.
The assortment of shiny gel polish is not yet as wide as we would like, but the choice is still quite large. You can choose an option with a good price-quality ratio.

Using a template
For novice craftsmen, many details have been invented to facilitate the work. These include templates and stencils.
These auxiliary tools are made of sufficiently durable, non-staining materials. Manufacturers today offer a large assortment of sketches.


In order to transfer the foil to gel polish, you need to follow the following algorithm.
- Wait until the base coat is completely dry.
- Place the template on the nail plate. Some stencils have a sticky backing so you don't have to worry about unexpected movements. If there is no such layer, then you will have to independently monitor the immobility of the template so that the drawing does not blur.
- Next, glue is applied over the template.
- Only after the adhesive has dried to the desired degree should foil be applied. You need to squeeze it well and hold it for a few seconds.
- The next step is to remove the template along with the foil.
- As a result, a beautiful pattern will remain on the nail, which was obtained without any effort.
Templates are also used when working with liquids. In this case, the liquid foil is applied with a brush to the background coating through a stencil.
Even professional craftsmen are happy to use such improvised means to create complex designs using monograms and fanciful patterns.
Thermofoil application
Thermofoil is the simplest way to get an interesting manicure without much effort.

After the basic preparation of the marigolds and removing the sticky layer, they should be treated with a buff, which will improve the adhesion of the film to the nail surface.
The blanks should be cut in advance in the shape of the nail.


For work you need a hairdryer or a lamp. The foil is heated by warm air, it becomes more plastic and pliable, which is necessary for its even distribution.

To avoid the appearance of bumps and other irregularities, the thermal foil is smoothed with a special wooden stick or a pusher.
After the material "seizes", the excess film is removed with nail scissors, and smaller defects are eliminated with a nail file.
A colorless top-fixer is applied over the foil and dried under a lamp. Professionals recommend applying it twice.
At the end, the sticky layer is removed with a clinker. That's all, the manicure with thermofoil is ready.

French and moon manicure
Classic manicure with foil elements looks neat and stylish.

It does not require much experience and skill to reproduce it. It is suitable for nails of any length and shape.
The classic design is perfect for beginners who are starting to work with gel polish.


Option 1
At the initial preparatory stage, the main shade is chosen, parts are cut out of the foil in the shape of a hole for a lunula or an edge for a jacket.
Metallic colors work well with black, gray and white, as well as monochrome companion shades.


At the second stage, standard processing is carried out, a basic manicure is applied.
Next, gel polish of the selected shade is applied and dried under a lamp.
The nail surface is treated with a cleanser.

The edge or hole, depending on the chosen type of manicure, is covered with an adhesive. It is necessary to wait until it dries to the desired condition, after which the foil parts are carefully laid out with tweezers and pressed with a special manicure stick.
This is followed by a transparent layer of fixer gel, drying it under a UV lamp and removal of the dispersion layer with lint-free wipes.

Option 2
If in the first case, colored gel varnish was applied first, and then foil, then in the second, it was the other way around.
The metallized material is first laid on the base coat. And here it is not necessary to strictly adhere to the form. The main thing is that the hole or, accordingly, the edge of the nail is completely closed.

It is better to apply the foil directly to the gel polish without removing the sticky layer. The translation material will greatly facilitate the work. It is important to remember that foil-coated parts must be carefully smoothed while pressing them to the surface.
Next, there is a transparent fixer, drying and cleaning with a clinser.

After that, they begin to apply a contrasting gel polish, leaving the area of the hole or edge unpainted.
The layer is again fixed with a top and dries thoroughly under the lamp.
After removing the dispersion layer, the manicure is ready.
The classic design using foil on gel polish looks impressive. You can choose the color scheme in such a way that the manicure becomes not a business, but a solemn option.


Service life of manicure with foil
The durability of the foil depends on its quality, the correctness of the actions and the accuracy when creating a manicure.
You can't violate the technology. It is necessary to consistently perform all actions, thoroughly dry each layer of gel polish.
A well-applied manicure with foil will last for about two weeks, while using ordinary varnish - only a few days.


Beautiful examples
Professional craftsmen and beginners alike are happy to use foil to create unique designs on gel polish. The images are bright and spectacular, business and solemn, catwalk and natural. Moreover, you can get them without much effort, quickly, easily and simply.
The popular classic foil jacket looks more festive.

Lunar manicure on gel polish can be created using both regular foil and liquid.


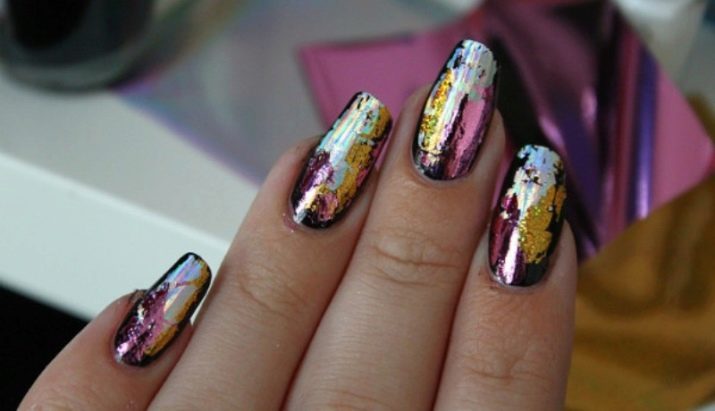
A specular or metallic sheen can be obtained using plain foil. It turns out spectacularly and boldly.


Liquid foil allows for interesting designs. It is not necessary to cover all legs with this shiny gel at once, it is enough to select at least one or two for the manicure to play in a special way.

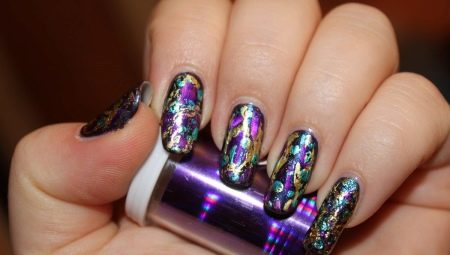
Using crumpled foil, you can create unimaginable design looks that will never be repeated. Moreover, the smaller the pieces, the more natural the decor looks.
Any decor can be depicted on gel polish using foil: futuristic, vegetal, snowy, starry, "broken glass", casting, craquelure and many others. It all depends on the fantasy and imagination of the master.
For information on how to make a manicure with foil, see the next video.


