How to make a French manicure with gel polish at home?
French manicure is today considered one of the classic types of design. Due to its versatility, it will always stay on the crest of the wave. Therefore, those who are not yet familiar with the implementation of this design using modern coatings should familiarize themselves with the features of the design itself and study the step-by-step technique for its implementation.


Peculiarities
French, French manicure or French design - all these are the names of a single type of nail design. It appeared not in France, but in America; today the technology has already turned 40 years old. The idea of its creation was born due to the lack of time for painting the nails of actresses. That is why there was a need for a design that would fit any image, which was created by the founder of the Orly Trading House.


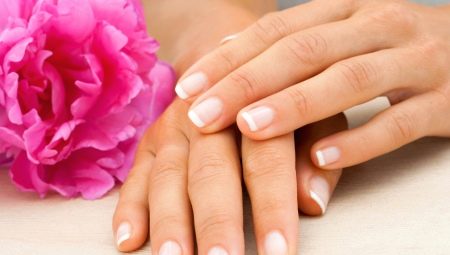
The classic version of the jacket has a flesh-colored background and a white smile, which is used to form part of the grown nail.
Today, this trend is quite relevant in situations of a strict dress code. The jacket itself has long gone beyond the classics: the focus of fashion trends is color solutions, as well as decorating nails with a smile. The shape of the smile of traditional French manicure can be different.

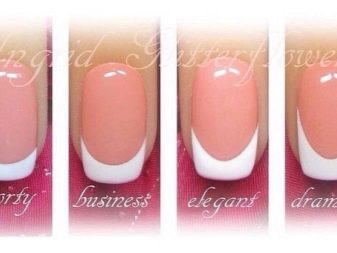
It depends both on the characteristics of the nail plate and on the shape of the cut of the regrown edge. The width of the contrast stripe may vary, sometimes it is very thin, in other cases it is completely diagonal. For example, almond-shaped nails have a wider smile compared to oval-shaped nails. And also today a smile can be fancy, which opens up a lot of opportunities for creating thematic and seasonal designs.


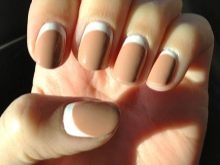
An inverted jacket differs from the usual one in that, in fact, it is its mirror image. That is, his smile is located at the base of the nail bed. Such a manicure is considered one of the most popular today. It is used by beauty bloggers and celebrities.


The shape of such a smile can be very diverse. For example, in addition to the hole and imitation of the growth of the nail plate, it can be diagonal, triangular, semicircular and made as a contour stroke. One of the features of the modern jacket is its combination with all well-known manicure techniques. Moreover, it can be the basis or its accents. Plates with a contrasting smile can be decorated with different nail materials.


Ways of applying a "smile"
A smile can be done in a number of ways. Beginners who are just starting to master working with gel polish should take into account the fact that due to the peculiarity of the composition, you can work without haste. The hybrid coatings that are used in French manicure today do not dry without a special lamp. Therefore, you can safely design and adjust it before drying in a UV or LED device. As for the methods of applying the so-called smile, they depend on the design. In general, for beginners, the option using auxiliary strips or foil tape is better suited. The main nuances of different options can be roughly divided into traditional (brush and stripes) and fantasy (stamps, dots, stickers, fimo).


Brush
Using manicure brushes to shape a French smile can be difficult for beginners. It is difficult to draw the lines equally evenly on all fingers to make the design look professional. Of course, you can contrive and resort to fantasy drawings, but if you do not have drawing skills, such a manicure will not look beautiful. To learn how to draw the necessary lines, and even more so by drawing to yourself, you should train on special stencils.


Stencils
French stencils mean special strips of different shapes and widths. Depending on the client's desire, you can use both traditional arcuate elements, and corners, waves, zigzags, hearts. However, stencils do not simplify the work 100%, as novice craftsmen might mistakenly think. Together with them, when separated from the base, part of the varnish with which they created a smile can also come off. And this means that you cannot do without a brush, because you have to correct the lines.


Dots
Sets of sticks with different attachments allow you to create one of the most popular French designs today. At the ends of the tools, there are metal balls that are dipped in gel polish, and then put dots on the nail plate in the right places. It is easy to work with such a tool, but at least without minimal training it will not work to make a beautiful smile. In addition to the fact that you need to clearly set dots in the selected shape, which should be ideally the same on other French nails, you need to make dots of different sizes.


Stamping
This method is easy, because working with stamps that have an engraved pattern will be perfect the first time. Stamping is distinguished by the accuracy of the lines, for which this type of design is chosen by the masters of the nail service. Like the previous version, this type of smile turns out to be fantasy. It is also applied to accent nails of manicure.

Slider design
Another solution to overcome the lack of experience in nail art is island or application sliders. Water-based stickers on a transparent basis are easy to use, such a jacket looks incredibly delicate and beautiful. It doesn't take as much time to create the desired design as it does the tedious alignment of smile lines.


Fimo
This material is used for a creative jacket.This decor is a variety of elements, cut into a thin layer of oblong sticks. These are a variety of stars, fruits, berries, which are simply glued in the area of overgrown nail plates. The decor is voluminous, and therefore such a manicure cannot be called comfortable in everyday life. However, fimo can be used in aqua design by sealing on top with several coats of modeling agent.


Required tools and materials
Depending on the variant taken as a basis, the type of tools and the raw materials used for the design may differ. Let's take a traditional technique as a basis, from which in the future it will be possible to build on and improve the design with various decor. It is also important to first decide on the type of manicure, because it can be conventional or hardware.

As for working with the device, this method is more convenient and less traumatic for nails and skin around them. If there is no apparatus at home, and a woman is just beginning to get acquainted with nail art, you can use a basic set for manicure: nail scissors, nail file, pusher, tweezers.
You will also need to work:
- rubber hoof;
- napkins for manicure;
- dehydrator;
- soft polisher (buff);
- drying lamp for nails of the required power;
- base material;
- finishing agent;
- pigmented background varnish;
- contrasting pigment for a smile.

If you plan to complete the design on accent nails, prepare the decor conceived by the design. When a dots is needed for decoration, but it is not there, you can use an ordinary wooden toothpick.
Preparation of nails and cuticles
Before starting preparation, the nails are treated with an antiseptic. After that, with a file, give the free edge of the nail plates the desired shape. At the same time, back and forth movement is strictly not allowed: all conditions are created for crumbling and further injury to the nails. In addition, two different directions of the file can cause manicure detachment.


After that, a special cuticle remover is applied to the side rollers and cuticle. It will help soften the skin and prepare it for faster and more painless removal. After the product is applied to all 5 nails, the time comes for the most pleasant step in a hygienic manicure. The hand is dipped into a bath with warm water (the water temperature should be at least 30–34 ° C). The hand should be in the water for about 3-4 minutes. After the required time has elapsed, they wipe the fingers and proceed to the manicure. Using a pusher paddle, push the cuticles and skin on the sides. In this case, you should not press on the instrument too hard, so as not to injure either the skin or the nail.


Next, they take tweezers or a scalp and cut off all excess and keratinized around the nail plate. It is important to keep the tool at the same angle and make sure that the cut is not intermittent. If everything is done correctly, then you can prevent the appearance of burrs in the future. After you walk with tweezers, you should take a pusher or an orange stick and clean out the pterygium. Before this, the stick must be soaked in water. You need to carefully walk along the contour of the nail when cleaning the pterygium. This stage will allow you to assess the quality of the work performed by the tweezers: to understand how well you cleaned the excess skin. If, when passing along the contour with an orange stick, skin remains are found, take the scalp and clean up what was not cut off immediately.

The procedure is performed on each nail. After that, a special cuticle oil is applied to the skin treatment sites. It is at this stage that the edged manicure ends.
In order not to injure the skin, you can take note of a few tips from the masters in the field of nail service. For example, trauma to the skin can be attributed to improper movements of the scalp or nail scissors. You cannot do it in jerks, and even raise the tool up. The cuticle should be removed with movements in the course of cutting the skin.

In order to minimize the risk of injury to the skin at this stage and not cut off excess, you need to slightly pull the skin at the cut. So it will be visible where the cut ends, and the base line will not be ragged. We must not forget that before trimming with the larger side of the pusher, the skin at the base of the nail is pushed back and only then is it lifted. As for the pterygium, it can also be cut with the sharp edge of the pusher. In this case, you do not need to deepen the tool too far under the nail. Injured skin around the nail will ruin the appearance of the manicure, and at the same time, the mood. In addition, nails that have undergone such stress will hurt for a long time. You can start further work with nails only immediately before painting them.

Step-by-step execution technique
To get a high-quality coating, you need to choose sharp and comfortable tools. It is important not to forget to disinfect them. With the correct implementation of all stages, the French manicure on the nails will last for at least two weeks. Insufficient drying of each layer can be one of the main reasons for its fragility. It is not worth reducing the overall work time at the expense of it, because as a result, the coating may begin to chip off in a couple of days. Better, on the contrary, to add time for the last (sealing) layer.
It is not difficult to do French manicure on prepared nails.
Whether in the salon or at home, the technology will be the same. It is not always convenient to do a manicure for oneself, and therefore it may require more time. If you do not have enough information, you can refer to the video tutorials of professional nail service masters. In the classroom, many professionals show the ideal execution technique step by step, teach how to perform it step by step correctly.

To work closer, move the top, base, pigments, a thin brush, if necessary, stencils and a lamp. You need to start with the preparation of the nail.
- Strengthening and removing gloss. At this stage, you need to remove the upper glossy layer from the nail plates. This is necessary so that all layers applied in the future are held firmly and securely. It is on this that the durability of the manicure will first of all depend. Take a buff (soft rectangular grinder with fine grain) and remove the gloss with light movements. Then a dehydrator is used, degreasing the working layer and removing sawdust residues. Now you can start decorative manicure or strengthen your nails. The strengthening process is necessary for thin and fragile marigolds. In addition, it will be useful for nail plates, which rarely rest between manicure.

- Basic coverage. After removing residual sawdust and oiliness, degreasing the surface of the nails, a layer of base material with a transparent texture is applied to them. This material should be applied in a very thin layer, because the accuracy of the work will depend on this (a dense layer of the product will flow over the cuticle and side rollers). The base is dried in a lamp; the drying time depends on the type of device (from 30 seconds to two minutes). It is important to consider that each applied layer will have to dry when working with gel polish. And each layer needs to be passed along the end of the nail, because the durability of the coating will depend on this. The base may remain sticky after drying, so you should try to avoid accidental touching.

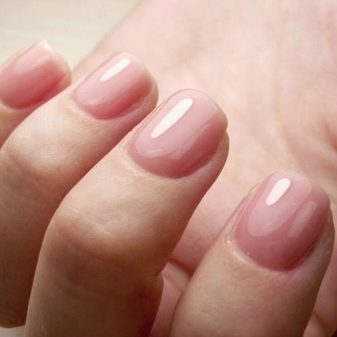
- Background. With the traditional technique, after the base layer, a camouflage gel polish is taken with a maximum match to the skin tone. The pigment is applied in two layers, each of which is dried in a lamp. To prevent the composition from flowing outside the skin and evenly spreading over the surface of the nail plate, you need to take a little pigment. In this case, it is undesirable to send the coating to drying immediately after application: you need to give the varnish the opportunity to distribute over the plate, get rid of the stripes.Since it is rare for novice masters to get neatly to the base of the nail, after the first layer of pigment is dried, they take a thin brush and paint on the edge at the base of the nail with it. This will exclude varnish flowing, and will also allow you to trim the pigmented layer, thereby making the coating aesthetically pleasing. After working with a brush, continue painting the nail with a second layer of pigment. The varnish is dried in a lamp.

- Smile. A smile, which will give the jacket a status, is best applied with special acrylic paint or gel. To do this, you can use gel polish contrasting with the main background. It will be easier for beginners to use templates: depending on the type of stencil, this can be quick and easy. But if the stencil is attached unevenly, the smile will also be uneven. If there is no fear of hand-drawing, take a brush and first draw a thin line with white paint along the contour of the edge of the nail plate. Even a professional's hand can sometimes tremble, which will lead to the formation of a defect. In this case, you can use a special tool by dipping a brush into it to correct the line. If the work is slow, the drawn line may bleed slightly.

To prevent this, you can remove the residual stickiness after drying the background gel polish. Now you can safely draw the desired line, trimming its width. So you don't have to worry that the material will flow and the line will spread out in width. To achieve better precision in work, it is worth drying two nails in a lamp: the smile will definitely not spread.

- Sealing. After the smile is dried in the lamp, the sealing must be done. For this, a thin layer of top is applied. The self-leveling material evens out the background coating with a smile, making the step near the smile line invisible. However, if the smile initially turned out to be too thick, you need to use the buff, carefully trimming the smile line in a delicate way. After that, you can apply another layer of top on top. Final drying will be the last step of the job.


- Decorating. Having understood what the method of performing a French manicure is, you can diversify it by leaving one or two nails for the design. You can not make a smile on them, but instead place a sticker on the accent, transfer the pattern using disposable stencils. The design with a picture will also look beautiful. You can paint anything on such nails: you can even decorate a French manicure with a seasonal pattern. This trend is quite popular today.


Do not cover your smile on top with glitter varnish. From this, a clear contour is erased, the coating may lose its expressiveness. As for mother-of-pearl, rubbing will look more weightless on the background of the jacket. It is applied before sealing, and a smile is made on top of it. A jacket with pearl dust looks especially delicate; today it is considered the best material for creating a special effect of a background coating.


You can quickly and easily decorate French manicure with stickers or the so-called slider design. To do this, after applying the base material and pigment with their mandatory drying, another thin layer of the base is applied to the accent nail. The application picture is placed on a wet napkin, wait 30 seconds, then remove it from the paper backing, apply to the nail on a layer of undried base. The slider is leveled, then dried, reinforced with a base and sealed with a layer of top.


How do I use the strips?
French stencils and strips can be used in different ways today. They are glued, retreating from the edge of the required distance. It is not necessary to press the template into the freshly applied and dried coating. Immediately after covering the prepared area, the strip or stencil is removed, since this cannot be done after drying.


Strips are sold in ready-made sets, as well as rolls.Roll options give only a straight edge, which is far from always convenient due to the peculiarities of the nail plates. The sets are variable in shape and are convenient to work with. Beginners can be advised to use, in addition to the strips, a special silicone agent that protects the skin around the nails from polish. Anything that gets on the film can be removed, thereby increasing the accuracy of the work.

How to make a French manicure with gel polish, see the video below.


