How to properly glue rhinestones on gel polish?
Fashion passes, but rhinestones remain, they are loved by all girls. If possible, the beautiful half of humanity would wear sparkling pebbles on their nails every day. Moreover, modern trends in nail art make it possible to do this. Rhinestones will decorate any manicure from the simplest in a monochromatic version to painting with monograms and fancy patterns. The only thing that stops many is the painstaking work and fragility of such a manicure.
Features of technology
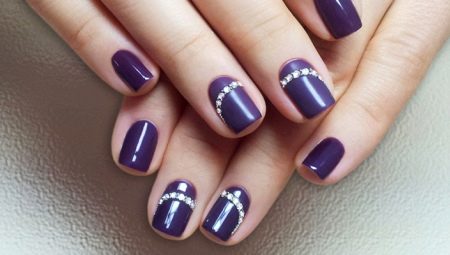
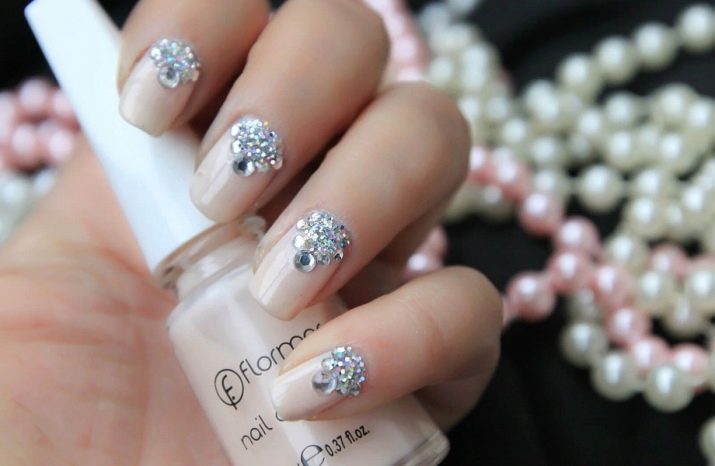
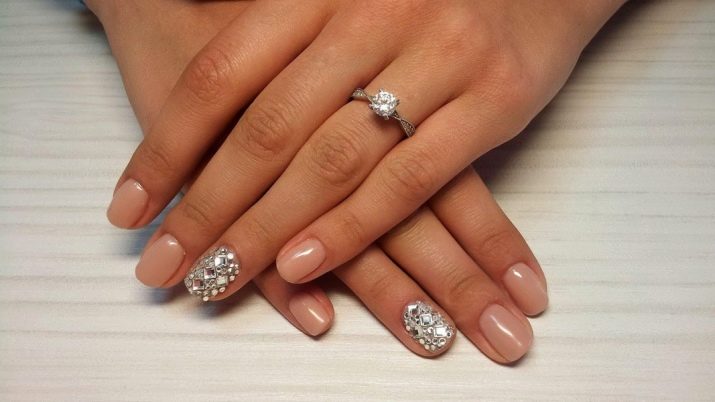
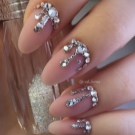
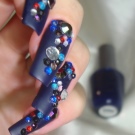
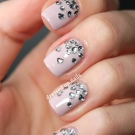
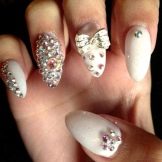
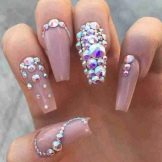
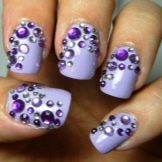
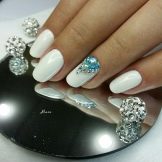
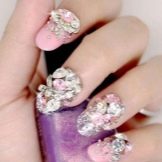
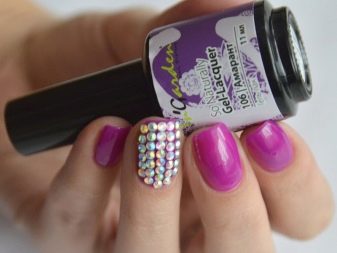
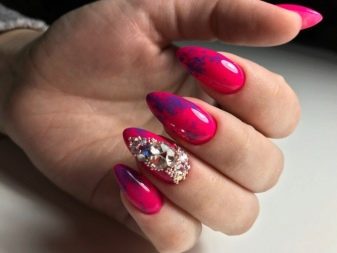
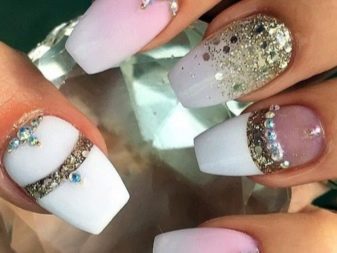
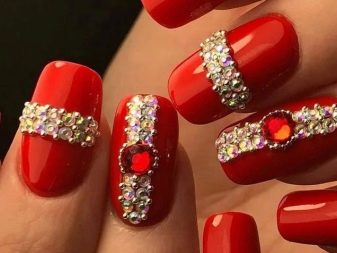
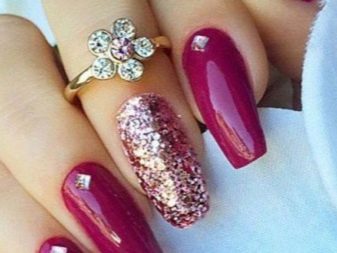
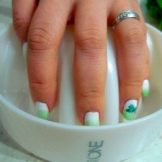
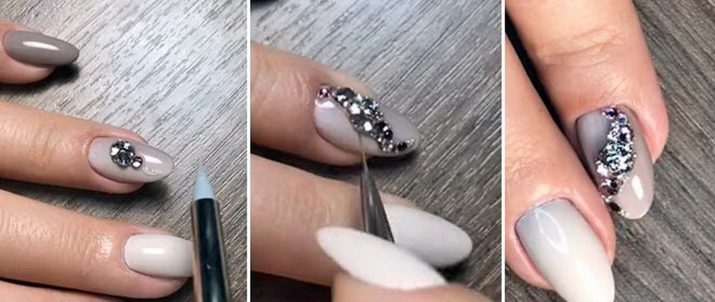
Having made a nail design with rhinestones at least once, for example, in a nail salon, I want to return to this decor again and again. After all, it looks luxurious. Sparkling stones add charm and zest to any look. It is worth noting that recently the accent nail has been completely covered with rhinestones, or complex patterns of stones of different sizes and shapes have been used on a pair of accent fingers. For everyday wear, nails are decorated with several modest rhinestones in the form of pattern elements and rows on the lunula or in the middle of the nail plate.
Bringing a manicure with rhinestones to life is not difficult even at home. It is only important to know the correct technology of work, which will help to firmly fix the rhinestones on the nails. Then the view will be spectacular and neat, and the manicure itself will last for a long time. The introduction of a new long-lasting coating, shellac, has made the job much easier. Now you can create shine on your nails for 2 weeks or more. And if necessary, it is not at all difficult to make a correction.
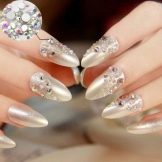
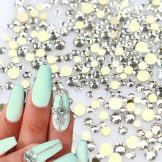
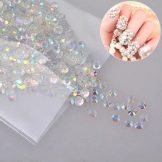
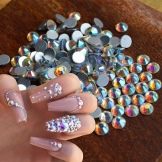
Experts advise not to skimp on materials and choose the highest quality ones. This also applies to gel polish and rhinestones. The best stones are made of glass or crystal, and have many sparkling facets.For the price, they are somewhat more expensive than the Chinese options, but the manicure is worth it. In addition, some craftswomen manage to use rhinestones more than once. If after wearing them, carefully remove them and clean them from the remnants of glue or coating, then you can do a manicure with them again.
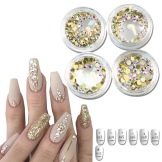

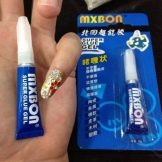
The stores also sell more affordable plastic rhinestones. They do not shine as great and it is quite problematic to use them twice. They are easily damaged and scratched when removed. You should not try to put them on the usual universal glue of the "Moment" type. The metal coating on the base of the rhinestone can react with the glue and dissolve. Then the stone will hardly shine. It is best to purchase inexpensive glue, which is often sold at the same nail supply store.
To securely fix rhinestones on nails, two main methods are now used: working with special glue and gluing rhinestones on gel polish. Each method has its own advantages and features.
The glue has a medium-density structure, therefore it is universal for decoration of different sizes. It comes in a handy little package with a small brush. It can be smeared on the very reverse surface of the rhinestone or put a few drops in the right places already on the nail. The glue hardens rather quickly in air, which shortens the working time. But on the other hand, it also creates some inconvenience, since it will no longer be possible to correct the pattern or correct individual stones. The glue provides a strong fixation of various elements: stones, rhinestones, broths, decor for caviar manicure, microbeads.

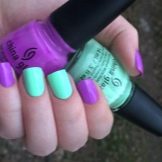
To create a decor from rhinestones on a manicure with gel polish, use the base and top coat. It is very important to choose a texture. If the product is too runny, you can add a little acrylic powder to it. It will not lose its fixing properties, but it will become more viscous. A thick base is used to glue large heavy elements so that they do not run down the nail plate. Smaller rhinestones are best planted on a top coating. It will securely fix the stones and will not let them "drown" in the coating.
When creating a design with rhinestones, the finish, according to professionals, is best used without a sticky layer. The final stage of any shellac manicure is to remove the sticky layer from the topcoat. During the procedure, you can remove excess, move stones or remove some of the shine from them. That is why it is better to fix this type of design with a finish without a sticky layer.
Rhinestones on the nails can be combined with any decorations. If the color of the stones and manicure is kept in cold shades, you should choose silver metal hand jewelry. Gold goes well with gold rhinestones and manicure in a warm palette. Glitter and various materials with a metallic effect are often used along with rhinestones. This is acceptable in moderation. Designers do not recommend wearing rings, especially with stones, if rhinestones sparkle on the nails, otherwise your hands will look too overloaded with decor. What is good in the picture does not always look good in life.
Required tools and materials
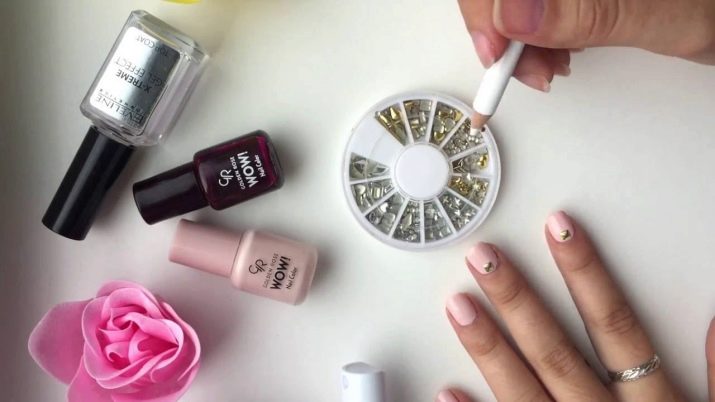
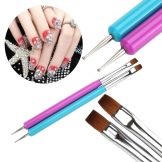
To create a manicure with rhinestones, you will need the same tools as for a regular design using gel polish. Some additional materials will come in handy for attaching the rhinestones to the nails and further removing them when the nails grow back. You will need:
- cotton pads, metal foil or special caps for nails, nail polish remover (remove old varnish);
- bath, essential oils, bath salt (we make a warm bath for hands);
- cuticle softener, orange stick, tongs, scissors, file (we correct the cuticles and give the desired shape to the nails);
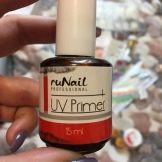
- buff, clinser or alcohol, primer, base coat (to prepare the nail plate);
- gel polish of different colors, glitter, other necessary decorative elements, topcoat, UV lamp (to create the main design);
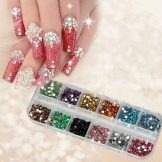
- rhinestones, glue, rhinestone pencil or tweezers, toothpick, orange wood stick, base and top without a sticky layer, UV lamp (for creating rhinestone decor).
Sometimes, to create a design with sparkling stones, not separate rhinestones are used, but thermal stickers with whole ready-made designs and patterns from rhinestones. For such a manicure, special tools are required. You will need a heat press or a soldering iron to warm up the film before transferring it to your nail. This method can significantly save time, especially if the manicure is done for one or two evenings. In addition, it will appeal to beginners who have not yet “got their hands on” at small jobs.
For a design with rhinestones, it is better to choose an ultraviolet lamp. It will polymerize all types and thicknesses of coatings. In addition, it dries out all the elements of the manicure much better.
Many questions arise when the nail plate has grown back and it is time to remove the rhinestones. High-quality glued decor is not so easy to remove. In nail salons, it is often simply cut down. If you want to use the rhinestones again, you will have to work a little longer and more carefully. There is a special composition to neutralize the glue. To remove rhinestones from gel polish, correction fluid is most often used. The stones soaked in it should just move away. If the decor sits firmly, you will have to apply mechanical action. You can help yourself with tongs or an orange tree stick. Do not be afraid to harm the surface of the nail, as it is protected by gel polish and a couple of layers of coating.
Procedure
To please yourself with a beautiful pattern with rhinestones, you need to fix them correctly. Then the manicure will last for a long time. The gluing technique depends on what you will use so that the rhinestones do not fall off. You can glue them with special glue or a top on gel polish. You need to do the whole process step by step. Only if the technology is applied correctly can rhinestones be expected to sit firmly. Consider a technique for creating a beautiful manicure with rhinestones that uses glue.
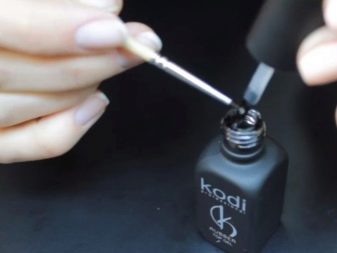
- We carry out the usual hygienic manicure. Degrease the nails and apply the base, dry under the lamp.
- We apply 2 layers of the chosen gel polish or we carry out the design that you have chosen. It can be painting, gradient and other styles. We strive to create each layer as thin as possible. Dry separately slowly. In the case of a UV lamp, it will take about three minutes, a LED lamp will cope in 30 seconds.
- On those nails that are without rhinestones, you can apply a top coat and dry it.
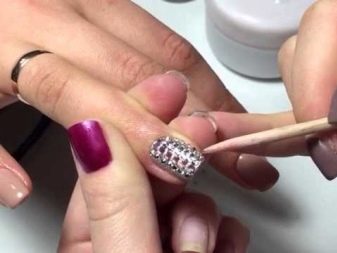
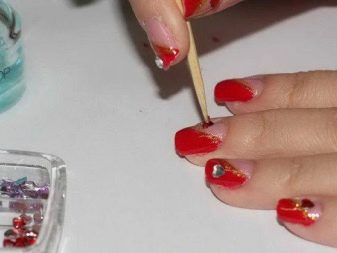
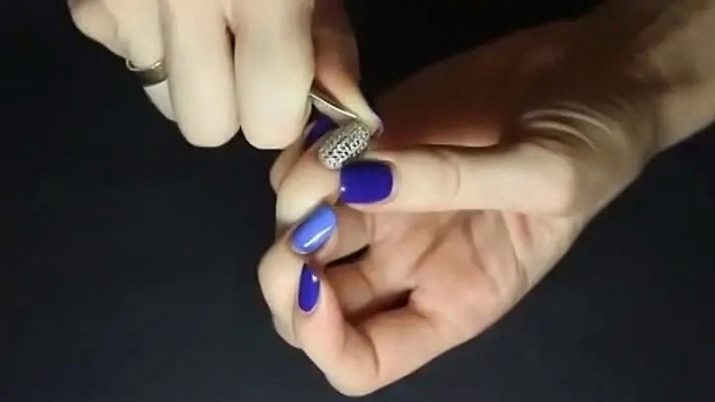
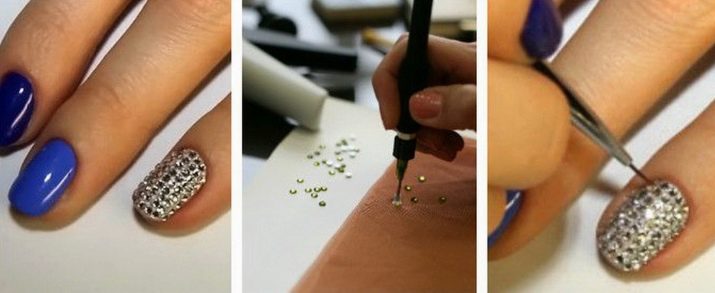
- Next, we take glue and rhinestones. The pattern drawing and layout should be thought over and rehearsed in advance. The glue hardens quickly, so most likely it will not be possible to move or correct the rhinestone.
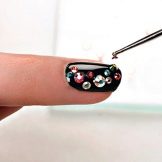
- It is better to take rhinestones with tweezers or a special wax pencil - it does not leave marks on them and does not spoil the shine. We apply glue with a brush from a bottle or a wooden toothpick on the back surface of the stone. You can also make glue points directly on the nail in those places where decorative elements will be located.
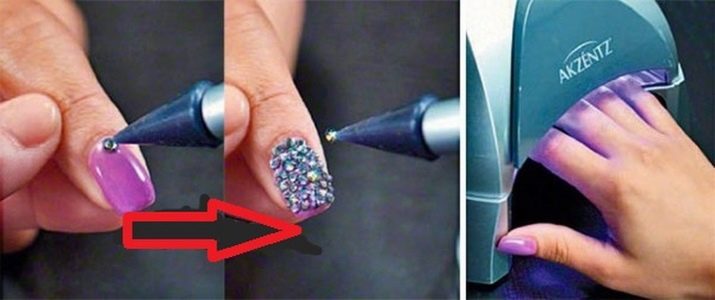
- We are waiting for the glue to dry. The time is usually indicated on the bottle. Now you need a top coat without a sticky layer and a toothpick. We apply the finish to the nail, passing around the base of each of the stones. We strengthen them with gel, trying not to touch the rhinestones beyond the edges. In no case should they be covered with a top, otherwise the effect of cheap muddy plastic will turn out.
- Dry the manicure thoroughly under the lamp.
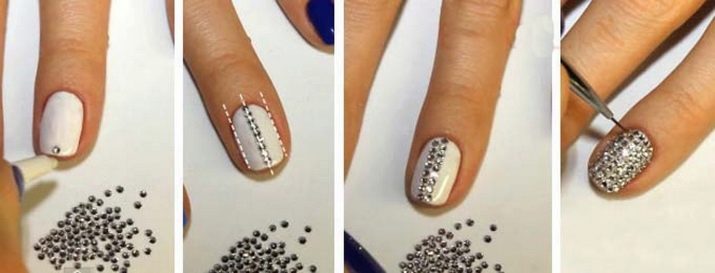
There is another technology for gluing rhinestones - directly onto gel polish.
- The process is no more complicated than with glue. It provides more room for correction and error correction.
- So, the basic grooming manicure is done, the nails are buffed, degreased and primed.
- After applying the base and drying it, we make the basic design on the nails. Rhinestones are combined with different techniques - from classic French manicure to trendy ombre or trendy geometric patterns.
- The coating is applied in two or three layers. We try to make each of them homogeneous and thin. Dry the layers under the lamp after each next application. For ultraviolet, it will take at least three minutes.
- On nails that are not intended for rhinestones, apply a top and dry. Remove the top sticky layer.
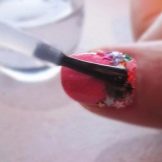
- The fingers, where the rhinestones will be attached, are also covered with a top. But we do not dry it, but we put stones on it with the help of tweezers. In this case, each rhinestone must be pressed, as it were, so that it "drowns" a little with the base in the finish coating.
- If the rhinestones are blurry, try adding acrylic powder to thicken the finish. You can mix everything on a palette or a piece of foil.
- When the entire pattern is created on one finger, dry the nails under the lamp. And you can move on to the design of the next finger.
- After thorough drying, the stones will need to be fixed again with a top. To do this, use a toothpick or a thin brush. We circle each rhinestone around the base. We fill in the finish all the free spaces between the rhinestones. We try not to get the coating on the surface of the rhinestones.
- We dry manicure in a UV lamp. For such a design, it is better to use a top without a sticky layer, so as not to touch the decorative elements at the final stage.
To make a luxurious manicure delight you longer, we offer some practical advice from nail design masters. Any work involving warm water, chemical or abrasive substances must be done with gloves. A manicure with rhinestones should be protected from too hot water. Going to the sauna with such marigolds is also highly undesirable. For a gorgeous manicure with a shimmery décor, focus on fresh trends that speak of moderation. Create your own unique image, connect your imagination. Combine different techniques and types of coatings in one manicure. Do not be afraid of creative ideas and experiments with manicure. This is how most often you can choose the most successful options for yourself.
For information on how to properly glue rhinestones on gel polish, see the next video.


