Simple drawings of gel polish on nails for beginners
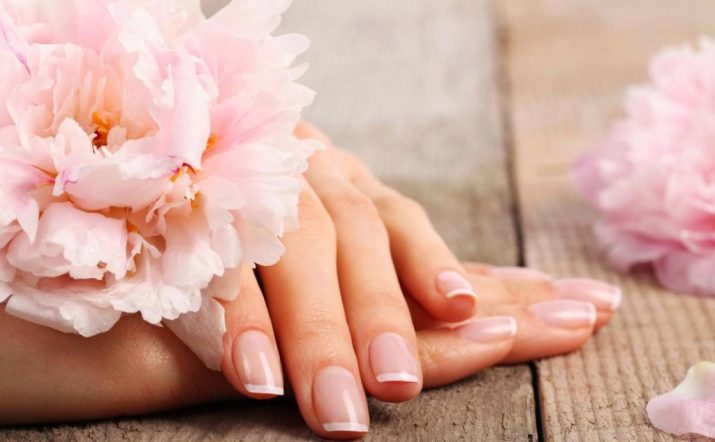
For a woman to look stylish and attractive, it is not necessary to spend energy, time and money on visiting beauty salons. You can create a unique fashionable image at home. In this article we will tell you how to make fairly light gel polish drawings and what you need to do.
Required tools and materials
To implement a high-quality manicure, you should stock up on all the necessary tools in advance.
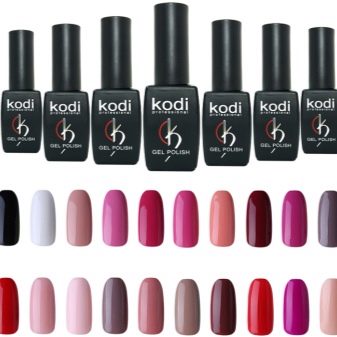
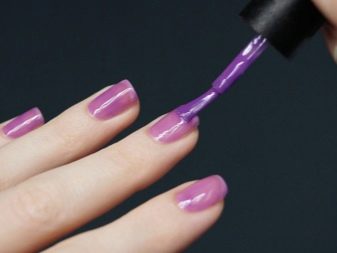
- Colored varnish or acrylic paint. These options are needed in order to give the nail surface the desired shade and to embody a creative pattern. Acrylic paint has more saturated pigments. It is intended for artistic painting. If you want to make drawings with multi-colored gel polish, then remember that its shades should differ from the main coating by at least a couple of tones. Then the composition will line up consistently and beautifully.

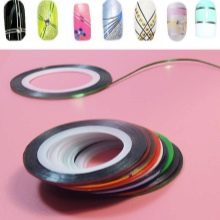
- Necessary elements for the embodiment of a particular design. These can include stencils, stickers, scotch tape, and many other items. Everything will depend on the drawing that you are going to embody.
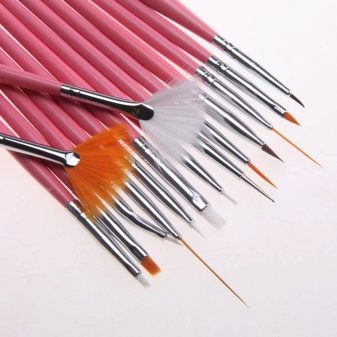
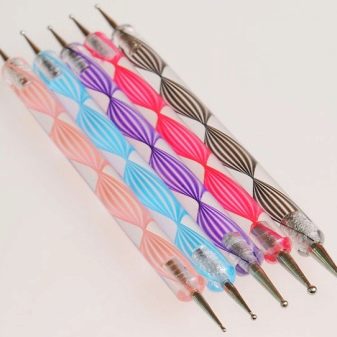
- Brushes. They can be thin, thick, short, long. They will help to clearly draw the necessary elements. You can also stock up on a needle or pin for smaller parts or a toothpick.

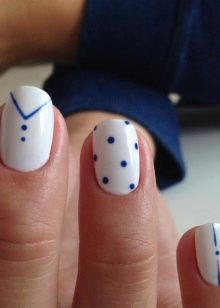
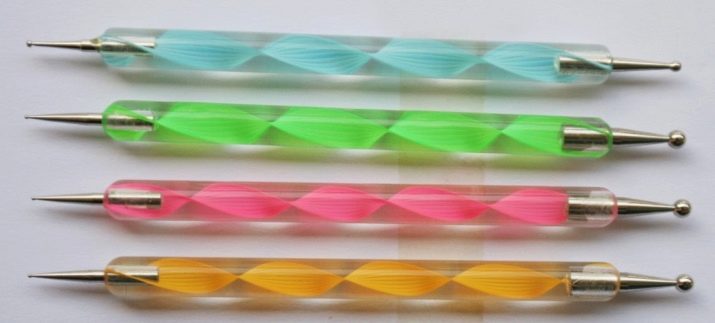
- Dots. This item is an essential attribute of a beginner. It has rounded tips. With the help of dots, you can easily and simply put round drops on the surface of the nail plate.This will allow a person with no artistic experience to create a real masterpiece on the nails.
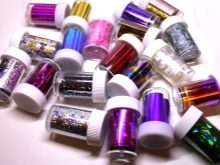
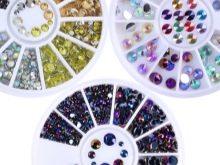
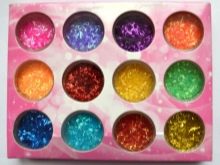
- Decorative items. These can include foil, rhinestones, sequins, glitter. First, you should choose a suitable design, and only then proceed to its implementation.
At home, you can find various materials at hand, which will also become assistants in the creation of creative nail art.
For example, dots can be replaced with invisible or sewing pins with different tips.
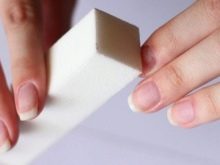
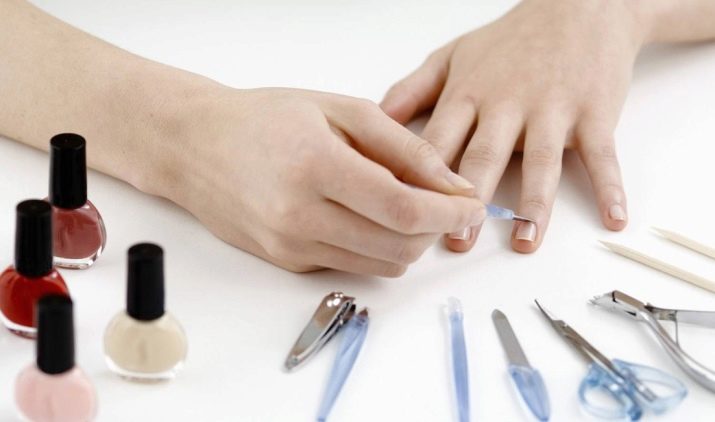
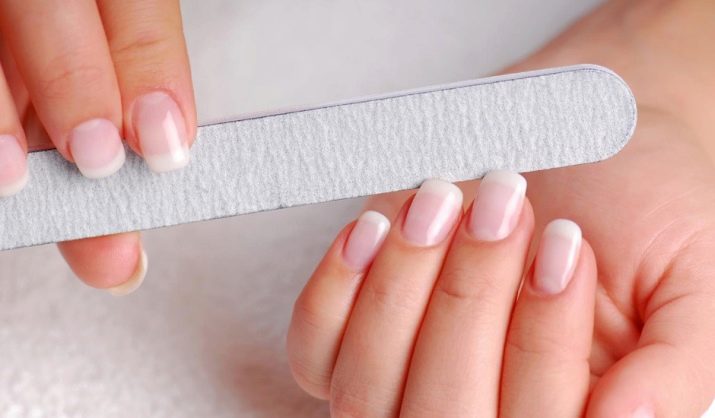
Before you start making drawings, you should take care of the fingers and the surface of the nail plate. Nail art will be perfect when your hands are perfectly finished. This will also require certain quality tools.
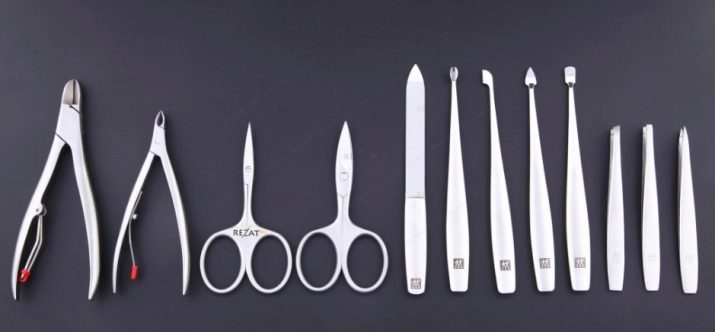
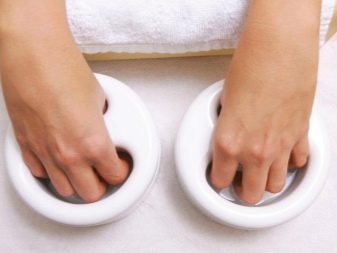
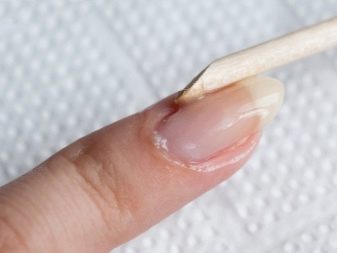
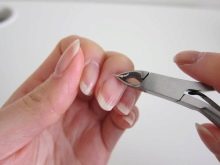
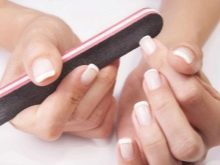
First of all, this is a small container with warm water, where you will soak your hands, preparing them for processing. Then an orange stick. With its help, you can gently push back the cuticle without damaging the nail plate. Excess skin is removed with tweezers. With the help of a file, the nails are given the desired shape. And their surface is polished with a buff.
You should not be careless about the preparatory stage of processing and move on to design faster. Indeed, the durability and accuracy of the manicure will depend on how well the nails are worked out. Therefore, spend your precious time at this stage, so that later you will not regret the efforts made.
The easiest ideas
Today you can find the most creative at the same time uncomplicated ideas for gel polish manicure. Below is a step-by-step description of how you can make this or that design, what elements and fixtures will be required.
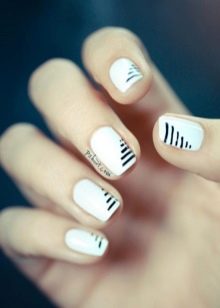
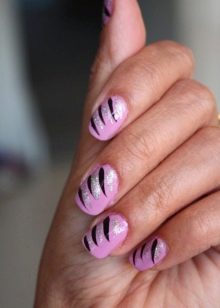
Abstraction
Simple nail art can be done using this technique. Even a novice master will cope with this. You do not need certain skills and a lot of time. A design like this can look cute, stylish, shiny - it all depends on your preferences.
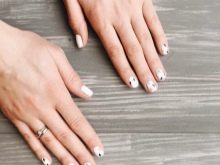

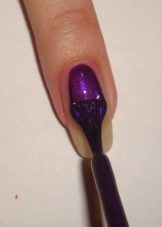
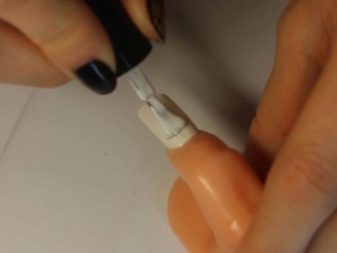
To embody a stylish design, you will need a base, gel polishes of a certain shade, a needle or toothpick, a cotton swab and a lamp to dry the layers. If you want to create beauty on your nails yourself, then you should start with simpler drawings. Gradually, it will be possible to draw complex elements.
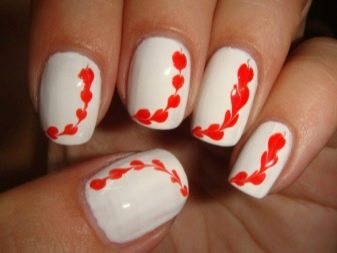
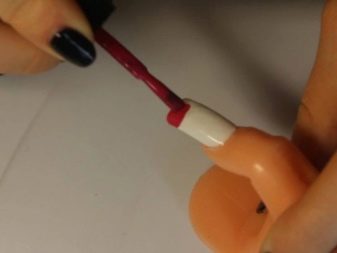
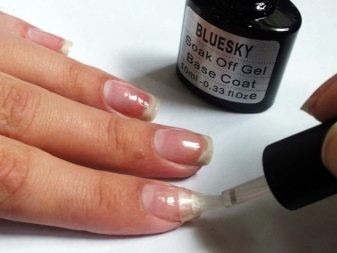
Cover the nail plate with a base and dry in a lamp. Then apply your preferred shade of gel polish. Without letting it dry out, you should put three or four dots in the center. Their location depends on the length of the nail. Take a needle and carefully connect these points in the same direction. You can draw a line from the edge to the hole and vice versa.
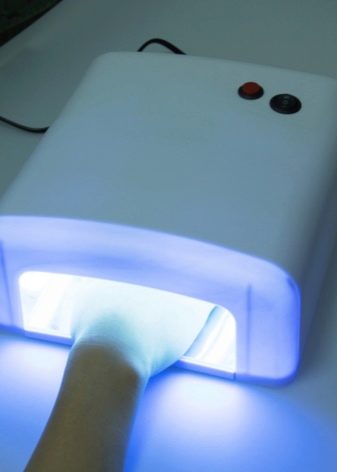
The finished drawing is first dried thoroughly under a lamp, and then fixed with a top coat.
There is also another option. Draw a vertical line in your mind that will divide the nail plate in half. Each half should be painted over with a specific color of varnish, and two fingers (for example, the ring and middle) should be painted with different colors (for example, black and red). Red dots are put on the black half, and black ones on the red. With the help of a needle, horizontal lines are drawn from the middle of the point to the center of the nail plate. In this case, the line should be slightly underestimated. So you need to go through all the points.
Well, the easiest way is to put the points in a line and connect them with a toothpick using this technology. For such an abstract drawing to look stylish and neat, the nails must be of the same length.
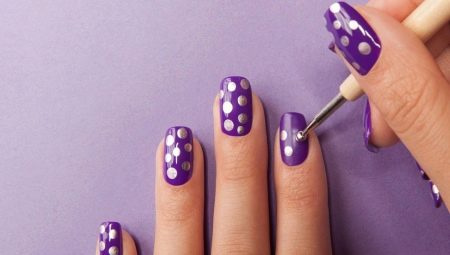
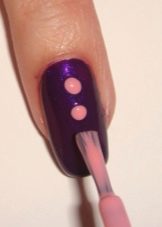
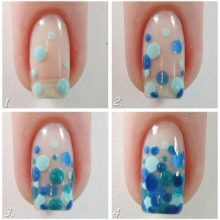
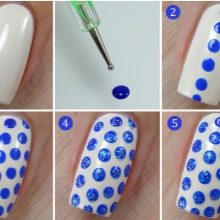
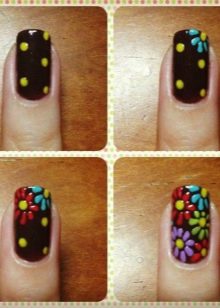
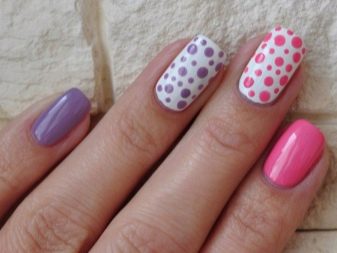
Point technique
Before embodying it, it will be advisable to practice several times, as well as choose the right tool. You will need a base, gel varnishes of various shades, dots, foil, top coat. You can choose a hairpin, pencil, pen instead of dots. They will also help you make your dreams come true.
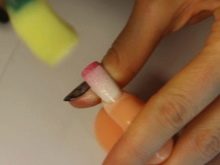
First, a base is applied to the nails and fixed in the lamp. Then the surface of the nail is covered with the selected color. It is convenient to use white, blue, beige tones. We also dry everything thoroughly.Take a piece of foil and put drops of red gel polish on it. We take a dots and use it to put red dots on the surface of the nail, repeating the shape of the hole.
After that, wipe the tool with a napkin and repeat the procedure, but with a different shade of gel polish. And so on until the end of the nail plate. The points can be different in volume. After completing the design, everything is dried in a lamp and fixed with a top coating.

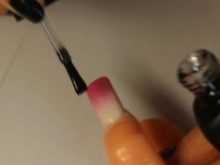
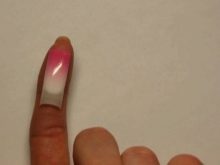
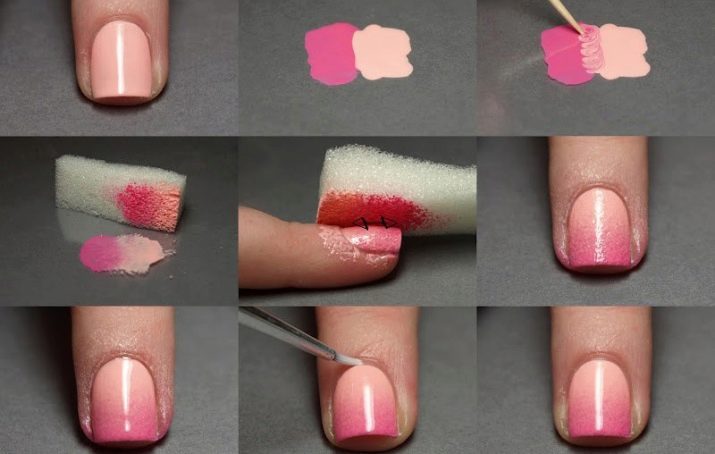
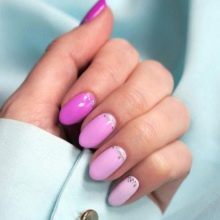
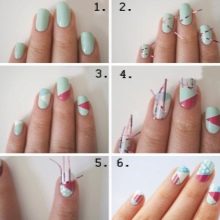
Gradient
This option is also easy to implement. You will need colored gel polishes, a base, a top, a piece of foam rubber or sponge, foil, nail polish remover, cotton swabs, and a toothpick. Apply base first and cure well in the lamp. Next, cover the nail plate with the gel polish of the selected shade. It will be the main one in our design. Let it be a lighter scale.
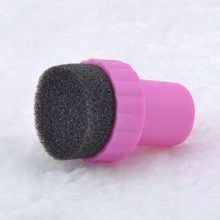
Then the foil is taken. Drop in a gel polish that is darker or more saturated than the base. Now dip the sponge into the varnish and apply it to the surface of the nail, pressing, but not hard. If you want to use not two, but several shades at once, then the next color should be applied with an overlap.
Take a cotton swab, moisten it in a special solution and remove excess varnish on the cuticle and along the side rollers.
When the design is completely ready, it is fixed with a top coat and cured in a lamp.
You can make a flow from one tone to another and in a slightly different way - immediately apply the desired colors to a piece of foil. Use a toothpick to blend one shade into another at the border. After that, dip the sponge into the gel polish and transfer the color to the surface of the nail with quick and clear strokes. The remains of the varnish are also removed, the top is applied and the composition is dried in a lamp.
You can make a gradient on all fingers at once. To do this, you need to cover the thumb or little finger with a darker color. The rest of the nail plates will have a range slightly lighter than this main color. To do this, we add white gel polish to the base shade. All this is done on foil. The colors are well mixed, and only then are applied to the fingers. So even plain coatings will look fashionable and attractive.
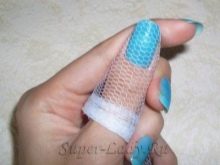
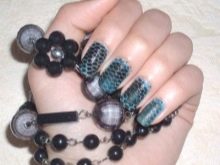
With tulle
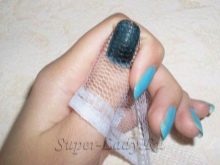
An interesting and creative moment for inexperienced nail artists will be to use a piece of ordinary tulle or lace. So you can create an attractive decor for marigolds, make them stylish and delicate. Stock up on gel polishes: base and finish. Also stock up on pretty patterned lace. Cut equal strips with similar images so as not to spoil the whole composition.
First, the base is applied, fixed in the lamp. Apply polish of the chosen shade to your nails, which will become the base. Now you can move on to the design. Take an elongated piece of fabric, hold it with your fingers, and press the lace against the surface of your nail. Apply varnish on top of it and quickly remove the material so that the varnish does not have time to seize, otherwise the whole picture will be smeared. After the composition is dry, apply the fixer.
Drawing workshops
Drawing at home is easy and simple. The main thing is to stock up on patience and good adaptations. First, you should use simple options for the embodiment of personal nail art. Gradually, you will expand the boundaries of your craft and move on to more ornate patterns. You can find a variety of lessons and workshops on detailed drawing of objects. Follow them clearly and you will get a positive result.
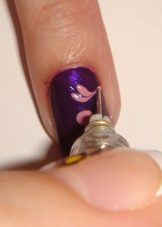
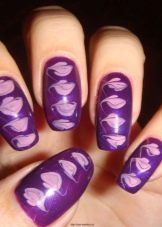
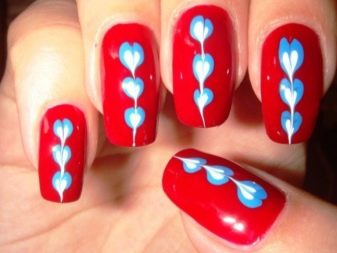
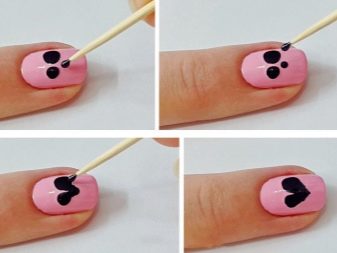
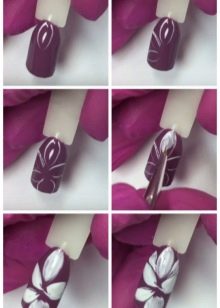
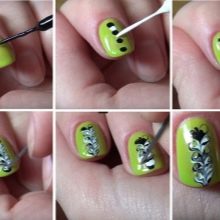
- Hearts. Created with toothpicks. Precise movement and good light are key in this design. Initially, a base is applied to the fingers, which polymerizes in the lamp. Then the nails are covered with a suitable shade. We take the foil and put the drops of the selected gel polish there, which will create the hearts. Dots are placed on the nail with a toothpick next to each other. From each mark down, slide a strip at an angle so that they connect.So you can get a beautiful heart.
Upon completion of the design, the nail plates are covered with a top and dried in a lamp.


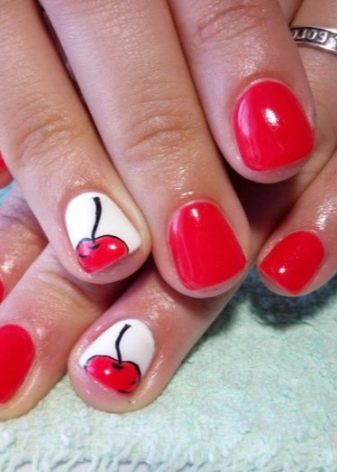
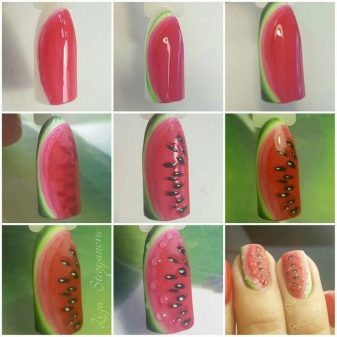
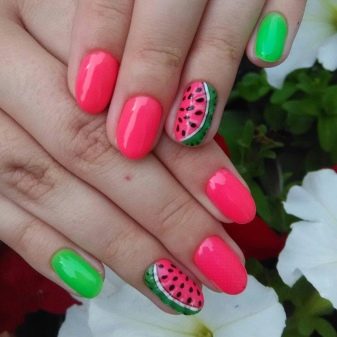
- Watermelon. To create such a pattern, you will need suitable gel polishes and a brush. Cover the nail with a pink shade. The edge of the plate is framed by a green strip. A thin strip of white shade is drawn over it, and then black dots are placed across the entire nail plate, which symbolize watermelon seeds.
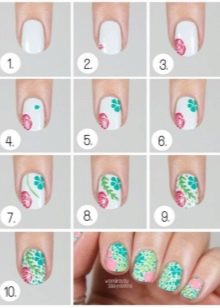
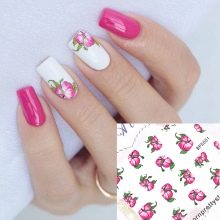
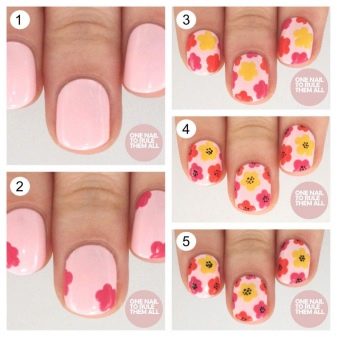
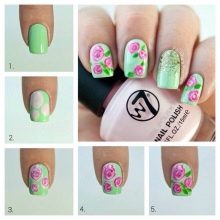
- Floral patterns. Drawing flowers is also pretty simple. At the same time, such compositions look spectacular and attractive, suitable for any clothes and any event. You should be patient and perseverant for the first time. Initially, the nails are covered with a base that dries well in a lamp. Then you should cover the nail plate with a light-colored gel polish. Use a toothpick or needle to mark a dot on the nail. It will symbolize the middle of the flower. Remove any remaining varnish from the tool. After that, around you need to arrange points in a circle that simulate the petals. Using a toothpick, draw a line from the petals to the center. This way you can make the required number of floral elements. After completing the design, everything is dried in a lamp and covered with a top.

Secrets and Tricks
Do not be discouraged if right away you did not manage to accurately embody the chosen nail design. You will need to practice a couple of times to feel confident and get creative nails. The whole procedure should be done slowly and carefully. If you are a beginner specialist, then only preparing your hands can take a long time. Take your time. Speed itself comes with experience. It is better to do everything initially slower, but better.

Do not neglect preparatory procedures. Nails and fingers need to be perfectly finished before creative designs can be applied to them. Sloppy nail plates look not only unfashionable, but also vulgar, even if they have the most stylish designs. Be sure to organize your workspace. The quality of the procedure also depends on this. The table should be spacious, where all the necessary supplies for a manicure can fit. It must be light, otherwise you simply will not notice the small nuances of the design.
Nobody and nothing should bother you.
File the nail plate only in one direction. This will avoid cracks and brittleness. At first, it may be unusual, because we are all used to sawing our nails in both directions. But with practice, you will quickly be able to do these things. A positive result will not be long in coming.
Do not shake gel polish before use. This can create bubbles that will obstruct the smooth finish. Apply the coating in a thin layer. It would be better to make several thin layers and dry each in a lamp than one thick one, which will spread and cause a sloppy manicure.

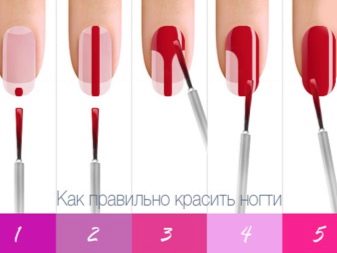
Experts strongly recommend grabbing the edges of the marigolds when staining. So you can avoid chips, and a stylish manicure will delight you for a long time. Be sure to use a fixer. It gives the coating not only a glossy shine, but also guarantees durability and resistance (of course, if all the rules of manicure are followed exactly).
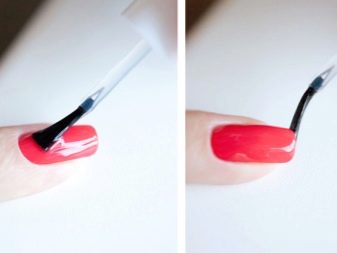
All layers should be dried well in a lamp. The clarity of the picture and the durability of the entire composition will depend on this. To remove excess gel polish, you need to use a special nail art brush. It will help to gently peel the skin and keep your hands looking good.


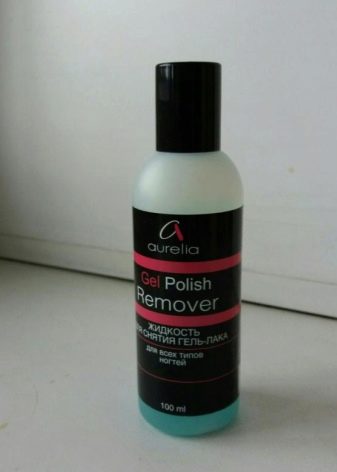
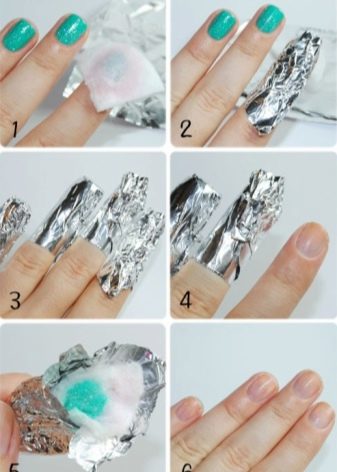
It is better to remove gel polish using professional products. Do not use a file. In inept hands (and often in skillful ones!), It can injure the nail covering. It is better to protect yourself in order to avoid negative consequences.
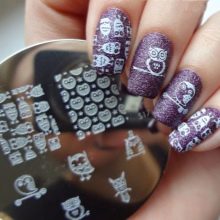
If you want to create a unique decor, but do not have the proper experience, you should start with simple drawings. You can also use the tools at hand: stencils, stamping, decorative elements. They will help you create creative manicure.
Quality materials and tools are also important. You should not buy an expired gel polish. It will not lead to the desired result. Quality products are more persistent. When drawing decor, you should pay attention to the surface of the nail. You should not plant multiple patterns on the nail plates. It will look ridiculous.
Better to accentuate a few fingers.

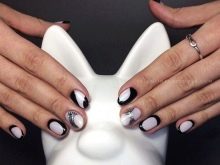
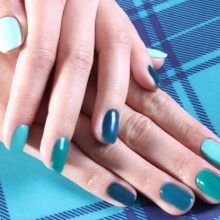
Beautiful examples for inspiration
When creating your creative manicure, do not be afraid to experiment, revealing your personality. You can supplement the examples that you have seen with your own developments, use available tools to create creative decor. Here are some examples.
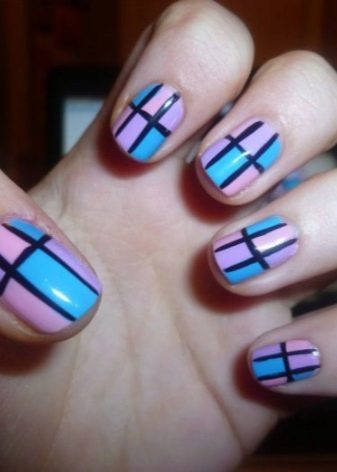
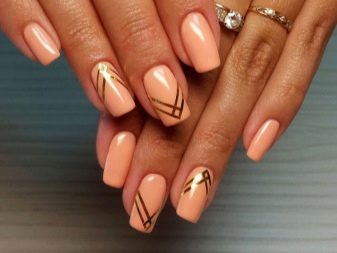
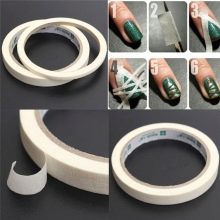
- Geometry. For this design, you can use regular tape. It is best to start with the simplest geometric shapes. Initially, it is worth applying the base and drying it in a lamp. After that, figures of the desired shape are cut out of the adhesive tape with sharp scissors. Use tweezers to stick them onto the nail plate. Cover everything on top with a different color. After the varnish has dried, you can remove the tape and cover everything with a finishing layer.

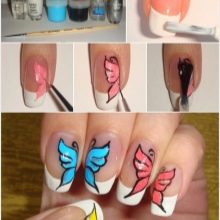
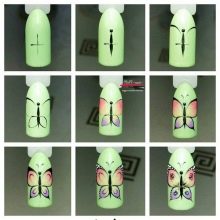
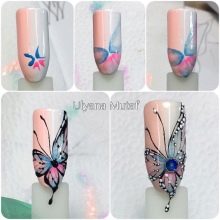
- Butterflies. Multicolored butterflies on the nails will look beautiful and unusual. They can decorate all fingers or focus on one. The nails are covered with a base coat and thoroughly polymerized. After that we cover them with the main chosen color of the gel polish. Apply five dots in white on the nail plate. The largest is placed in the center. Now, with the help of a brush, draw the wings, torso and antennae. So quickly, you can create an attractive butterfly effortlessly.
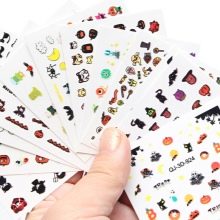
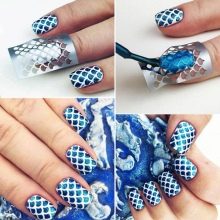
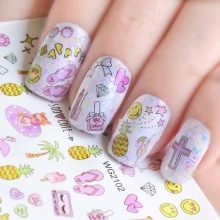
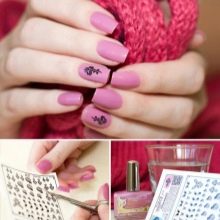
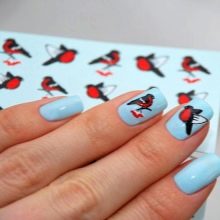
- Drawings with stickers. An interesting, effective and simple option for beginners. You can buy a wide variety of transparent stickers and place them on your fingers. It can be sliders, thermal film, transfers - there are a lot of them. After that, everything is covered with a top layer and dried in a lamp. Such simple options can decorate any look.
In this article, we looked at how to create simple gel polish drawings for beginners. Follow the selected instructions step by step and you can get the desired result. Don't forget about the quality of materials and tools. Your manicure will also depend on them. Do not be afraid to create and experiment, gain experience and embody the most creative ideas!
For information on how to make simple drawings on the nails, see the next video.


