Gel polish brush: how to choose and clean?
Well-groomed beautiful nails and manicure applied to them are an important addition to the image. Coating nails with gel polish saves time, since the composition dries much faster and lasts longer. Therefore, more and more often professionals and those who do manicure on their own give preference to it. However, the choice of tool is also important in creating a beautiful, long-lasting manicure. This article will focus on how to choose a gel polish brush and how to clean it after use.

Types of brushes
Shellac application tools have many different characteristics. Depending on the specifics and technique of manicure, the choice should be given to the brushes that are most suitable in terms of quality, size and type of bristle.
Components of the tool for applying gel polish, the quality of which is worth paying attention to.
- Brush pile. It can be natural or made from synthetic materials. Naturally, the first option will be more expensive than artificial counterparts. To apply shellac, the villi must be dense, unbreakable. The bristles should not diverge to the sides, forming a sparse bunch. The pile itself should taper at the tip, regardless of the overall shape.


Brushes with artificial hairs are less whimsical in terms of care. They are suitable for beginners or those who like to do their own manicure. In addition, a high-quality artificial pile has just the required strength and density, and retains its integrity longer.
A recent innovation is the silicone-tipped brushes. The elastic material works well with shellac. It does not clog or deform with a thick composition.This tool is easiest to clean after use and is very durable. In addition, silicone tips allow you to save on gel polish consumption.


- Tool handle. This part can be made of wood or plastic. The main criterion is ease of use. Take a brush and listen to your feelings: if you are comfortable holding it and making the necessary movements, feel free to choose it. Most often, a tool with a plastic handle is much cheaper.


- The middle part of the brush for applying varnish is a clip. This small piece connects the handle and the tip of the instrument, that is, the pile. Pay attention to whether it fits snugly against the base of the brush, whether the villi adhere well. This part of the brush should not be bent or dents. Use your fingers to lightly pull on the hairs at the tip of the brush. They must not fall out of the clip.

Pile size and shape
- For a solid finish, wider brushes are best. In this case, the varnish layer is well distributed over the area of the nail. It is also convenient to apply a base with such a tool.
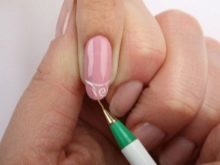
- Very small decorative details or dots are drawn with the dots tool. It is also suitable for decorating manicure with adhesive elements such as rhinestones.
- Thin, sharpened brushes are great for drawing graceful lines and patterns. Usually, a tool with a pile diameter of 1-1.5 mm is used for this.


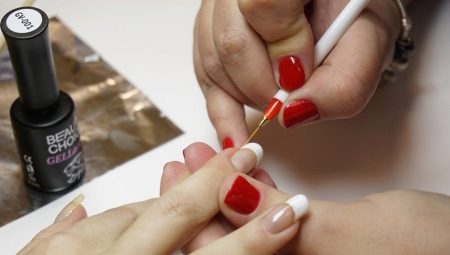
- Brushes with a slightly beveled tip are used to apply the so-called jacket. This bristle shape is very handy for creating an even smile line.
- Too large and wide brushes are not particularly convenient when working with gel polish. They absorb too much varnish, thereby increasing its consumption. And the application of shellac with such a tool is very difficult, the result most often does not look very neat.
- A brush, the tip of which is cut in the form of a semicircle or oval, stains well the areas at the base of the marigolds. It is also ideal for applying the composition under the cuticle.


Recommendations for the selection of brushes that are needed to create manicure of various types and styles.
- Neat and beautiful jacket. The brushes are best suited for the third and fourth numbers. Select the one with rounded pile. Professionals use rather thin brushes with elastic bristles to apply the "smile" line.
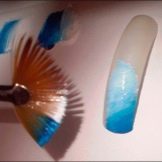
- Gradient applied to nails. In this case, manicurists most often use silicone brushes or sponges. The tip of the tool should be flat, this is the only way to achieve a smooth flow of colors and shades. For better shading of fairly thick shellac, after applying it, you should choose a brush with a soft bristle. It will not work to recreate a smooth color transition on the nail with a hard brush.


It is very convenient to purchase a complete set of manicure tools. It includes the main brushes for applying most types and styles of manicure.
Cleaning and maintenance
The quality of the performed manicure directly depends on the state of the instrument. To prolong the life of your brushes, it is important to take proper care of them. One of the main conditions is to clean the brush from gel polish immediately after the end of work, before it has dried.
Tools that can be used to clean the lint or silicone tip of a manicure tool.
- A common option, especially among professionals, are special liquids for degreasing and removing the sticky layer. Their cost varies depending on the manufacturer and the softening components included in the composition. The most affordable options can be purchased at a price of 50–70 rubles per bottle with a capacity of 100 ml. The Brush Cleaner brand is very popular. It removes gel polish and acrylic well from natural and artificial surfaces and materials.


- At home, if you don't have a special liquid on hand, you can use alcohol.It will also do a good job of cleansing the lint.

Procedure for cleansing the brushes after applying shellac.
- Pick up a small, flat glass container. Pour some of your chosen lint rinse into it.
- Dip the brushes into the container so that the product covers the bristles. Top up as needed. Leave the tool on for a couple of minutes to soak the bristles slightly.
- Gently move the pile along the bottom of the container, trying to do this on each side.
- Remove the instrument from the container of cleaning agent and rinse it under warm water.
- Take tissue or paper napkins, dab some moisture on the nap.
- While the brush is still wet, gently reshape the tip of the brush. If this is not done, the hairs may become locked in a curved position and the pile will lose its contours.


Make sure brushes are completely dry before storing them in a case or other covered storage area.
Removing cured gel polish from the brush.
- Use a degreaser and tacky remover. Soak the instrument for 15–20 minutes.
- After the fluff has softened slightly, remove the brushes from the liquid.
- Use pressure to fan the tip of the brush.
- Next, you need an orange stick with a beveled tip, which is used to move the cuticle. She needs to carefully remove the softened gel polish remaining between the hairs. The work is rather painstaking and slow.
- The washed brush is rinsed under running water, dried and put away for storage.

To avoid ruining your gel polish brushes by trying to clean them, keep the following tips and cautions in mind.
- In no case should you use acetone to wash your brushes, which is used to remove and dissolve regular varnish. After contact of this substance with the pile, the tool will definitely become unusable. Natural bristles especially suffer from acetone.
- Do not try to soak the brushes in boiling water or very hot water. Artificial pile instantly twists in different directions, and the instrument turns into an ugly broom.


Do not rub the fluff of the brush on the napkin, just blot the entire tip.
- When cleaning and washing the lint, do not apply too much pressure on the brush.
- Avoid too frequent and long (more than 15 minutes) soaking of the instrument in the cleaning composition. This greatly weakens and thinns the stubble.

Do not immerse your brushes in a bottle of cleanser, as this will degrade its quality each time. Use separate dishes.
For the care and storage of manicure brushes and how to clean the brushes from gel polish, see the next video.


