How to make a capo with your own hands?

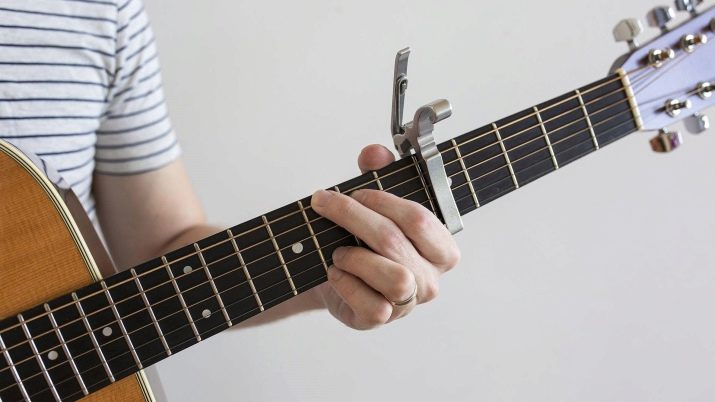
The capo is used for stringed instruments to change the key as well as the tone of the pieces. It is also necessary for performing compositions in higher tones. On the guitar, it is often used to reduce the number of barre chords. The capo itself is a clamp, which can be made in various forms.
What do you need?
Before making a capo yourself and choosing the right materials, you should familiarize yourself with what clamps are generally available.
-
With adjustable strap. It has a simple structure and an affordable price. Usually made in the form of a rubber-coated metal plate. To attach it to the guitar neck, a tightening strap or elastic is used. The design of such capo is very wide.
Among the main advantages, it is worth noting the low weight, ease of fastening on the frets, the ability to adjust to the neck width. The disadvantages include a short service life.
-
Screws are very popular with guitarists. The structure of such clamps may differ, but the installation principle is the same: it is attached to the neck in the open position, and then fixed with a screw. The service life of this type is longer, but more effort must be made when tightening. It is also inconvenient to take it with you.
-
Spring loops are also very popular and are built on the principle of a clothespin. Most guitarists love these clips as they are easy to attach and remove. However, finding a well-built spring capo is not easy. This is necessary so that the pressure on the strings is even, and they do not make rattling sounds.
-
Pins with detent-teeth are the least common. This is due to the fact that they are made of plastic and are fragile.
-
Spiders are similar to spring spiders. Each of the "legs" of such a clamp is installed on a separate string.


It is undeniable that a store-bought capo is better than a home-made capo. But sometimes there are reasons why he is not available, and then imagination and skillful hands come to the rescue.
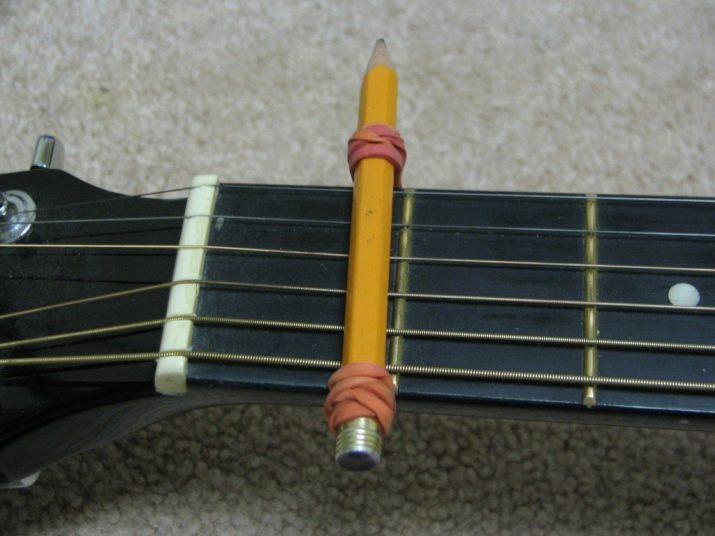
The easiest and cheapest option for a guitar can be made from a pencil and a regular rubber band. Most often, these items are already at hand, and if not, then they are easy to purchase at any stationery store.
The elastic can be replaced if desired (especially at home) or if it does not hold tightly to the neck. For this, some take a very tight elastic band or fold a weaker one in two or three layers. Moreover, both stationery elastic bands and hair accessories are equally well suited. In addition, you can use a tape, cord, soft wire.

Do not replace your rubber band with something as hard as wire. This is because it can damage the bar.
The pencil can also be successfully replaced. For example, a regular pen, lighter, felt-tip pen, or just a thick stick will do. However, it must be borne in mind that dents can form on wooden objects over time. As a result, the fixation of the strings will weaken and the desired effect will not be obtained. Some craftsmen make homemade capo from a clothespin.


Manufacturing scheme
It is not difficult to make a capo at home, but keep in mind that it is only suitable for clamping all six guitar strings. If only partial clamping is needed, then a store device should be preferred. As a rule, every experienced guitarist has one, but sometimes he is absent at the right time and you have to do it yourself. Even most novice performers know how to make a convenient clip from available tools.

A device of two rubber bands and a pencil:
- fold the elastic bands twice in two layers;
- put the resulting design on one of the sides of the pencil;
- the pencil is attached to the neck of the guitar, and the rubber bands are wound around the other end.


In order to make the pressure tighter, you can wind tape around the pencil. Scotch tape will also help if the neck has a slightly convex shape. The sound with such a capo will be clear. However, you should not use it often, so as not to spoil the instrument.

Installing a homemade capo
Regardless of whether the string clip is made by yourself or bought from a store, it should be located on the zero side of the nut, as close to the fret as possible. Many people make the mistake of placing the capo in the middle of the fret. As a result, the sound is wrong. Do not use too much pressure on the fretboard to avoid overtightening the strings, which also distorts the sounds.
As soon as the capo is installed, you need to immediately check the tuning of the guitar. Particular attention should be paid to the scale so that the system does not "float". Of course, if the instrument is of high quality, then this may not be the case.

It is important to learn how to properly attach the clip to your guitar to avoid damaging the neck and strings. It should be borne in mind that the one in which the capo is installed is the first. When raising the key of the guitar, the frets should be counted up to that pitch. Moreover, it must be borne in mind that one fret is a half tone. Better yet, use a special table that lists the keys for the guitar.
The best option for the location of the capo is not on the fret gate, but directly in front of it. This will make the sound brighter and smoother. But do not remove the clamp from the nut at a great distance, so that an additional metallic sound does not appear.
Most of the clips should be placed on the neck of the guitar from top to bottom. This will point the mount up. This is because the greatest pressure occurs at the base, where the three bass strings are located.After all, the greater the thickness of the string, the more pressure must be exerted on it. It is worth noting that this is very difficult to do in order to get a clear sound.
For information on how to make a capo with your own hands, see the next video.


