Repair and restoration of guitars
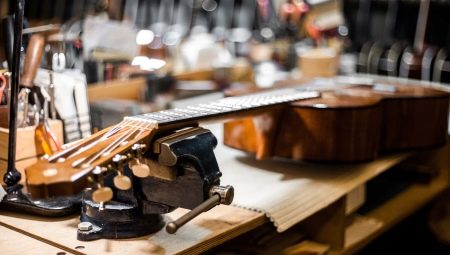
Do-it-yourself repair and restoration of guitars are relevant when the frets and other structural elements of musical instruments fail. Judging by the reviews, even experienced owners rarely know about what composition can be used to seal the cracks on the case or hide the chips. A detailed overview of how to troubleshoot various faults in acoustic guitars and electric guitars will help to understand all the important points.


What might you need?
There is a specific set of tools and materials that you may need when repairing your own guitars. This includes accessories - brushes or containers for consumables. It is better to repair deep damage epoxy resin or glue based on it. For surface restoration of the coating, transparent varnishesdesigned for woodwork.


The main list of necessary components for repairing guitars looks like this:
- clamp;
- screwdriver;
- tweezers;
- small files;
- fine sandpaper;
- tuners of the appropriate type;
- set of strings;
- joiner's glue;
- epoxy resin;
- GOI paste for polishing.
You can only glue the body of the guitar with minor damage. Serious damage cannot be repaired outside a specialist workshop. Also, when working with paints and varnishes, a cotton rag may come in handy.

How do I repair acoustic guitars?
If an acoustic guitar breaks down, self-repair, if you believe the reviews of the owners of such musical instruments, may well be crowned with success. At home, you can solve many problems - replace the strings and tuning pegs, restore the body if part of the soundboard comes off. Before proceeding with the repair of a classical guitar, it is worth conducting a thorough diagnosis, establishing the localization of damaged areas, and also remembering the order of assembling its elements if they are to be dismantled.

Replacing strings, tuning pegs and pads
The main type of self-repair of guitars is the replacement of external elements that are not related to the structure of the body. You can do the following with your own hands.
- Replacing strings. Even if only 1 failed, the complete set will have to be reinstalled. This is due to the fact that the materials for their creation vary from different manufacturers. In case of mismatch, loss in sound quality is inevitable. The strings are taken from the same set, subject to recommendations for their location, they are adjusted and tensioned to the desired level.
- Replacement of pegs and pads. It always starts with the complete removal of the strings. Then the pegs and pads are loosened at the attachment points - in some cases you will need a screwdriver. After that, you can start replacing. When selecting new elements, it is important to make sure that the diameter of the rod in them will be slightly larger than in the old ones, otherwise the tuning pegs will dangle.


To cope with this work is quite within the power of every owner of an acoustic guitar. In the process of replacing elements, it is important to follow the order of actions. For example, strings are easier to remove and replace 1 at a time, especially if this is the first time.
Sealing metal sills
With prolonged use of a musical instrument, metal saddles may lose their tightness. Epoxy resin and needle files will help to correct the situation. It is not difficult to glue the bottom or top element if you follow the instructions.
- Carefully remove the nut from its seat. It is important not to apply too much force, otherwise the cracked wood may crack.
- Process the attachment point of the part with triangular files. Grinding begins with a coarser grit and finishes with the finest file.
- A portion of the epoxy is being prepared. It is important to observe the recommended proportions of the hardener and base so that the setting time of the composition corresponds to the one declared by the manufacturer.
- The prepared nut seat is filled with epoxy resin. The metal bar is installed in place, tightly fixed with a clamp.
- After the adhesive has solidified, the holder is removed. Excess, beads of resin are removed by grinding. Large defects are removed with a file, small ones - with sandpaper.


When jags and other damages appear on the surface of the metal sill, they are sanded down. The work can be done with fine-grain sandpaper. Then processing is carried out using GOI paste to shine. Finishing is done with soft flannel or woolen fabric. If whitish spots appear on the glue layer when processing the surface of the wood, they can simply be painted over with a gradient that is suitable for the composition.
You can apply the mixture with a brush or cotton swab.


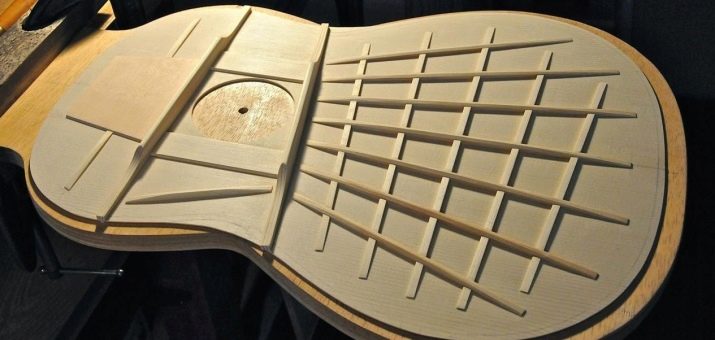
Attaching the Wooden Bars to the Inside of the Drum
A common breakdown in acoustic guitars is the material drying out over time, with internal wooden bridges loosening and falling out of the joints. In this case, the successful restoration of the instrument is also possible at home, without visiting a workshop. Provided, of course, that the hand is narrow enough to fit through the hole in the deck. In other cases, a complex and lengthy dismantling of the body elements will be required, which, if mishandled, will negatively affect the sound of the guitar.


The procedure for self-attaching the wooden jumpers in the drum in place will be as follows.
- Remove the strings from the deck surface. This is necessary for free access to the hole in it.
- Armed with sandpaper, sand the attachment points of the wooden bridges inside the drum.
- Treat the surface with acetone or another compatible solvent.
- Prepare wood glue. Apply it at the attachment point. Press the strip firmly, leave it in this position until the glue is completely dry.
- Reinstall the strings.
It is worth considering that guitars with adjustable string heights require a complete dismantling of the neck prior to such repairs. In classic tools with a glued type of construction, there are no bars.
Solving other problems
Other breakdowns that the owner of an acoustic guitar may encounter include damage to the spring or the head of the tuners, incorrect fret positions, cracks and dents on the surface of the body. It is quite possible to close up "cosmetic defects" in the construction of a guitar deck correctly and accurately without much effort. But fixing the instrument if the neck is broken, or replacing the cracked fingerboard with it will be more difficult, but these works are also quite within the power of a home craftsman.

The most common problems and how to solve them deserve closer attention.
- Deformation of the neck. It is directly related to the violation of the operating conditions of the musical instrument. Increased humidity causes the bar to lose its shape. Adjusting its position with an anchor or completely replacing the part will help to solve the problem.
- The strings are too high or low. The problem is solved by adjusting the position of the neck anchor. If this does not help, you can replace the metal nut with a lower or higher one. In addition, sanding the grooves in it can help. If the strings are too high, sanding the holes below them with fine-grained sandpaper may solve the problem.
- Burr formation on the frets. They create serious discomfort while playing. If roughness is felt when touching the bar with the palm of your hand, they can be easily removed by machining with a needle file or a conventional diamond-coated nail file.
- Damage, need to replace frets. They are removed with pliers, you need to act carefully, trying not to disturb the lacquer coating of the lining. Then a new set of frets is prepared, the places where they are installed are cleaned. Installation of new elements is carried out using a mallet. On the sides, the surface is grinded down to the level of the neck.
- Cracking in the pad. Such damage can be repaired with fine wood dust remaining after sanding the material. Before starting work, it is necessary to dismantle the strings. Then the pad is moistened so that the crack opens better, the damaged area is carefully filled with wood components, covered with a thin layer of cyanoacrylate-based glue, and after the hardening of the composition is completed, grinding is performed.


These are the basic jobs you can do when repairing a guitar at home. All of the above troubleshooting steps apply only to acoustic instruments.

Can the electric guitar be repaired?
Do-it-yourself troubleshooting in an electric guitar requires a lot more experience and knowledge from the master. However, some manipulations can still be performed independently. It is worthwhile to prepare a soldering tool and the necessary consumables for it in advance, to allocate a workplace. Most often, repairs are required when pickups fail.

The procedure in this case will be as follows.
- Find the closed compartment on the back of the instrument. Remove its cover from the mount.
- Switch on the soldering iron. Heat it up to the set temperature.
- Unsolder the pickups at the connection points, bringing the tip of the instrument to them. Light pressure may be required.
- Remove all unnecessary elements from the guitar deck. Remove the previously installed pickups after unsoldering.
- Firmly pull the cables remaining from them into the electronics compartment. This will make the work process more comfortable.
- Install new pickups by soldering them to the wires.
- Check the correctness of the work. To do this, the guitar is connected to the network, the sensors are tapped. In this case, sound should come from the speakers.


Once the repair is complete, you can reassemble the guitar by placing the pickups in the compartment and then replacing the cover. All work is carried out with the device disconnected from the network. Then you can replace the strings and other previously dismantled elements.

Features of the restoration
Unlike local repairs, restoration involves a more global renewal of the appearance or structural elements of a musical instrument. It is quite possible to restore an old guitar even with significant damage. For example, if it cracked, the sills began to recede. A more serious restoration will be required when separating the shell from the front or back of the case.
You will not be able to cope with the task on your own if the wood is delaminated, cracked in the area of the voice pick, or the heel of the neck is broken off.


Chips on the lacquered surface, the formation of small cobwebs of cracks in the lacquer - these are the main problems that a master may face when restoring a guitar at home. In this case, the old coating must be carefully removed with a suitable solvent. It is only necessary to work with chemical compounds in well-ventilated areas.

New coatings can be applied to the prepared wooden body in different ways. For example, opaque bursts (gradients) in this regard differ little from ordinary enamels. It is enough just to cover the wood with a primer, let it dry, then apply decorative enamel of the desired color in 1 or 2 layers. The lacquer finish will be transparent.
Working with more complex gradients is quite different. They have a translucent structure with varying degrees of density and are applied in a thinner layer. The finishes range from dark to light, with a matt or glossy finish after finishing. Special formulations ensure not only the maintenance of the required level of humidity in the deck, but also high-quality acoustics, spreading sound, rather than absorbing it.


Restoration of medium complexity, available for home use, includes the following types of work:
- full body painting;
- elimination of small chips;
- repairing small cracks.

Even minor damage to the body of a musical instrument requires many hours of restoration. Not every master can cope with this work. In case of more serious damage - warping, deck separation - you will have to contact a specialist.

The following video will tell you more about the restoration and repair process of an acoustic guitar.


