Making pots from plaster with your own hands

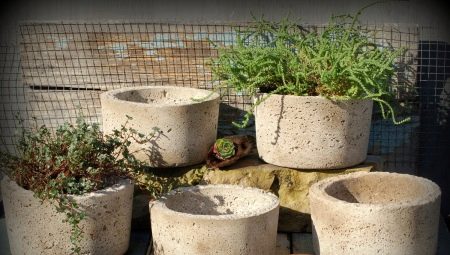
Making a pots out of plaster with your own hands can be very interesting and useful if you figure out thoroughly how to make a swan flower pots according to a master class at home. At the same time, it is necessary to find out what kind of gypsum should be used for the manufacture of decorative pots. A separate hot topic is the creation of a pots-cat.


Which plaster of paris to use?
Graceful flower pots immediately attract attention and are very convenient in everyday life. But spending money on their purchase is not very reasonable. It is much more correct to study the recommendations for making a decorative pots yourself. Gypsum products are the most complex, much harder to work with than models made from plastic bottles or other materials, but the more exciting such work will be, and the more valuable the result. For work, you only need dry gypsum plaster (including the one that is sold under the name alabaster), but medical plaster is not suitable at all; sculptural is not bad, but very expensive.

How to make it in the shape of a swan?
There are many options for creating do-it-yourself plaster pots at home. However, even the largest originals will agree that the graceful swan figurine will perfectly fit into any composition and will satisfy the most stringent requirements. At the same time, in order to get a really good flower pot, it is necessary thoroughly study a master class. The technology is simple and good only with a detailed step-by-step execution.

The size of the figure is determined at your discretion. However, for balconies and loggias, it is advisable to create smaller pots. It is quite enough if 2-3 flowers can be planted in them. For work, you will need, in addition to the plaster itself:
- 5 liter plastic bottle;
- unnecessary barbecue grill;
- a set of acrylic paints;
- craft varnish;
- pharmacy bandages.
The gypsum is kneaded strictly according to the instructions. You can add new portions only as needed.


One side of the bottle is simply cut off. A wire is introduced into the lid, bent in the manner of an arc. This will be the graceful swan's neck.
Dry sifted sand is poured into the bottle so that it is more stable and mechanically more stable. Then you need:
- cover the main block of the structure with plaster and let it grab;
- after setting, immediately add a new layer;
- introduce a pair of identical gratings along the edges (immersed in plaster of Paris and bend slightly inward);
- fully overlay both blanks with gypsum (it is better to work with your hands, making sure that the metal does not shine through at all and does not even be guessed through the stone layer);
- cover the neck and head of the bird with plaster, fixing the material with a bandage;
- add plaster in different places with a paint brush to achieve a visual resemblance to a swan, smooth out the shapes;
- leave the resulting pots to dry for at least 24 hours (if necessary, the figure is covered with a temporary canopy if the weather deteriorates).


But the stone planter itself is only a basic base. In its pure form, it looks completely unattractive. The surface of the pot is completely covered with water-impermeable varnish, and its head is painted with acrylic paints. Then you can pour soil into the bottle and plant the desired flowers there. Some people just put a small pot inside - it turns out just as good.


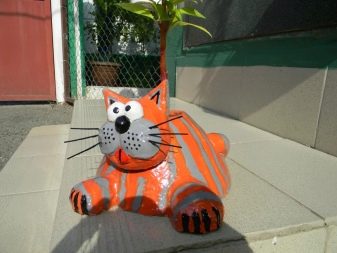
Making a pots in the form of a cat
These flower pots look just as good. And therefore, a detailed description of their creation is also worth familiarizing with. The matter will not be limited to one plaster. As in the previous version, you will need a large plastic bottle. You will also need to work:
- cement;
- good sifted dry sand;
- water;
- metal wire (not too thick or too thin);
- varnish;
- building paint;
- wooden slats.


The base of the flower garden is a plastic bottle. It is cut off as they see fit; the cement will hold onto the plastic thanks to the tightly wound wire. Then they prepare the rack frame and attach the reservoir to it thoroughly. Then you need to act like this:
- make a concrete solution similar in consistency to thick sour cream (the same consumption of sand and cement is required);
- wear rubber gloves;
- taking a little concrete in your hand, put 30 ml of gypsum in it;
- kneading the mixture in your hands, roll up sausages in the manner of and fasten to the frame;
- continue this work until an even, smoothed figure with all the necessary bulges appears.
But this is only the body of the cat. Its muzzle is created from small balls of solution. You need to work in the same way as with ordinary plasticine. Pre-wetting of the surface helps to improve the retention of small parts. For your information: if your hand is wet, it will be more convenient to polish the surface of the planter.


The almost finished figure should dry thoroughly. Therefore, it is covered with plastic or cellophane wrap for 72-96 hours. On the first day, the composition is systematically moistened. As soon as it dries, take an emery and sand the surface. The grain of the sandpaper does not matter.
To paint a garden cat, use enamels or water-based paints. The use of car paints is also allowed. The next step, in any case, will be varnishing.
For your information: the plaster-cement planter can suffer from extreme cold. Therefore, it is better to transfer it to a heated room for the winter.


Useful Tips
It is very important to take care of the strength of the structures. Therefore it is required strictly observe the recommended proportions of different components. Since gypsum and solutions with its addition set quickly, you need to work very clearly. It is better to allocate a completely free period of time and free all the space from any foreign objects.And even in this case, it is more correct to work one by one with small portions.
The less water (within acceptable limits) is used, the stronger the pots will be. But only the use of plasticizers will make it possible to compensate for the dryness of the solution. It is very important to clearly determine in advance the dimensions of the pots to be created along all three axes. If a simple gypsum solution is created (without cement and other components), then the ratio of gypsum and water is ideally 4 to 1. In terms of density, this solution is close to thick sour cream.

Step by step, the technology for making a simple plaster pot is as follows:
- a large box from the inside is greased with sunflower oil;
- the smaller box is lubricated outside;
- prepare the place of work by spreading newspapers;
- plaster is poured into a large box;
- a small box is placed inside a large one;
- press a little to make the bottom smoother;
- when 24 hours have passed, take out the inner box;
- cover the outer walls with white acrylic paint;
- decorate the surface of the flowerpot additionally at your discretion.


Next, see a master class on making plaster pots.


