DIY flower pots
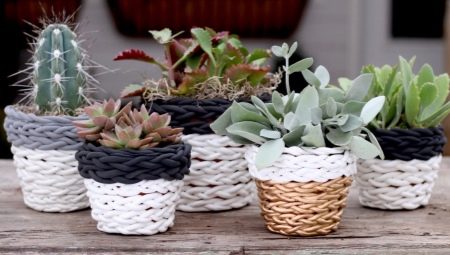
Flowers are essential for everyone today. They not only play the role of an eco-filter, but are also able to change the interior look of any room. It is these criteria - and the love of wildlife - that make many people set up mini-gardens on balconies and window sills. However, do not forget that the beauty of flowers lies not only in their leaves, buds and inflorescences, but also in containers for growing them. Pots that do not match in design will create confusion in the mini-garden. That is why it is recommended to use "one-caliber containers" with a decor suitable for the interior of the room or balcony. In modern flower shops there is a wide variety of flower pots, but gardeners are trying to create these on their own, especially since it is a pleasure to make containers for growing flowers.


How to make from clay?
The best material for making flower pots is clay. Since ancient times, clay pots have been in great demand among gardeners. And today they are an element of luxury, even a mini-garden window sill.


Modern variations of clay pots have no standards. These containers can be square, round, rectangular or even triangular in shape. The same goes for sizes. The gardener only has to choose the right model, but not all flower lovers like factory-made clay pots. They are inconspicuous, of the same type, there is no brightness and some kind of zest in them. That is why gardeners begin to create unique and inimitable containers for indoor flowers with their own hands.Of course, it will not be possible to make a design masterpiece the first time, especially for those who do not have the skill of working with clay. But after a couple of lessons, they will definitely create a stylish clay pot.


Well, in order to understand how the process of working on its creation is proceeding, it is proposed to consider one simple and at the same time entertaining master class.
For work, you will need clay, a container that corresponds to the desired dimensions of the pot, a sharp knife, a kitchen rolling pin, a brush, paint and varnish. Having collected everything you need, you can start creating.
- First of all, you need to make the bottom of the flower pot. To do this, a piece of clay is rolled out on a flat surface, a prepared container is applied on top, along the contour of which the clay layer is cut.
- The remaining piece of clay is crumpled, rolled into a long sausage, then pressed down and cut into a flat rectangle.
- The resulting clay plates must be connected to the base. The fixation should be as strong as possible.
- Using water, it is necessary to smooth the resulting seams.
- Further, the craft is set aside until it solidifies completely. Drying time depends on the clay itself.
- After drying, the workpiece goes into the stage of decoration. Initially, the paint is mixed with water, after which the bottom of the container is covered with it.
- Black paint is sprayed over the applied background. To do this, you can use a toothbrush or a brush with a hard bristle.
- After the paint has dried, the pot must be varnished.
- If the clay has not gone through the firing procedure, a container should be inserted inside the craft, in which the flowers will grow.


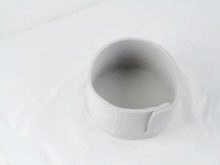


The original pot made of cement
Cement flower pots are incredibly spectacular. At the same time, it makes no difference whether it is a large outdoor container or a small pots on the windowsill. And most importantly, you can make such an unusual pot at home, using the most common set of tools and materials, or rather: old tulle, a container for the base, such as a plastic bucket, and cement.
- It is necessary to prepare the cement mass. For this, the dry mixture is mixed with water. It is important to ensure that the consistency is liquid.
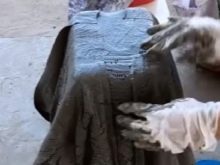
- Tulle is immersed in cement water.
- Next, a container for the base is taken, turned upside down and covered with cement tulle. This stage of work requires the master to show his creative potential. It should form nice folds in the fabric.
- Hanging corners of the fabric are thrown over the edge of the container.
- The bottom of the container, covered with tulle, must be wrapped with rope or braid.
- The tissue surface is coated with the remaining cement mixture, combined with a strengthening compound, and left alone for a day.
After 24 hours, the fabric pots can be painted in any color and, after drying, can be used for their intended purpose.




Making from scrap materials
Today, you can create beautiful flower pots from a wide variety of objects and things. The best option would be clay, earthenware and porcelain containers. This can be: a teapot, salad bowl, even coffee cups. These varieties of homemade pots will easily fit into the interior of any room. In the conditions of a summer residence, enamel dishes, teapots, pots, buckets and much more are used as containers for flower pots.


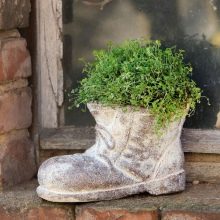
Containers for growing flowers made from old shoes are quite unusual. To create a drainage system, it is enough to make holes in the sole. The front part of the shoe pot can be painted, sheathed with fabric material, or simply washed.


Another unusual idea for a homemade flowerpot involves the use of vinyl records. They heat up, after which the master must give the soft material the desired shape for the planter. The finished container can be painted, but most gardeners prefer to leave the crafts in black.You can decorate the walls of your vinyl pot with CDs.


As a basis for a flowerpot, you can use an old suitcase, a broken umbrella, cans, containers for canned food and much more. All this can be decorated or left in its original form.


From plastic bottles
Flower pots can be crafted from a variety of things, including waste, with plastic bottles being the most common. For work, you can take both small containers of 0.5 liters and 5-liter bottles. Well, there are a lot of ways to create such pots, the main thing is to follow the step-by-step instructions for each individual master class.
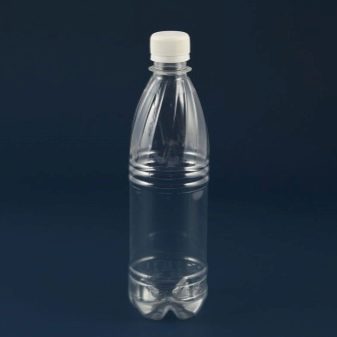

The most common way is to create 2 pots from one bottle. To work, you will need an empty 1L bottle, glue, paint and a CD.
- The bottle must be cut in half. You can use a straight line, or you can make wavy edges. So two blanks are obtained, they will also be the bases for flower pots.
- One half already has a solid bottom. For the second part, you need to screw the cap firmly and glue it to the center of the disc.
It remains to paint the finished bases in the desired color and decorate according to your own taste.


From tin cans
Making flower pots from a variety of useless things is considered the best way to recycle a lot of waste. You just need to connect your imagination and, having collected the necessary tools, spend your time with benefit and enjoyment. It makes no sense to list the quantitative variety of bases that can be used as flower pots. However, the best among such waste are cans.


Containers for canned food are present in every home. After emptying them, do not send the container to the trash. Using glue, laces, white enamel and colored pigment, you can create a unique flower pot. These materials and tools should be prepared in advance so that in the process of work you will not be distracted by the search for missing inventory.
- The first step is to thoroughly rinse and dry the tin containers.
- In the bottom of the cans, it is necessary to make holes through which water will leave.
- The front of the containers must be painted with white enamel and set aside until completely dry.
- In a separate container, it is necessary to dilute the enamel with pigment. The finished shade is applied to the surface of the jar in the form of an unusual pattern. It can be a chaotic mess or a specific image.
- The upper and lower parts of the harvested containers for growing flowers must be decorated with thick threads or twine. Glue is applied 1 cm from the upper and lower edges of the can, over which a rope is wound. After decorating, the pot is set aside until the glue is completely dry.
- It remains only to transplant the plants into new pots and place them around the perimeter of the mini-garden or windowsill. The main thing is to remember that you cannot put tin flower pots in direct sunlight, otherwise the containers will lose their beauty and grandeur.


From the teapot
It's no secret that indoor plant lovers always have little room to grow flowers. They regularly bring home plucked twigs of plants, which should first be planted in a small container, and after strengthening the roots, transplanted into a larger pot. And of course, under such breeding conditions, containers for growing flowers are never enough. Accordingly, gardeners have to find different ways to solve this problem. For planting, they can use different things and objects, including pots, jars.


But the most unusual and very effective option is the metal teapot.
For work, you will need the kettle itself, paint, watercolors, pebbles, glue and brushes. Stones in this case play the role of decoration, they can be changed to any other elements.
- First of all, you need to understand what the finished model of a teapot-pot will be.It is advisable to make a sketch on paper, you can build on it when creating decor. Next, you need to prepare materials and tools, without which the creation of crafts will be impossible.
- First of all, you need to wash the kettle, then degrease it. For degreasing, it is best to use a solvent; in its absence, alcohol will do.
- Next, pebbles are taken, they must be painted in the colors of watercolors desired by the master. After the paint has dried, glue the stones to the bottom of the kettle in a chaotic manner.
- After the adhesive has dried, the untouched part of the kettle must be painted with metal paint.
- The desired pattern is applied over the paint. In this case, everything depends on the capabilities of the master. Those with creative talent can get confused by complex images. If there is no art education, you can use a regular stencil.
- When the decor is finished, you can varnish the surface of the teapot, including the stones. Thus, the master protects his masterpiece from the negative effects of the sun or rain.


From the mayonnaise bucket
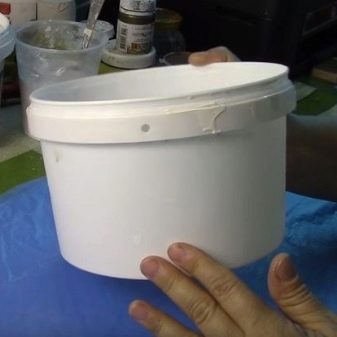
The owners of mini flower gardens on windowsills and balconies never get rid of the containers that appear. Some keep sour cream jars in reserve, others - from yogurt, and still others - tetra packets of juice. Along with these containers, lovers of home flowers keep plastic buckets of mayonnaise. In fact, it is a terrific material for making flower pots. The decorated container can be placed at home on the windowsill and in the garden at the dacha. The main thing is that you can create such a miracle with your own hands, using the simplest materials, namely: mayonnaise bucket, plaster mix, acrylic-based paints, knitted or cotton fabric, acrylic-based varnish, putty mixture, egg carton, sandpaper and glue gun.
- First of all, you need to cleanse the mayonnaise bucket from the remnants of the edible mass. Next, the surface of the container should be passed with sandpaper. It is important to achieve a strong scratch effect. Due to their presence, the most durable adhesion to the plastic surface of the bucket occurs.
- The next stage of work involves the cultivation of gypsum. The amount of the prepared mixture must correspond to the size of the plastic container. A small amount of water is poured into a deep container, dry gypsum is gradually poured into it. During kneading, it is important to mix the components thoroughly so that no lumps form. The finished mass should turn out to be thick, somewhat reminiscent of the consistency of sour cream.
- The prepared fabric must be cut into small strips. Each piece of cloth is dipped in a plaster mixture, after which it is applied to the surface of the bucket. When applying plaster fabric, you can create irregularities, make folds, or you can lay it out classically - straight. The main thing is to work quickly: gypsum dries up in a short period of time, especially when it has a thick consistency.
- After the gypsum has solidified, the surface of the harvested container must be sanded, then the front part of the craft must be covered with acrylic-based paint. At this stage, the preparation of a flower pot has come to its logical conclusion. You can start decorating.
- Using stencils and a putty mixture, a volumetric pattern or an unusual ornament is applied to the front of the flower pot.
- Next, an egg carton tray is taken and divided into cells. From each individual egg storage compartment, you need to create flower patterns. Then paint them with white acrylic and set aside until completely dry.
- Now you can start fixing the flower decorations. The main thing is to remember that the flowers should not be attached to the plastic base, but to the fabric material. Otherwise, the decorative filling of the pot will not last long.
- And now comes the climax - painting the craft.To do this, you can choose any color and even make a rainbow combination of shades.
- After applying the paint, the surface of the pot must be coated with an acrylic-based varnish. To simplify the work, you can use a spray type of varnish fixer.
After the varnish has dried, the pot can be used for its intended purpose.


From the canister
From different types of materials, you can create not only standing pots, but also hanging ones. By the way, the planter on a rope looks very impressive. The main thing is to choose the right base for the flower pot. According to many gardeners, the best option for such a craft is a plastic canister.
- The prepared container must be cut in half horizontally.
- Next, you should process the cut edges so that they are not sharp. This stage of work involves grinding with a special machine. It is very difficult to cope with this task manually.
- Identical holes must be made about 1 cm from the edge of the containers opposite each other. A rope will pass through them. If the gardener will not hang the container, then there is no need for holes.
- Now it is necessary to form suspensions, for example, in the form of loops. Thanks to them, it will be possible to hang the pots on a wire, nails and hooks.
- At the bottom of the canister, it is required to make several holes, thanks to which a competent microclimate of the soil composition can form inside the container. And of course, excess moisture will leave through these holes.
- The surface of the pots can be decorated with various techniques, for example, wrapped with twine or painted.


For information on how you can make a flower pot with your own hands, see the next video.


