What are engravings and what are they?
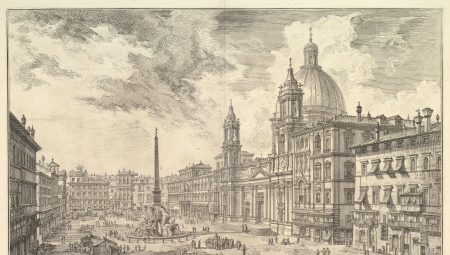
Engraving, to quickly define it, is a type of graphic created by printing. The prints can be obtained by drawing on paper from the board, and each will be unique. The engraving has a rich and interesting history, but its present is not at all covered with a layer of dust. Moreover, it is one of the affordable, yet challenging and entertaining artistic hobbies today.


What it is?
Both graphic technique and printing technology can be called engraving. In a nutshell, this is a print. The impression is made from the plate on which the drawing was cut. The word itself is translated as "cut, create a reflex." The result of such graphics will be an impression on any surface - indeed, on any (you can experiment here). Brushes were not used at all in the process of creating the image. The pattern on the plate was created using knives.
Artists - even those who did not specialize in engraving - often used this technique. For a long time, engravings were encountered very often in book illustrations, leaflets and brochures. And once it was in demand, because the number of impressions from one plate is multiple, that is, the technology was considered more than suitable for the dissemination of printed information.


The process of creating an engraving is complex and interesting at the same time. You need to tinker with the plate, picking up a knife - a very painstaking work, and then you have to be as delicate as possible with the typographic part of the process. It is necessary to wipe and rinse, roll the plate with a paint roller, and then moisten the paper, apply it, roll it under the press between a pair of machine rollers, and finally evaluate the result.And do this entire cycle several times. All this was done by hand, which is very difficult and delightful.
At one time, engraving was cheaper than illustration because the number of prints made the technique commercially viable. Today, when you can print anything and on anything, you will rather surprise the consumer with manual work. And engraving is becoming one of the techniques that make modern things unique. For example, if you cut a beautiful leaf with teeth on a piece of wood, you can create a unique pattern on a tablecloth, curtains, dress and much more with this resulting stamp.
Today, adults and children, people whose profession is connected with art, and lovers of creative experiments, who are completely far from subtle matters, are fond of stamps, which are related to engraving.


Historical background
If we turn to the first mentions of engraving, they refer to China in the 6th century. And the first, indeed, popular technique was drawing on tablets (woodcut), with the help of which stamps and text were printed, of course. The first engraved images were, as you might guess, ancient biblical subjects. But engraving reached its peak in popularity in medieval Europe: engravers practiced different techniques (the latter were actively developed and improved), and therefore engraving had its own face in different European countries. Of course, engravings of the 15th century differed significantly from ancient Chinese works - due to the religious, social, spiritual characteristics of the era and system.
In the ecclesiastical circles of the European Middle Ages, engraving occupied a special place. And in this sense she reached artistic heights.
And then the printing press appeared, and the embossing technique predictably began to supplant (this is such a pun) engraving.


Interesting historical facts about engraving.
-
Probably the most popular exponent of this technique was Albrecht Durer. He was talented as a painter, as a draftsman, and as an engraver. In terms of the diversity of heritage, one of the main artists of the Renaissance is comparable to Leonardo da Vinci. His works "Melancholy", "Knight, Death and the Devil", "Adam and Eve", "Walk" are impressive to this day.

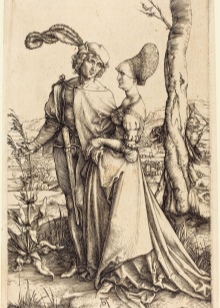

- The true time of the appearance of engraving is considered to be the 15th century. Yes, the Chinese "invented" it earlier, but many art critics consider their phenomenon a prerequisite for engraving, and not by itself. You can even consider not just the Middle Ages as the era of the appearance of engraving, but the end of the Middle Ages. The Renaissance was about to come, and with it a wonderful era of artistic discoveries.


- For the first time, engraving made it possible to print not only a drawing, but also a text. When words merged with the image, the enlightening power of this union became even greater.

- It should be admitted that initially the possibilities of engraving were modest. Cut or longitudinal woodcuts were done on conventional boards. And the author-artist could simply draw on the board, while the artisan-carver was engaged in further labor-intensive processing.
A break between true artistic creativity and technical design was outlined.

- Separately, it is worth noting a deep engraving on metal - etching. It arose after incisal engraving and appeared, most likely, at the end of the 16th century in Germany, and then quite quickly the technique was taken up by Italian masters.


- The Zlatoust art of engraving was absolutely unique. This engraving on steel appeared at the beginning of the 19th century. At the arms factory in Zlatoust, steel blades were made, they were decorated with special patterns. At that time, it became fashionable in the world to decorate weapons, and Russian craftsmen decided to keep up with fashion.


Modern engraving is so good that a conventional printer cannot reproduce the details of an image created by hand engraving. Moreover, the engraving cannot be scanned.
Despite the emergence of high-precision milling machines, there are those areas where manual engraving cannot be replaced by anything.

Views
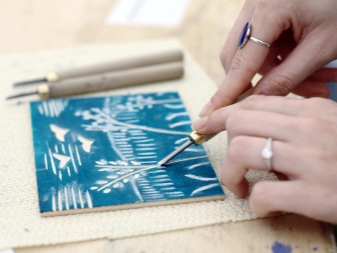
By design, engraving is easel, book and applied.According to the method of processing the form, etching and engraving are distinguished. According to its artistic value, it is author's and reproduction, and according to the material of the printed board - metal, wood, plastic, plexiglass and linoleum are also used. Well, according to the coloristic solution, it can be color and black and white.
Convex
This is the name of high engraving, that is, set for letterpress printing. From the surface of the board, the master removes everything that should turn out to be white on the print, and the lines and planes, consistent with the drawing, will act as a relief bulge. Cutting or gouging will help him remove this. Paint is dropped onto the relief with a roller, which will transfer to the paper under pressure. Convex engraving is characterized by a linear pattern, contrasts of light and shadow.
But the picturesque spot in it still matters, especially when it comes to color engraving or cut-off.

In-depth
In this case, the image is applied to the surface in the form of special grooves located on the recess. Scratches, grooves and grooves are the fundamental difference between this technique. The coloring composition gets into them, and under strong pressure it is transferred to the paper surface. The pressure from the printing press will leave indentations on the paper along the edges of the board, which will also separate the image from the margins. All engraving on metal is considered to be in-depth engravings - incisal, etching and others.

Flat
A flat engraving is considered to be a simple glass matting through a stencil, which does not imply a relief. Such engraving can be positive and negative. In the first case, it will be a matte pattern on transparent glass, in the second - a transparent pattern on frosted glass. And although this technique is simple, it can be called exquisite and quite pictorial. And also a flat engraving means an image on a stone. The stone base is treated with chemical reagents, after which, when printing, the ink will only get into the intended places (chemically treated will not be affected), that is, the background.
If it is a stone engraving, it will be called lithography, if on aluminum - algrafia.


Where is it used?
The works that have survived to this day are incredibly valuable, they are a special kind of antiques. The limited number of such printed graphics is what gives them their value. The author's form was enough for a maximum of 300 copies. And the collectors of the world are hunting for the first prints, moreover those made by the author of the engraving himself. If this is the first of 10 prints, the price of such a work is comparable to the cost of an original painting by a renowned artist. For example, at Christie's auction, the engraving of the same Dürer "Rhino" was sold for more than 866 thousand dollars.

Today, engraving can be considered a more applied technique. It is used, for example, on banknotes, especially important documents, plates for money printing. In a word, for all documents with special sensitivity, as it is called. The modern discipline of manual engraving remained only in a number of specialized areas - in the creation of firearms, in jewelry, in the production of musical instruments.
Of course, the appearance of machine engraving was predictable. This was the result of a request for a large replication of inscriptions, landscapes, portraits, logos, flowers, and so on. These processes include roll stamping (engraving on roller stamps).

How to do it yourself?
This is a very popular adaptive technique - that is, for example, for children today you can find a huge number of creative kits on sale. This is not the same classic engraving, technically complex and requiring physical strength and endurance, but a completely comparable simplified form. The main thing is that it is available at home and allows you to learn something new.
If you want to carry out the whole procedure with your own hands, without using even a standard set, you can go this way in an interesting way and avoiding the simplest solutions. So, engraving on cardboard is very entertaining and illustrative for those who are just studying engraving.

For work you will need:
-
needles - if there are none, an awl and a needle will also work;
-
cardboard - any thickness and texture; in professional printing, one whose thickness is not less than 2 mm is used;
-
cardboard or paper for a print - it is quite possible to take a drawing;
-
a rubber roller or a spatula - well, or a brush with bristles;
-
tracing paper;
-
copy paper;
-
ink (it is better to take, but you can do without it);
-
plexiglass;
-
acrylic paint (if this is a master class for a child, gouache is also suitable).


Here's how to do an engraving at home.
-
First you need to draw a sketch on plain paper. We'll have to remember what composition and layout are. When thinking over a sketch, you must take into account that the image will be obtained by cutting out fragments on cardboard. Therefore, so that the working surface of the cardboard does not break, the drawing is done either with a spot or with simple strokes. Cross-strokes are excluded.

- After that, the drawing can be transferred to tracing paper.
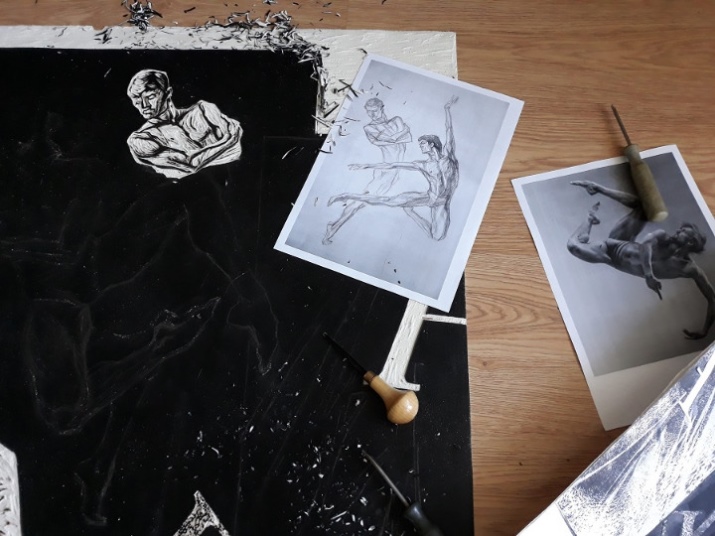
- Then the sketch on paper should be broken down into light and shadow. This is done with ink, but if it is not there (or there is no experience with it), you can use a felt-tip pen. When working with cardboard, this is important, it helps not to get confused. If the engraving is colored, then the color solution will have to be done at this stage. But beginners usually don't start with complex color problems.


- The sketch from the tracing paper is transferred to the cardboard. You can do this with a soft pencil: the tracing paper is placed with a pattern on the cardboard and the surface is smoothed, for example, with a spoon. Or you can circle the drawing along the translucent contour with a non-writing pen. True, not all lines can be printed, it is risky. Plus, the drawing will be imprinted in a mirror image. And you can transfer the drawing through carbon paper.

- So, there is an image on the cardboard, it's time to cut out the whitespace with the tools. You need to be careful when scratching the cardboard. To make it easier to adhere to the pigment, it can be primed, by the way. The pattern can be applied with a burning needle.

- And you can also deviate a little to the side, and supplement the engraving with applique. Real plants, or rather, their parts - twigs, blades of grass, leaves will look gorgeous as an auxiliary part of the engraving.

- That's it, it's time to move on to filling with pigment. The pigment (a little) is poured onto the plexiglass, it is evenly distributed on the roller and transferred to the cardboard base. Transfer layer - 0.5 mm. The pigment should be evenly distributed over the cardboard. If acrylic or gouache is used, the dried paint must be moistened.


- Well, print time - instead of an offset press, there will be an ordinary tablespoon (there should be no patterns on it). So, a clean sheet of thick paper is put on the already painted cardboard (you can use cardboard again, but of a larger size). Better to secure it with paper clips. And the sheet is smoothed with a spoon from the center to the edges. This is done slowly, carefully and carefully so that everything is printed.
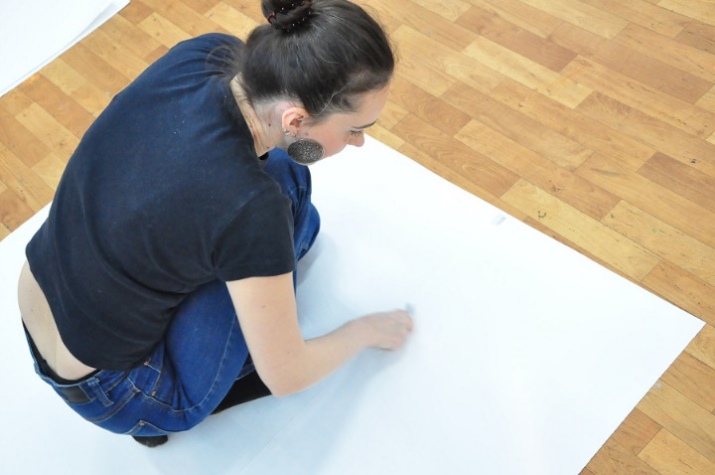
- You can check how high-quality the image is by peeling back the sheet. After the entire surface has been ironed, the sheet is neatly separated from the cardboard without smearing the paint.

- The image must be allowed to dry.

All is ready. A high-quality print will be free of ink smudges and defects. The painting itself should be uniform, the image should be well read. But even if there are minor flaws, you should not despair: engraving on the first try as a master of the 18th century will not work anyway. And yet a painting is a new and unique experience of a completely unusual painting. Yes, you can draw in different ways, so fine art. And the engraving is rightfully considered one of the most exquisite incarnations of it.

For information on how to make an engraving with your own hands, see the video below.


