Everything you need to know about woodcuts

Woodcut is considered one of the oldest engraving techniques. It is rooted in the Far East region - in Japan, Korea, China. As early as the 8th century (at least), woodcut was known there, but it came to Europe only in the 14th century. And the main feature of the technique is that the master makes a printed form, not a drawing, and it is from the form that he makes prints.


Features and history
Technique is considered a kind of production graphics. Printing on paper is achieved by imprinting a mirror image from an engraved wood board. Woodcut is a combination of the words xilo (wood) and grapho (write). This art arose in ancient China, most likely in the 6th century. From there it came to neighboring countries - this is how Japanese and Korean prints appeared. The most ancient example of engraving technique is the Diamond Sutra, a printed Buddhist text. It dates back to 868, and today the unique creation is in the British Library.


Woodcuts came to Europe with a great delay, only at the end of the 13th century. This was facilitated by the fact that Italian craftsmen came to understand the production of paper in an industrial way. And from Italy, an interesting technique spread to other European countries. The invention of book printing (1445) made woodcut quickly become the dominant method for producing graphic book illustrations. True, at the beginning of the 16th century it will give way to etching (gravure printing technique with the use of metal plates).

It should be noted that in Russia woodcuts have been transformed into a special type of printed graphics - splint. They hand-colored the printed print on paper and, thanks to this, got vivid pictures.And somewhere until the middle of the 19th century, splint, one might say, served religious and philosophical, fairytale and historical, epic, propaganda illustrations.
The Englishman Thomas Buick invented cross-woodcutting in the 18th century, which gave a new round of popularity to this art on wood. Printing from wooden boards is again becoming in demand, only, in addition to various pictures, now engraving helps to make reproductions of famous paintings.

Description of the technique:
-
the drawing is created on the surface of a wooden board with a knife or other similar tool;
-
the image is drawn directly on the block or transferred from paper, painting over the back with graphite / chalk - the sheet is applied to the panel, drawn along the lines of the drawing with a stylus;
-
graphite leaves traces on the surface, the printer cuts out those areas where ink should not fall;
-
ink is delicately applied to the formed relief with a stamp pad or roller;
-
then the block is sent to the printing press, moistened paper is placed on the surface covered with ink and pressed with a press (previously it was pressed by hand, but then the ink could be unevenly distributed).


The wooden blocks themselves, usually made of soft woods, were dried in natural conditions to reduce the moisture in the wood. This helped prevent the block from cracking. By the way, the block size depended both on the image and on the parameters of the printing press.
Large engravings had to be printed in fragments, which were then joined together. Small blocks cracked less. A block thickness of 2.5 cm was considered ideal.

Technique types
There is a longitudinal, and there is an end woodcut - these are the two main varieties to this day.
Longitudinal
Initially, European woodcuts resembled the technique of making printed boards. In longitudinal engraving he built a knife, the engraver had several knives of different shapes and sizes. The wood plane was sanded, a drawing was applied to it, then its lines were cut with a sharp knife on both sides, and the stroke remained intact. This is why longitudinal engraving was also often called edged. The background was selected using wide chisels, reaching a maximum depth of 5 mm. Then the board was rolled up with special paint and imprinted on paper.

The cut engraving had an exceptional feature - it was dominated by a black stroke. That is, purely technically, it was possible to make white, in some Florentine editions of the 15th-16th centuries. it is also noticeable. There were even prints in the negative style, white on black. But all this is nothing more than an exception. The white stroke occupied a very modest place.
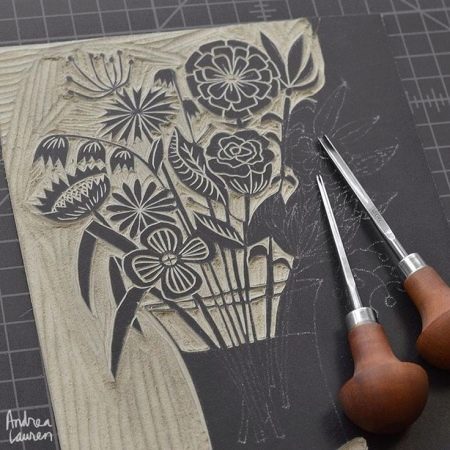
Those who today work in the technique of longitudinal woodcuts often use tools from linocut. These are semicircular and angular chisels, reminiscent of cranberries, and more.


End
Another name is tone. It is also called reproduction engraving. For book graphics, this invention was revolutionary. Then the woodcut again became the dominant in the book, already displacing both etching and incisal engraving on metal. The surface of the end board was solid and uniform, which means that it was elementary easier to get both thin lines and complex tonal solutions on it. Lighter than a longitudinal board.

The main tool for end engraving is a grater. It is similar to those used in deep metal engraving, only the variety of shapes is more obvious. A stichel is such a narrow steel rod that can have different sections. Its length is about 10 cm, the cutting end is sharpened at an angle of 45 degrees. The other end of the cutting element is inserted into the mushroom handle. The bottom of the handle is cut flat. If a graver with a handle is placed on the board, the cutting tip may be raised.


Why is face engraving also called tone engraving? The point is that it has a wide linear range. He helps to create works that can be called the richest in terms of plastic expressiveness.
For example, clearly drawing black and white strokes, or spots with textured characteristics, as well as unique tone transitions. This is why this technique is often used for reproduction.


And also this type of woodcut is distinguished by the durability of the printing plate. Quality prints number in the hundreds, sometimes thousands. Endboards were often used even for standard printing, included in the form for printing headpieces, initials, or even mini-illustrations. And the circulation, with a relatively small change in quality, reached tens of thousands.


Application area
Today you can trace the fashion for uniqueness, manual labor, handicraft. I would like to revive and those techniques that have been supplanted by mass production. Woodcut belongs to such a fine genre. She helps to cut stamps and logos, make interesting illustrations. For example, beautiful labels can be a woodcut product, and stamps for author's postcards go there as well. And also with its help they make modern posters, posters.
If someone wants to comprehend this art himself, everything is quite real. Even children's wood carvings can be transformed into woodcuts.


The algorithm for creating such an engraving looks like this.
-
First, a sketch is created. It must be drawn with all the details. It will then be transferred to linoleum using carbon paper.
-
Now linoleum is taken, it is better to process it with a thin layer of tempera, so that the print will be of better quality. And to better distribute the paint, it is better to apply it with your fingers. A little bit of paint is squeezed onto the pads of the fingers, and then it is stuffed evenly onto the smooth side of the linoleum. The paint must be allowed to dry.
-
While the paint dries, you need to cover the sketch with a thin layer of vegetable oil. It saturates the paper through and through, making it transparent, practically tracing paper. And therefore the drawing can be easily turned over, not transferred as a mirror image. Although, of course, a sketch can be simply scanned (if there is a scanner), mirrored in a graphic editor, and then simply printed on a printer.
-
When the tempera is dry, you need to take carbon paper and transfer the sketch to the form. The sketch paper should not slide out. You can even fix it with tape.
-
As soon as the sketch is transferred to linoleum, the image is drawn with markers.
-
Now you can take up the graver. Exceptionally light parts are cut out - only the space between black lines and strokes.
-
When the engraving is ready, the plastic board is taken, paint on it with a metal spatula. It is better not to spare the paint, then the excess is still easily scraped off into the jar. The laid out paint must be rolled out with a rubber roller on the board. When the paint is evenly applied to the roller, he rolls it over the cut linoleum. Then you need to turn the linoleum over, gently lean it against the paper, making a print.


Homemade engraving is ready. Making it on your own shows how ancient techniques can be applied (for decorative panels, for example). This engraving is also used for images on textiles. For example, you can make a print on linen, from which a shopping bag will be sewn later.


Work examples
You can consider the nuances of technology, its beneficial sides, using beautiful examples.
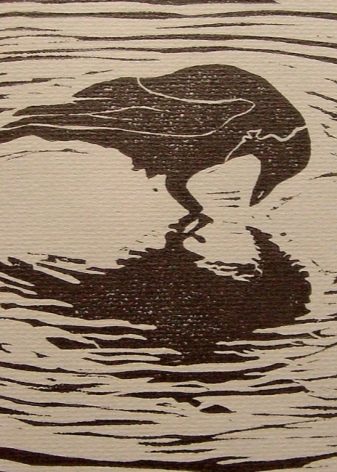
Here are 10 beautiful woodcuts.
-
Not the most difficult jobs available for beginners. Interesting in that a whole series of pictures comes out.

- Such an image will decorate the interior and will suit those who have little to do with graphics and fine art in general, but really want to try.

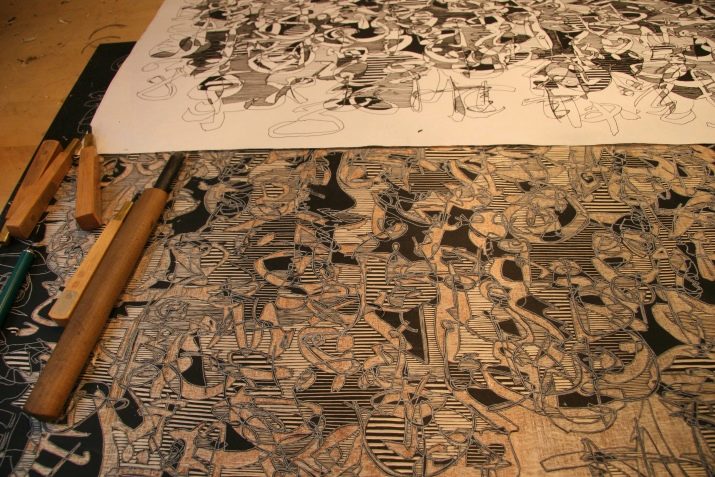
- This is how the creation of an image looks like, from which an impression will then be made.

- Simpler drawings that even children can draw. Several techniques are combined at once.

- Such rollers, by the way, can be found on sale along with a set of paints.Such miniatures appeared relatively recently (precisely as a popularization of woodcuts for non-artists).

- Images in the process are often supplemented with spontaneous details. And this is an example of work in which details play a special role.

- These are the stunning (and uncomplicated) color cards you can create using woodcut.

- Here is the carved board itself, and the impression that became the final product.

- Miniatures in this technique are also great. Even those who first tackled it.

- Voluminous work and the work of the master are in the process, and there is a ready-made version on the wall. It is really addicting.

Enjoy your creative immersion!


