How to mold a plasticine chicken?

Almost any animal can be made from plasticine. For example, plasticine chickens are very cute and adorable. Children love to create such crafts. In today's article, we will figure out how you can mold a beautiful chicken from plasticine mass.


Simple option
It is advisable for the youngest sculptors to start with simple plasticine crafts. Such options are easy to do, do not cause any particular difficulties. To make a simple and attractive chicken figurine, you need to stock up on some components:
- plasticine - it is recommended to use a quality product, the chicken is best made from a yellow bar, but you can give preference to other colors;
- a special board or oilcloth for modeling - with such components, the child will be able to easily sculpt figures without leaving greasy spots on furniture and decorative coatings;
- stack kit - most often these components are initially present in the kit with plasticine bars;
- a toothpick, a match - these components will be needed to make indentations for the eyes.


Let's consider step by step how you can make a simple chicken from plasticine mass with your own hands.
- So that the kid understands well what exactly he will sculpt, he should first show pictures with chickens or the corresponding figures. Parents are encouraged to make crafts with their child.
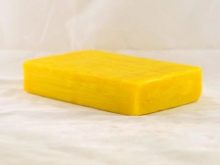
- A yellow plasticine block is taken. It must be kneaded well in your hands so that the material acquires the necessary plasticity.
- Next, the chicken torso is prepared. To do this, you need to roll a ball in your palms, which then needs to be slightly flattened.
- The next step will be the creation of plasticine blanks for the chick's legs. You need to roll 2 identical balls, the dimensions of which will be much smaller than the body. The blanks must be flattened, and then glued on the sides of the chicken body.
- Next, you need to take brown or orange plasticine. You will need to roll 2 small balls from this material. They are flattened and then fixed in the lower body.
- With a stack on the legs, you need to make a couple of indentations on the chicken legs.
- The next step is to make the chicken head. To do this, you need to make a small ball of yellow plasticine mass. Then it is slightly flattened on both sides and fixed on the upper body.
- To make the tail of the bird, cut the plasticine cake into 2 halves. One of them will need to be carefully divided into quarters. One of the quarters should be stuck in the back. Thus, it will turn out to make a ponytail.
- Using a stack on both sides, you need to push the tail, forming feathers.
- Next, you need to mold the beak. It can be made from an orange piece that is flat or slightly tapered to the tip. The little master can choose the shape of the beak on his own.
- Recesses are made for the peephole with a match or pencil. Small black balls are placed in them.
- The wings are made of yellow plasticine cake, divided in half. The finished parts are stuck on the sides of the body.
The adorable chicken is ready. A similar craft will be available for children aged 3-4 years.


Modeling with natural materials
Very beautiful and unusual crafts are obtained from plasticine and natural materials. For example, a child can make an original bird from the following components:
- cone;
- colored plasticine;
- gouache.


We will analyze step by step how to make a cool craft from natural materials. First, you need to create all the necessary parts from plasticine mass: a yellow ball, a pair of legs, and a chicken beak from red plasticine. You will need 2 white balls and 2 small black balls - from these components we will make the eyes.
Next, we take a pine cone. Natural material must be thoroughly cleaned of dust and dirt. Paint the cone yellow. Further, this part must definitely dry out to the end.


While the cone dries, it is worth going back to working with plasticine. On the yellow ball, which will play the role of the head, it is necessary to stick flattened white balls, and on top of them flattened black ones. Thus, the chicken's face will acquire eyes.
It is necessary to stick a red beak on the chick's head. We fix the finished chicken head securely on the top of the cone. We attach paws molded from red plasticine to the bottom of the natural material.


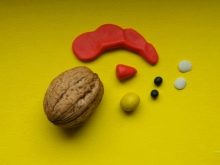
An adorable chicken is made from a combination of plasticine and walnuts. Let's take a look at the step-by-step instructions for making such a figurine. At the first stage, we form from 3 to 5 plasticine balls, differing from each other in size. They must be fixed on a nutshell, which plays the role of a head, in ascending or descending order. This will make a scallop. It is necessary to mold 2 black balls and 2 white cakes. From these components it will be possible to make chicken eyes.
It follows from the plasticine mass to make a cone-shaped beak. To create this component, it is recommended to use a red or scarlet bar of plastic material. You will also need an oval element that will act as the neck of the figure.


When all the necessary parts are ready, they should be attached to the nut shell. This sometimes causes some difficulty because the surface is smooth. It is recommended to act with the utmost care so as not to harm the form of the plasticine components. Wings can be made multi-colored, but it is easier to make them one-color - red. These details need to be shaped like leaves.If you want, you can depict plumage on the wings using a stack or a toothpick.
Plasticine tubes will not withstand the weight of the nuts, so it will not be possible to put the craft. It is easier to seat a bird on a stump of the same nuts. All prepared parts should be combined into a single composition. At this point, all the work can be considered finished.


Cute figurine
From plasticine mass, a child can sculpt an incredibly cute chicken with beady eyes. Such a craft will certainly captivate and interest the young master, and its results will definitely delight him. Let's analyze in stages the complete process of making a cute plasticine chicken figurine.
First you need to prepare all the necessary blanks. A large ball should be rolled out of yellow plasticine. Next, you need to take a plasticine mass of a different orange hue. From this material we will make legs for the future chicken. We attach the ready-made orange legs to the bottom of the previously prepared yellow ball-base.


At the next stage, it is advisable to deal with all the necessary details that the plasticine chicken should consist of. We make chicken wings from the yellow material. These elements should be a pair of drop-shaped flattened blanks.
Place the finished wings on the sides of the yellow plasticine ball. Next, you need to make a crest for the chicken. To do this, you need to carefully roll 3 small flagella, and then connect them to each other.


The finished tuft will need to be fixed on the top of the main yellow ball, which will act as the body and head of a cute chicken. At the next stage, we supplement the yellow ball with a beak. The shape of this part can be almost any.
Since the chick is planned to be cute, it is advisable to make a rounded beak for it, which will look softer and more friendly. After fixing the beak, you should fix the eyes. Black beads will play their role.


For information on how to mold a plasticine chicken, see the next video.


