How to sculpt turtles from plasticine?
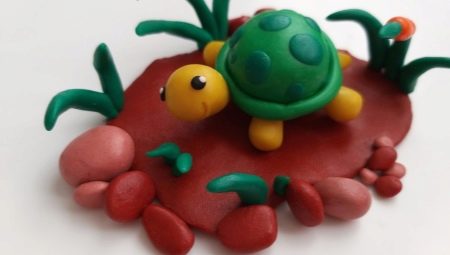
Plasticine is considered one of the simplest and most convenient materials to work with. Kids can make a variety of crafts from plasticine. One of the interesting options that is worth sculpting from this soft material is the turtle.
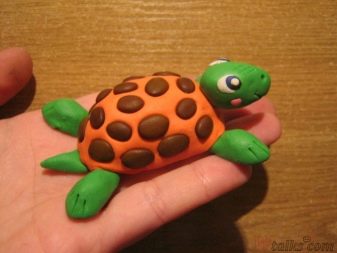

Classic version
In the classic version, the turtle has a greenish-brown color with a darker shell. Her whole body is hidden under a shell, which is a kind of home for her. The carapace is its main element. They pay more attention to it, decorating it in a special way.
Making a product from plasticine is not at all difficult. A prerequisite for this is the presence of the material itself.
You do not need to take a whole pack, you only need to use the necessary shades.
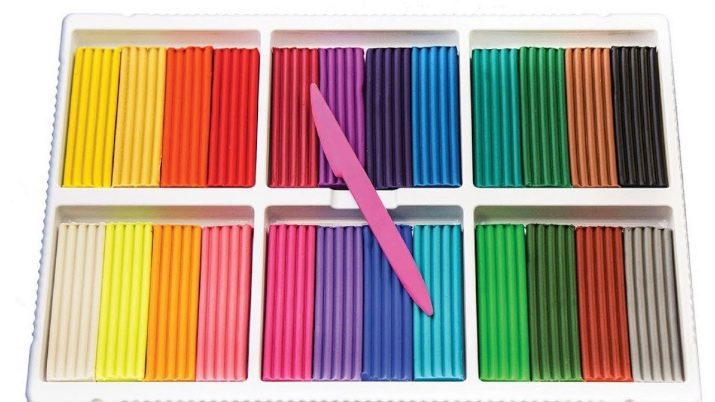
For work you will need:
- pieces of plasticine (in this case, the main color will be green or brown, you should also take small pieces of white, blue and black);
- stack;
- dostochka.


Having prepared the necessary materials, you can get to work.
- Take green plasticine and use it to build a torso. You need to knead the material so that it sticks well, and separate the ball for the head, two balls for the front and hind legs from the piece, and separate a small piece for the tail of the turtle.
- Let's make blanks for the eyes. To do this, you need to roll two small balls from pieces of white and use very small balls of blue as pupils.
- One of the important details is the construction of the shell. For him, take a piece of brown plasticine and also make a blank in the form of a ball.Small green balls will be used as armor plates, so you should also prepare them.
- To build a shell, we make a shape resembling a convex bowl from a brown blank. As a decoration for the shell, we use flattened green balls.
- Having completed work on the shell, we proceed to collecting all the details. We attach a slightly flattened piece of green plasticine to the finished shell, which will act as a head. It should give it a slightly elongated shape, attach eyes and push its mouth.
- At the final stage, we attach the legs to the shell on the sides, giving them a flattened shape. They should be pressed down a little and stripes made.
- Taking a stack, we modify the product, highlighting the turtle's mouth, nostrils, fix the legs and tail. The tropical turtle is ready to travel to hot countries.


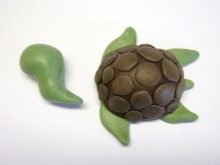


To make the work fun for children, it is advisable to tell more about the turtle itself, about where it lives, what it eats, what is its lifespan. The children will be interested to know that turtles can be of different sizes, there are huge gigantic turtles, and there are also very small specimens.
Working with plasticine helps the child develop fine motor skills of hands, teaches him perseverance, patience, develops imagination and creativity.

How to mold a sea turtle?
Having molded an ordinary turtle from plasticine, you can start creating a sea turtle. They differ from their land-based counterparts by the presence of wide fins. The shell of a sea turtle looks somewhat different, it is flatter and outwardly resembles a heart in its shape. They also differ in their size, usually marine life are larger than land relatives.
You can make this figurine brighter. To do this, you will need the following materials:
- a piece of beige plasticine, it is used to sculpt the head, fins and torso;
- a piece of green plasticine for the shell;
- pieces of yellow, purple, black and white decoration material.

To make such a craft, consider the procedure.
- Take a piece of beige plasticine and use it to make the exposed body parts of a sea dweller. In a calm state, you can see her head, 4 legs in the form of fins and a tail, so you need to roll 5 balls of the same size (for the legs and head) and 1 small ball (for the tail).
- Roll a ball out of the green mass, then flatten it, giving the shape required for the shell. If you press down on the shell with your finger, you can reproduce the relief present there. Moving in a circle, you need to make the dents so that they almost touch each other.
- Roll up small balls from bright colored pieces of plasticine and use them for decoration. To do this, on each dent in the shell, we glue flattened yellow balls, then green and lilac. This should be done, starting from a larger layer and ending with a smaller one.
- After that, we will assemble the parts. To do this, we attach pre-prepared parts to the shell in the form of a head, legs and a tail. Considering that this is a plasticine sea turtle, it is necessary to give the legs the shape of flippers, slightly flattening them and turning them inward.


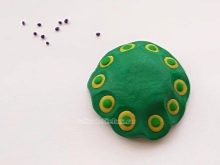
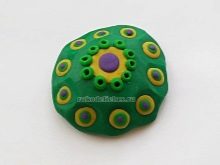

It remains only to form eyes for the sea inhabitant from prepared pieces of white and black colors, rolling small balls out of them, and also to highlight the nostrils and mouth.


More craft ideas
Plasticine is used as the main material, but you can supplement it with other materials by building figures from walnut shells, nuts, cones or shells.
It is advisable to carry out the work in stages, in steps, as indicated in the description.
Bright
The turtle is considered to be very wise and calm. She moves slowly over land and feels comfortable in sea or fresh water. It is difficult to see as it has a coloration that matches its habitat. Using pieces of saturated color when sculpting from plasticine will make this figure brighter.
Performing the work step by step, you can easily build a cheerful and bright turtle, which will become an ornament in the collection of such crafts.
For work, you should take pieces of brown and green plasticine; you will also need a part of the mass of bright orange color to decorate the product.


The work progress consists of several stages.
- A shell is built from dark shades of plasticine. It can be made by weaving brown and green sausages. Having twisted the parts, they are rolled up in the form of a ball and given a flattened shape.
- Then balls for the head, four legs and a tail are sculpted from pieces of brown. Pull them out, giving the required shape.
- Using a stack, grooves are made on the legs.
- Eyes are glued.


A bright orange material is used to decorate and decorate the shell. Small lumps are broken off from it, forming flower buds from them. They are made by twisting orange plates in the form of a spiral.


With walnut
As a material, along with plasticine, natural materials can be used, one of the options is walnut shells. Externally, the halves of the shell are very similar to the shell of a turtle.
For work, you will need a walnut shell, plasticine and acrylic paints (optional).


Instructions for performing the work will help you do the craft correctly.
- You should take the shell and paint it with paints. This will make the craft look brighter. You don't have to paint the shell, in which case the turtle will look more natural.
- From plasticine of a dark color (you can use shades of green, gray or brown) roll a ball in size suitable for the inside of the shell.
- Then sausages are made for the turtle's legs, as well as for the head and tail.
- A ball is rolled from a piece of plasticine and a cake is made from it, fixing it on the shell to form the lower part of the shell.
All parts are attached and fixed. With the help of a stack, the eyes and mouth are drawn. The patterns on the carapace can be drawn using a brown felt-tip pen.


With chestnut
Chestnuts are also a wonderful natural material used for children's crafts. The shape of the chestnut is very similar to the shape of the shell of a marine inhabitant, so it is very often chosen for its creation. For the rest of the parts (paws, head and tail), plasticine will be used.
To build a craft from these materials, you will need:
- chestnut (1 pc.);
- pieces of brown or orange plasticine;
- pieces of brown soft mass (for decoration).

Progress:
- take plasticine and knead it well so that it is soft and molds well;
- prepare blanks in the form of a head, legs, tail, draw them out in the form of drops;
- using a stack, notches are made on the paws;
- the prepared parts are attached to the chestnut, which acts as a shell;
- form a face, make eyes from pieces of white and black plasticine, cut through the mouth.


As a decoration, flat cakes made of brown plasticine are used, which are molded onto the base.


With shells
Having seashells available can also make very interesting crafts. It is advisable to choose a large shell, as it will be the shell of the future craft.
The main materials used are:
- a large shell;
- a toothpick or skewer;
- pieces of plasticine (white, black and green);
- stack.


The basis of the product is a seashell. It is to it that plasticine parts will be attached.
- First you need to cut 4 pieces of the same size from plasticine and roll balls out of them. Flatten the blanks and give them a teardrop shape.
- Next, all the details should be attached along the edges to the shell in the form of the legs of our turtle.
- From a piece of plasticine, you need to form a head and also fix it by attaching it to the walls of a seashell.
The head is given the necessary, slightly elongated shape, eyes, tongue are attached.


With cones
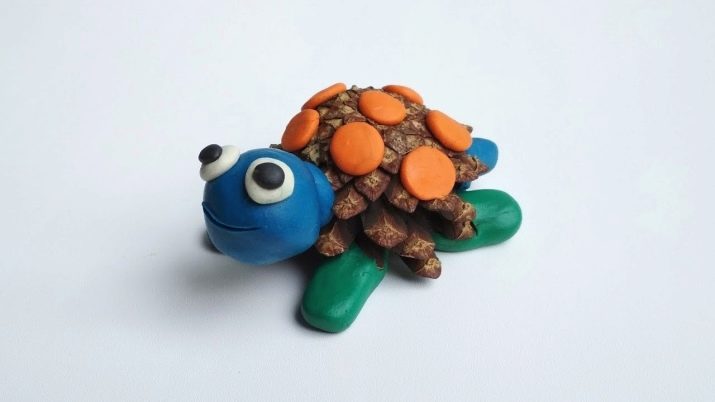
Pine cones will be used as a basis in this case. It is quite simple to build such a craft.
For work, you will need the following materials:
- pine cone;
- plasticine;
- stack.


It is advisable to choose a well-opened pine cone for the craft. She will be the future shell for the turtle. To give it a more natural shape, it is better to cut off the top of the bump. An adult must do this. It is better for a child to entrust work with plasticine parts.
- Roll a ball out of plasticine and use it to shape the head. We will fix the prepared part on one side of the cone.
- Next, roll up 4 balls and give them the shape of flippers. They are attached to the sides of the base.
- Taking a small piece of plasticine of white and black colors, we will make eyes for the turtle, from a piece of red we blind the tongue.


As a decor, you can use plasticine pieces of a bright color, which are attached to the cone in the form of flattened balls.


Such interesting crafts can be left as a souvenir by fixing them on cardboard and placing them in a place convenient for viewing.


For how easy it is to mold a turtle from light plasticine, see the next video.


