How to mold a cat or a cat from plasticine?

Learning how to mold a cat or a cat from plasticine will be useful not only for professional teachers, but also for parents who want to captivate their child with creativity. Modeling various crafts with your own hands helps to develop imagination, brings a lot of positive emotions. Detailed master classes will help you figure out: how to make a cat with bumps step by step, a kitten or cats with your own hands - the main thing is to act in stages, not to rush, to enjoy joint creativity.


DIY ginger cat
A child of 3-4 years old is already quite ready for the manifestation of his creative abilities in the manufacture of various sculptural compositions. The simplest of them depict pets. Even a very restless baby will want to mold a cat from plasticine on his own. The main thing is that the craft should be simple, easy to create step by step, give room for imagination. For example, if in the original the craft is decorated with a lush bow, you can easily replace it with a bright autumn scarf or an elegant neckerchief.

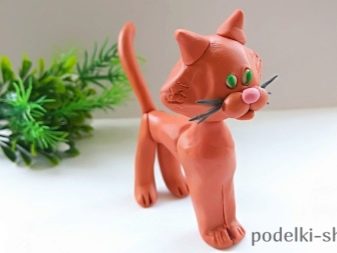
In many cultures, the ginger cat is considered a symbol of happiness, prosperity, financial well-being and unexpected luck. With such a craft, a child can easily please parents by making it for the holiday. For work, you will need plasticine of the main color - bright orange, as well as additional bars of material for stripes, eyes, decoration of the figurine of the child's choice. Also useful in the work of a stack, match or toothpick.


The sculpting process is presented in stages below.
- Roll up the orange plasticine, knead it thoroughly in your palms. For younger children, it is better to use a soft material made from a wax base.

- Divide the resulting workpiece into fragments. The largest one is for the body, two smaller ones are for the head and tail, and another four are for the legs. Roll all the elements into balls.

- Craft a torso... To do this, the spherical element must be given the appearance of a pear, stretching the upper part, this will be the neck. Complete the blank for the head with ears. To do this, tucks are made on it, which are neatly given a triangular shape. Roll the tail blank into a rather thick "sausage" tapering towards the end. 4 balls for the legs should be slightly flattened on the sides, giving the appearance of voluminous "cakes".

- Make a muzzle... To do this, round colored blanks for the eyes are glued to it, the child can choose the shade on his own. On top of them are glued small black discs with stuck white dots. The eyes are ready. Also, a button-nose is glued to the muzzle, a smile and antennae are made using a stack.

- From contrasting - darker or lighter plasticine - strip sausages are made. They are fixed on the tail in a ring-like manner, on the back of the figure they are slightly smoothed out to avoid unnecessary relief.

- Press the blanks for the feet in 3 places from above, creating stripes on them.

- Collect cat figurine... Attach the tail to the back, place the head on a long elongated neck, after having stuck a match into it, in order to fix the parts as best as possible, slightly press. Mark the paws at the bottom of the body in the front and back. Ensure that the figurine is stably positioned on a flat, flat surface.


Complement the finished plasticine sculpture with a bright bow or an autumn plasticine scarf. The kitty turns out to be recognizable, characteristic, bright. Due to the fact that the child himself chooses additional colors, each figure can be endowed with a bright personality.

How to make a black cat?
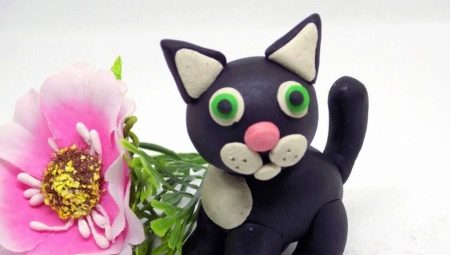
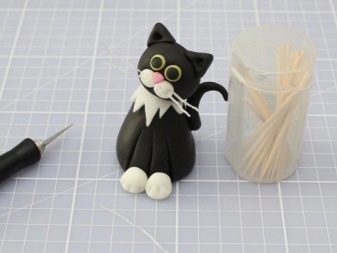
Sculpting for children is one of those activities that never gets boring.... By learning the basics of sculpture, toddlers can recreate their own pets or cartoon characters. The black cat is one of the most popular characters. Preschoolers or primary school students will be able to blind such a figure in stages. For work, you will need black, white, green and pink plasticine, a modeling board, and a stack.

The sculpting procedure is simple.
- Material preparation. A block of black plasticine is laid on a board, cut into 3 unequal parts - 2/3 will go to the body, the remaining piece is also divided into a small strip and the rest, a blank for the head.

- Knead short parts thoroughly... From the smallest one, mold a long thin tail.

- Make a ball out of a larger piece... Make 2 small discs of the same size from white plasticine. Fold them in a figure eight on the front of the circle, making the cheeks of the future cat figurine. Fix a small piece of pink plasticine on top, giving it a triangular or spherical shape. Make antennae. For them, you can use pieces of wire or thin "sausages" of pink plasticine, collected in bunches of 3 pieces. Fasten on the sides of the cheeks.

- The largest plasticine blank must be stretched in length. Smooth slightly without kneading. Divide from the edges into parts, forming paws, make notches at their ends, imitating claws. Bend the part, stretching it forward, bending the hind limbs under the body, as if the cat is stretching.


- Craft 2 Small Black Triangle Parts... Fix the resulting ears on the head. Install this piece in front of the cat's body. Fasten the tail at the back, giving it an unusual graceful curve.


A cute cat is ready. The craft can be supplemented with a bright "ball" in the paws, making it out of thin plasticine sausages. You will get a sculpture in the form of a playing pet.

Other options
For novice craftsmen aged 3-4 years, complex crafts can be unnecessarily time-consuming. For them, it is worth choosing the simplest options for plasticine figures.You can make a cat that sits or lies, make its head or body out of natural materials, or make an applique on cardboard. However, for older children, such a master class may also seem interesting. It is enough to offer something new and exciting in the framework of joint activities with parents.
Sleeping kitten
An adorable kitten, sweetly dozing, curled up in a ball, is a cute gift that a child can make for his loved ones. The craft is made easily and simply. She needs plasticine in only 2 colors - purple and pink, if you wish, you can replace them with other similar shades. The order of work will help you quickly make a craft.
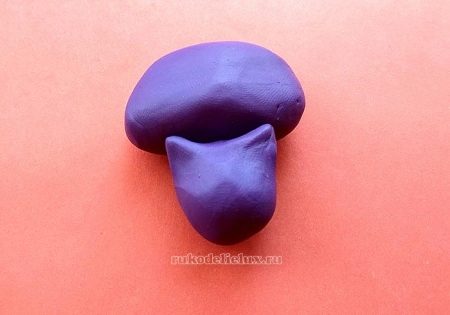
- The selected plasticine of the main color - purple or other - is carefully kneaded. This mass can be divided into parts or left intact, gradually forming a sculpture out of it.

- For children's crafts, it will be more common to create separate spherical fragments: the largest for the body, the smallest for the head, 2 for the legs, one small for the tail. All workpieces are thoroughly kneaded.

- A head is molded from a medium-sized ball. On the sides, sharp ears are formed with small depressions in them. At the same time, the muzzle turns out to be protruding. With the help of a stack, it depicts the closed eyes of a cat in the form of two semi-ovals directed upwards, a nose and a mustache.

- The smallest workpieces for the feet should be slightly notched with a stack... You should get "claws".

- The blank for the body must be pulled into an oval, giving its edges an arched shape. The workpiece-body is laid on its side, legs-balls are laid in its front part. The kitten's head is placed on top of them. It is necessary to make the figurine look as if the animal is asleep. A sausage of non-uniform thickness is rolled from the remaining piece of plasticine. Wide at the base, narrow at the end. The thin edge of the tail is wrapped in a "snail". The workpiece is fixed to the body so as to cover it from above.

- A heart and a small triangle for the nose are molded from pink plasticine.... The first blank is placed on the side of the kitten so that its tip is hidden under the "snail" of the tail. The nose is glued into place.

Adorable little kitten with a heart is ready. For him, you can make a plasticine basket or a stand from thick colored cardboard. The result will be a completed work, which is not a shame to present as a gift.

With natural materials
Natural materials give a huge scope for children's creativity, and if you supplement them with plasticine, you can get a very original result. A figurine of a cat with cones and chestnuts, acorns and other similar elements will look interesting and unusual. Even a preschooler can easily master the simplest craft option. To make a figurine of a cat, you will need colored plasticine, several pine cones, and thin spruce.

The master class step by step allows you to go through all the necessary stages of creating crafts. It is enough to follow the instructions.
- An unopened cone-shaped pine cone is set vertically, with the sharp end up. The head is fixed on top with plasticine. It is made from an open pine cone of a small diameter, with the base up.
- 4 blanks for paws in the form of sausages are made from gray or brown plasticine. 2 hind legs are placed horizontally under the body. The front ones are slightly bent, used as a support. They are attached in the chest area.
- A bushy tail is formed from a narrow, slightly curved spruce cone. You can also use plasticine by fluffing it around the edges with a stack.
- Make decorative details. Sharp ears are made from black plasticine, from 2 flat white discs - cheeks, on which strips are drawn in a stack. Also, the muzzle is complemented by a rounded nose, two eyeballs of a bright shade with black pupils.


A funny cat made of cones and plasticine will definitely appeal to both children and adults. Parents are delighted with the creativity of the little ones, and the process of making the figurine takes a minimum of time.

White figurine
Japanese culture has managed to penetrate deeply into the lives of children thanks to cute cartoons in which "kawaii" animals appear. One of the traditional Asian symbols is maneki-neko - a mythological cat that, according to legend, brings good luck. Its obligatory attribute is a golden bell on the neck. When sculpting such a talisman, one of the legs must be left raised, but in a children's toy it is quite possible to do without it.
Let's consider step by step the procedure.
- Divide the white plasticine into 6 unequal parts. Roll the largest into a ball - this will be the head; in Asian culture, the figures are always large. Decorate it with gray triangular ears, spreading them wide. Form a thin flagellum from black plasticine, divide it into 4 parts. From 2 to form dash eyes, place a ball-nose in the center of the muzzle, place a smile under it, making it from the remaining parts of the blank in the form of a thin sausage.
- Roll a medium-sized piece of plasticine into a ball, then give it the shape of an elongated drop. Lay 2 more drop-shaped parts smaller on the sides of the body, setting this element vertically. You will get a seated body with legs. Attach the white tail flagellum at the back.
- Blind the plump flagella, forming the front legs from them. Fasten them on the sides of the body, put them below in front of the back ones, connecting them.
- Place your head on your body, tilting it slightly to the side.
- Form a round bell from bright yellow plasticine. Flatten it slightly, cut at the 1st end. Secure the bell on the breast.


The figurine of a snow-white cat will delight the child longer if you replace the plasticine with a solidifying mass for modeling. In this case, the finished product after a while will turn into a toy.
On cardboard
The ability to beautifully sculpt crafts does not come immediately. It is sometimes easier for children over 7 years old to create their first works in the genre of plasticineography - on a cardboard basis, than to make figures of the same type for the hundredth time. The main difference from volumetric crafts here is that the figurine of a cat is created on a plane, like a stained glass window or a painting. The stages of making a craft look simple step by step.
- Lay out the materials necessary for work on the table. You will need a sheet of cardboard, colored plasticine, a simple drawing pencil, stacks of different shapes, a stand, a napkin for hands. Draw the silhouette of a cat on a sheet of white cardboard. Form a rounded head with pointed ears, a long neck, an oval body with a curved tail. Divide it into fragments, which will be used to change colors.

- A tourniquet made of selected dark plasticine lay out the outline of the cat figurine.

- Form many thin flagella of different colors... Lay out lines with them inside the figure. Having rolled into a "snail", arrange a toe on the head. The technique of work is changing. Some elements are simply marked on the cardboard. For others, plasticine is applied with generous strokes, mixed if necessary, new shades are obtained from a combination of tones.


- Upload fragments, decorating them from above with colored mosaics and other decorative elements.

- Having filled in all the white parts inside the body contour, you must smooth them out carefully so that there are no gaps.

It is recommended to place the finished craft under a film or glass, having previously laid an interlayer of elastic material between it and the cardboard. This will prevent deformation of the work. The resulting craft should not be placed next to heating sources, placed under the open rays of the sun.

For information on how to mold a plasticine cat, see the video.


