How to mold a mouse from plasticine?

Modeling a mouse from plasticine is an exciting activity that can be carried out with children from three years old. To facilitate the task, it is worth using detailed master classes. However, it is possible that in the process of sculpting, children or parents will have their own ideas.


Classic version
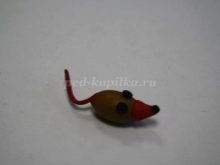
Modeling the classic version of the mouse from plasticine is considered the simplest... The youngest kids will be able to cope with the task. The character consists of a minimal amount of detail, but looks very cute and cute. In order to dazzle it, you need gray or white plasticine. The mouse can be made brown or black, but in the second version you will have to try with eyes.
It will be an interesting task for children to make several animals of different colors.


The step-by-step process looks like this.
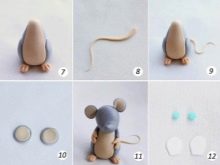
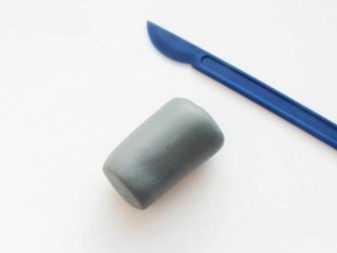
- First, we form from plasticine torso (an oval resembling an egg).
- Next, a smaller piece is made head with a pointed nose.
- You can make the mouse even more cute if spout make it quite large from a ball of black or pink plasticine.
- Ears are formed from plain plasticine or with light inserts in the inner part, so that the animal looks more natural.
- Integral element - long tail... You can make it from plasticine rolled into a flagellum.
- The last detail is eyes... The easiest way is to use two black balls, but you can make white eyes with black or colored pupils.


Figurine with heart
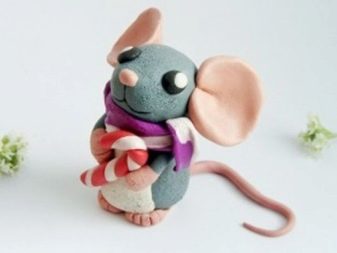
A mouse with a heart can be dazzled as a present for mom for some holiday or just as a souvenir. The main stages of sculpting do not differ from the classic version.However, in this case, the animal must be made sedentary or so that it stands on its hind legs. This is necessary to place the main attribute - the heart.
- First, we make the torso and head according to the standard scheme. The body is oblong, the head has a pointed nose. The size and shape of the ears must be chosen independently. The characters look equally cute with both large and small ears.
- Now we decide in what position the animal will be... If he stands, then the hind legs are made as stable as possible. A thicker tail can be used as additional support. If the mouse is sitting, then the hind legs are made in the form of balls.
- You can experiment with eyes making them in the form of beads or using black and white plasticine.
- Then it remains to make a heart... To do this, you will need red or pink plasticine. The size of the workpiece should be optimal for the character's body and fit in the front paws.


How else can you make a mouse?
There are a huge number of options for small plasticine mice. They can differ not only in their appearance, but also in additional accessories. Sims can be rewarded with cheese, pine cones, acorns, nuts, or chestnuts. You can make one mouse and several accessories so that the child can play with it and come up with different stories.
Such crafts are suitable for toddlers or beginners to sculpt.... Some step-by-step instructions allow you to make a character quickly and in a simple way, others are more complex.
Natural materials will be an original addition to a hand-made animal.


With cheese
In order to mold a mouse with cheese, you need gray, pink, yellow, black and white plasticine. This craft looks very cute. Even the youngest child can cope with the task. In order for the mouse to retain its appearance for a long time, you can cover it with a transparent varnish. The child will be able to play with it for a longer time.
The sculpting process.
- You need to start sculpting from the largest part of the character's body - from torso... For this, an oval resembling an egg is formed from a piece of plasticine. Its bottom should be slightly wider than the top (where the neck will be located).
- Having formed two more small balls, you need to make hind legs and attach them to the lower torso. Imitation of fingers and claws can be done with a toothpick.
- Front legs are made from small pieces of plasticine in the form of a kind of sausages. Unlike the hind limbs, they must be made in such a way that additional cheese can be placed in them.
- Head is created in the form of a cone with a slightly elongated base (imitation of the nose of a mouse).
- Next, we proceed to ears... You can make them small or huge. Depends on the child's imagination. To do this, we form two small balls and turn them into flattened circles. In order for the ears to look more natural, we place two more circles of a smaller diameter and pink color in the middle. We attach the blank to the head.
- Thin ponytail can be made from pink or gray plasticine by bending it in any direction.
- Cheese can be made round or in the form of a triangular piece. The imitation of the holes is created with a toothpick.
- Details remain - nose and eyes... We make the nose from a tiny ball of black plasticine. Eyes - from two flattened white circles. The imitation of the pupils is carried out using black plasticine.


With cones
To sculpt a mouse from a cone, not only plasticine is used, but also real natural materials. The main thing is to find an option that best suits the size. Any cones are used - spruce, pine.
For little characters, you can use spruce or pine buds, which in appearance also resemble cones.
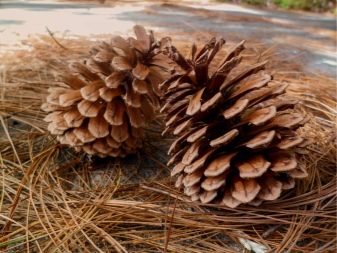

A bump can be turned into an eared animal with just a few details:
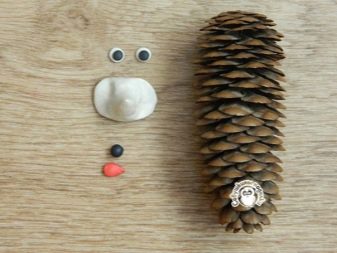
- we make a cone from plasticine. it must be fixed at the base of the cone;
- ears and eyes are attached here;
- the tail in the form of a plasticine flagellum is attached at the base of the “open” part of the cone;
- for stability, you need to add legs (you can simply in the form of balls or ovals).


With an acorn
A mouse with an acorn is an original and funny craft. You can make an acorn yourself or take a real one. It will be interesting to look at a character with two or three acorns in his paws. In order to replace natural material with a plasticine version, you will need a toothpick, light brown and dark brown plasticine.


With a body of acorns.
- An acorn mouse will turn out miniature... Above the details will have to try.
- The miniature cone should be attached to the base of the acorn head or where it was attached. You can make the whole head, then the animal will be larger and get an interesting "fluffy" collar.
- Paws, ears and tail are also attached in the right places.
- Hat can come off the acorn, so it is better to attach it to the glue in advance.



Jerry
The main feature of Jerry from the cartoon is the color of the fur and the peculiar shape of the body and ears. To facilitate the sculpting process, it is recommended to prepare an image of the hero in advance. Additionally, you can make accessories for the mouse. For example, a piece of cheese.
- The sculpting process begins from the body... It is better to choose plasticine in a light brown color for a greater resemblance to the original character.
- Front and hind legs are made in the standard way... The main nuance is their location. The mouse should be standing, so the lower limbs should be sufficiently stable. Better to make an imitation of a kind of foot.
- Another important point is a round head... Jerry does not have a pointed muzzle, so this part of the body will hardly need to be corrected.
- Ears should be fairly large and located on the sides of the head. It is better to make the inner part pink.
- Next stage - light muzzle. On the front of the head, you need to put a circle of white plasticine and carefully level it. The nose is also located here.
- Eyes Jerry's are big enough. They also need to be made from white and black plasticine.
- If you have the skills to work with microscopic parts from plasticine, then you can supplement the image antennae and cilia.
- Tail Jerry is small. This nuance must also be taken into account.


With chestnut
Chestnuts are usually quite large in size. If you make a character who will hold such an accessory in his paws, then the mouse should be quite voluminous. Placing a small mouse on a chestnut might be an interesting idea. The character should seem to be sitting on it.
A simple option would be to make a smaller version of it from plasticine.


With a chestnut body.
- To make a mouse, you can take one large chestnut or one large and the second smaller.
- In the first case, you will need to make a whole head out of plasticine. In the second, a small chestnut will imitate it.
- To make the animal look more like a real one, it is recommended to think over the neck in advance. To do this, a small piece of plasticine is attached between the head and body.


With walnut
A walnut, like a cone, chestnut or acorn, can be taken in its present form or made from plasticine. It is important to choose the lightest version of the mass for modeling and prepare a toothpick. With its help, the bumpy surface of the nut will be repeated.


With a walnut body.
- As with chestnuts, you can take one large nut or two different sizes.
- If you use one nut, then you don't have to make the head separately. Attaching the ears and nose to it, you get a funny round mouse.
- Sustainability the figure is given by means of plasticine paws.
- Two nuts are also easy to turn into an eared animal. The small one will be the head, the larger one will be the body. Be sure to make the neck. She will hold the two nuts together.
- As well as in other options, ears, nose, paws and tail are placed in the right places.


The modern assortment of plasticine allows numerous experiments. The sculpting material can be neon and glow in the dark. Kits called "airy plasticine" are interesting goods for creativity. This mass hardens and resembles molding dough in structure.
A self-made character can become a souvenir or even a keychain.

For information on how to mold a mouse from plasticine on your own, see the next video.


