How can you mold a deer from plasticine?

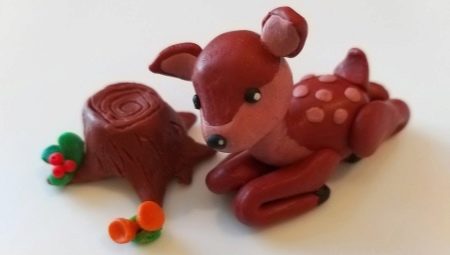
The article describes how you can mold a deer from plasticine and how to create it with acorns step by step for children. Even the step-by-step modeling of a simple deer with your own hands has a number of subtleties and nuances. It is imperative to figure out how to make the head of the sculpture, as well as other details.


Classic version
For children, modeling is one of the most attractive and at the same time calm activities.... Already at preschool age, this activity can be organically combined with the study of the surrounding nature. Gradually, however, the proposal to mold hares, wolves, foxes and bears begins to bore. However, there are many other forest dwellers.

A plasticine red deer is definitely a better option than some kind of badger or hedgehog.
For work, you need a brownish material. The main difficulty is not so much the torso itself as the branched horns. It is not easy to shape them properly. To make step by step red deer or red deer (as you like), you need:
- soften the plasticine lump;
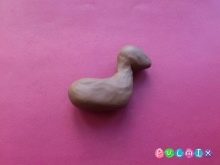
- form the body and head;
- bend a narrow section of the body to obtain a neck;
- fix the head on this neck;
- work out small details (first of all, sharpen the deer's head);
- put a black nose;
- set blue eyes;
- fix a pair of versatile ears;
- form "sausages" from orange material, which will then become graceful horns;
- fix the horns on the head (the larger the figure, the larger they should be);
- complement the figure with 4 legs obtained by stretching the brown "tubes";
- decorate a plasticine deer with yellow or white spots;
- complete the creation of the image with a medium-sized tail.


Modeling with natural materials
The creation of a deer sculpture with your own hands can be done in stages using a different technology. For her, in addition to colored plasticine, you will need twigs and chestnuts. The nuts should be larger. Additionally you need:
- board;
- wet wipes;
- stacks for modeling.
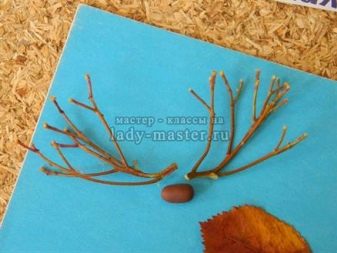
The first step is to select a pair of branched branches. To make the horns on the animal's head look more symmetrical, they are cut to the same length. Next, take a large chestnut and clean it from dust. The deer is generally done like this:
- knead plasticine;
- roll back the roller;
- divide it into 2 parts;
- an additional roller is molded, again divided in two;
- flattening the top edge to form powerful thighs above the hooves;
- limbs and torso are joined;
- stick a leaf-like tail;
- the center of the tail is complemented with a lightened strip;
- split the edges of the tail using a stack;
- a thick brown roller is molded;
- fold back its top (this will be a semi-finished product under the head and neck);
- stick around the face and neck with another variety of brown plasticine with a lighter color;
- make ears on the edges of the head;
- sculpt white eye bases in the form of droplets;
- add blue irises and deep black pupils;
- the edges of the eyes are complemented with small white reflections;
- using a narrow stack, prepare the nostrils;
- having rolled a red tourniquet, they make it look like a mouth;
- join the head and body;
- smear light areas, creating the effect of blurring the transition;
- gently insert the twigs.


You can also make deer from acorns, pine cones, and plasticine. The cones will have to be attached to each other with the help of the same plasticine at a slight acute angle. Such fastening of parts is reliable enough even for participation in exhibitions and competitions. Fragments of thin branches are inserted into the attachment points. The branches are usually cut or sawed to ensure an even cut.
The legs must be the same length. Then they look proportional. The acorn in this version will replace the head with the figure of a deer. Picking up a branched twig to replace the horns is not easy - but the results are worth it. To fix the horns, it is appropriate to use the same plasticine.

Helpful hints
To simplify the work, it is useful to print photographs and hang them where the modeling will take place. With tablets or smartphones, you can simply display pictures on the screen. If there are no acorns or chestnuts, as a last resort they can be replaced with smooth sea or river pebbles. Fir cones are often used instead of the body, and a pussy willow flower looks good as a tail.
Problems with picking up a lush twig are easy to get around. You just need to take a couple of branches that are less catchy than necessary, and fasten them with glue. Sometimes plasticine is used again instead of glue. Ears are good from sunflower seeds, eyes are from peppercorns, and a mountain ash berry can become a deer's nose.
In some cases, the head is formed from knitted threads, and the wings of maple seeds or scales from pine cones are put on the ears.


Other recommendations:
- horns they come out well from grape twigs - of course, devoid of berries;
- muzzle sometimes they are made from colored balls of cotton wool or from copper wire rolled into balls;
- legs and tails from matches - quite acceptable for home workouts;
- put the craft deer can be on a board or cardboard, on a saw cut;
- excellent decoration of the composition - paper applications.


To learn how to mold a deer from plasticine, see the video.


