Methods for sculpting a rooster from plasticine

When a child picks up plasticine, creates a new structure from a standard bar, mixes colors and plays with a form, he develops logical and abstract thinking. You can sculpt a cockerel according to different schemes: from extremely simple to those that require the use of additional material, for example, cones, acorns, nutshells.
Simple option
If you make a rooster from wax plasticine, brighter and more saturated, the rooster will turn out to be very expressive. The brightness of the shades will divert attention from the fact that the design itself is made simply and ingeniously.

The instruction for children should be easy. The cockerel is molded in stages.
- The main part of the rooster is made of yellow plasticine. From a lump of material, you need to roll a cone with a rounded top.

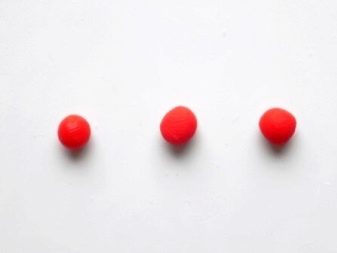
- To attach a scallop to the top of this cone, you need to make 3 small red balls... They are attached one after another, they are not spliced in advance.

- To form the wings, you should take green plasticine, roll small balls from it... Then these balls must be flattened. They are bent and attached to the sides of the yellow calf.


- The cock's beak can be made orange: it will be a thin flagellum, necessarily pointed at the end. The flagellum must be folded in half and fixed on the yellow body at the head.


- To form peephole the figure uses white and black plasticine.

- For paws you will need orange balls, they need to be flattened a little, and then notches are made on them with a stack. You can use a toothpick instead of a stack.


- The legs are fixed right under the little body.

- For a bright and lush ponytail, you need blue, blue and purple plasticine. Pieces of material of these colors must be rolled into flagella.The tail is attached to the calf at the back.


Such a rooster does not require special skills from the performer. Even in the first lessons on mastering sculpting, you can use this scheme.
How to blind a cockerel with a family?
The sculpting product can be called plasticine sculpture. It is not difficult to make a whole sculptural group out of a simple and accessible material. For example, a cockerel with a family: chicken and chickens. This composition can be done according to the scheme.
- Prepare materials and tools: a box of plasticine, stacks, a modeling mat, wet wipes or soft flannel cloths for wiping hands and tools.
- Think over the course of work: with which figurine to start sculpting and why. Since the cockerel is the main character of the composition, you can start with him. If it's easier to make small chicks first, so do it.
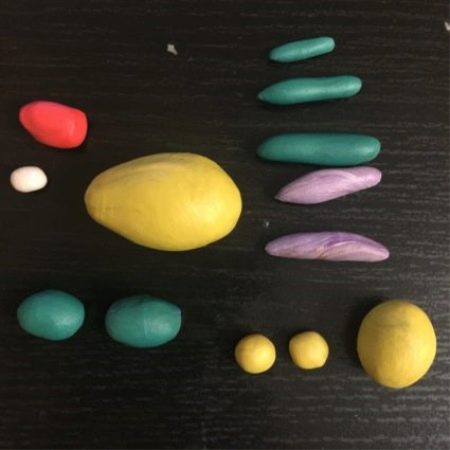
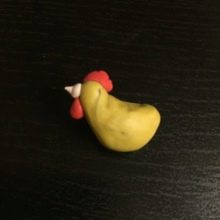
- The material must be warmed up before work. First, a large detail is performed, that is, the body of the cockerel. From a large yellow ball, its elongated body is gradually formed: at first it is drop-shaped, then slightly curved.

- After sculpting the base of the figure - the body - you can move on to the head. Eyes, crest, beak - can be done in any order. If the clay does not work well, you may need to wipe your hands or tool once more.


- Then you can move on to the wings.... Cakes are formed from green balls, which will become wings. They are attached to the body on the sides, notches are made on them in a stack, which creates a resemblance to feathers.

- The next sculpting element is a lush multi-colored tail. It can also be stacked with patterns that resemble the texture of feathers.


- Now you need to make legs... They can be made quite voluminous, as if they have a lot of fluff on them. This is really easy to do, and if kids are sculpting a rooster, you should stop at this version of the legs. But there is an alternative: break the match (without the head), and stick two matchstick fragments with plasticine. The legs will be more stable. The legs themselves are made from flagella, yellow or orange. The cock can be placed on a stand by fixing his stable limbs on it.


- The chicken is noticeably smaller than the cock, but the modeling takes place according to the same scenario. They begin to sculpt it from the largest part (body), and then small parts are attached in turn: a comb, beak, eyes, wings. Her tail may be completely inconspicuous, elongated from the yellow body.



- The chickens will complete the modeling of the bird family. Two to three yellow chickens are also molded from largest to smallest. There may be more chickens, if the idea of the composition requires it. The chicken will become a yellow ball, to which wing cakes are attached, as well as small eyes and small beaks. It is not at all necessary to make legs, because spherical plasticine chickens have a special charm.



- You can fantasize and make your own hands also food for birds... This is painstaking work, because the grains will be very small. Or you can make a box or trough of brown plasticine and put real seeds there.

More ideas
Combined techniques are also found in sculpting; children really like this fusion of creative directions.
It is especially important to use natural materials by combining techniques in autumn.
With cones
For work, you will need colored plasticine, a pine cone and a modeling board. Modeling is performed step by step.
- You need to roll a ball out of yellow plasticine - this will be the head.
- Form 2 legs from orange plasticine.
- Make 2 balls of white material, flatten them and attach them to the place where the eyes should be. In the middle, do not forget to make a black pupil.
- Form a red beak and scallop.
- Now it's time to take the cone, which will be the body of the rooster. The head is attached to the wide part of the cone, and the legs are attached to the narrow part. On the sides, wings are fixed (2 cakes made of light plasticine).
- You can fix the bird on a piece of cardboard, which will become a stand.
Such a rooster will be easy to make for children 3-5 years old, because it is very simple and does not require any experience in modeling. By the same principle, you can make the cock more graceful: a bump will remain his body, but the wings are formed from multi-colored feathers (flagella). The tail can also be sculpted from several bright plasticine flagella.


Big orange cock
If you ask what color a rooster is, the first most popular answer will be "orange". Although this color is not found in its pure form in the plumage of a bird, the overflow of an orange hue is noticeable in its color. And you can display this beauty with the help of plasticine. The peculiarities are that you will have to mix different pieces of plasticine: orange with a little blue or green, burgundy with orange or red with blue. A large rooster is also made step by step.
- You need to make a rather big, even, smooth ball... The neck and head of the bird should be attached to it (one part flows smoothly, without a sharp transition, into the other). To indicate the change of parts of the body, you can use a different color, lighter. Transitional tones work well, such as rich yellow with dull yellow or bright orange (carrot) with reddish orange. So, a bright yellow base, turning into a pale yellow neck, will look harmonious.
Not every set contains such shades, but if it is a box of plasticine with bars of 30 colors, choosing is easy.


- On the head of the cock are dark eyes, a red beard, a beak... Colors can be different, but in tune with the general idea. The beak can be made brown, dark brown or beige, sandy shades. This will also give beautiful combinations.

- A large, very bright red comb must be attached to the crown.... Notches on the ridge are usually not placed, but with a stack, you can give the ridge a wave, making the shape expressive.

- To sculpt the wings, you need red, orange or burgundy plasticine mixed with green... From two balls, 2 cakes are formed. They attach on the sides. With the help of a stack, you can make notches on them. The notches should be applied with sufficient frequency, because it is the frequent pattern that gives the imitation of bird feathers.


- The tail is shaped in the same color scheme as the wings. The plastic mass turns into several colored sausages, which have to be fastened together at the fixation point on the cock's body. Already fixed parts of the tail can be slightly pressed down with your hands to make them flatter. If you do this before fixing on the body of the rooster, the fragments of the tail will stick together or interfere with each other during assembly.


- The legs are made with a match. It is broken into 2 parts, discarding the sulfur head. Each part must be glued with plasticine evenly and accurately. These legs are easily attached to the body and fixed on the stand. The bird will be stable, will not fall forward or backward. Instead of matches, you can take toothpicks.


Everything is ready, the cockerel can be "relocated" to a stand, added as a hero to a story-related craft, or just play with him.
For information on how to mold a rooster from plasticine, see the video.


