Methods for sculpting a penguin from plasticine

You can mold a huge number of different figures from plasticine. These can be both extremely simple and very unusual crafts. In this article, we will learn how you can make an adorable penguin out of plasticine.

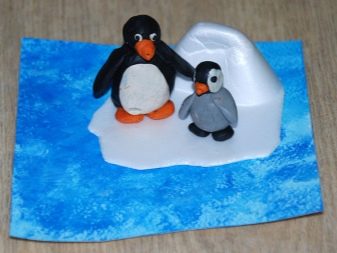


Simple option
There are many different ways to sculpt a penguin from plasticine. There are complex and there are extremely simple techniques that are ideal for children.
Using simple instructions, little craftsmen can make very cute penguins.


To easily and easily mold a penguin, you will need to prepare the following necessary components:
- black and white plasticine - these colors are the main ones, so it is better not to replace them with anything;
- several more colorful and bright pieces of plasticine, for example, blue, orange, red.

If all these components are ready, you can proceed to sculpting a penguin using the simplest scheme.
- A simple figurine does not need to clearly define the head and body. It is possible to prepare one egg-shaped base, and then make a penguin's face, a white breast on its front part.

- First, you will need to thoroughly knead the plasticine in order to make the central part of the craft out of it. At the same stage, you can prepare a small piece of white color, but before that, it is advisable to remove all the remnants of the dark plasticine mass from your hands.


- The plasticine components should be crushed one by one, and then immediately used to sculpt a penguin.
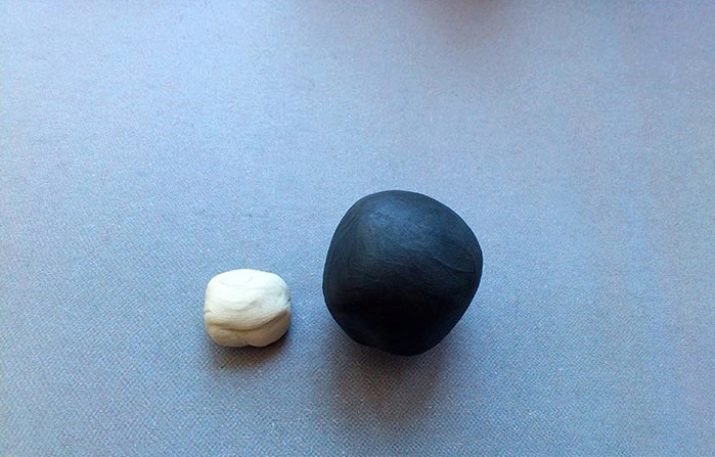
- From the black piece, you need to form a piece that resembles an egg. This element will play the role of both the head and the torso. From a piece of white you need to make a small cake.Its outline should follow the contours of the previous main part.

- Attach the white flat cake to the black egg-shaped piece. This procedure should be carried out as carefully as possible. The part will need to be carefully smoothed out with your fingers so that the top of the snow-white mass is even.

- At the top of the ovoid part with a match, push 2 small holes. This is where the eyes will be located. Better to make them close enough to each other. Next, you need to prepare a yellow or orange beak.

- The pits made for the eyes should be filled with pieces of black plasticine. A little lower, the penguin's beak is glued.

- The resulting central piece must be supplemented with black wings. These components must be made oblong. You will also need paws made in the form of yellow cakes, cut in two places.

- All components will need to be gently pressed to the base. The legs are attached at the bottom, and the wings are attached to the sides. The figurine of a small and cute penguin is ready. It can be supplemented with plasticine accessories in the form of a rolled scarf or tiny headphones made up of a thin plasticine sausage and two slightly flattened balls.


The finished craft will look very nice and funny.

How to mold from light plasticine
A cool penguin can be sculpted from a light variety of plasticine. Such material, after all the manipulations, soon solidifies, making the homemade product more durable and stable.
But it must be borne in mind that you should work with a light mass without undue delay, so that it does not have time to weather, lose a sufficient level of elasticity.
To work, you will need the following components:
- plasticine mass of black, blue, white and red;
- stack;
- water.

We will analyze step by step how to correctly make a penguin figurine from high-quality light plasticine.
- A block of blue color must be thoroughly kneaded between your palms, and then rolled into a neat sausage. You should not squeeze this workpiece unnecessarily in your hands.

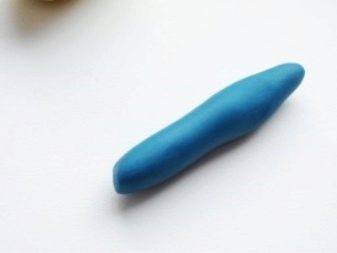
- Next, a piece of blue must be given the shape of a future penguin. The workpiece will need to be slightly flattened. As a result, you get a detail in which the smaller half will play the role of the head.

- A piece should be cut off from a white block of plasticine. From it you need to make a small sausage, and then flatten it into a pancake. The white piece is stuck to the front of the torso in blue. This is the side where the penguin's head and belly will be organized.

- The nose and paws must be molded from a red plasticine ball. Next, these components are connected to the main workpiece. From the black mass, you need to blind eyes for crafts. You should gently walk your wet hands over the workpiece to smooth out any uneven elements.

- 2 sausages are made from the remaining blue plasticine. They need to be flattened, and then put on the sides. These will be the penguin's wings. All contours of the elements should be well smoothed out so that they can be securely fixed on the body.

- If desired, the craft can be additionally decorated by making, for example, a scarf, a hat or other interesting details. The finished product must be left to solidify overnight. After that, the penguin will gain the desired level of strength, it will be possible to play with it.

Lightweight plasticine is a very malleable and high-quality material. In order to make really reliable and durable products from it, it is recommended to purchase the material in specialized stores.
Light plasticine is often found in retail outlets, where everything for art and creativity is sold.


How to make with cones
A plasticine craft can be very unusual if you additionally use cones in its manufacture. We will analyze in stages how to make a beautiful penguin with similar natural materials.
- First, you need to make a ball out of black plasticine, which will play the role of the head of the craft. This component should be fixed at the top of the bump. The components must be connected as tightly and reliably as possible. There should be no voids. The eyes and beak are made of colored plasticine.
- Next, roll 2 sausages from the main color. These will be the wings. They are also connected to the bump. Paws are made of colored plasticine. They are attached to the lower half of the body.
- A cake is formed from a white plasticine mass. Then it is attached in the central region of the penguin's abdomen.
- On this, the manufacture of the original penguin from plasticine and cones will be completed. The craft will turn out to be very interesting and funny.


Such an original and beautiful craft can be made even more spectacular by painting the cone base in any color you like.

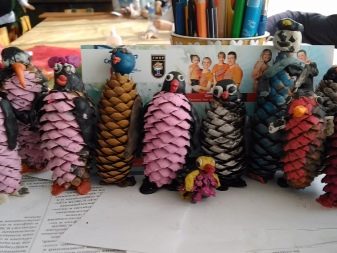
Basic colors are ideal - white and black. In this case, the imitation of the penguin's body will turn out to be more aesthetic. Additional decorations in this case will also be useful.


Modeling on cardboard
Plasticine penguins based on cardboard are original and cute. This is a kind of unusual volumetric applications.
Crafts of this type are ideal for older kindergarten children, preschoolers.
To implement all stages of work, certain skills are required, a young master must adhere to the correct contours of the craft.
Applications of this type are quite simple to do. First of all, on a cardboard base, you need to sketch the planned character.
It is possible to use a printer for these purposes.
It is worth printing an image of a funny bird using such equipment. Plasticine can be applied to a similar base.

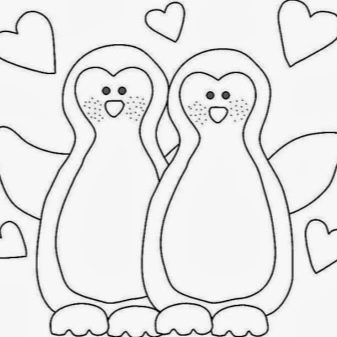
Small balls should be prepared from plasticine of all the necessary colors. These details will need to be “smeared” one by one on the cardboard base. Thus, all the contours and details of the sketched or printed picture will be effectively drawn. Plasticine strokes must be done smooth and neat. It is advisable to act accurately, not to go beyond the boundaries of the main picture.

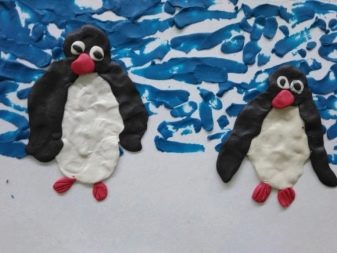
After all the stages of work, the finished original picture can be coated with a special varnish, and then placed in a beautiful frame.
However, it should be borne in mind that crafts of this type are usually not stored under glass, since under such conditions they soon lose their correct shape, wrinkle.


Idea with acorns
Very cute and cute penguins can be made from a combination of plasticine and acorns. In the manufacture of these crafts will be extremely simple, so children of any age will be able to cope with all stages of work.
Let's consider in stages how you can make a beautiful penguin from plasticine and an acorn.
- The first step is to prepare all the necessary components for making cute birds. You will need acorns, as well as pieces of plasticine in black, white, red or orange.
- Acorns should be perfectly clean and dry. These components will serve as the body and head of the penguins. Leave the natural caps on the acorns.
- It is necessary to prepare all the plasticine parts. First, you can take black plasticine, roll it into small sausages. These details should be flattened a little. The resulting components will play the role of penguin wings.
- Next, you need to take a piece of red or orange plasticine. This material should be used to mold the beak and legs of the future character. The beak should be triangular and slightly bulky, and the legs should be rounded and flattened.
- Next, white plasticine is taken. You need to roll a couple of small balls out of it. Then you need to flatten them. The resulting components will play the role of penguin eyes.
- When all the components are ready, you can start fixing them on the acorn base.Black wings should be attached to the side surfaces. The eyes and nose are attached to the front of the craft. The flattened legs are attached to the lower half of the acorn. On the white bases, the peephole needs to be fixed with small black (other colors are also suitable) plasticine circles.
If you do everything correctly and in stages, the craft will turn out to be very interesting and attractive.
If desired, an acorn penguin can be supplemented with various decorative components.
In the above life hacks, these can be plasticine scarves, hats, headphones, and so on.

How to mold a plasticine penguin on paper, see the next video.


