How can you mold a pony from plasticine?

Plasticine modeling is a favorite pastime for many children of different ages. This material allows you to create beautiful and original figures, make up whole compositions. Today we will talk about how you can make a plasticine pony with your own hands.
Tools and materials
Before you start making ponies, you should prepare everything you need:
- plasticine of various colors;
- stack for cutting plasticine;
- board;
- matches or toothpicks.


Modeling options
There are a huge number of ideas on how to make such a figure step by step. Consider the most popular options for creating characters from My Little Pony and others.
Sparkle
In order to gradually mold this toy, first a small block of brightly colored plasticine is taken. With the help of a stack, it is neatly divided into seven parts. They will become the basis for the manufacture of the neck, head, torso and limbs. To form the pony's head, you will need to roll a small ball. A cone-shaped blank is created for the neck, and an oval blank for the body.
All the resulting elements are connected to each other. All junction points are slightly leveled. To form the limbs of the figurine, you need to take matches or toothpicks and stick them with plasticine of the same color. Small horseshoes are made from material of a different color.


To make the expression of the pony's face more interesting and cute, first roll up two balls of white plasticine, lightly press on them to make ovals. These elements will be eye blanks. Then they take a little black material and roll two smaller ovals from it, which are attached to a white base.Thanks to these actions, eyes should be obtained.
Then small and thin cilia are rolled up and attached to the finished eyes. Ears are made from small triangles. The mane and tail for the figurine can be made from thin flagella of various lengths. At the final stage, accessories are created.
For each cartoon character, certain products are characteristic. So, pony Apple Jack is created with small apples. Wings can fit the Rainbow.


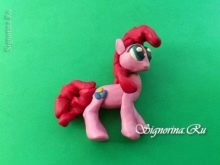
Pinkie pie
To make this pony from the series "Friendship is a Miracle", you will need to select the material of suitable colors. In this case, you will need red, pink, white, blue and black bars. The pink base is divided by a stack into six parts, while four of them must have the same dimensions (for sculpting the limbs). The other two lobules should be medium and large.
A ball is formed from a medium-sized piece, a tubercle is pulled out of it with three fingers. To turn it into a pony nose, you need to gently push the nostrils and mouth with a stack. After that, on the sides of the nose, large eyes are formed from blue plasticine. They should be oval in shape. Small black and white dots are sculpted on them as pupils. Cilia should be attached on top.

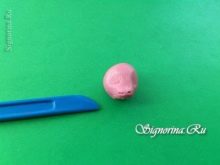
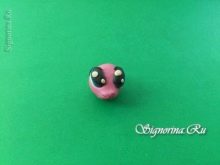
Later, all other parts are rolled out, the body is pulled out, and the neck is slightly sharpened. It is better to make the limbs from cone-shaped parts. They are attached to the body. In this case, all joints should be carefully smoothed out with your fingers. Then red plasticine is taken, it is cut into separate slices. These blanks are used for the hair part. Curly bangs are attached to the head. A match is inserted into the neck: it will act as a support that will not allow the material to bend under the weight of the head.
The head is attached to the body. Curved flagella are attached to the back of the neck, which will act as a mane. At the final stage, ears are created in the form of triangles or ovals.


moon
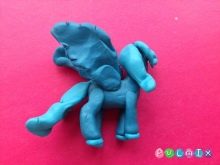
To make such a pony, you must first also prepare several separate blanks to create the limbs, head, neck and body of the desired shape. In this case, you should take blue and cyan materials for work.
The iris for the eyes should be made from turquoise plasticine. The sign of the moon and a choker for the pony's neck are cut from the black base. The jewelry is attached to the neck. Two small moons are cut out using two circles with different diameters. One of them is attached to the necklace, and the second is attached to the decal.


After that, a gray material is taken, and patterns for the hooves are formed from it. They are attached to each of the limbs. Then, from the blue base, they create a bang, a tail, and also a mane. A thin purple flagellum is rolled out on the board, and a stroke for the tail and mane is made from it. The resulting element is glued. Using a match or a toothpick, the head is attached to the body of the figurine.
Next, a crown is carefully cut out of the black plasticine mass and glued to the head. At the end, a small dark blue flagellum is rolled up, twisted and slightly sharpened at one end. This element will serve as a horn. The finished craft should be decorated with sparkles.


Princess Celestia
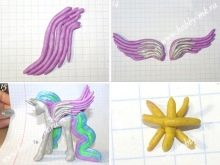
Eyes for ponies are made of purple mass. The tail and mane should be formed from stripes of light blue, blue, pink and green. All strips should be bent in such a way as to create a slight wave. Next, you will need to sequentially attach all the resulting parts to the head.
It is worthwhile to make blanks in advance for the formation of individual parts of the figure.... After that, the tail is attached to the body, for this it is better to use a match or a toothpick.
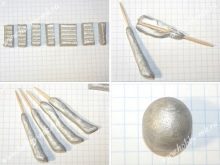


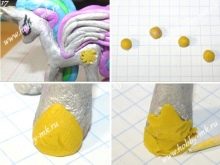
Later, a yellow plasticine mass is taken, from which a necklace, patterns for the limbs and a crown are made. Purple diamonds are also glued to the necklace and crown. It is also worth making a distinctive sign for the pony: a yellow sun with orange rays.A horn is cut out of the white base, it is attached to the middle of the head in front of the crown.
The mane and tail are covered with sequins at the end.

Rainbow Dash
To create this figurine, a ball is sculpted from a blue material, and then a head is formed from it, at the same time creating the contours of the muzzle. The mouth and nostrils should be immediately marked. Black small balls are placed in the holes for the eyes, and then purple slightly flattened ovals.
Glare for the eyes is created from pieces of white material. They are neatly attached to the pupils. It is also worth making the eyelashes. Next, the ears are formed from a blue base. They should have a triangular shape. The elements are attached to the pony's head.


Later, the body is cut out from a bar of the same color. It is connected to the head with a toothpick or a match. All joints are carefully smoothed. At the same time, several thin, multi-colored flagella of different lengths should be prepared. They are needed to create a tail, mane and bangs.
You also need to make blue wings. They should be arched. Each of them is made of two layers of plasticine. At their ends, small notches are cut out and feathers are made. At the end, the resulting parts are attached to the body.


Useful Tips
When working with plasticine, it is worth remembering some important recommendations. Before starting the manufacture of figures, the plasticine should be well softened, otherwise it will not take the desired shape. To speed up the process, you can place the mixture in a bowl of warm water for a few minutes.
Also keep in mind that when sculpting, you can easily mix materials of different colors to get a new shade. So, if you take the red and yellow mass together, then the result is an orange base.
To learn how to mold the characters of the cartoon My Little Pony from plasticine, see the next video.


