How can you make a parrot from plasticine?

The parrot is one of the most interesting birds with bright plumage.... There are many varieties of parrots, and you can try to mold each of them with plasticine. In the process of work, it will be necessary to use several bars of material of different colors. And you will also need additional devices.


Simple option
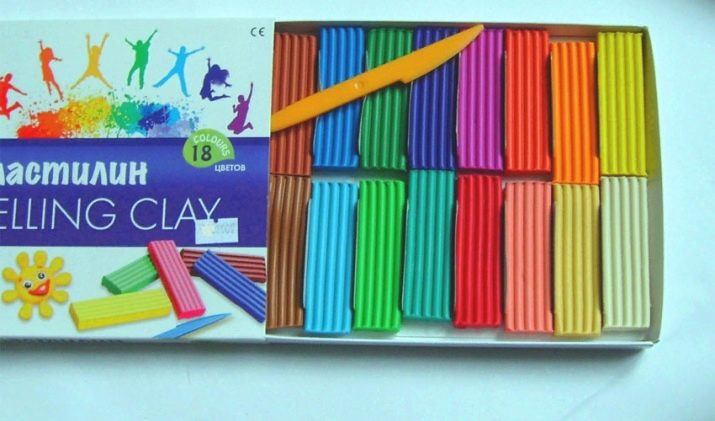
It is best to start sculpting a parrot with the simplest option. The proposed modeling scheme is suitable for children of school and preschool age. For work, you will need to prepare several multi-colored blocks of plasticine: green, red, yellow and blue. Additionally, you will need a small piece of white or beige, as well as black.

To create the main part of the figure, you need red plasticine. It is the masses of this color in terms of quantity that will be required the most. Let's consider the sculpting process step by step.
-
It is necessary to take a sufficient amount of red plasticine and knead it well in your hands. Then divide into two parts: one large (for the body) and the second smaller (for the head).

- From a large piece, you need to roll an oval shape, and from a small piece, mold a ball. Then the two figures need to be connected together and fixed well. If necessary, align the neck area with your fingers.

- Next, you need to take white plasticine to work.... From it you will first need to roll two balls of the same size, and then turn them into cakes. The resulting flat figures need to be glued to the part of the head where the muzzle will be. Care should be taken to ensure that these figures are located relative to each other as symmetrically as possible.

- At the next stage, you need to take a small piece of black plasticine into work and make a rounded sausage out of it - this will be a beak... When the element is completely molded, it must be glued between the white cakes and fixed properly. And also from black plasticine it is necessary to form two black dots - these will be the eyes. They must also be symmetrically fixed on white cakes above the beak.

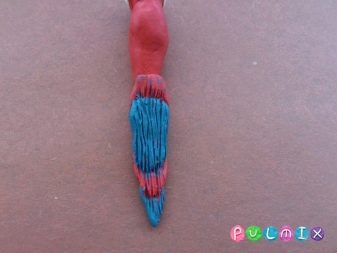
Now the formed base must be put aside for a while to start sculpting other parts of the figure. So, you need to take plasticine of two colors (blue and red) and knead it well too until a soft consistency. Each of the flowers must be divided into two parts, first form balls, and then turn them into cakes. As a result, there should be four elements in terms of quantity. They need to be superimposed on each other, alternately changing colors, and fixed. At one end, the extreme cake needs to be sharpened. This will be the tail.


Wings are created according to the same principle. The only difference is in the color and size of the balls - they will be much smaller. It is necessary to take plasticine of blue, green, red and yellow colors and form the same cakes as in the first case (there should be 8 of them in total). Then they need to be connected together, and the endings also need to be sharpened.
The next step is to pick up a toothpick and apply longitudinal sections to both the tail and the wings. Thanks to such manipulations, the effect of feathers will be created. Now the final prepared parts need to be connected to the main body.


An important point! During the sectioning process, you should not constantly change the toothpick, beware that the colors will mix. This shading gives even more naturalness to the color.
At the final stage of creating the shape, you need to make the legs. To do this, you need to form two small ovals from red plasticine and two sausages from black. The red ones are attached to the body, and the black ones are already directly attached to them. Using a toothpick, you need to separate the legs so that they are as similar as possible to the real ones.

How to blind the bird Aru?
The Macaw parrot is a rather large species. For naturalness, the plasticine figure itself also needs to be made large. During the sculpting process you will need:
-
plasticine of different colors - blue, yellow (large volume), a little brown, black and white;
-
scissors;
-
toothpick.

The head and body must be sculpted in the same way as in the first option. To do this, you need to use yellow plasticine. When the oval body is ready, you need to make white cakes, beak and eyes according to the same principle to decorate the muzzle.
For a parrot, it is necessary to make a so-called crest on its head. To do this, you need to roll a ball of blue plasticine, flatten it and cut from one edge with scissors. The result should be some kind of fringe. The crest is fixed on the head.
Further, according to the already known technique, it is necessary to make a tail and wings. Only in this case, you need to use two colors: blue and yellow. The latter will be at the bottom and the blue one at the top. The tail should also be cut into several wide strips with scissors.
At the final stage, you need to take brown plasticine and make paws from it.


The decorative part of the work also needs to be done with a toothpick or orange stick.
Modeling a parrot Kesha
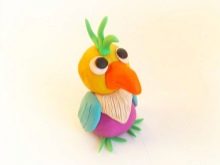
Since the hero of the famous cartoon parrot named Kesha is a very popular character among children, it is possible to mold him from plasticine. To do this, you only need plasticine of different colors: pink (dark and light), yellow, red, green, blue.
The body needs to be dazzled from dark pink, and the head from light pink. Next, you need to stick two white cakes on the muzzle, and make the beak and eyes from yellow plasticine (in this case, they should be large).


To make the wings, you need to roll two green ovals, and attach a small blue ball to them. Flatten the resulting figures, and make cuts from the blue edges with scissors.


Now you need to stick a short tail from green behind the body. And then roll a sausage out of the same plasticine and make it flat. It also needs to make small cuts and stick on the head - this is a mohawk.
The paws must be formed from yellow plasticine. In this case, you do not need to do the decor with a toothpick.


How to make a cone figurine?
As a base-body, you can use not the plasticine itself, but a spruce or cedar cone. It needs to be painted red or blue with gouache. When the paint is completely dry, you can proceed to work with plasticine.
This will require plasticine of different colors: blue, red and green. And also for the eyes and the design of the muzzle, you need to prepare small pieces of white and brown material. Step by step, the sculpting process is as follows:
- form a head from blue plasticine, decorate the face according to the already worked out scheme;
- make wings and a tail from green and red plasticine;
- each piece connects to the torso.
It is necessary to make stable legs from black plasticine and attach them to the bottom of the cone.
If you don't want to work with paints, you can stick a thin layer of plasticine around the bump. The main thing is to warm it up well before that.


For information on how to mold a parrot from plasticine, see the video.


