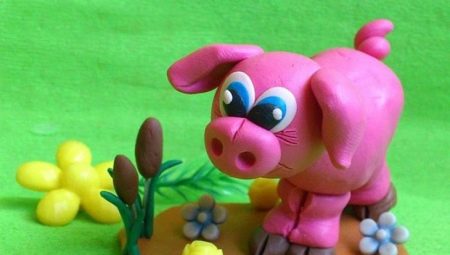
Methods for sculpting a pig from plasticine

You can mold a huge number of different figures from plasticine. Children are very fond of making animals out of plastic material. From plasticine mass, you can make not only cats or dogs, but also adorable pigs. This article will show you how to do this.

Simple option
You can make a very cute and cute pig out of plasticine mass. The process of making such an animal will be extremely simple and fast.
It is advisable for small children to use the classic schemes, which are the most understandable and not complicated in any way.

To make the simplest pig, you need to use pink plasticine. For the first children's crafts, this option will be the most appropriate. Consider what other components will be needed to make a cute plasticine figurine:
- plastic stack;
- a special board designed for comfortable sculpting.

Let's consider in stages how to make a piglet from pink plasticine mass.
- First you need to take a bar of pink plasticine... It must be divided into 3 parts, one of which should be the largest in comparison with the rest. A smaller part will need to be left for the manufacture of the torso and tail. The second half of the plasticine should be cut into 4 more pieces. In the future, the hooves of a small pig will be made from them.
- It is necessary to cut off a piece from a large plasticine part, and then put it aside for a while. The remains will need to be rolled into a ball, which will be used to make the animal's head.
- Then you need to make the eyes of a pig from white material.... In addition, you will need to make a small patch. For the manufacture of the latter, it is recommended to use plasticine of a darker, almost purple hue.
- All prepared components of the face should be fixed in the correct places.... After that, you should take the stack. With its help, it will be necessary to draw a mouth on the face of a pig.
- From the remnants of a piece of pink plasticine, you need to blind your ears... They must be made triangular.
- An oval piece must be formed from a medium-sized piece, which will then serve as the body of a piglet. From one end you will need to insert a match, and then put on an already prepared head. After that, you can start making the ponytail.
- There are still 4 pieces of material left... They should be used to make piglet legs. Hooves can be made from purple plasticine.

After such a simple and understandable master class, the child will quickly learn to work independently with plastic material.

How to mold a yellow pig?
From plasticine mass, you can make not only a pink, but also a yellow pig. It is believed that this animal brings prosperity, luck and happiness to the home. A beautiful craft will become not only a joy for a child, but also a kind home decoration. Before you start making such a charming plasticine talisman, you should prepare all the necessary tools and materials:
- plasticine mass of various shades;
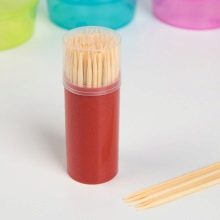
- several toothpicks;
- a kit consisting of several stacks;
- a sculpting board.


Consider the step-by-step instructions for making a yellow plasticine pig.
- A yellow plasticine piece is necessary initially divide the stack into separate parts. You need to take 2 large pieces. Oval parts should be formed from them, from which the body and head of the pig will be made.

- Piglet leg blanks should be made. At their ends, you will need to fix pink pieces. Thus, it will turn out to arrange cute hooves. The tail is made of a spiral plasticine "sausage".

- From a couple of small plasticine pieces of a yellow shade you will need blind ears. For these purposes, you need to carefully roll the oval elements, and then flatten them. The same steps should be repeated for the pink plastic mass, and then placed in the middle of each ear.

- The next step will be head decoration of a yellow pig... A charming patch is made from a small mug. In it, you will need to draw the nostrils. To do this, you can use a match or a toothpick. You should also sculpt the eyes, cheeks and mouth.

- You can take green plasticine, and then make a beautiful wreath out of it.... It will serve as an original decoration for a plasticine pig. To make such a decor, you need to take a green piece of material, make a "sausage" out of it, and then close it into a ring. You will also need to prepare several leaves and flowers, which will complement the plasticine wreath.

- The legs of the yellow pig are connected to its body.... A match is inserted into the upper half, and then the head is placed on it. The tail must also be attached to its place.

A cute yellow pig made of yellow plasticine will become an interesting interior decoration. The craft can be placed in the most conspicuous place in the children's room.

How to make a clover figurine?
Plasticine pigs on clover are very beautiful and interesting. They are quite simple to make, so it won't be too difficult for kids to make them on their own. To make such a figurine, you will need:
- plastic bars of pink and green shades;
- a special sculpting board;
- plastic stack.


Let's take a look at the step-by-step instructions for making a pig on a clover.
- First of all, a pink block will need to be divided into several parts.... Four pieces will be used to make the legs. They should be flattened, since the pig will not stand, but lie on the green plasticine clover.
- It is necessary to sculpt an oval detail, which will then serve as the body of the craft... One part should be made slightly tapered, since the muzzle will be located here.
- The blank is necessary connect with flat legs.
- Next, you should take a small piece of pink plasticine mass. You need to make a patch of it. It is advisable to fix this component from the side of the narrower part. You will definitely need to make small nostrils.
- Made of white material make beady eyes... They are put in their place.
- Tail for a pig it will be easy to make from a small pink "sausage". Pig ears should be made in the form of triangular pieces.
- Next, you will need to take a green bar. It will need to be properly rolled out on a plank to get a flattened part. By means of special felling, it will be necessary to prepare clover leaves on a green base.
- A figurine of a pig should be placed on the finished base. On this, the manufacture of an interesting craft can be considered complete.


Making Peppa Pig
Peppa Pig is a favorite character of many children. This popular animal can also be made with your own hands from plastic material. For this you will need:
- a set of high quality plasticine;
- stacks;
- modeling board.

Let's find out what the algorithm of actions will be.
- A light plasticine bar is taken... A ball is rolled out of it, in order to then form an oval piece. A patch in the form of a cylinder is attached to the side.

- They decorate the pig's patch and mouth.

- Then take small pieces of light plasticine mass. The ears and eyes of Peppa pig are formed from them. All prepared parts should be secured in place.

- Next, use red plasticine... The body of the pig is made from it. To do this, make a large "sausage".

- The thinner "sausages" are used to form the arms, legs and tail of the character. It is worth forming the fingers on the hands of the pig.

- All parts made are fixed in the correct places... To make the figure more stable, you can additionally make plasticine slippers. To create them, you should use a plastic material of black color.

The original toy in the shape of Peppa pig is ready. If desired, the craft can be cooled: this way it will harden faster.
Sculpting with a cone and an acorn
With your own hands, you can make very original and cute crafts from plasticine and natural materials. Acorns and cones are often used to make an adorable pig.

To make such an original animal with your own hands, you will need the following components:
- small pine cone;
- acorns;
- plasticine mass;
- stacks;
- special plaque;
- wet wipes for hands.


Let's get acquainted with the instructions for making crafts from plasticine and natural materials.
- It is recommended to use a cone that has scales tightly attached to the base.... Be sure to wipe off all dust and tar. The acorn also needs to be peeled, the hat does not need to be removed.

- Next, a pair of ears is sculpted, differing in an elongated structure.... For the manufacture of these components, you should use yellow plasticine. Using a stack, it is recommended to carefully draw the inner ear folds.

- The hind limbs of the pig are made. The hooves should be separated by a stack.

- Roll up small rollers. These will be the front legs of the figurine. Here it is also necessary to highlight the stack of hooves.

- At the next stage, the cap is separated from the acorn. The inner space of a natural element is filled with yellow plasticine. The surfaces are carefully leveled. The nostrils are made with a stack or a match.

- The piglet is neatly connected to the round side of the cone.... A mouth is attached to the pig's face.

- The eyes of such a craft should be made more expressive and bright. To do this, you can make a beautiful iris from blue plasticine. The pupils should be made black, complemented by small white highlights. The eyes must be firmly fixed over the patch.

- All limbs are connected to the trunk from a bump... The details must be firmly pressed against the piglet's body.

- Prepared ears are necessary fix on the crown of the piglet.

The finished product can be decorated in different ways. For example, it will be interesting to look at a large appetizing acorn, which the pig squeezes with its paws.

You will learn how to mold a plasticine pig from the video below.


