How to mold an owl from plasticine?

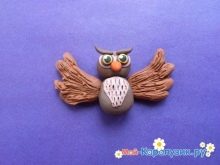
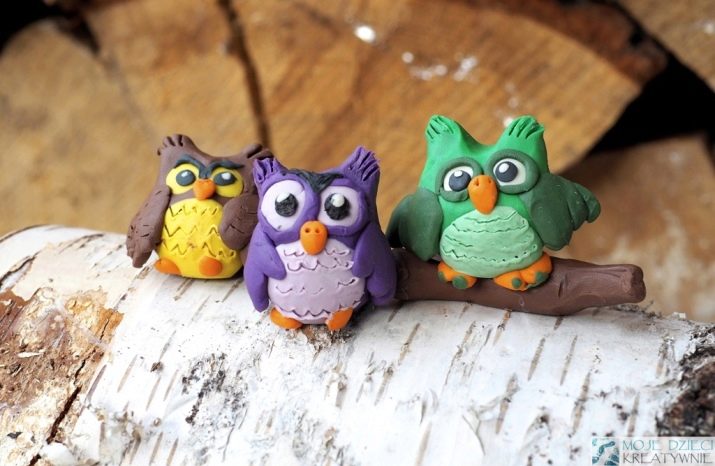
The plasticine owl is a cute character that should be molded at least to decorate the child's working shelf. And, perhaps, it will complement the craft in a garden or school, or it will be useful for some large voluminous work. Many adults believe that if they have not taken plasticine in their hands since school years, then it is not worth starting. But sculpting is such a fascinating business that it attracts everyone at once. Therefore, the option "I will not succeed" is definitely worth rejecting.


Classic version
In this example, the plasticine owl will not be very original, but it will definitely work out well, quickly, and the character will be one hundred percent recognizable. And also this master class is designed just for those who have not crumpled plasticine in their hands for a hundred years.

For work, you will need plasticine of several colors (yellow, black, brown, orange, white, beige), you also need stacks and a modeling mat.

How to blind an owl: step by step instructions.
- Work begins with sculpting two ball bases: one larger, the second smaller. In this case, they are brown, but you can play with the color.
- The balls need to be connected, a little blinding them to each other. From above, the product should be pressed lightly with your palm to add flatter blanks.
- On the front part of the head ("face") two light cakes are stuck, on top - smaller brown cakes. These will be the huge eyes of the owl.
- Slightly lower in the center, an orange curved beak of the bird is attached.
- And again, return to the eyes. On top of brown cakes are attached yellow, then black, then white reflections on black pupils.
- You can move on to the owl's breast - a triangular cake is attached to it, on which notches are applied with the tip of the stack in a checkerboard pattern.
- Two curved tubes are used to make "eyebrows", which give the owl's gaze a predatory determination.
- You can grab the wings. The brown material is kneaded, divided into two portions. These will be cakes that need to be turned into triangles. A stack forms notches along the edges, and so the entire surface is stripped to simulate the wings.
- The wings are attached to the back of the owl, spread apart.
- To form limbs, shins are made of plasticine, and orange legs are made of material of a different color. Details are held together.
- The legs need to be connected to the body, you can make matches as the basis of the legs so that the bird is more stable.
- A beige triangular tail is attached behind the body.


The bird is ready! In stages, such a craft will be mastered by a child. For preschoolers, this may be difficult, but elementary school students have to cope.

How else can you make a figurine?
Modeling an owl step by step is also possible according to other scenarios: for example, a bird can be themed, made for a certain holiday. Or is it not a figurine, but a plasticine painting. Or, which is often found at autumn exhibitions in kindergarten, a craft made of plasticine and natural materials. It makes sense to describe each of these cases in detail.


For halloween
There is a noticeable difference in this little owl - it seems to have stepped out of a picture dedicated to the mystical holiday of Halloween. If children celebrate it, they will like this decor. By the way, the instructions for this modeling are simple, and the guys themselves can make a simple plasticine sculpture.

For work, you should prepare dark green and black plasticine, additional colors (orange, white, purple, black and yellow), as well as a thin stack or stick.

Modeling an owl with your own hands in stages.
- The first part to be rolled up is the skeleton. It is made from dark green plasticine. It will be an oval figure, flattened on both sides. The oval will soon become both the head and the body of the bird, which merge into almost one figure.
- Two white round cakes are made for the eyes. They need to be closed, and inside to make black, next to the attached pupils. Grooves are applied with a thin stick or a stack under the eyes.
- An owl needs to be formidable, which means it needs to make eyebrows. They are created from two thin brown sausages.
- The wings are flat cakes, pointed on one side. The wings are glued on the sides, they will be spread out - on Halloween night, the bird does not sleep, but hunts.
- Further, blanks of smaller parts are made. Orange paws are forming. A hat with a black rim and a yellow buckle is made from purple plasticine.
- The paws are molded to the bottom of the calf. An orange beak adjoins the eyes, the tip of which is curved downward. Spread your paws, as if an owl is hunting right now.


The owl looks frightening, to match the holiday for which it is made.

On cardboard
Plasticinography is a direction where they draw with plasticine on paper or cardboard. It turns out very nicely. Of course, this is no longer as easy as just sculpting, but the effectiveness of the work is much higher.


You can verify this by looking at the following examples.
- Owl according to the author's methodology of Olga Fonina. First, a background is made (blue with a black vignette), then the main elements: a tree branch and an owl sitting on it. Plasticine with many shades is used, it is the coloristic selection that helps the work to be convincing and memorable. Although, of course, everything is technologically filigree here. Based on the model, relying on creative intuition, children 10 years and older can repeat this work.

- Winter owl, and also on a branch. The sculpting principle is similar. You can play with flowers, as well as with the size of a plasticine painting.

- A very delicate job, which not every adult can handle, even those who love creativity and are fond of something from the DPI category. It can be seen that the master has a handwriting and a full hand. But as a reference point, such an owl is ideal: mixing colors, working with a stack, attention to detail - there is a lot to learn and something to try to repeat.

- A cute family photo - that's how you can call this plasticine painting. Successful selection of colors, the choice of plasticine, the idea itself. May be family work.

There is a lot of intuition in plasticine art, understood not so much in theory as in the process of modeling. TOHow exactly to knead the material, how to achieve a thin and uniform layer, how to "paint" with a stack - all this comes during sculpting, therefore the main requirement for such creativity is only one: take and try.


With natural materials
The simplest version of such a craft is a pine cone and plasticine. For work, you will need a stucco material of any color (as the author wants), a spruce cone, a plastic stack.
- The first stage is the production of blanks for the wings. They will be the same brown balls. From them you need to form two tear-shaped elements. They will become the wings that are attached to the sides of the owl's body. Taurus is a pine cone.
- The head blank is formed directly on the body. In this case, she is also brown.
- Now you can take up the eyes: two more or less large balls are made of white plasticine, smaller balls are made of blue plasticine. First, white cakes are attached, then blue, then black pupils (even smaller balls) and white reflections.
- An owl's beak is made from orange plasticine. The paws will also be orange, made from flagella.

This is a very simple owl, everyone can handle it.
If you fantasize with what other natural material you can combine plasticine so that an owl comes out, it can be a walnut shell, leaves (for wings), seeds (to imitate feathers, for example).


Useful Tips
If you work not with classic plasticine, but with light (sometimes it is called airy), the level of quality of the craft can be higher. This material self-cures in the air, and the variety of its colors is impressive. And also the mass does not stick to the palms, its greasy traces will not be found on the floor, on carpets, on the sofa.


But they usually start with simple plasticine, inexpensive and more familiar. Crafts are sculpted in parts, from the largest parts to the smallest.

Recommendations for beginners:
- if you wet your fingers before smoothing the clay, the surface of the craft will shine a little;
- to depict thin plasticine threads, you can use plastic syringes (without needles, of course);
- for the most insecure, stencil plasticinography will be helpful, everything is debugged in it, there are almost no mistakes;
- before work, plasticine must be kneaded in hands, warmed up;
- sculpt only on a rug or a backing board - marks and even greasy stains may remain on the table (as well as on clothes, on paper);
- it is convenient to store plasticine in sectional containers - there are such samples for cosmetics, thanks to their divisions, each color has its place.

To get a beautiful craft, you need to tinker. Someone thinks faster, someone will need several attempts. But modeling is not in vain considered a part of art therapy, so not only the result is pleasant in this matter, but also a calming, relaxing process.
How else you can mold an owl from plasticine, see the video below.


