How to mold a giraffe from plasticine?
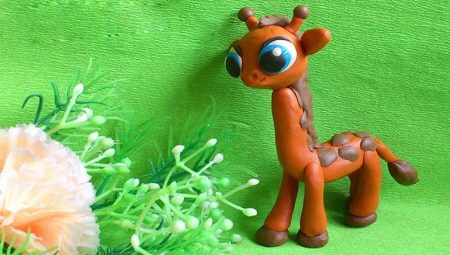
If your child is interested in plasticine, then the time has come for conscious creativity, and not just rolling balls. Help in this is a wonderful reason to become closer to your own child, because it is precisely such moments that make parents not just dads and mothers, but also friends.

Classic version
If the creative choice falls on the giraffe, this is an excuse to broaden the horizons of the child. At the same time, give a short lecture in the form of a funny story about these magnificent animals. True, for this you must first prepare yourself - go to the Internet, read information about them, prepare a video show. It will certainly take some time, but it will be worth it. Firstly, the baby will be delighted that his mom or dad knows so much, and secondly, children are very curious and have a phenomenal memory. The information received in a playful way will remain with them for life. And, finally, thirdly, this is another reason to boast of your parents in kindergarten.
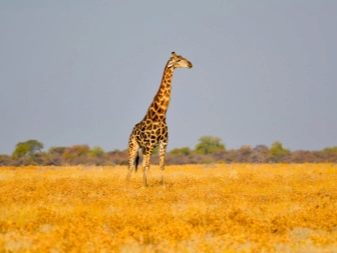

African giants are very beautiful and, despite their gigantism, they are able to perfectly blend in with the surrounding background. A great topic to tell your child about when it comes to choosing the color of plasticine for the body and spots on the skin. The work will become much more fun if you accompany it with an interesting story about the life of "living construction cranes" from mysterious Africa with its Limpopos and hippos. The movie about giraffes gives the child a visual representation of what a real animal looks like. They also have a small head with huge eyes and funny horns, located approximately at the level of the third floor of an apartment building.


. To sculpt a giraffe from plasticine you will need:
- yellow or orange plasticine as the main material;
- dark brown plasticine for manes, hooves and specks, and some white, blue and black for gorgeous eyes.
In addition, you will need:
- plasticine rug;
- special knife for cutting;
- matches or toothpicks for the legs and neck;
- a piece of floral or copper wire for the ponytail.
How to mold a giraffe with your own hands?
The use of contrasting shades is a prerequisite for reproducing a giraffe, otherwise it will be impossible to repeat the pattern on the animal's skin.
Its beautiful spots should be clearly visible on the figurine.

A block of the main color must be kneaded, warmed up in the hands to obtain an elastic pliable material. After that, divide it into 3 parts:
- for the neck;
- for the head;
- for the torso.

A real giraffe has a disproportionately small head - to get a cute little animal with a cute face, you can make it bigger than it actually is. To this must be added the legs and tail parts. These parts, of course, will cool down and become solid until their turn comes, so you should not strive to immediately make them perfect. The dimensions are determined arbitrarily.
Now it's time to start doing the torso.
- Crumpled and warm plasticine is drawn in the form of a carrot, in which one end is thicker and the other is narrower.
- The finished "carrot" is bent approximately in the center. The thinner end will be the neck, a match must be inserted into the neck, leaving a small tip sticking out - the head will subsequently be fixed on it.
- Tiny balls of contrasting plasticine are rolled up, flattened on the rug and molded onto the back and neck. It is more correct to do this now than to sculpt on a finished figurine (as is usually advised), since it is easy to damage a newly made, still soft figurine with long legs.
- From the same color, you need to make a mane and attach it to the neck.


Making a head is also available for a small child:
- you need to roll the ball and slightly stretch the muzzle;
- at the tip of the muzzle, make two small pits with the head of a match - these will be the nostrils;
- help your baby to depict a smile with a thinner end of a match;
- now you should roll 2 small sausages in the form of horns, 2 more of the same should be slightly flattened in the upper part and give them the shape of ears;
- for the eyes, you need to make 2 cakes of different sizes from white, blue, black plasticine and connect together, making 2 eyes.


Attach all the blanks to the head, resulting in a funny and cheerful face. The head is connected to the neck by the protruding tip of the cervical "skeleton".

To make legs, you will have to complete several steps:
- 4 rectangular blocks need to be fashioned from the main color;
- stretch them into long cone-shaped parts and roll them out slightly, while observing the proportions - on one side they should be slightly wider;
- now you can insert matches or toothpicks inside the blanks and carefully "wrap" with plasticine, trying to make them even;
- to make the legs look natural, you need to add hooves - roll 8 small balls from dark plasticine, and then mold them in pairs (a reason to explain to a child what the definition of artiodactyls means).

Attach the finished hooves to the legs, and the legs to the body, the tips of protruding toothpicks will help with this. Do not forget to decorate the legs with spots.

The tail blank is even easier:
- a thin sausage is rolled out of the main plasticine;
- after that, it must be rolled out slightly, as is the case with the legs;
- insert a "skeleton" inside - if you use a match, the tail will be straight, and the use of wire will make it slightly curved, which will give more liveliness to the figure;
- a small thickening brush of a contrasting color should be glued to the tip of the tail.
Having connected the legs with the finished body, you need to put the plasticine giraffe on the table and lightly press down on top so that the figure stands steadily.

Modeling with cones
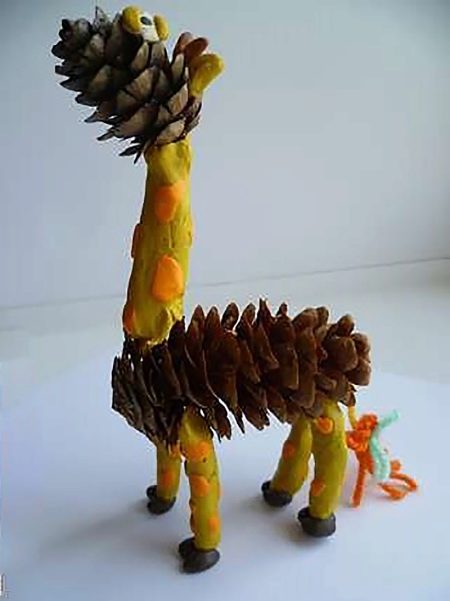
Another option is to sculpt a giraffe with your own hands from natural materials. How you can make a figurine from plasticine and cones - the method is painted in steps. Making such a craft is available even for kids 3-4 years old.
To make a simple craft you will need:
- 2 pine or spruce cones of different sizes - you can take an elongated spruce cone for the body and a small pine cone for the muzzle;
- plasticine of different shades - orange, brown for the body, white and black for the eyes, yellow and orange woolen threads;
- matches should be replaced with toothpicks - their sharp tips will help connect all the details with the bumps.

Stage-by-stage production:
- make legs from the main color in the way described above, not forgetting about hooves and spots;


- legs must be connected to a big bump;

- now the horns, ears and eyes are sculpted, glued to the bump head;


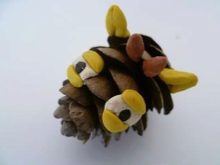
- the turn comes to the neck, and it is already known how to make it - roll the sausage, pierce it with a toothpick, decorate with specks and mane, connect it to the head;


- the tail can be made fancy - weave a pigtail from the prepared threads, tie it at the end with a bow, leaving a brush at the end;

- tie the tail to the bump using the threads left at the beginning of the braid.

After that, it remains to connect all the parts into one structure and check it for stability. That's all. The cute little animal looks like a cartoon character.
How to make on cardboard?
A great way to make a plasticine wall panel application with your child. The field around the future flat figurine provides an opportunity to turn on imagination and create a fairy tale in the picture. Decorate it with banana palms, coconuts, depict the sand and the sea.
The principle of creating such pictures is "smearing" the plasticine on the base or rolling it out with a rolling pin and then gluing it onto cardboard.
Step by step algorithm:
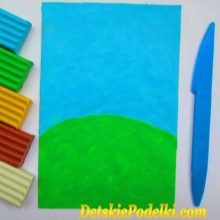
- first, they create a background - grass, the sky at will, a conceived landscape, leaving the central place empty - for a giraffe;
- colored cardboard will make the task easier and make the end result more interesting;
- after that, they draw the contour of the giraffe and begin to fill it with plasticine in accordance with the parts of the body and color;
- palm trees, bananas must be made voluminous - in 3D, that is, a convex layer of plasticine is smeared, the drawing on it is made in a stack.


The finished applique is decorated with beads, rice, butterflies. By placing the work in a frame, parents and their child can admire and be proud of it.

A detailed description of the process of sculpting a giraffe from plasticine can be found in the following video.


