How to make a snake from plasticine?

Plasticine modeling can captivate not only children, but also adults. You can create any crafts from this material and even decorate a nursery with them. But for this it is worth practicing. For the first crafts, it is better to choose simple options. For example, you can mold a snake from plasticine.


What is necessary?
Before starting a creative activity, it is necessary to prepare a workplace, everything you need should be at hand. We list all the items that you may need to make crafts.
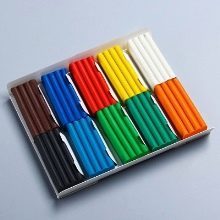
- The kit for creativity in this case will include several colors of plasticine. You may need gray, black, brown, green shades. But it all depends on the idea that it was decided to implement. Bright shades cannot be ruled out either.
- A modeling board or oilcloth is a must. This will help keep the table clean. And it is more convenient to sculpt on a board. You should not choose an option that is too cumbersome. A board measuring 30 by 40 cm will be the best option.
- Stacks will help with the decoration of small details. Plastic knives and scissors with rounded ends, as well as a rolling pin, will also not be superfluous.
- In some cases, you may need a pencil, cardboard (if a picture of plasticine is conceived), decorations in the form of various sequins, beads, beads. Paints and varnish are often needed.


Step-by-step instruction
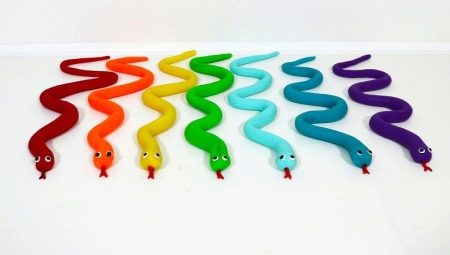
A plasticine snake is one of the simplest crafts, so it will not be too difficult for children to make it with their own hands. A snake can look completely different, there are so many options that you can create an entire terrarium. Snakes can be thin, thicker, short, very long, monochromatic, with bizarre patterns. You can also dazzle a funny cartoon snake.In a word, sculpting such a reptile is a very exciting process.
First, let's look at how to sculpt the simplest snake. First, take a green piece of plasticine and start rolling it out. Ideally, you should get a "sausage". We adjust its thickness ourselves. It is worth rolling out so that a narrowing occurs at one of the ends. This will be the tail of the snake.


The head can be formed at the other end of the same "sausage". It is enough to give it a slightly oval or diamond shape with the help of your fingers. The head can be dazzled separately. To do this, you need to take a piece of plasticine, make an oval or diamond shape and attach it very well to the snake's body.
At the next stage, we make the eyes. We need two small white and two black pieces of plasticine. White will be slightly larger. Slightly flatten the balls and glue them to the snake's head. Then attach the black balls on top. You can replace them with small beads or beads.


To make the snake patterned, take a stack and draw diamonds on the snake's body.
Next, the snake can be twisted into rings or left in an elongated form. This is at the request of the little master.


There are also more complex options that will be of interest to older children. A detailed master class will help you create your own craft. Moreover, it is not at all necessary to always strictly follow the recommendations. You can choose your colors and shapes based on only the basic process.

Let's consider the whole process in stages.
- First, take a piece of brown or orange plasticine and twist a thin "sausage" out of it. We do this carefully so that the body turns out to be even and smooth. This will give the snake a more realistic look.
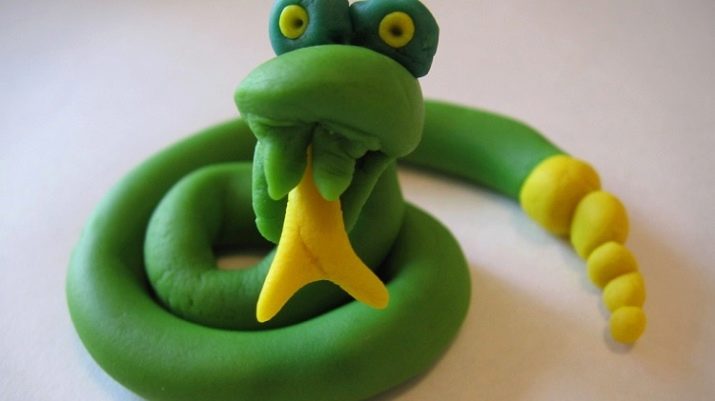
- Then we start making the head. To do this, take a piece of plasticine and roll an oval out of it. With the help of our fingers, we give it the shape of a slightly elongated snake's head, and then at one end we separate the plasticine so that we get an open mouth. We level and smooth the surface well.
- Now you need to blind a thin sting and teeth, and then carefully insert them. You can also use red woolen thread as a sting, and beads instead of teeth. Eyes can also be made from a wide variety of materials. Even sequins will do.
- The snake will look good with colored patterns. To do this, you can, for example, take green and yellow plasticine. We roll out a strip of green, then slightly flatten it and glue it to the back of the snake along its entire length. After that, we make a thin strip from the yellow material and place it on the back in a zigzag manner, pressing it well against the green strip.
For information on how to mold this snake from plasticine, see the next video.
Useful Tips
If you are going to start the creative process, you should prepare the workplace, remove all unnecessary things, stock up on wet wipes. It will be useful for a little master to purchase a special apron and oversleeves. The stores have different options for boys and girls, for example, with characters from popular cartoons. If this is the first experience, the baby can be offered to mold a bright snake with a cheerful muzzle. You can sculpt a plump "sausage", attach a ball to it as a head, and place eyes and a smiling mouth on it.
Older children, on the other hand, will be interested in experimenting and making different types of snakes, for example, cobra, anaconda, python. An interesting collection can turn out. In addition to the snake, there is always the possibility of dazzling other elements.
For example, a snake on a tree or just on a stand. It can be arranged in a straight form, laid in rings, and a whole family can be created. In a word, sculpting is a very exciting activity.


