How to make the middle for kanzashi?
Applied art products have been appreciated at all times. Any handmade jewelry always adds originality and elegance to the style, making the image more expensive and sophisticated. Products made using the Japanese kanzashi technique are of particular interest. Real craftswomen create in this way unique, amazingly beautiful works.
What it is?
In the world of handicraft, kanzashi is the direction of applied art to create original jewelry from satin ribbons, silk, organza, beads, rhinestones, beads, sequins and other materials that only fantasy tells... The modern kanzashi technique consists of many options: from simple patterns to the most complex ornaments. But even the most uncomplicated jewelry looks charming.
Initially, Japanese geisha began to use the kanzashi technique. Luxurious silk kimono and hand-made unique exquisite flowers in the hair were indispensable attributes of the images of the captivating beauty.
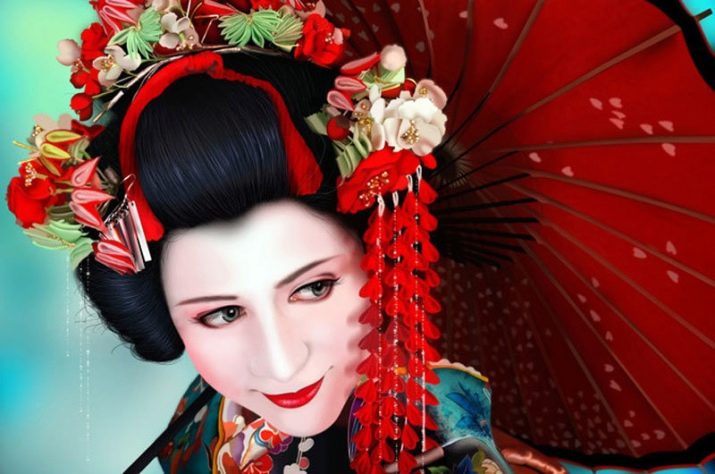
Now work in the kanzashi technique is not limited only to hairstyles (hairpins, hairpins, combs, headbands, bows). Kanzashi style products are used to decorate clothing accessories, bracelets, jewelry boxes, attributes of weddings and other festivities, decorative interior elements and other items.
Necessary materials
The main element in the kanzashi technique - flowers of all kinds and levels of complexity of manufacturing. Obviously, beginners need to start mastering kanzashi with simple schemes and gradually improve their skills. For example, you can first try to make a center for a flower.
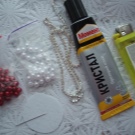
To work, you will need simple accessible materials:
- beads of different sizes;
- half beads;
- beads of various colors;
- strass chain;
- cabochons;
- polymer glue (you can take "Titan");
- cotton pads or pieces of felt;
- sewing needle;
- thread or thin fishing line;
- scissors;
- tweezers.
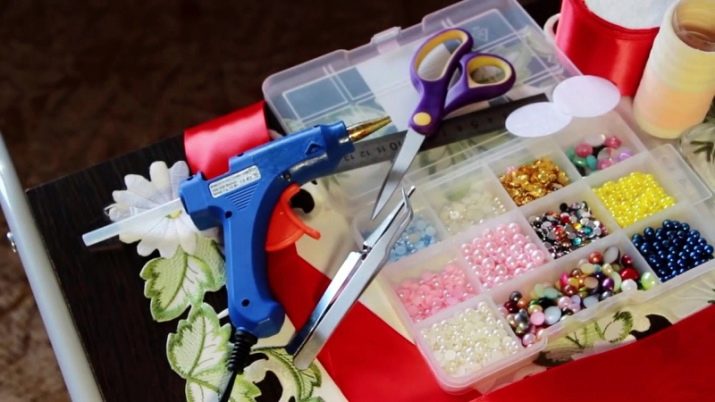
It is important to prepare everything that is needed at once, so as not to be distracted later. The work is connected with many small details, and if every now and then get up from the table for missing accessories, then you can accidentally scatter materials.
Step-by-step instruction
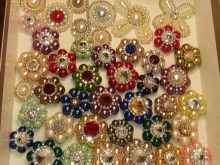
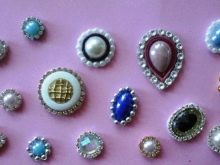
Many different options can be made from this set of materials. midpoints for kanzashi. Not necessarily everything will be used in every product.
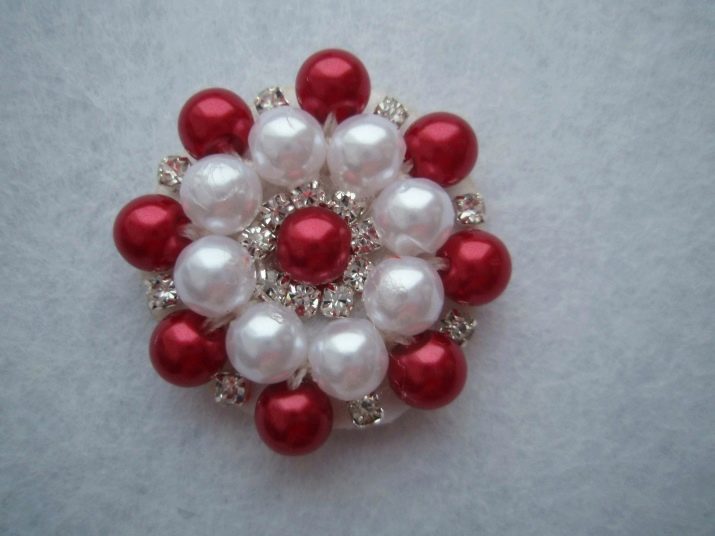
You can make the middle only from beads, or in combination with beads, or with rhinestones, or from several types of material. It all depends on the artistic conception and imagination of the craftswoman
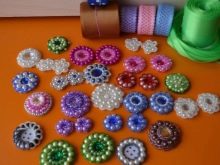
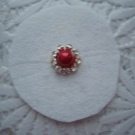
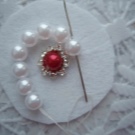
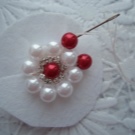
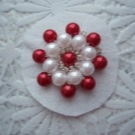
Here's a simple example for beginners. This is the center of beads, strass chain and beads. The sizes and colors of materials can be selected differently, then you get the middle of different sizes and colors. You will also need: a half-bead, a felt circle for the base, tweezers, a needle and thread, glue.
- Apply glue to the felt circle in the center and glue the half-bead.
- We glue the half-bead in a circle with a piece of a strass chain, gently pressing it against the felt and straightening each strass with tweezers so that they all lay down on the glue with their underside.
- When the glue dries, cut the felt in a circle, leaving an edge from the strass chain about the diameter of the beads that were prepared for sewing.
- Insert a thread in 2 folds into the bead needle, pierce the felt base from bottom to top and fasten the thread.
- We string beads and beads alternately through a needle so that they close into a ring around a half-bead with a strass chain.
- We close the ring, bring the needle to the wrong side of the base, tighten it well and fix the thread with knots.
- Without cutting the threads, we bring the needle to the front side and sew each bead to the felt one by one: we pierce the base up and down and over and over again move in a circle by one bead around the entire ring, we sew all the beads.
- We fix the thread on the underside of the felt with knots and cut off the end.
The middle is ready. You can light the edges of the felt over a candle or lighter. This is one of the simplest ways to make a kanzashi center. There are other options, but if there is no experience, then you should not take on several things at once.... Let one thing turn out well at first, and the first works will be simple and understandable. When you have gained some experience, you can gradually move on to making more interesting, but complicated products.
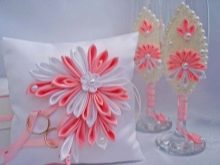
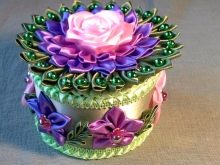
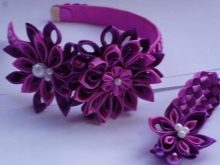
Beautiful examples
The beauty and sophistication of the finished work is admirable. Here are some beautiful examples of products using the kanzashi technique:
- these cute bow-tie hairpins with a simple center will also be made by novice needlewomen;
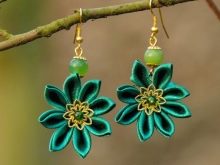
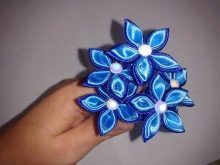
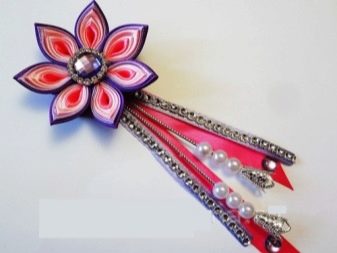
- original bracelet with a kanzashi flower;

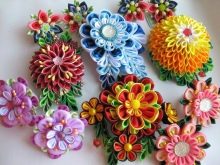
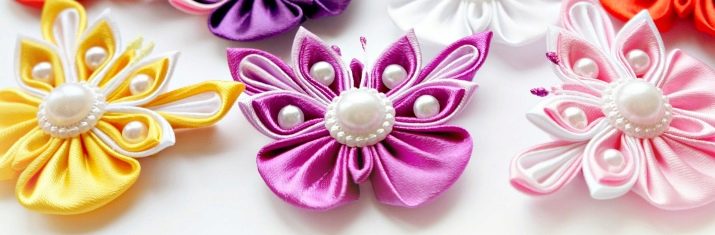
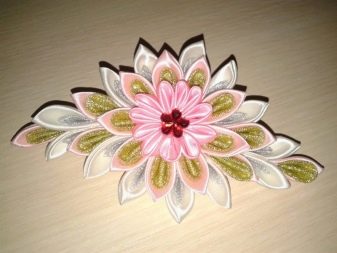
- such flower hairpins will appeal to any little fashionista;
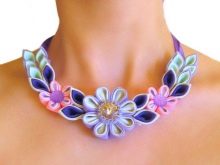
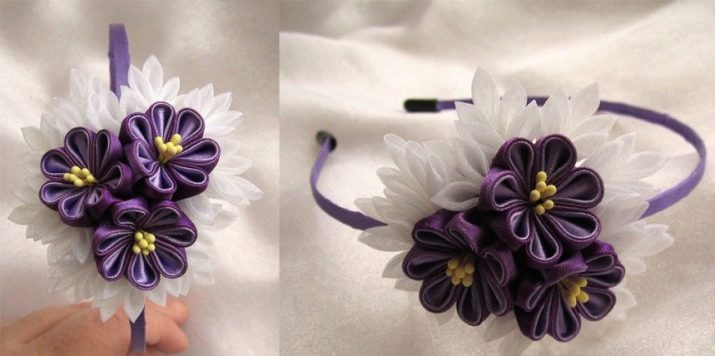
- a headband decorated with kanzashi-violets with a center in the form of stamens;
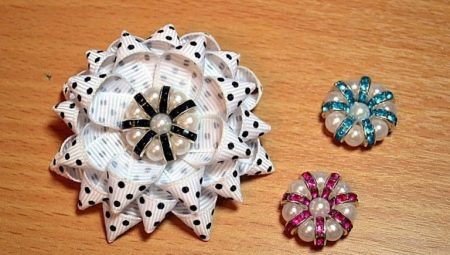
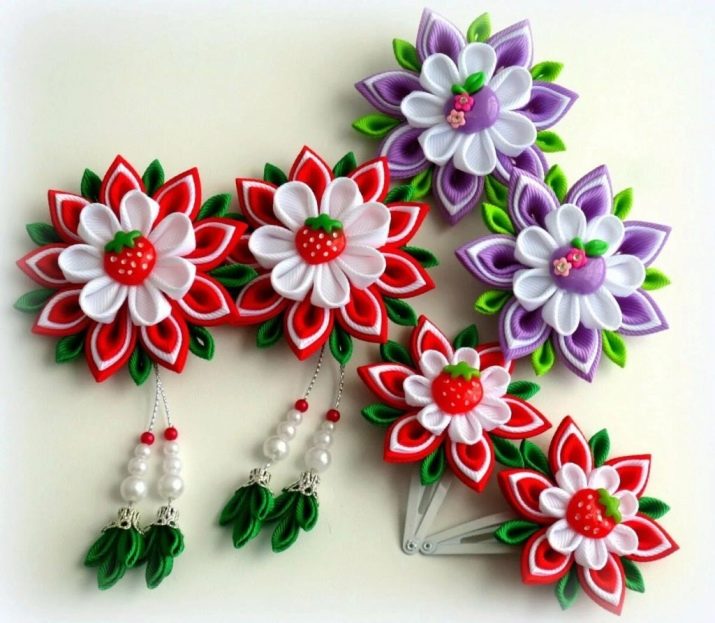
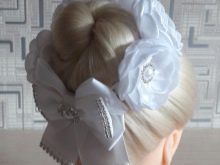
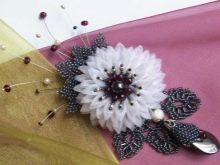
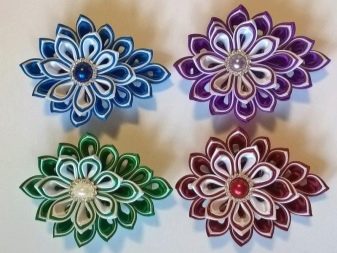
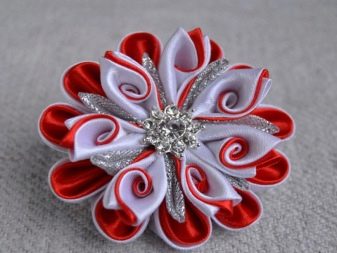
- these are beautiful white flowers for a hairstyle with a bun, hairpins with bright flowers and a simple center, an exquisite brooch;
- and here are some more examples with a beautiful middle.
If you perfectly master the kanzashi needlework technique, you will begin to create unique exclusive jewelry for yourself, for your family members, for home decor, and on occasion you can make a wonderful original gift to a loved one for an important event.
You will learn more information on how to make the middle for kazansha with your own hands in the next video.


