Hair ties using the kanzashi technique
Kanzashi hair ties have gained immense popularity outside of Japan, where they are part of traditional culture. For those who want to try themselves in this form of art_ there are simple master classes with detailed and understandable instructions. With your own hands, you can easily make unusual rubber bands from a ribbon for a bun and school ones, for little girls - it all depends on the imagination and desire of the needlewoman.
Peculiarities
Kanzashi elastic bands for hair are a popular decoration that allows you to give a hairstyle originality, highlight it, add unusual accents... Their manufacturing technique has a long history. Initially, kanzashi - this is how the name is correctly pronounced - is an element of the traditional costume. Japanese girls, girls and women decorated their hairstyles with ribbon flowers, wearing casual or smart kimonos as early as the 18th century. Moreover, kanzashi was not originally called the decor itself, but what it is attached to - hairpins, combs, clamps.
However, there is also a variant of the pronunciation of ka sashi, which literally means "stuck flowers." It was used in relation to the tradition of weaving living plants into hair before turning to the gods. The most beautiful kanzashi really inspire the idea that they are not a man-made creation, but a gift from nature itself.
Depending on the technique chosen, the petals can be pointed, like a lotus, or rounded, like sakura.
The main feature of kanzashi hair bands is that the simplest materials and tools are used in their manufacture... Usually it is a wide satin or rep ribbon with a width of 50 mm, 25 mm, 10 mm and auxiliary decorative elements. The number of layers and the splendor of the flower are also always individually regulated. You can assemble the product using a glue gun or a sewing needle, and the manufacturing process itself takes a minimum of time and does not require complex manipulations.
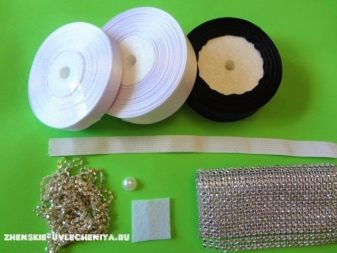
Tools and materials
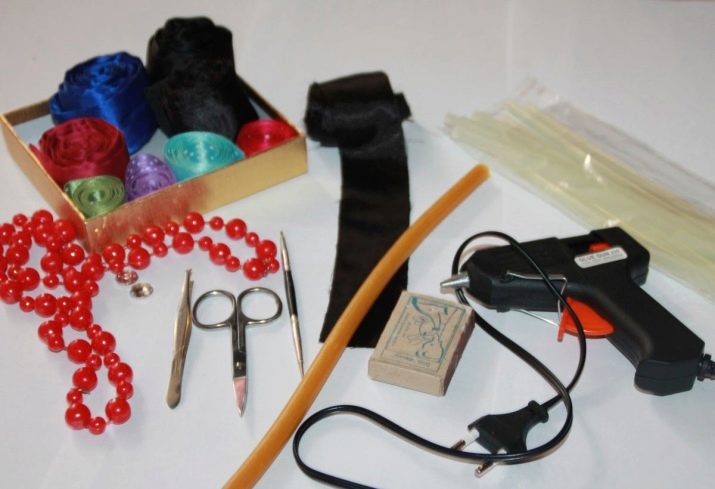
Original kanzashi bows are easy to make with your own hands. To work, the foreman will need a basic set of tools available in every hardware store, as well as consumables. Among the mandatory list, there are the following items:
- sharp scissors;
- tweezers with long thin lips;
- glue gun filled with a rod;
- thin pins;
- matches or lighter;
- ribbons 1-10 cm wide, chiffon, rep, satin;
- felt;
- ready-made hair bands;
- accessories (fasteners, cords, tips, braid);
- decorative elements from rhinestones and sequins to beads.
The most beautiful kanzashi elastic bands are made from satin ribbons, but for beginners, working with them may seem too difficult.
Reps options that do not slide so much in the hands will help out. Fire sources are required to prevent shedding of the edges of the tape. They are carefully singed, which is why children can make such jewelry only under the supervision of adults. A thermal gun is used to connect parts during assembly; heated glue is applied to the smallest parts with a toothpick.
To protect the finished product from contamination, the craftsmen also have the means. You can prepare a spray of hairspray in advance. When the assembly is complete, the kanzashi flowers on rubber bands are simply sprayed with a spray from a distance of 25-30 cm. After the protective layer has dried, the product will keep its shape better and will not get dirty for a long time.
Best ideas
There are many rubber bands using the kanzashi technique. Teenagers wear them with strands of different colors, put on a bun. With your own hands, you can easily make simple school versions and models for little girls in the form of strawberries, roses. On September 1, white waterfalls with ribbons look interesting, on New Year's holidays - options with sparkles and lurex, with snowfields-pendants. For school in a casual format, it's best to create kanzashi-style rubber bands without unnecessary distractions.
For beginners, there are simple master classes that explain step by step the essence of the work. Experienced needlewomen prefer fantasy creativity - children's rubber bands can be turned into real masterpieces, new items regularly appear in thematic stores and at craftsmen fairs.
For a start, it is better to take ribbons 5 cm wide - they are easier to measure and fold. As you gain experience, you will be able to master more complex techniques.
Simple
Novice craftsmen should master the basic elements of creating jewelry using the kanzashi technique. So, after spending no more than 1 hour, you can create a beautiful pair of rubber bands for school or kindergarten with your own hands. It is worth considering the basic models in more detail.
Bows
To create beautiful elastic bands with bows using the kanzashi technique, you need to prepare materials and tools. Necessarily need tailor's pins with voices, a ruler, scissors, a thermal gun, a lighter and a needle and thread. For 1 product, the following amount of materials is required:
- rep tape with lurex edging - 2 × 20 cm with a width of 25 mm;
- similar stripes with gold or silver patterns;
- narrow ribbon 6-9 mm - 10 cm segment;
- hair tie in the color of the materials;
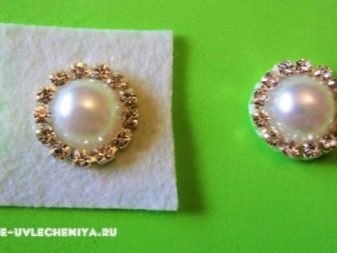
- middle - mini-buckle made of plastic, metal.
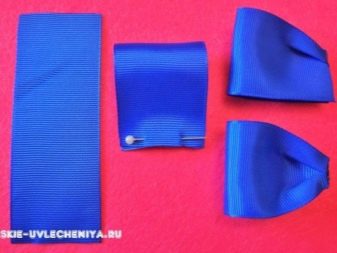
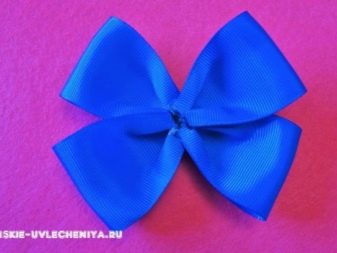
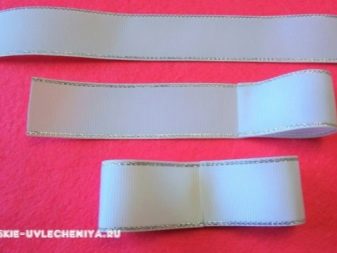
Before proceeding with the assembly of the product, each tape with edging and monograms is folded with the wrong sides. At the edges they are scorched with fire, soldered together. Important: a fabric burner or thermal knife will help to make the work more accurate. Next, the assembly begins.
- 7.5 cm retreat from the edges of each pair of welded tapes. A pin is injected at the desired point.
- The ribbon rolls up in the form of a Latin V.If everything is done correctly, half of the wrong side will be opposite the front, the pins will touch.
- The joint is fixed. The old pins can be removed. Position the workpiece so that its front part with monograms looks straight up.
- A section of the tape from the inside out (without a pattern) is folded over and held vertically. You will get a right angle with a petal cleaved with a pin. The blank will look like a Latin L.
- The upper part of this structure is lowered. The result is an inverted check mark. Its right side must be bent inside out and secured with the end at the top, where there is already a pin. The left one is attached in the same way, but the front side remains on top.
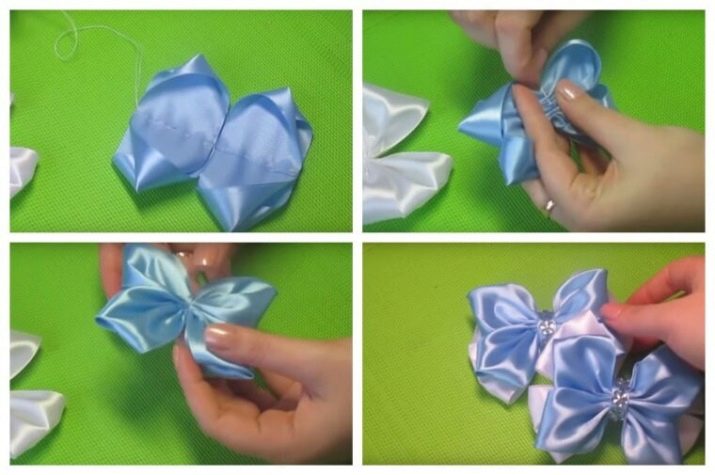
- As soon as both blanks are made on a pin, they are collected on a thread and fixed. After that, the temporary clips are removed.
- The resulting sides of the bow are sewn together. You need to tighten it tightly, fasten it securely.
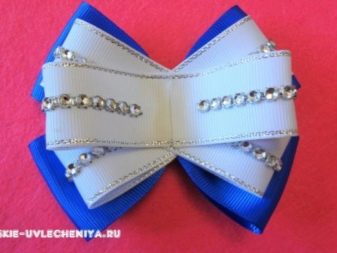
- From the inside of the bow with a heat gun, glue an elastic for hair.
- In the central part, fix a narrow ribbon with hot melt glue. Wrap it around the bow several times, securing each layer with glue. The middle is threaded into the penultimate turn. Secured with 1 more layer of tape.
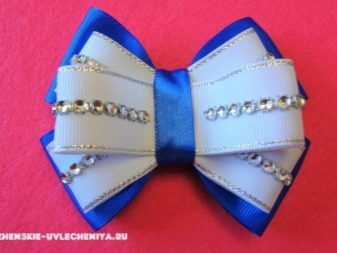
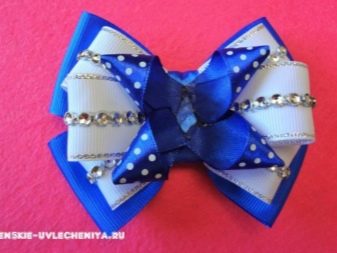

Ready-made bows with an elastic band have a diameter of 8 cm. They can be made in white, gold, silver and even black versions. The presence of an ornament will make the decoration solemn, but not too massive.
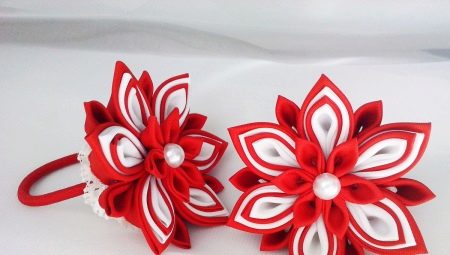
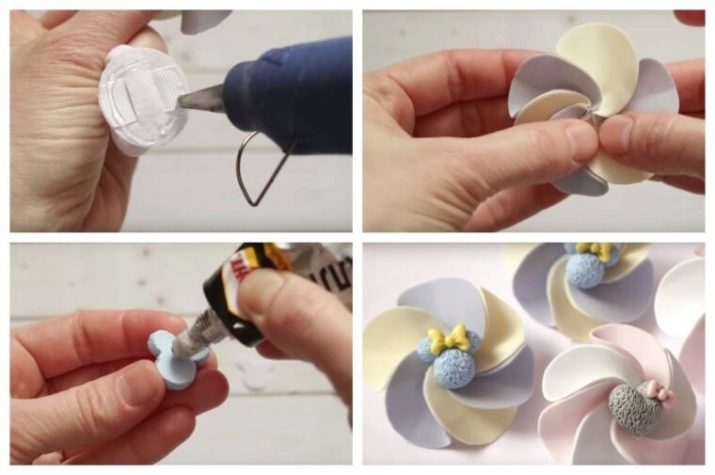
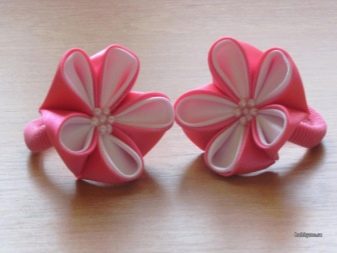
Simple elastic bands-flowers
To make a simple floral decoration, you need a 25 mm wide satin ribbon. Green - 8 pieces in 80 mm segments, color for petals - 6 x 70 mm and 4 x 60 mm, middle, felt bases. The folding pattern of each petal is very simple.
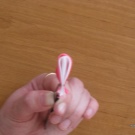
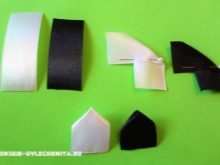
- The straight section is laid face down.
- Curved from left to right to form the Latin L.
- The opposite ends are connected, the workpiece is folded to the left. The edges are soldered over the fire.
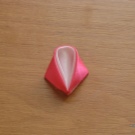
- You will get a kind of "house" with a triangular top and a rectangular base. It must be folded in half along its length so that the front side is outside. The lower edges are folded up, secured.
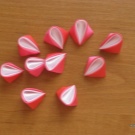
- You can spread the petal. Make the rest in the same way.
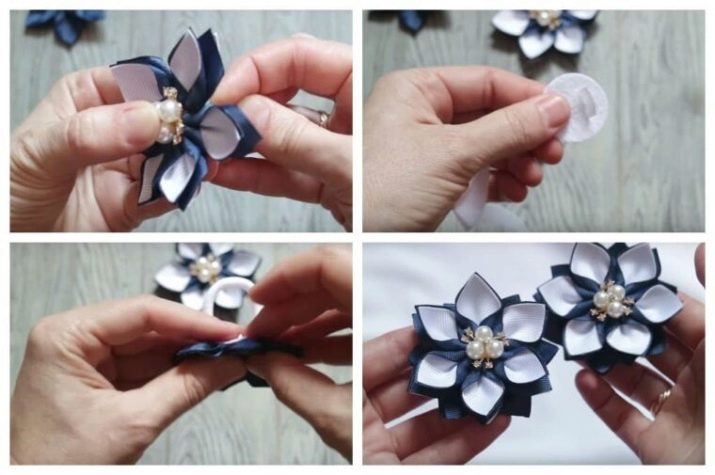
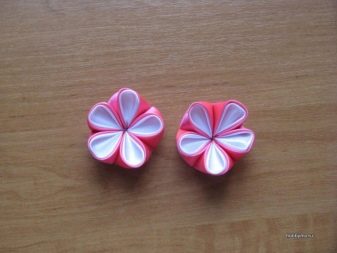
- When assembling, a green backing is formed first. It is connected with hot melt glue. Then 6 and 4 colored petals are also formed.
- All parts are connected, the middle is glued in the center of the "flower". The base is fixed on the seamy side. An elastic band is glued to it.
This is how you can get a simple but beautiful hair accessory. You can additionally make pendants using the kanzashi technique, or simply fix tassels and beads on the laces.
Fancy
Original jewelry-elastic bands for hair using the kanzashi technique are more laborious to manufacture. But this does not stop the real masters. It is worth considering the most interesting master class in more detail.
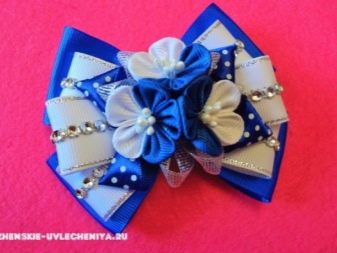
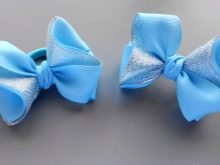
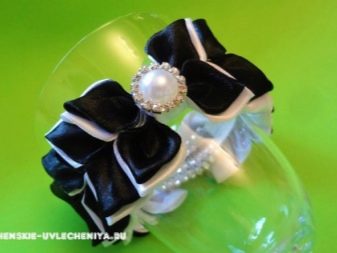
Elastic band for bun
This version of the product is suitable not only for teenagers. It is appropriate at school, office or university. The basic model is made of black and white ribbons, for summer you can take a white-pink or blue-blue version. It is worth stocking up on materials in advance. To make an elastic band on a bundle, you will need the following.
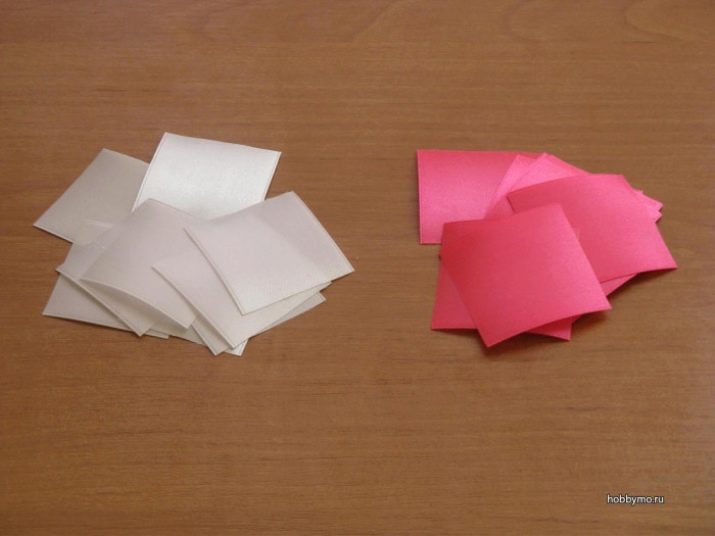
- 48 squares of satin ribbon in each color. Size 5 × 5 cm.
- 4 pieces of white 50 mm satin ribbon 100 mm long, 2 pieces 50 × 80 mm.
- Felt circles with a diameter of 30 mm - 7 pcs., Choose the color of the product.
- 2 pieces of black satin ribbon measuring 50 × 90 mm.
- Decorative rhinestones - 10 pcs., Middle - 7 pcs. Black or completely transparent will do.
- White lace with floral ornament 20 mm wide and 90 mm long - 2 pieces.
- Thin ribbon 1 cm wide. You need white, about 10 cm.
- Lacy elastic band, airy - about 25 cm long.
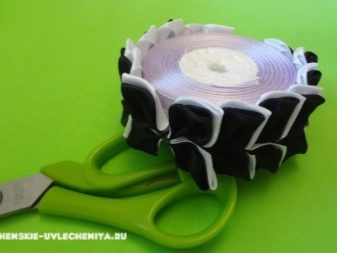
Before starting work, all tapes must be scorched to avoid shedding. For the base, you will need a lace elastic band, squares of satin ribbon, lace and wide stripes for a centerpiece, center and cabochons. The order of work will be as follows.
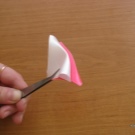
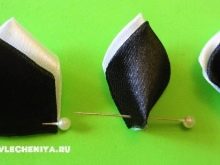
- Prepared satin squares of each color are bent diagonally... Fold up in pairs, black at the top, split off with a pin. They are laid with the top down, the side corners are pulled towards it. You will get a rhombus with a black ribbon inside, it is cleaved with a pin.
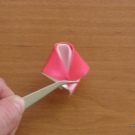
- The lower part of the workpiece is cut off - about 1 cm or slightly less. A fold line is drawn from corner to corner. This part is wrapped to the black side. Then, without lifting your fingers, you need to pull off the sharp corners with a cut, close and singe them, securing them. The inner part will be opened, you will get a white cone with a black center - there are 8 of these to be made.
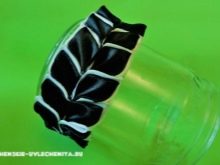
- The finished parts are connected in a flower with a thermal gun. You need 6 such "marshmallows" to decorate the side of the elastic. The middle is glued into the center of each, and a circle of felt is fixed on the back side.
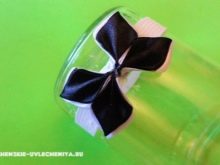
- 4 wide white stripes 10 cm long are folded in volumetric loops. For splendor, a fold is fixed in the center. The blanks are glued together in the form of the letter X. Combine a 9 cm black satin ribbon with lace, form loops with a central fold. Connect with a glue gun.
- Form a bow from a white and black blank... In the center, wind it with a white narrow tape, hiding the seams. Secure the middle.
- Fix the remaining white pieces of satin 8 cm each with a central fold in the form of "ponytails", cut the bottom edge diagonally, singe and decorate with rhinestones. Fasten on the inside of the bow. Glue the felt base.
- Sew an elastic band of the required diameter from a lace elastic band... Decorate it with a bow in the center and marshmallows on the sides, symmetrically.


An elegant decoration for the bundle is ready. If the work with the thermal gun was carried out correctly, all decorative elements will be held securely. In extreme cases, their felt bases can be grabbed with threads.
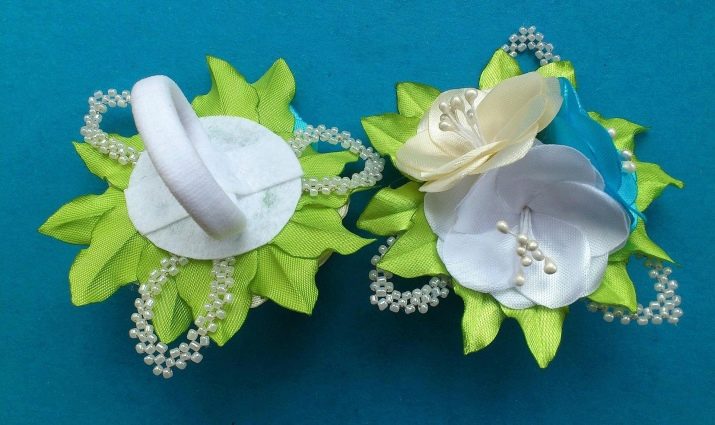
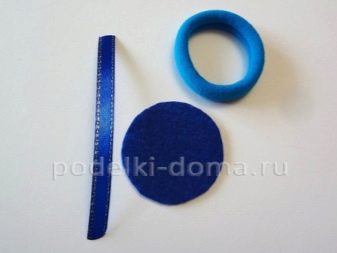
How to attach to the base?
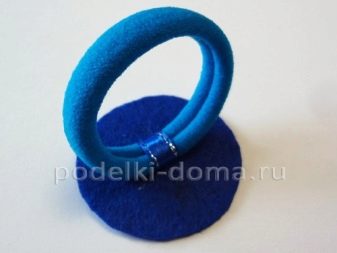
You can easily attach a hair tie to the felt base. As a fixing element, a narrow tape 10 mm wide will be used, the length of the segment should be 4-5 cm. A piece of felt is cut round, the size of a five-ruble coin or a little more. A hole is made in its center with an awl or scissors. The edges of a piece of tape are pre-scorched with fire.
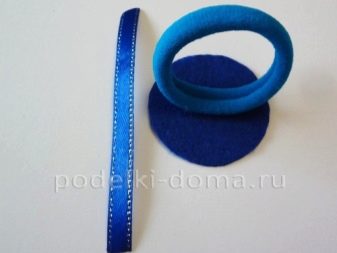
The fastening process itself is as follows.
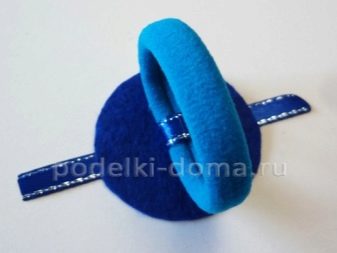
- The ribbon is slung over the elastic with the satin side out.
- The ends come together. They are passed through the hole of the felt mug.
- The edges of the tape are fixed on the back of the felt with hot melt glue.
- The base itself is connected to the flower blank. It is enough to use a glue gun, applying a bonding layer around the circumference. Press down.
Stylish kanzashi elastic band is ready to use.
If desired, the mount can be made universal - under the bezel or hairpin, hairpin, clip. To do this, the loop from the ribbon is not threaded into the elastic, but simply left outside.
Beautiful works
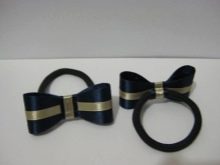
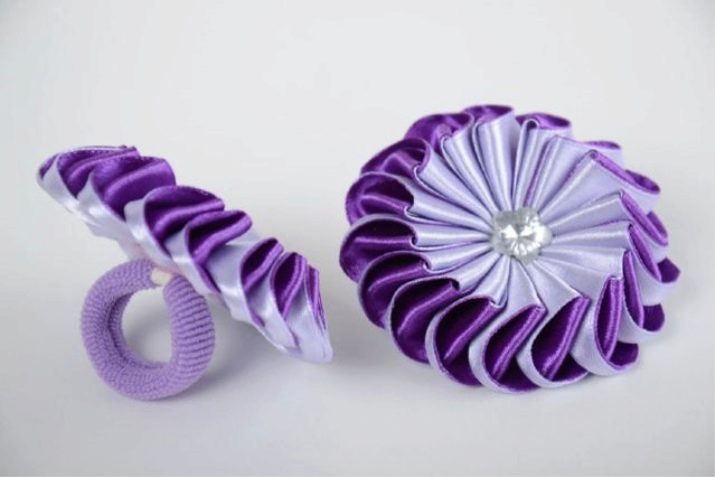
- Stylish lilac-purple pair of elastic bands with a complex petal structure. The product looks elegant, but not too pretentious.
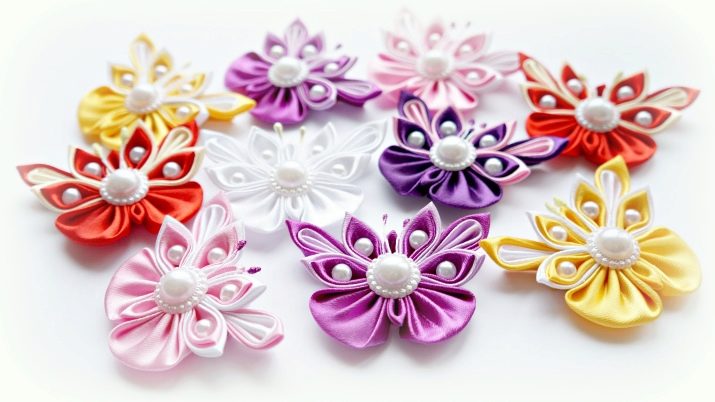
- Simple flowers - "butterflies" using the kanzashi technique. Bright decorative elements can be worn on an elastic band, headband or hair clip.
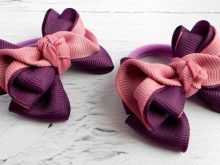
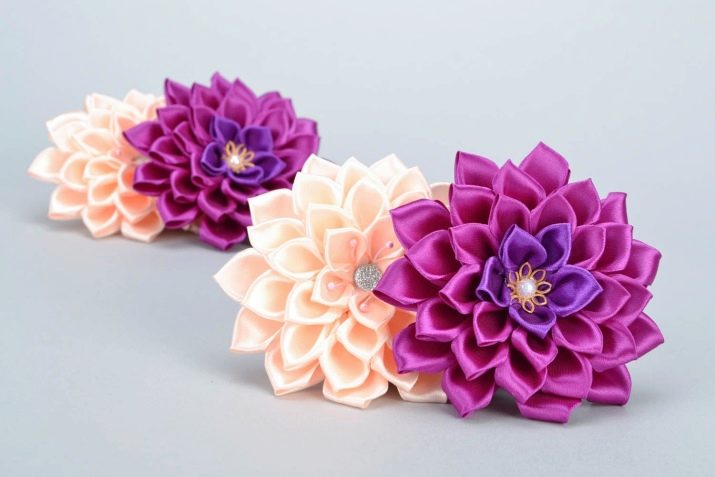
- Lush peonies using the kanzashi technique. Burgundy purple flowers look elegant and bright. Delicate salmon shades will perfectly complement an outfit for a festive occasion.
For information on how to make gum using the kanzashi technique, see the video.


