School bows in kanzashi style
Every parent wants to see their child the most beautiful, especially when such a crucial stage as studying at school begins. In order for girls to always look smart and tidy, it is necessary to carefully monitor the hairstyle, select hairpins and bows. The most affordable and beautiful hair accessory is kanzashi-style bows - they are easy to make with your own hands or with your child.
Peculiarities
Currently, the appearance of schoolchildren is limited to school uniforms and strict requirements. Elastic bands, hairpins and other accessories should not be provocative, therefore strict colors are preferable: white, black, blue, cream, gray or others suitable for uniforms. In addition, the hairstyle should be appropriate for the event - you can use more elegant bows for special events than for every day.
Even a small first grader will need at least three pairs of hair ornaments to look diverse and have a replacement in case some are lost or worn out. Lush bows are useful for warm weather, but more compact models are needed under a hat or hood. In addition, bows can be attached to a different base: an elastic band, various types of hairpins, hairpins, ribbons, headbands. If the child straightens his hair or braids the braids himself, it is necessary to choose an option according to his strength.

All these and other requirements can be easily taken into account if you master such a technique for making hair jewelry as kanzashi. It has other advantages as well:
- materials and tools can be purchased everywhere and are inexpensive;
- even beginners of any age usually quickly master simple options for making school bows;
- like any kind of creativity, kanzashi develops creativity and improves skills;
- handmade bows will leave no doubt about their quality, save money and become a source of pride.
For many people, a beautiful hobby over time turns into an additional source of income. This is also facilitated by the fact that there are many free master classes on making bows of varying complexity on the Internet.
Tools and materials
Since kanzashi-style bows are created from pieces of fabric folded in a special way, the first thing before starting work is to choose the right material. The most popular and affordable are all kinds of tapes.
- Satin... They are very beautiful in appearance, differ in a wide range of colors, bright shine with beautiful tints in the light, smoothness and softness. The web of such a tape can be both double-sided and one-sided and needs to be cauterized at the cut.
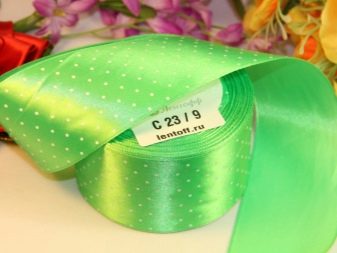
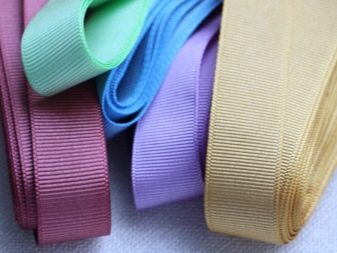
- Reps... They are not inferior in strength and ease of processing to satin, but they have a more complex weaving, which forms noticeable relief stripes (scars).
- Satin... Quite durable, but at the same time soft and pleasant to the touch tapes with a slight sheen. May have wire edges to allow for any shape.
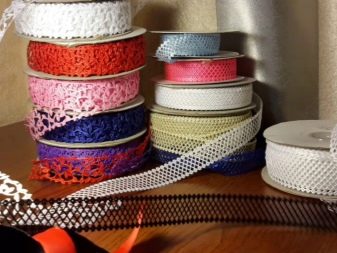
- Lace or openwork. They give any bows a special appeal and airiness due to complex patterns.
- Organza... Translucent, lightweight, yet durable material. Well processed, decorated and combined with other types of ribbons.

In addition to the above, in the manufacture of bows, felt is used for the bases, as well as all kinds of decorative elements: beads, rhinestones, crystals, sparkles. The tapes themselves can be colored, monochromatic, patterned or printed.
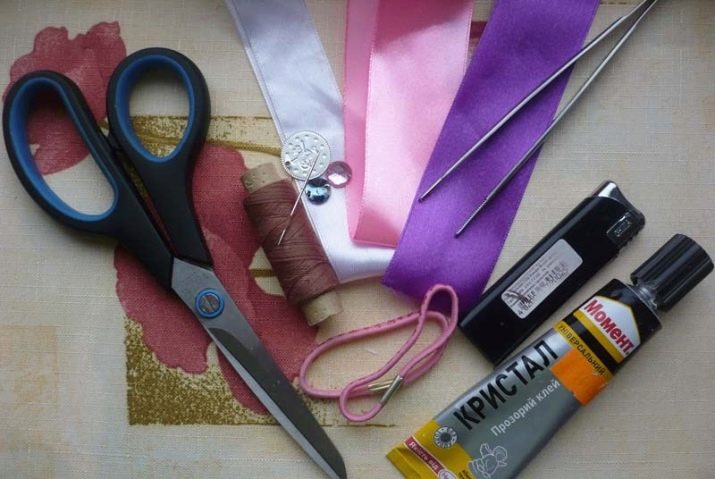
In order not to break away from work, it is important to prepare all the necessary tools in advance:
- scissors with straight blades or lengths of curly cut, small or medium-sized scissors will be enough for both cutting ribbons and cutting threads;
- ruler or measuring tape;
- crayon or pencil for marking;
- fine needles and threads of a suitable color;
- tweezers or tweezers;
- matches, a candle or a lighter to light the slices;
- glue or glue gun.
Manufacturing methods
You can talk for a long time about Variety of Kanzashi Art... Using various techniques and techniques, simple and multi-layer bows are made from loops, flowers with round, oval or sharp petals are created.
From ribbons
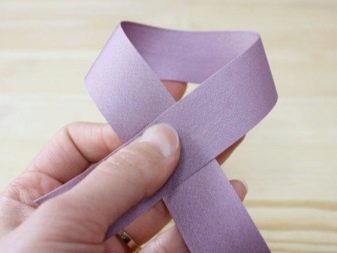
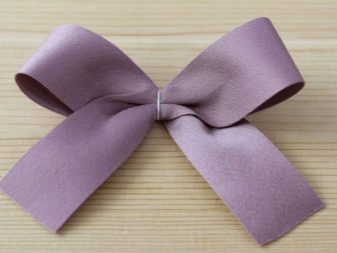
As the first experience in making bows - a laconic version of narrow ribbons. To begin with, you need two pieces, which must be folded in half in turn and set on fire by holding them together. The resulting rings must be laid seam down on top of each other with a small indent, stitched and pulled in the center. To add splendor, you need a second layer. The longer tape must be folded so that its ends cross slightly, and two loops form on the sides. The center of the new blank is sewn together and glued to the first layer.
Threads are easy to hide with a double-folded or narrower ribbon. All sections must be singed so that they do not crumble.
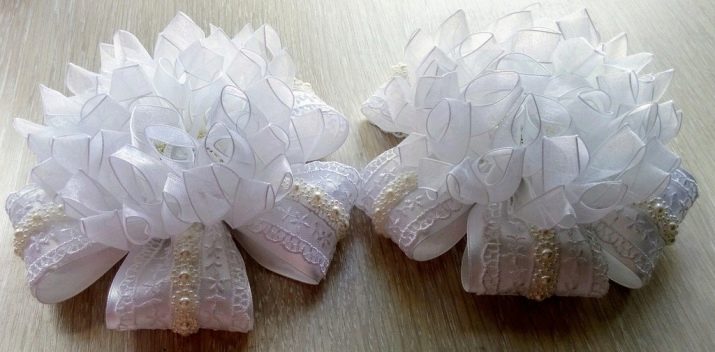
In addition to decorating hairstyles, all kinds of kanzash bows will come in handy for schoolchildren, which can be used as brooches, ties or frills. Making one of the popular options is quite simple.
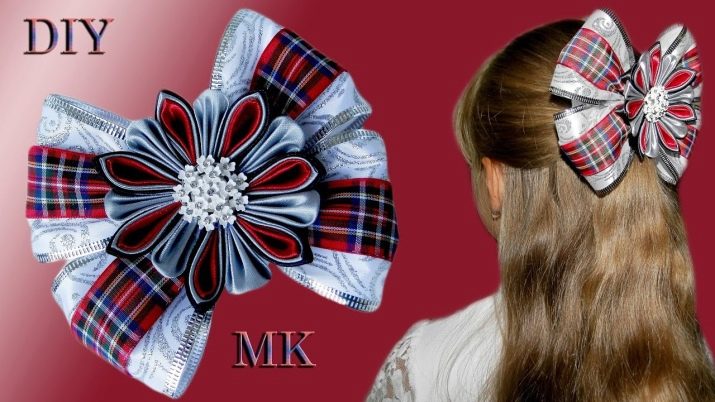
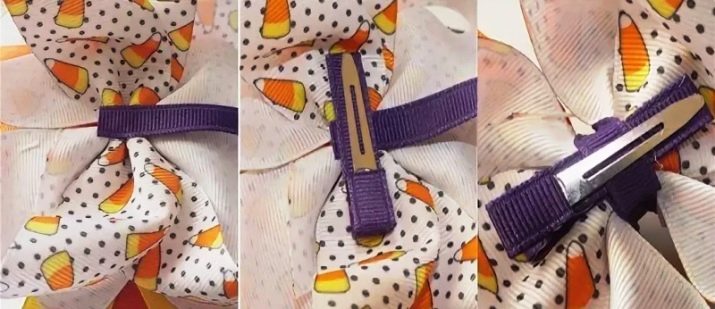
- First you need to take two pieces of wide tape. Slices of each of them should be folded towards the center and fastened. The resulting rectangles need to be stitched in the center with a slight overlap and assembled. Thus, the bottom bow is obtained.
- A narrower rep tape with a contrasting pattern must be folded in the same way as the previous ones, swept in the center, but not tightened, glue in the middle. Two more of the same blanks are placed diagonally, sewn together, pulled together in the center and glued to the previous one.The center of the tiered bow is masked with a narrow ribbon of a suitable color.
- The strips for the free part must be folded so that they form an acute angle, glue and cut the lower cuts obliquely. They can be glued with contrasting tape or lace. As the second tier, shorter ribbons are glued in exactly the same way. Then, in the places of gluing, all irregularities are cut off and both parts of the tie are connected.
- The center of the upper bow and the edges of the lower ribbons are decorated in any way or left as they are.

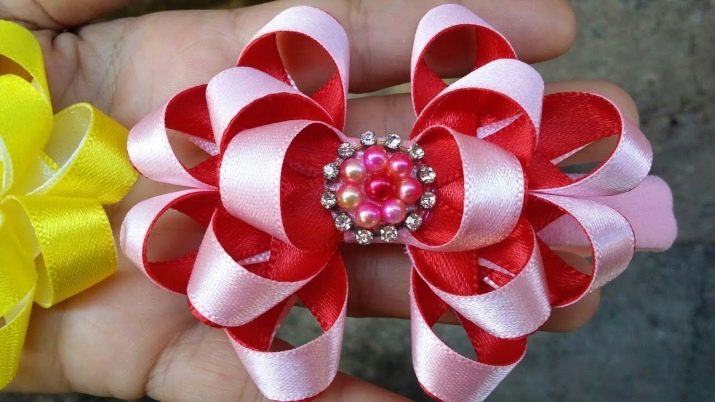
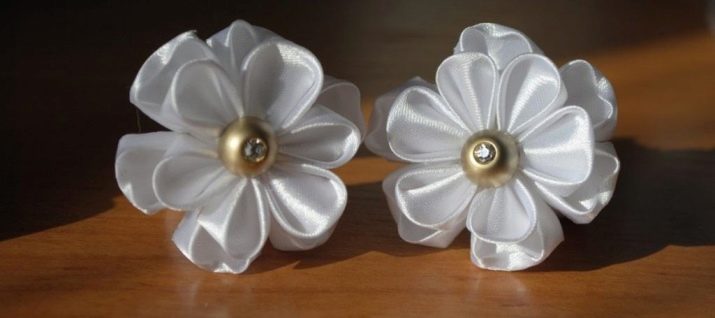
From satin ribbons, you can make a simple and rather cute-looking bow in the form of a flower.
- The five-centimeter tape must be cut into equal lengths (12 cm each).
- We bend the upper corners to the wrong side, and then turn the lower corners to the front two times and pin them with pins.
- We fold the resulting blank with the front side inward and fasten it from below with a thread and a needle. It turns out a petal.
- Thus, we make so many petals so that three circles can be made of them: large, medium and small. For example, 11, 7 and 5 petals or 8, 6 and 3. Petals are alternately strung on a thread with a needle and pulled together.
- The tiers must be carefully glued together, and a bead or rhinestones must be added in the middle.
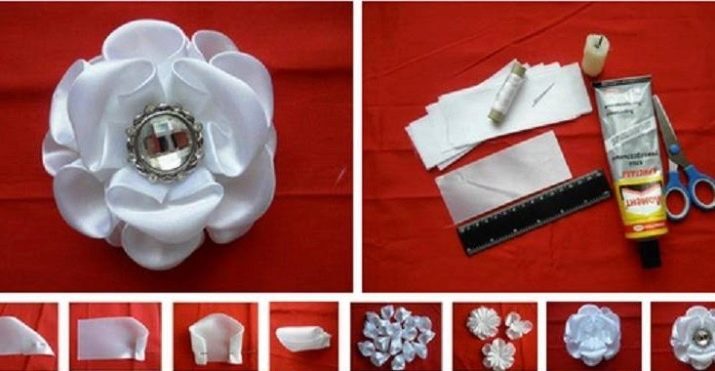
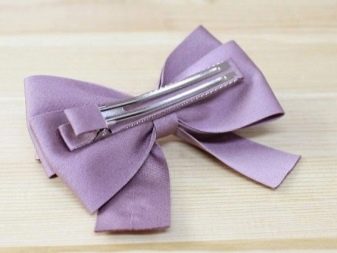
As a base, you can use a circle made of felt or any thin fabric. Another more practical option is to cut a circle of the desired diameter. thin plastic (from a bottle or package of juice), put a wider circle of satin on it and fit it around, gathering around the edge with a thread. To the base, in turn, any elastic band, hair clip, crocodile, etc. is attached or glued.
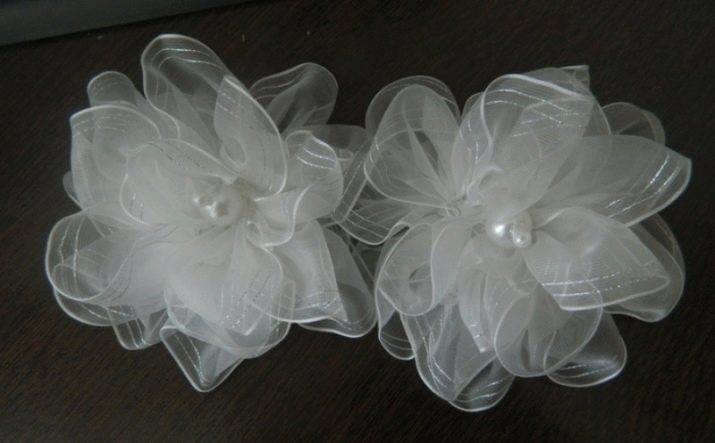
Organza
Working with organza ribbons is as easy as working with satin ribbons, however, you will need skill here too. You should start creating white air bows with a rather simple but lush model.
- Take a tape at least 4 cm wide and 4 m long. Sew it with a zigzag in small stitches so that the distance between the vertices is 8 cm. You can apply a weak marking beforehand.
- As you move forward, the ribbon must be gathered on a string. As a result, you should get a short workpiece with dense folds.
- Then it needs to be rolled up in a spiral, starting from the center. New turns can be hemmed on the wrong side or glued. The final step is gluing the base and decor.
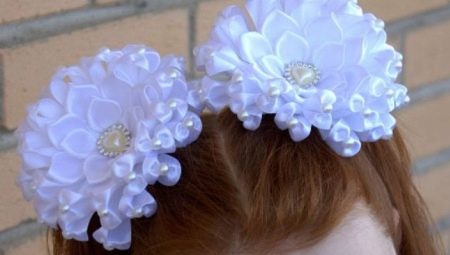
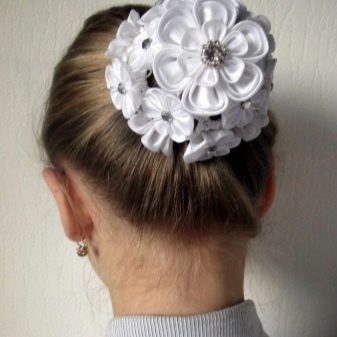
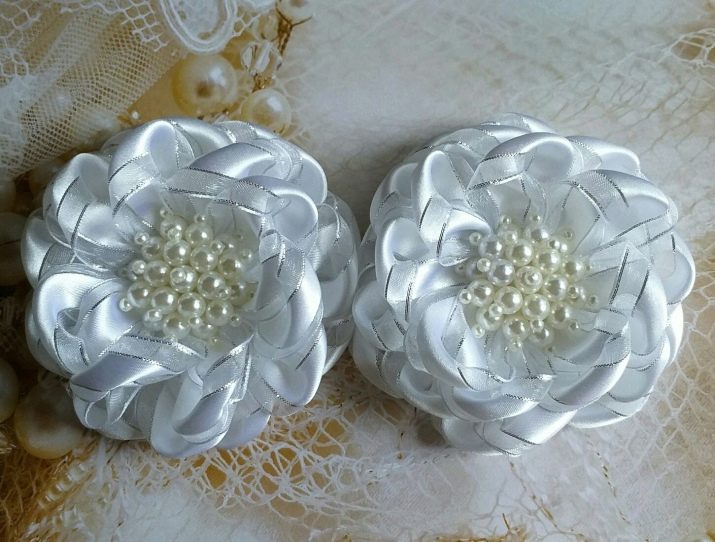
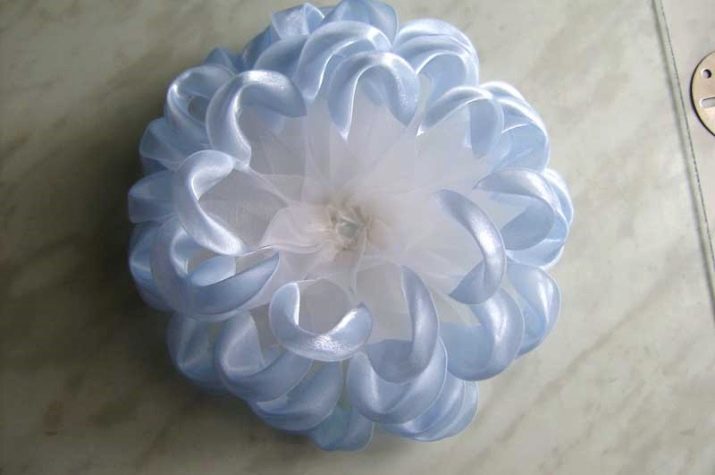
Another kind of kanzashi-style bows allows you to master the manufacture of the thinnest petals, from which a lovely white flower is assembled.
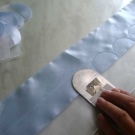
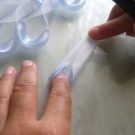
- From the canvas, it is necessary to cut 5 circles with a diameter of 15 cm and the same amount slightly less - 12 cm.Then we bend each of them in half and sew the resulting semicircle along the edge.
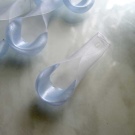
- Gently gathering the seam, we get round petals. They need to be collected on one thread in size.
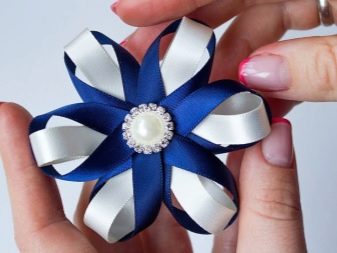
- As a result, we get two tiers that are easy to sew or glue. The middle can be filled with any decorative rhinestones or beads. To make the bow look more informal, several narrow ribbons can be glued between the tiers.
Organza goes well with any other material. Bows made of combined materials look especially original.
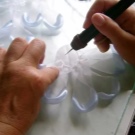
- In order to get unusual two-color petals, you need ribbons of two colors, 7 cm wide each. We measure out two white organza ribbons 140 cm each and one of the same satin. Then we lay the white ribbons in parallel and put the blue one in the middle. Of these, it is necessary to cut 50 petals on a workpiece 5 cm wide, this can be done with scissors and the edges are sealed with a lighter, but it is more convenient to take a soldering iron or a burner with a sharp needle.
- Pull the edge with the satin ribbon, pinch. We turn the lower cut of the petals inward and seal.
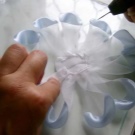
- The next step is to glue the petals onto the base circle. The more layers, the more magnificent the bow will turn out. The first three layers can be made with 11 petals, and then reduce their number to 9, 6 and 2, respectively.
Recommendations
Many masters in this area note a decrease in demand for kanzashi. But along with this, most schoolgirls go on September 1 with bows made of ribbons or organza. Therefore, we cannot talk about the loss of relevance. It's just that, unlike the time when this technique first appeared, today's women of fashion want to see more sophisticated color combinations and new models. Thus, you need to improve all the time, keep abreast of new products and boldly use these techniques to create unusual bows that can decorate your hair.
For beginners, it is important to choose an easy-to-work material.... If the purchased ribbons do not hold their shape well, the workpiece can be sprayed with varnish and allowed to dry before final assembly.
Although white is considered a universal color for bows to school, it is necessary to work with such ribbons carefully, as they can get dirty or change color after the sections are sealed.
Having mastered several options for making petals, you can safely start experimenting - changing not only the shape and size of the parts, but also their location. The same goes for regular bows - the principles of binding ribbons in both American and more traditional varieties are approximately the same.
In addition to manufacturing, it is important to learn how to properly care for kanzashi.... It is better to take the bows on the hairpins by the middle, since the sides are deformed very quickly. Dirt from ribbon jewelry can be removed with a swab dipped in soapy water and then in clean water. Wet bows should be dried very carefully, straightening and shaping all the details.

How to make a school bow from a rep ribbon, see the next video.


