How to create a ribbon using the kanzashi technique and weave it into a braid?

Beautiful and fashionable hair accessories are presented in a wide variety. Products for every taste and wallet can be found in any jewelry store or ordered via the Internet. Use the Japanese kanzashi technique to create an original accessory that will not be equal among the market products. It is easy to learn and the materials are readily available.
Selection of materials
To create an amazing piece of jewelry, you need to prepare the following.
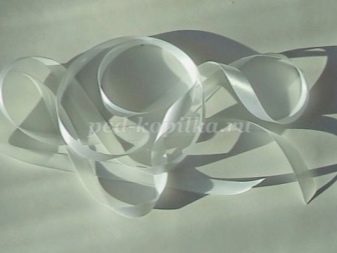
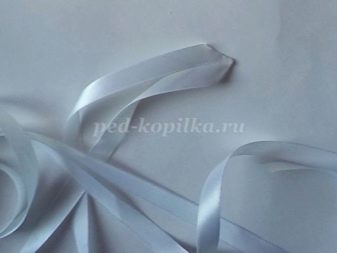
- The foundation. As a rule, satin ribbons are used in the work. They are bright, durable and affordable.
- All-purpose glue or glue gun.
- A set of sewing tools (needles, threads, scissors).
- Candle, lighter or blowtorch for fabric and soldering.
- Beads and other decorative elements (artificial or natural stones, sequins, rhinestones, beads, brooches, plastic figures and much more).
- Ruler or flexible meter (building meter can be used).
- Tweezers (any option is suitable, be it a surgical instrument or ordinary tweezers, with which eyebrows are plucked, the main thing is that it is convenient for you to work with it).
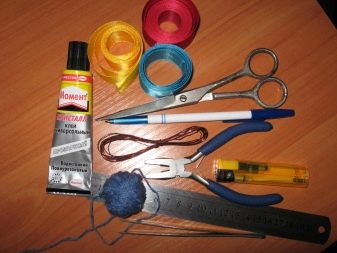
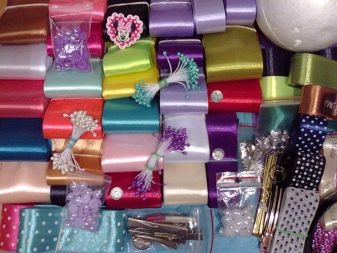
These are the basic tools and materials you might need. Also used are lace, organza, felt, rhinestones and much more.
How to do it?
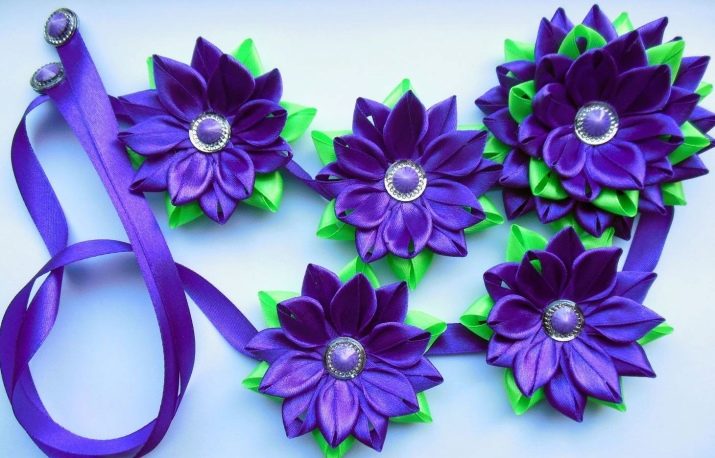
Kanzashi braid tape will not go unnoticed. This colorful accessory with vibrant colors will transform any look.
This kind of decoration is perfect for a girl or a girl.
To make crafts, you need to prepare the following.
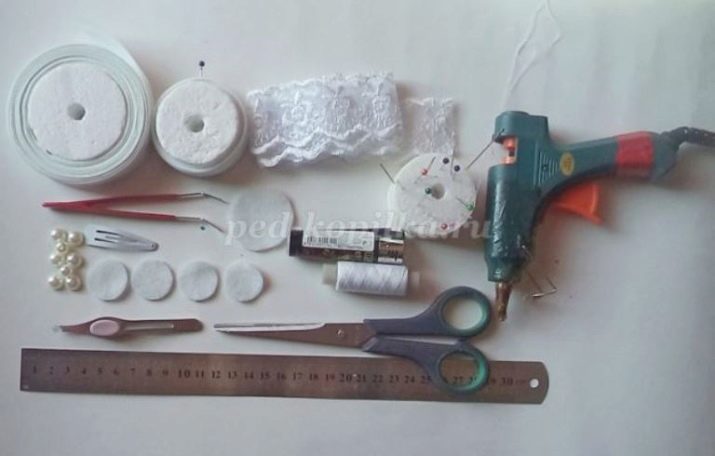
- Snow-white satin ribbon. Width - 2.5 centimeters and 1 centimeter.
- Barrette or hair clip.
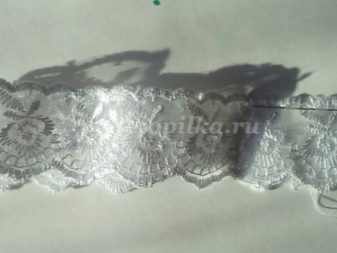
- Light and light lace.
- Felt circles of different sizes: 1 element 3.5 centimeters in diameter, 4 elements - 2 centimeters.
- 2 whole beads and 5 half beads.
- Threads.
- Candle or lighter.
- Needles and threads.
- Tweezers.
- Ruler.
- Glue gun.
- Click-clack hairpins, no decor.
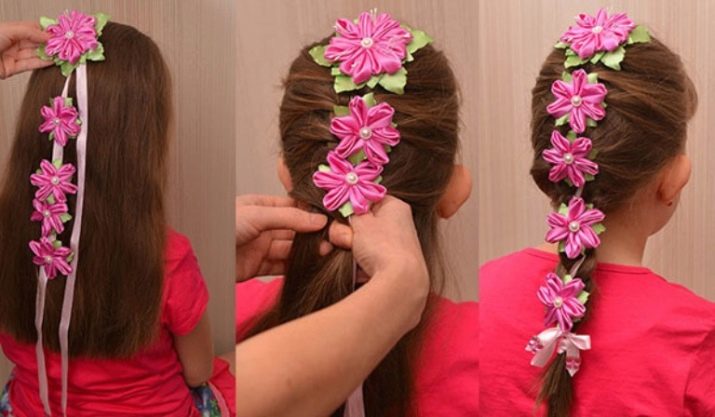
A step-by-step master class looks like this.
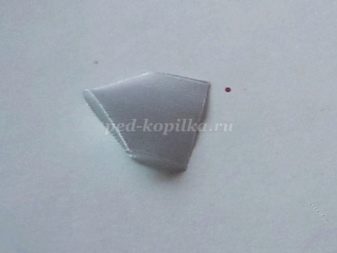
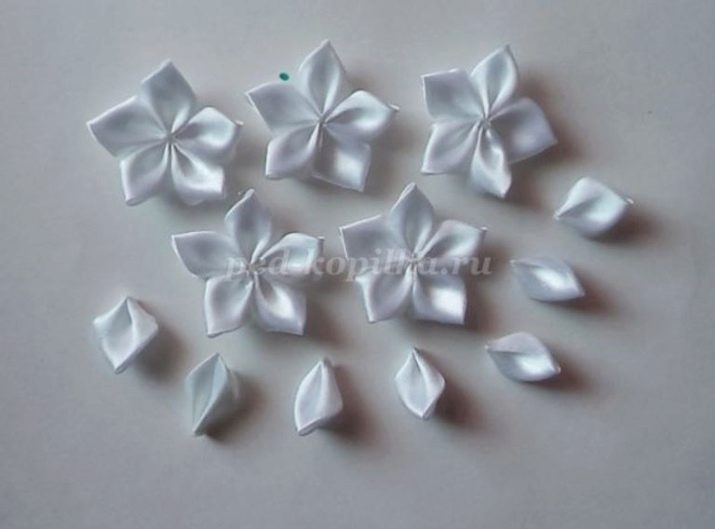
- To make the first flower, you need to prepare 2 pieces of ribbon. Dimensions: length - 5 centimeters, width - 2.5 centimeters.
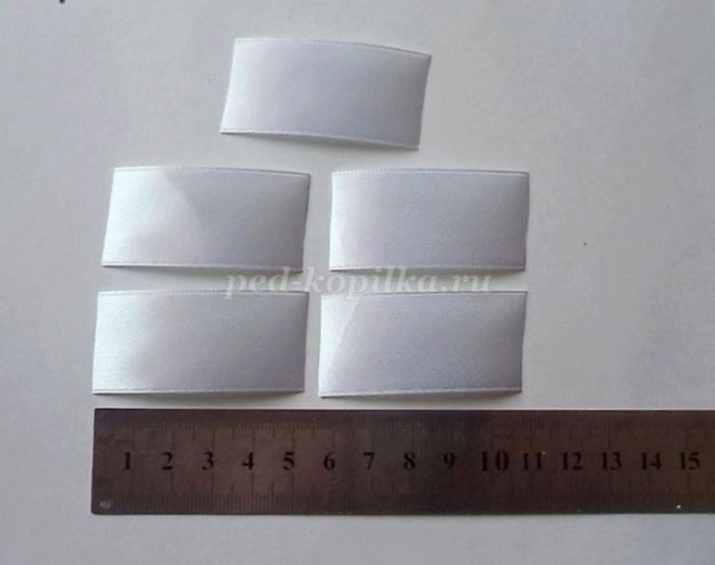
- The resulting segment is folded at a right angle, as in the photo. We fold the element in such a way as to join the ends.
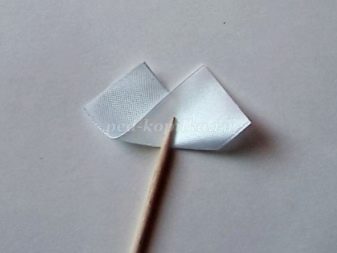
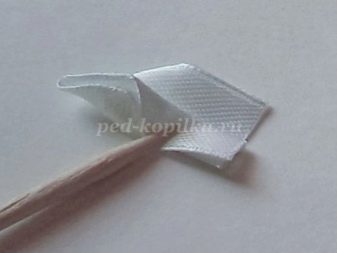
- This is how it looks from the back side. Using fire, we solder the ends, fixing them in place.
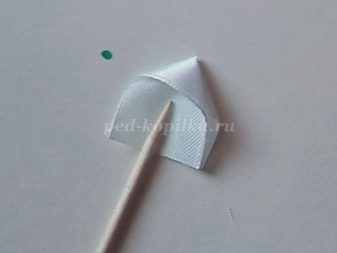
- Next, you need to fold the resulting petal in half, wrap the front side inward. Bend one of the parts to the edge. By analogy, bend down the other part.
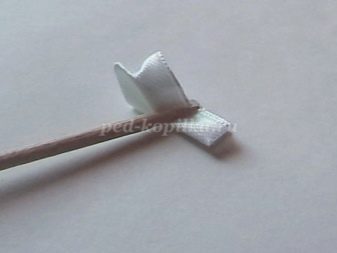
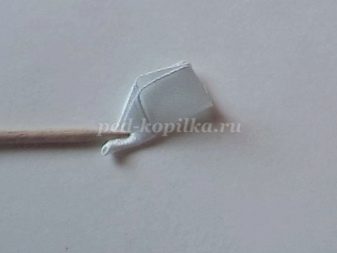
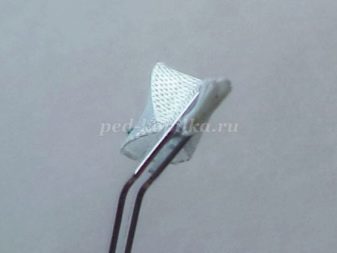
- We seal the petal with fire. This is what should come out in the end. We do the same with the rest of the pieces.

- We collect flowers from 5 petals (5 pieces). Also, in addition, you need to make 7 more elements.
- Now you need to prepare the tape. Length - 2 meters, width - 1 centimeter. We carefully process the edges with fire. Find the middle and fix it with glue, as shown in the image.
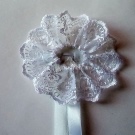
- Moving on to lace. We need a 35 centimeter piece. We sew it with thread, light stitches. Gently pull on the thread to pull the lace into a circle. Do not overtighten. Here's what you get as a result.
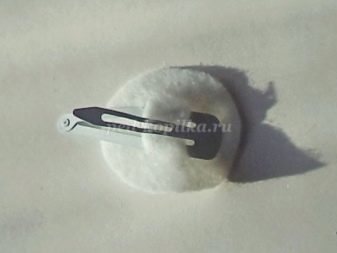
- We take circles from felt, with the help of scissors we make 2 identical cuts on them, as you can see in the picture. Place the hairpin in a large circle, the diameter of which is 3.5 centimeters. We fix it with glue.

The build process looks like this.
- You need to attach a ribbon to the main element with a hair clip.
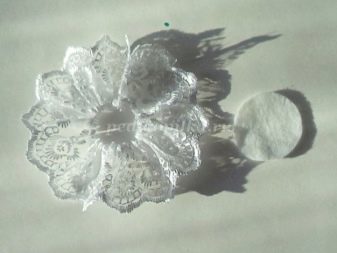
- We glue the lace rim securely to the felt mug.
- We fill the middle with snow-white petals.
- Having placed all 7 elements, we get just such a blank.
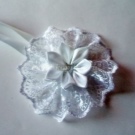
- We attach one of the finished colors on top.
- The rest of the felt circles should be strung on a satin ribbon.
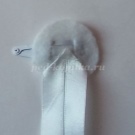
- We frame the edge of each circle with glue.
- And we attach the finished flower. Pressing it firmly against the base.
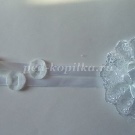
- This is how the jewelry looks from the back.
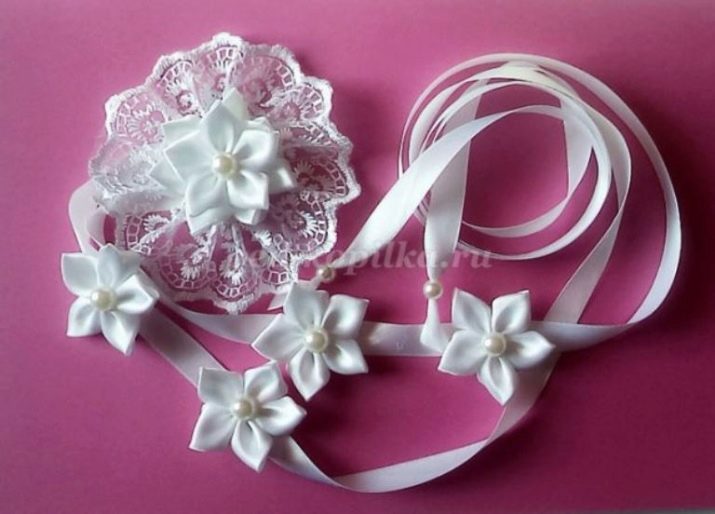
- We also glue the remaining flowers. We decorate each of them with a bead, placing it in the center. Here's an accessory that will turn out in the end. It is worth noting that the circles themselves are not glued to the tape, due to which they can be freely moved while creating hairstyles.
- The edges of the ribbons can be decorated with beads.
How to weave?
There are several ways to weave an unusual piece of jewelry into your hair. Let's consider the most popular ones.
Classic braid
Using a ribbon decorated with fabric flowers, you can transform an ordinary braid.
- The hair must be divided into three equal parts, as for a regular braid.
- The satin ribbon decoration should be attached to the middle one.
- After that, you need to braid a classic braid, with the difference that the middle strand is woven together with the accessory.
- The weaving pattern is simple, the strands along the edges need to be placed in turn in the center and so on until the end.
- Secure the braid with the edge of the tape or a regular elastic band.
- The result is an elegant and stylish hairstyle for a girl.
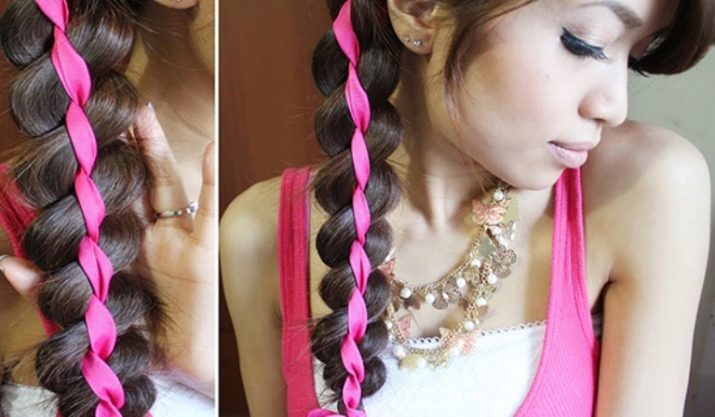
Tail braid
Another simple weaving option that is in demand.
- We collect all hair in a tight ponytail.
- We pass the tape through the upper elastic and stretch it in the middle.
- Divide the hair in the ponytail into two identical strands, and place the accessory between them.
- As a result, you get the following: two strands along the edges and two ribbons in the center.
- This is how the weaving looks like.
- We braid the hair to the end and fix it with the edges of the decoration.
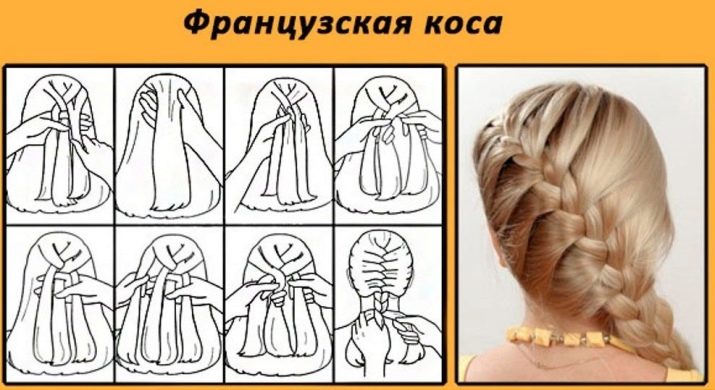
French braid
In this case, everything is quite simple.
- Attach the base of the hair accessory to the back of the head, fixing it to the middle section.
- Next, weave a standard French braid by weaving a ribbon with kanzashi flowers.
If you don't know how to make a French braid, use this scheme.
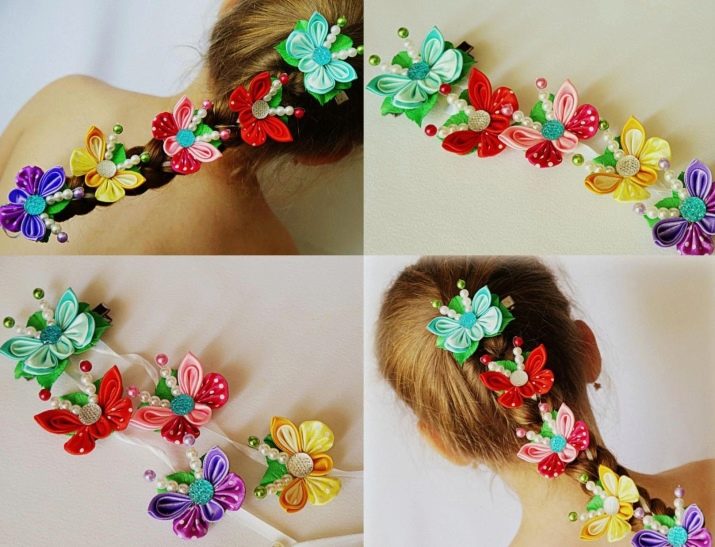
Beautiful examples
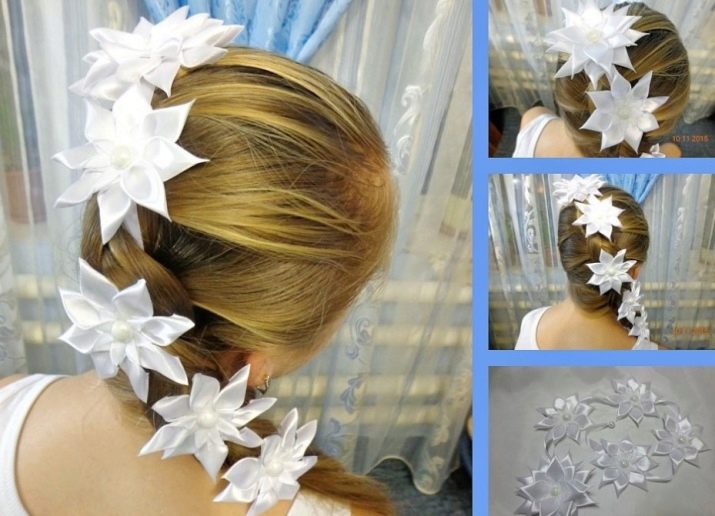
French braid with white flower kanzashi ribbon.
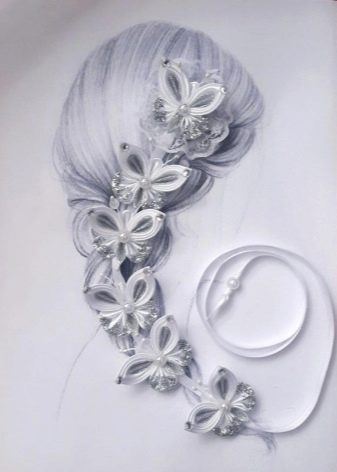
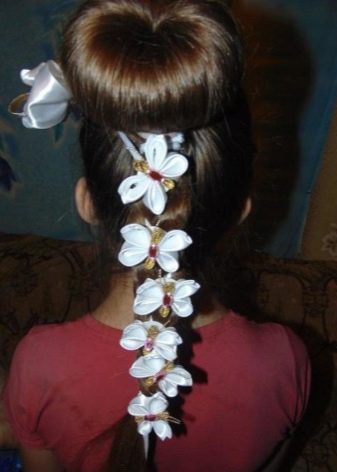
Weaving of original hair decoration.Instead of flowers, the craftswoman chose butterflies. It turned out very expressive and interesting.
Side braid complemented by red flowers.

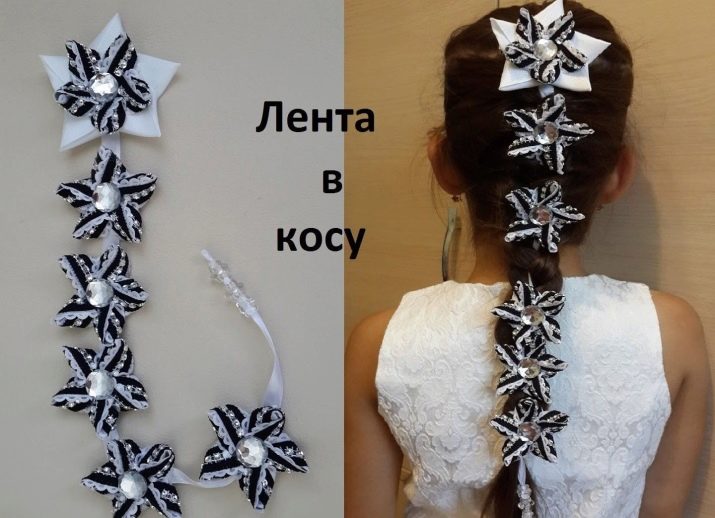
Black and white tape to the braid. A contrasting combination is always in fashion. The stars were chosen as the decor.
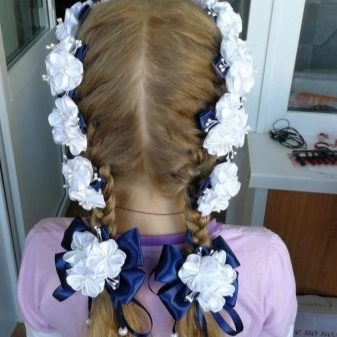
The double braid hairstyle is powerful when ribbons with kanzashi flowers are added to it.
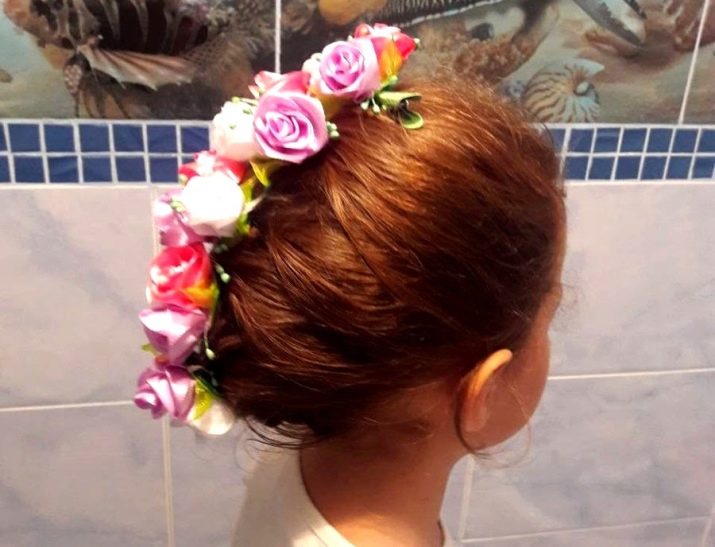
In this case, it was possible to elegantly collect the hair and complement it with a ribbon with lush roses.
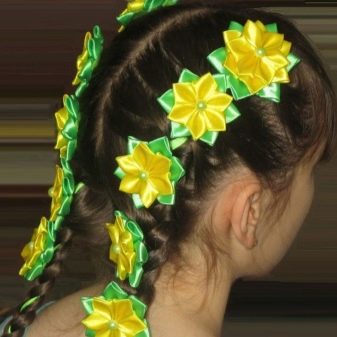
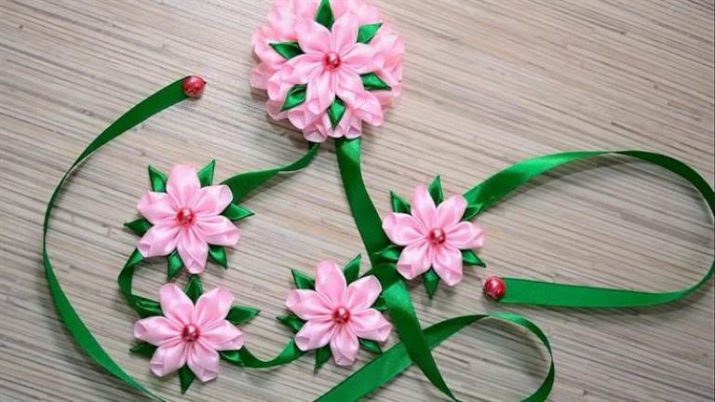
Bright ribbon with pink flowers and red beads. The color of the petals is in perfect harmony with the green ribbon.
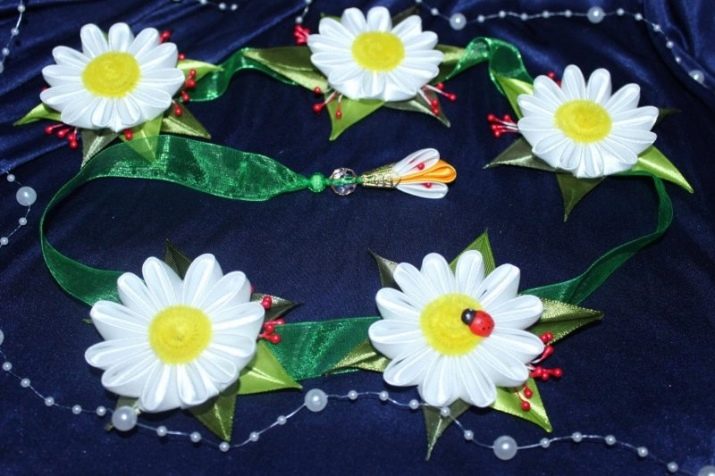
Summer decoration with daisies. Nice and original. Such an accessory will surely attract the attention of others.
A master class on creating a ribbon using the kanzashi technique and weaving it into a braid in the video below.


