How to make a stand for a cauldron with your own hands?
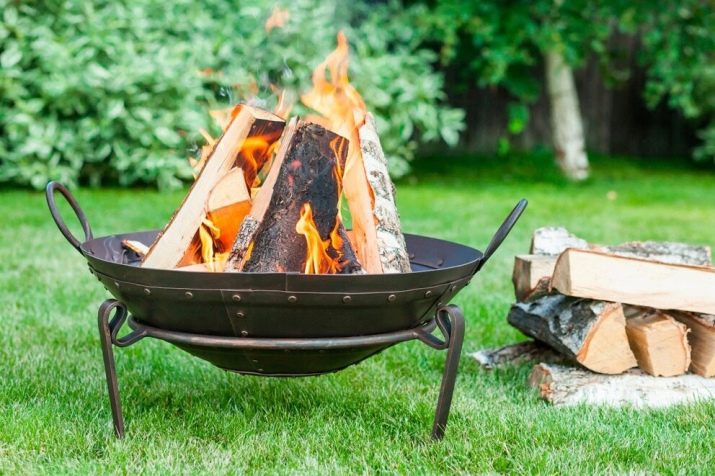
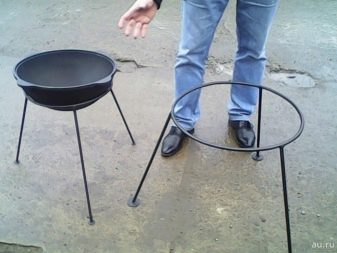
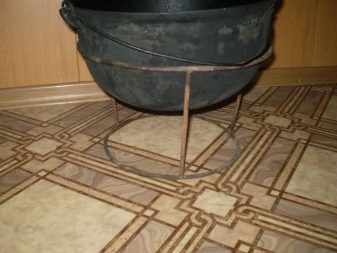
Kazan is a cast boiler. Its distinctive feature is a semicircular bottom, which does not allow installing it on the hearth without a special supporting device - a tripod. If you have a certain list of tools and materials, you can do it yourself.
Varieties and purpose
Homemade stands for boilers are of several types:
- three-legged;
- four-legged;
- impromptu.
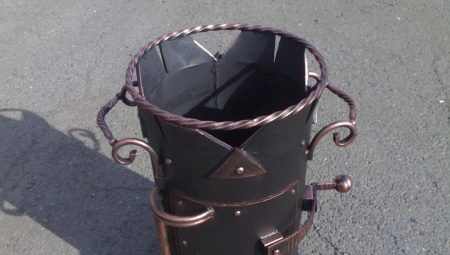
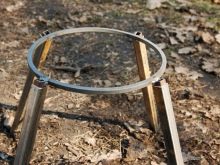
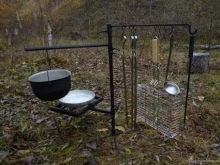
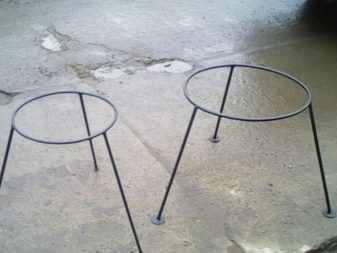
The legs of the three-legged stand are cone-mounted. An equal distance is maintained between them, which is an important factor determining the degree of stability of the structure. A hoop is installed as the top of the cone, the diameter of which corresponds to the outer diameter of the middle part of the cauldron.
This hoop acts as a holder into which the boiler is lowered.
This method of holding is the most effective, since with an increase in the mass of the cauldron's contents, its pressure on the inner side of the hoop increases, as a result of which the cauldron sits more firmly on the support.
To increase the strength of the structure, the support legs are fastened with the help of additional jumpers located below the retaining hoop, which prevents them from moving apart under the pressure of the boiler filled with contents.
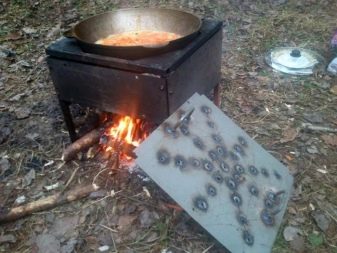
Tripods of this type are designed for open fire installation. A fire is made under them, the flame of which evenly heats the semicircular bottom. To provide enough space under the cauldron to accommodate logs, the height of the tripod should be adjusted according to the distance between the ground and the bottom of the container.
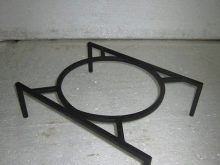
The construction of the four-legged stand is similar to that of a tripod.Their only difference from each other is the presence of a quarter support. Taking into account this factor, the location of the support legs of this stand is determined removing them from each other at an equal distance.
In the finished form, the lower points of support - "soles" - form the tops of a square or rectangle (depending on the design and the angle at which the legs are located in relation to the holding hoop).
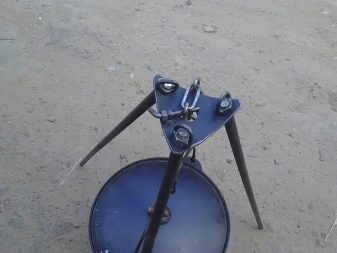
So that the four-legged stand can be installed on the brazier, its design is complemented by connecting jumpers connecting the lower points of the support legs. The jumpers are not only a fastening element, but also play the role of skis, ensuring a stable position of the stand on the grill.
When installing a cauldron on a brazier using a four-legged support, it is important to take care of the stability of the entire structure. The degree of resistance of the barbecue to loads must correspond to the dimensional and weight parameters of the cauldron filled with contents.
Improvised cauldron coasters are made from appropriate materials at hand. They can be: stock car disks, barrel-shaped containers and others.
These materials are being finalized and installed in such a way that a cauldron can be placed on them, a fire can be made under them, while the distance between the ground and the bottom of the container must be sufficient for a fire of the corresponding size.
The design of any type of stand can provide for its use both in a stationary form and in a collapsible form.
Instruments
The set of tools necessary for making a homemade stand for a cauldron may consist of a list of names determined by the type of specific structure and the materials from which it is made.
Instrumental set:
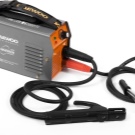
- welding inverter;
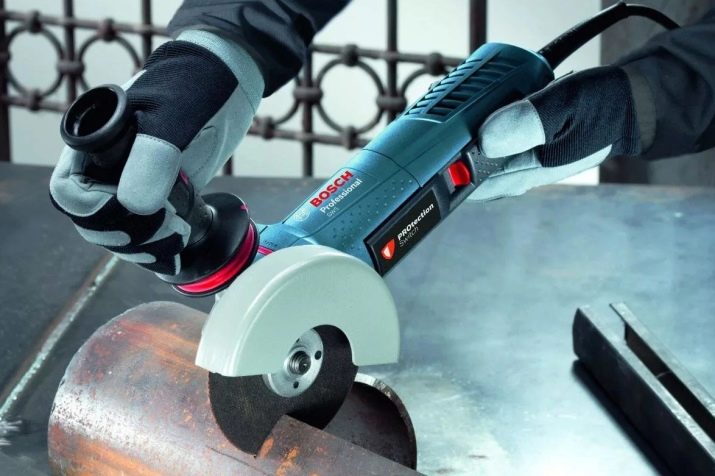
- Bulgarian;
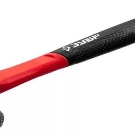
- hammer;
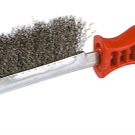
- brush with metal bristles;
- grinding attachment for grinder;
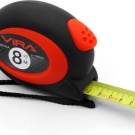
- measuring devices (tape measure or ruler);
- other related tools.
The presence of a welding machine is required. Since the product will be used under the influence of high temperatures, welded seams are the most reliable connection.

Materials (edit)
To make a stand with your own hands, you need to prepare a sufficient amount of the following materials:
- fittings;
- iron bar (replaces fittings);
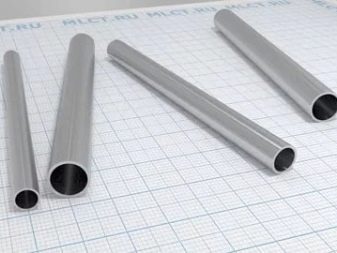
- round pipe;
- hoop (if available).
The diameter of the reinforcement must be at least 12 mm. Lower values of this parameter will not ensure the reliability and stability of the structure against deformation loads.
The diameter of the reinforcing bar should not be too large, since its increase entails an increase in the mass of the product, which is not a positive factor.
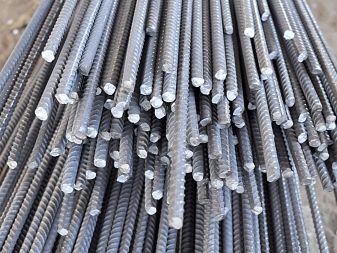


In the absence of a sufficient amount of reinforcement, a metal rod of round, square or hexagonal section can be used. The dimensional parameters of the selected rod must meet the same requirements as the reinforcing material.
Sections of a round tube are used to equip the joints of individual parts of the structure, which is important for collapsible modifications. The diameter of the tubular elements should exceed the diameter of the reinforcement or iron rod by 1–2 mm. This will allow the fastening of the component parts using the tongue-and-groove method.
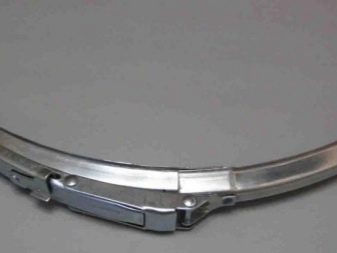
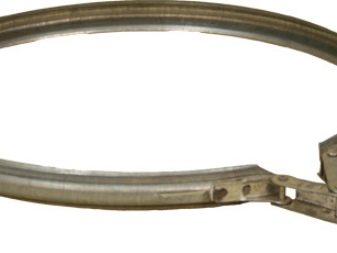
The holding hoop is selected taking into account the diameter of the middle part of the cauldron. In the absence of a finished element, it can be made with your own hands from a reinforcing bar.
Arrangement of the structure is allowed, which allows changing hoops with different diameters, which makes it possible to use the stand in conjunction with boilers of various sizes.
Manufacturing
Before you start making a homemade stand for a cauldron, you need to decide on the type of its design, purpose and draw up detailed drawings.
The optimal model of the boiler holder is the one that allows you to install it not only on the ground, but also on the grill. If it is planned to manufacture this particular model, then the drawings should indicate the dimensional parameters corresponding to the characteristics of the existing boiler and barbecue.
The diameter of the main hoop is marked. The distance between the extreme points of support - the "soles" of the legs, fits in. The value of this distance is calculated taking into account the thermal expansion of the metal and should allow the stand to be freely placed in the brazier.

Assembling the support legs
The legs of the collapsible stand are made according to the same principle. First, one of them is assembled, then the rest are copied from the sample.
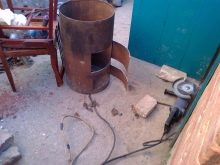
With the help of a grinder, a piece of reinforcement is sawn off, the length of which is sufficient for making a support leg from it. To ensure the leg can be folded to save space during storage, the section is sawn in the middle.
A tube with a length of at least 10 cm is welded to the edge of one of the parts of the segment. It is important to use a thick-walled round tube. A square or rectangular cross-section will not ensure the reliability of the connection and will contribute to the appearance of backlash. The diameter of this tube should allow the rest of the piece of reinforcement to be freely inserted into it. Thanks to the welding of the tubular element, the leg becomes collapsible and can be folded in half.
The other three legs follow a similar pattern. In the process of their production, it is important to strive to ensure the accuracy of compliance with the dimensional parameters, which will avoid upsetting the geometric balance of the entire structure.

Manufacturing of connecting jumpers
To ensure the fastening of the support legs, it is necessary to make connecting straps. For a four-legged stand, two will suffice.
They are made from the same material as the legs. This reduces manufacturing costs and simplifies the assembly process. The length of each jumper should exceed the distance between the lower anchor points of the legs by 5–10 cm. This is necessary to ensure the static structure on the grill.
To equip the nodes for connecting the legs and jumpers, tubular segments are welded to the latter, the parameters of which are identical to those that were welded to the legs. The angle of inclination of these segments in relation to the plane of the lintel depends on the angle at which the legs will stand. The value of this angle is arbitrary and does not require compliance with any design standards.
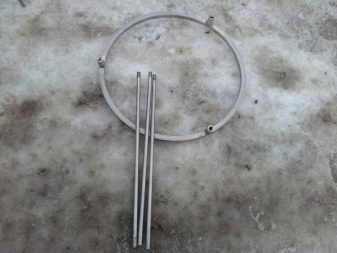
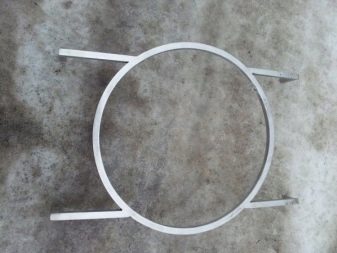
After connecting the two legs with the support bridge by means of tubular connections, a figure should be obtained that is similar in outline to a trapezoid without a vertex, a square or rectangle without an upper edge. The missing element is the plane of the holding hoop.
Making a hoop
In the absence of a ready-made hoop, you can make it from reinforcement. Its segment, the length of which is equal to the length of the outer circumference of the middle part of the boiler, heats up to high temperatures. In a heated state, a bush of a rod is applied to the outer surface of the middle part of an inverted boiler and bent in accordance with its diameter.
Suitable tools are used to hold and bend the rod: blacksmith tongs, pliers or gas wrenches. Wherein there is no need for high precision. After manufacturing, the hoop itself will take an optimal position in relation to the cauldron body. To facilitate the bending process, reinforcement with a smaller diameter can be used.
To ensure the possibility of replacing the hoop with a ring of a different diameter, it is necessary to weld to it segments of tubes up to 5 cm long, the number of which is equal to the number of support legs, which will allow it to be disconnected from the main structure.These tubular parts are positioned in such a way that the legs mounted on the connecting straps can be freely inserted into them. In this case, the hoop should lie on these tubes in order to overlap their upper part, preventing the legs from passing through them.

Use a metal bristle brush and a sanding pad to grind the welded joints to proper condition.
At the final stage of designing a homemade stand for a cauldron, it must be painted with paint that is resistant to high temperatures. You can use a spray paint can for this operation, as spray coating provides the optimum layer thickness. Once dry, the stand is ready to use.
How you can make a stand for a cauldron with your own hands, see below.


